
Bottling day brings you even closer to your brewing goal of having your very own handcrafted beer to enjoy and share. Bottling can either be a pain or painless. Learning through the pain process I have a few ideas to share so your brewing day experience will be something to enjoy.
Inspect your bottles to see if there is any debris or mold in the bottle, usually at the bottom. If there is I pour in a little vinegar and scrub it out with my bottle brush. Rinse well. You can also use a little kitchen cleaner…rinse really well.
Bottles now go into the dishwasher bottom rack and are run through on sanitize mode. Should you use detergent? I do but opinions vary. One thing that I highly recommend is that the bottles are cleaned without other dishes in there as bits of food can get into the bottles.
I let the heating cycle run and the bottles reach room temperature, not opening the dishwasher until I am ready to start bottling. So plan ahead to allow for this.
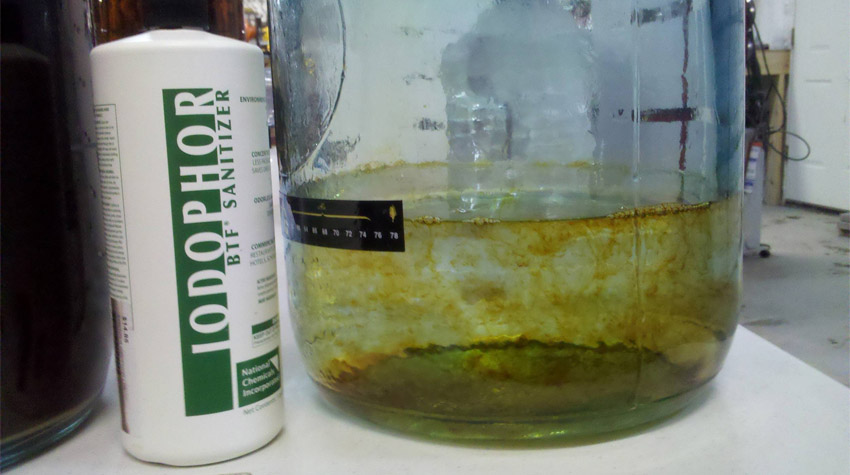
My favorite sanitation product is iodine since it healed many a cut and scratch as a child. Mix up a solution in your bottling bucket (about a gallon should do nicely) and soak your caps, hoses, siphon, and filling tube.
Rinse all these items under cool running water and set aside on a clean towel.
Using your sponge clean the inside of the bottling bucket and then clean the spigot by running the remaining iodine solution into the 1 gallon bucket. Rinse the bottling bucket with cool water, running some through the spigot.
Set small container with the remaining iodine/sanitizing solution aside for re-sanitizing if needed. You can also dip your hands in the solution if you need to sanitized them again for any reason.
Sanitation is critical to avoiding spoiled beer. Having said that, it is not necessary to work in a clean room environment. I look back on the history of beer and realize the monks and other early brewers had about zero in terms of sanitzation, and beer survived over the ages to arrive at its glory today.
The amount of priming sugar you need will be determined by the amount of carbonation you want, and the highest temperature the beer reached. The 5oz typically provided in beer kits is usually more than you need, so it's bets to play with an online calculator like the one on Brewer's Friend to determine the amount you really need for the style you're brewing.
Once you have your sugar measured out, dissolve it in hot water and add that to your bottling bucket. Having the priming sugar solution go into the bottling bucket before the beer helps it incorporate evenly without stirring (which would increase the risk of oxidized beer).

You need a nice uncluttered work surface where you can stage your bottles, have room for capping, and have a place to set your fermenter containing the soon to be drinkable beer. Assemble your equipment and start sanitizing.
Think of bottling like an assembly line, because it is. Put the fermentation bucket on the counter above your bottling bucket. You want it elevated because when bottling at home gravity is your friend. Be careful not to jostle it too much as this will stir up the sediment, not a good thing if it can be avoided.
Carefully put the bottling bucket on the counter and set the fermentation bucket aside. Place clean towels on the floor under the spigot. I have never been able to avoid spilling some beer.
Put your bottles on the counter within easy reach. Have a space to set your filled bottles and get your capping gear setup. If you are constrained on space you can work over the dishwasher removing bottles as needed and setting them aside as they are filled.
A word here on bottles. When I bottled my first batch I went entirely with 12 ounce bottles. For a 5 gallon batch you will need 45-48 12 ounce bottles. It quickly became tedious. So I graduated to a mix of 22 ounce, 32 ouncers with the integrated caps and bales (EZ Cap in some stores), and old champagne bottles. I also have two 1 liter growlers with the integrated caps and bales.
There are a number of really nice tools available. I have a simple siphon arrangement made up of the racking cane with a sediment standoff on the bottom and some hose. The standoff prevents drawing up sediment…for the most part.
Get the tubing primed and begin transferring the beer. I lay the hose in the bottom of the bottling bucket to let the incoming beer mix thoroughly with the priming solution. You can move the hose up and down during the transfer if you like to facilitate the mixing.
Keep an eye on the transfer. At the beginning, I do not put the racking cane all the way to the bottom of the fermentation bucket. Yes it has a standoff but it can still draw up sediment. So I keep it above the bottom and move it down as the beer level drops. As you near the bottom you can carefully tip the bucket and get as much beer as possible. When you see that the remainder is cloudy and full of sediment it’s time to stop. Yes, it pains to leave any brew behind but in this case it is for the best.
Give your beer a good stir to insure the priming solution is thoroughly distributed and let it rest for 30 minutes or so to allow any sediment to settle. You can get everything else ready during this lull in the action. If you beer is clear to your satisfaction you can skip this step.
Note on Sediment: Throughout this article I have referenced taking care to avoid getting sediment into your beer. If you do, it is not a disaster! It simply falls to the bottom of the bottle and makes you pour carefully so each glass containers beautiful, clear brew. You can drink beer with lots of sediment if you like but I prefer not to go that route. What do you do with the sediment from your fermentation vessel? In my current home with city sewer and water, I pour it on my compost pile. When I lived in the country with a septic system, I poured it down the drain to give the beneficial bugs in the septic field some tasty goodies for a change, something extra to keep them active and productive.

Filling techniques are very personal at least in my experience. You need to experiment and see what works best for you and your bottling setup. I have the bottle filler attachment that is supposed to stop filling at a certain level, kind of like the shut off valve in a gas pump nozzle. For me it is just not that successful so I simply hold the bottle under the spigot and eyeball it. Fill the bottles to within 1 – 1.5” of the top, just like store bought. Set aside and repeat.
If you are using the bottles with the integrated caps and bales,take a sponge that has been in your iodine solution and carefully wipe around the mouth of the bottle and the cap seal. Swing up the bale and lock the top in place. Easy peasy. Same for the growlers. Champagne bottles are actually quite easy as well. Buy or reuse the plastic corks and secure with wire bales. More on that in another post.
For regular bottles there are handheld cappers, what I use, and stand cappers. Since I have no experience with the latter I will focus on the handheld version. Place your bottle on the counter top. Place a cap over the mouth. With the capper in both hands, place it directly on top of the cap and push the handles down at the same time. I make an effort to keep the capper level and apply an even amount of force. Inspect the result to be sure the cap is on evenly and fully crimped all the way around. If there is a problem use the capper again or remove the cap and start over.

Set your finished beer aside at room temperature to bottle condition for a week or two, and then enjoy!
Other important bottling tidbits:
What you will need:
- Bottles
- Bottle brush
- Bottle caps and a capper
- Sanitizer
- Towels
- Sponge
- 5 gallon bottling bucket with spigot
- 1 gallon bucket for miscellaneous purposes
- Hoses
- Siphon
- Racking cane with sediment standoff
- Bottle filler
Preparation, Cleaning, & Sanitizing
Inspect your bottles to see if there is any debris or mold in the bottle, usually at the bottom. If there is I pour in a little vinegar and scrub it out with my bottle brush. Rinse well. You can also use a little kitchen cleaner…rinse really well.
Bottles now go into the dishwasher bottom rack and are run through on sanitize mode. Should you use detergent? I do but opinions vary. One thing that I highly recommend is that the bottles are cleaned without other dishes in there as bits of food can get into the bottles.
I let the heating cycle run and the bottles reach room temperature, not opening the dishwasher until I am ready to start bottling. So plan ahead to allow for this.
My favorite sanitation product is iodine since it healed many a cut and scratch as a child. Mix up a solution in your bottling bucket (about a gallon should do nicely) and soak your caps, hoses, siphon, and filling tube.
Rinse all these items under cool running water and set aside on a clean towel.
Using your sponge clean the inside of the bottling bucket and then clean the spigot by running the remaining iodine solution into the 1 gallon bucket. Rinse the bottling bucket with cool water, running some through the spigot.
Set small container with the remaining iodine/sanitizing solution aside for re-sanitizing if needed. You can also dip your hands in the solution if you need to sanitized them again for any reason.
Sanitation is critical to avoiding spoiled beer. Having said that, it is not necessary to work in a clean room environment. I look back on the history of beer and realize the monks and other early brewers had about zero in terms of sanitzation, and beer survived over the ages to arrive at its glory today.
Priming Sugar Preparation
The amount of priming sugar you need will be determined by the amount of carbonation you want, and the highest temperature the beer reached. The 5oz typically provided in beer kits is usually more than you need, so it's bets to play with an online calculator like the one on Brewer's Friend to determine the amount you really need for the style you're brewing.
Once you have your sugar measured out, dissolve it in hot water and add that to your bottling bucket. Having the priming sugar solution go into the bottling bucket before the beer helps it incorporate evenly without stirring (which would increase the risk of oxidized beer).
Work-space Arrangement
You need a nice uncluttered work surface where you can stage your bottles, have room for capping, and have a place to set your fermenter containing the soon to be drinkable beer. Assemble your equipment and start sanitizing.
Think of bottling like an assembly line, because it is. Put the fermentation bucket on the counter above your bottling bucket. You want it elevated because when bottling at home gravity is your friend. Be careful not to jostle it too much as this will stir up the sediment, not a good thing if it can be avoided.
Carefully put the bottling bucket on the counter and set the fermentation bucket aside. Place clean towels on the floor under the spigot. I have never been able to avoid spilling some beer.
Put your bottles on the counter within easy reach. Have a space to set your filled bottles and get your capping gear setup. If you are constrained on space you can work over the dishwasher removing bottles as needed and setting them aside as they are filled.
A word here on bottles. When I bottled my first batch I went entirely with 12 ounce bottles. For a 5 gallon batch you will need 45-48 12 ounce bottles. It quickly became tedious. So I graduated to a mix of 22 ounce, 32 ouncers with the integrated caps and bales (EZ Cap in some stores), and old champagne bottles. I also have two 1 liter growlers with the integrated caps and bales.
Transfer the Beer to a Bottling Bucket
There are a number of really nice tools available. I have a simple siphon arrangement made up of the racking cane with a sediment standoff on the bottom and some hose. The standoff prevents drawing up sediment…for the most part.
Get the tubing primed and begin transferring the beer. I lay the hose in the bottom of the bottling bucket to let the incoming beer mix thoroughly with the priming solution. You can move the hose up and down during the transfer if you like to facilitate the mixing.
Keep an eye on the transfer. At the beginning, I do not put the racking cane all the way to the bottom of the fermentation bucket. Yes it has a standoff but it can still draw up sediment. So I keep it above the bottom and move it down as the beer level drops. As you near the bottom you can carefully tip the bucket and get as much beer as possible. When you see that the remainder is cloudy and full of sediment it’s time to stop. Yes, it pains to leave any brew behind but in this case it is for the best.
Give your beer a good stir to insure the priming solution is thoroughly distributed and let it rest for 30 minutes or so to allow any sediment to settle. You can get everything else ready during this lull in the action. If you beer is clear to your satisfaction you can skip this step.
Note on Sediment: Throughout this article I have referenced taking care to avoid getting sediment into your beer. If you do, it is not a disaster! It simply falls to the bottom of the bottle and makes you pour carefully so each glass containers beautiful, clear brew. You can drink beer with lots of sediment if you like but I prefer not to go that route. What do you do with the sediment from your fermentation vessel? In my current home with city sewer and water, I pour it on my compost pile. When I lived in the country with a septic system, I poured it down the drain to give the beneficial bugs in the septic field some tasty goodies for a change, something extra to keep them active and productive.
Filling Your Bottles
Filling techniques are very personal at least in my experience. You need to experiment and see what works best for you and your bottling setup. I have the bottle filler attachment that is supposed to stop filling at a certain level, kind of like the shut off valve in a gas pump nozzle. For me it is just not that successful so I simply hold the bottle under the spigot and eyeball it. Fill the bottles to within 1 – 1.5” of the top, just like store bought. Set aside and repeat.
Capping Your Beer Bottles
If you are using the bottles with the integrated caps and bales,take a sponge that has been in your iodine solution and carefully wipe around the mouth of the bottle and the cap seal. Swing up the bale and lock the top in place. Easy peasy. Same for the growlers. Champagne bottles are actually quite easy as well. Buy or reuse the plastic corks and secure with wire bales. More on that in another post.
For regular bottles there are handheld cappers, what I use, and stand cappers. Since I have no experience with the latter I will focus on the handheld version. Place your bottle on the counter top. Place a cap over the mouth. With the capper in both hands, place it directly on top of the cap and push the handles down at the same time. I make an effort to keep the capper level and apply an even amount of force. Inspect the result to be sure the cap is on evenly and fully crimped all the way around. If there is a problem use the capper again or remove the cap and start over.
Set your finished beer aside at room temperature to bottle condition for a week or two, and then enjoy!
Other important bottling tidbits:
- Never bottle in the screw-off style bottle. They are designed for single use and homebrewer gear won’t recap them. Only use growlers that have the integrated cap
and bale. Stay away from screw on caps for bottling. - Color does matter when it comes to bottles. Generally speaking, stay away from clear unless you can store your beer in the dark until ready to drink. Most, but not all, beer styles don’t do
well exposed to sunlight. - Champagne bottles are terrific. Sturdy and designed to withstand high levels of carbonization pressure. Save them and their wire cages for re-use. If they have plastic corks, save those too.
- When you empty a bottle, rinse it thoroughly before putting it away. This reduces the chance of mold buildup.
- When you give someone a bottle of your beer, make it a provision of the exchange that they rinse and return the bottles. Recycle and refill!


![Craft A Brew - Safale S-04 Dry Yeast - Fermentis - English Ale Dry Yeast - For English and American Ales and Hard Apple Ciders - Ingredients for Home Brewing - Beer Making Supplies - [1 Pack]](https://m.media-amazon.com/images/I/41fVGNh6JfL._SL500_.jpg)


