OP
OP
-TH-
Well-Known Member
Ok, pardon my ignorance on how the spring loaded air cylinder works: when You step on the pedal, is it tap once and release or step on it til the cylinder drops completely and then let off? Basically, does it go until it exerts it's pressure by capping and then back off or so you need to keep pushing? How do the automatic ones work with different height bottles?
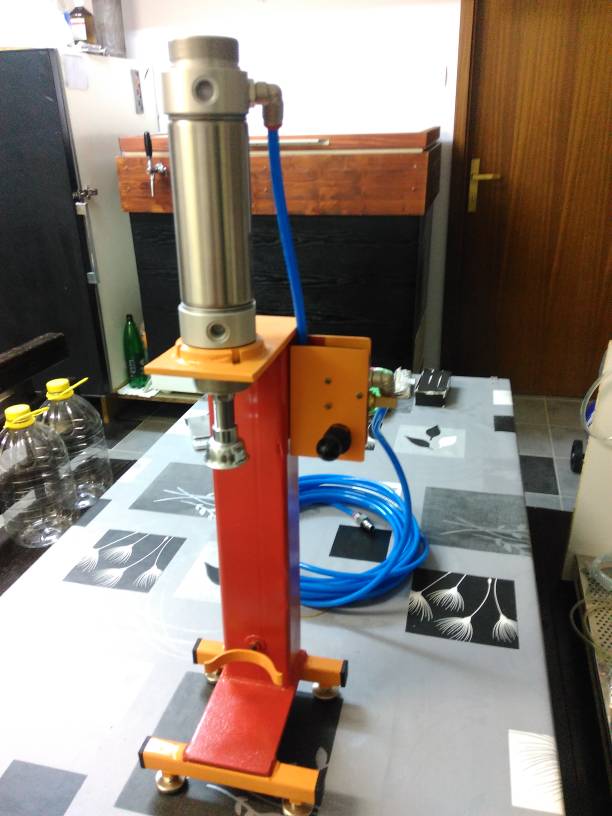
The foot pedal valve supplies compressed air to the cylinder only while the foot pedal is pressed down. The cylinder is a single-acting, spring-return air cylinder which means that when you supply compressed air to the it, the piston+rod will extend until it reaches the end of its stroke, or until it hits something to stop it (like a bottle cap on a bottle at any point within its stroke). When you quit supplying compressed air to it (like by letting your foot off the foot pedal), the spring inside the cylinder makes it retract (assuming air is allowed to be released freely out of the cylinder - the foot pedal valve should allow for this).
Hope that makes sense...
 . I will probably run it at more like 80-90psi when bottling a whole batch.