You are using an out of date browser. It may not display this or other websites correctly.
You should upgrade or use an alternative browser.
You should upgrade or use an alternative browser.
Pneumatic Bottle Capper - Just...because.
- Thread starter -TH-
- Start date

Help Support Homebrew Talk:
This site may earn a commission from merchant affiliate
links, including eBay, Amazon, and others.
I feel indexing at the neck is THE WAY. 12 oz and 22 oz bottles are almost identical at the top 1-1/2". A 1.15" dia half circle milled at 8 degrees is perfect. I drooped it another 8 degrees so the index meets the bottle neck at 90 degrees, which gives a solid surface. It makes it very easy to quickly get a perfect center.
That piece of aluminum stock... indexes the neck.How did you index the bottles and align them to the capper?
This was the ONLY place I was able to find any documentation at all indicating what pressure was needed to crimp the cap. And it correlates exactly with my tests using a Crown Go-No-Go gauge.
https://www.google.com/patents/US5458253
7. The crown of claim 1 wherein an average crowning force of about 417 pounds or less for a twist cap or about 516 pounds or less for a pry-off cap is required to apply the crown to a bottle.
https://www.google.com/patents/US5458253
7. The crown of claim 1 wherein an average crowning force of about 417 pounds or less for a twist cap or about 516 pounds or less for a pry-off cap is required to apply the crown to a bottle.

$176.97
1pc Commercial Keg Manifold 2" Tri Clamp,Ball Lock Tapping Head,Pressure Gauge/Adjustable PRV for Kegging,Fermentation Control
hanhanbaihuoxiaoshoudian

$20.94
$29.99
The Brew Your Own Big Book of Clone Recipes: Featuring 300 Homebrew Recipes from Your Favorite Breweries
Amazon.com

$10.99 ($31.16 / Ounce)
Hornindal Kveik Yeast for Homebrewing - Mead, Cider, Wine, Beer - 10g Packet - Saccharomyces Cerevisiae - Sold by Shadowhive.com
Shadowhive

$53.24
1pc Hose Barb/MFL 1.5" Tri Clamp to Ball Lock Post Liquid Gas Homebrew Kegging Fermentation Parts Brewer Hardware SUS304(Liquid Hose Barb)
yunchengshiyanhuqucuichendianzishangwuyouxiangongsi

$479.00
$559.00
EdgeStar KC1000SS Craft Brew Kegerator for 1/6 Barrel and Cornelius Kegs
Amazon.com

$44.99
$49.95
Craft A Brew - Mead Making Kit – Reusable Make Your Own Mead Kit – Yields 1 Gallon of Mead
Craft a Brew

$719.00
$799.00
EdgeStar KC2000TWIN Full Size Dual Tap Kegerator & Draft Beer Dispenser - Black
Amazon.com

$7.79 ($7.79 / Count)
Craft A Brew - LalBrew Voss™ - Kveik Ale Yeast - For Craft Lagers - Ingredients for Home Brewing - Beer Making Supplies - (1 Pack)
Craft a Brew

$53.24
1pc Hose Barb/MFL 1.5" Tri Clamp to Ball Lock Post Liquid Gas Homebrew Kegging Fermentation Parts Brewer Hardware SUS304(Liquid Hose Barb)
Guangshui Weilu You Trading Co., Ltd

$76.92 ($2,179.04 / Ounce)
Brewing accessories 1.5" Tri Clamp to Ball Lock Post Liquid Gas Homebrew Kegging Fermentation Parts Brewer Hardware SUS304 Brewing accessories(Gas Hose Barb)
chuhanhandianzishangwu

$33.99 ($17.00 / Count)
$41.99 ($21.00 / Count)
2 Pack 1 Gallon Large Fermentation Jars with 3 Airlocks and 2 SCREW Lids(100% Airtight Heavy Duty Lid w Silicone) - Wide Mouth Glass Jars w Scale Mark - Pickle Jars for Sauerkraut, Sourdough Starter
Qianfenie Direct

$22.00 ($623.23 / Ounce)
AMZLMPKNTW Ball Lock Sample Faucet 30cm Reinforced Silicone Hose Secondary Fermentation Homebrew Kegging joyful
无为中南商贸有限公司

$159.50 ($26.58 / Count)
3M High Flow Series System BREW120-MS, 5616001, For Brewed Coffee and Hot Tea, Valve-in-Head Design
Amazon.com

$58.16
HUIZHUGS Brewing Equipment Keg Ball Lock Faucet 30cm Reinforced Silicone Hose Secondary Fermentation Homebrew Kegging Brewing Equipment
xiangshuizhenzhanglingfengshop

$28.98
Five Star - 6022b_ - Star San - 32 Ounce - High Foaming Sanitizer
Great Fermentations of Indiana
Thanks to you I am now digging around my pile of parts looking for the stuff to build one. Just might have everything I need in my shop. Well, another Saturday lost to building Stuff for the brewery.
I will after Christmas. But I can say with some confidence after exbeerimenting with about 100 caps over the last few days, the cap WILL get stuck in the bell if it's partially crimped. There's no way in hell it's getting stuck if it's remotely close. The line between not crimped enough and over-crimped is 0.015". That's the width of 3 average human hairs. I'd bet most home brewer's have a decent set of micrometers (I meant digital calipers) ... if you can measure 1.135" or more anywhere around the diameter of the cap it's not crimped. And if your cap fits in a 1.120" hole it's overcrimped. Better yet, buy one of these like I did.Would you please post more pictures of side and back views? A video of it in action would be perfect. Have you experienced any stuck cap like others have? The capper would pull up the bottle after a cap is crimped.
https://www.amazon.com/dp/B01N01XKXQ/?tag=skimlinks_replacement-20
Read the reviews... Pretty much EVERY reviewer is saying "Oh crap, I never knew I wasn't crimping properly. Now I know why my beer tastes like cardboard after 2 months."
By the way, I'm using a generic capping bell. I was able to improve it's performance by milling out a ridge that was denting the tops of my caps, but it still takes 2-3 cycles at 140 PSI to get to spec with this 2" cylinder. The 2.5" is coming via eBay. If I were to build another, I'd without a doubt use a 3" dia, 2" stroke cylinder.
Last edited by a moderator:
haha... My apologies. But you know you love it!Thanks to you I am now digging around my pile of parts looking for the stuff to build one. Just might have everything I need in my shop. Well, another Saturday lost to building Stuff for the brewery.
Well, the new cylinder isn't going to bolt right on after all. I have to remodel the frame for it to fit. I also need to adapt the bell, and fabricate a spring loaded retractable magnet in the bell so it holds a cap correctly. Given my work schedule, it might take a couple weeks. I'll post a comprehensive YouTube video when it's done.Would you please post more pictures of side and back views? A video of it in action would be perfect. Have you experienced any stuck cap like others have? The capper would pull up the bottle after a cap is crimped.
Waiting for the 2-1/2" cylinder; decided to address the magnetic crown holder. After messing around will all kinds of magnets in the bell, realized the only solution is a magnet that captures the crown to center it in the bell and spring loads into the bell. I saw this design in a hand crimper, wanted to avoid it because of it's complexity fabbing a one-off, but what the hell... should work swimmingly. Ordered a 1/4" dia x 1/2" long cylinder magnet from KJ Magnetics, some JB Weld should hold it in place...

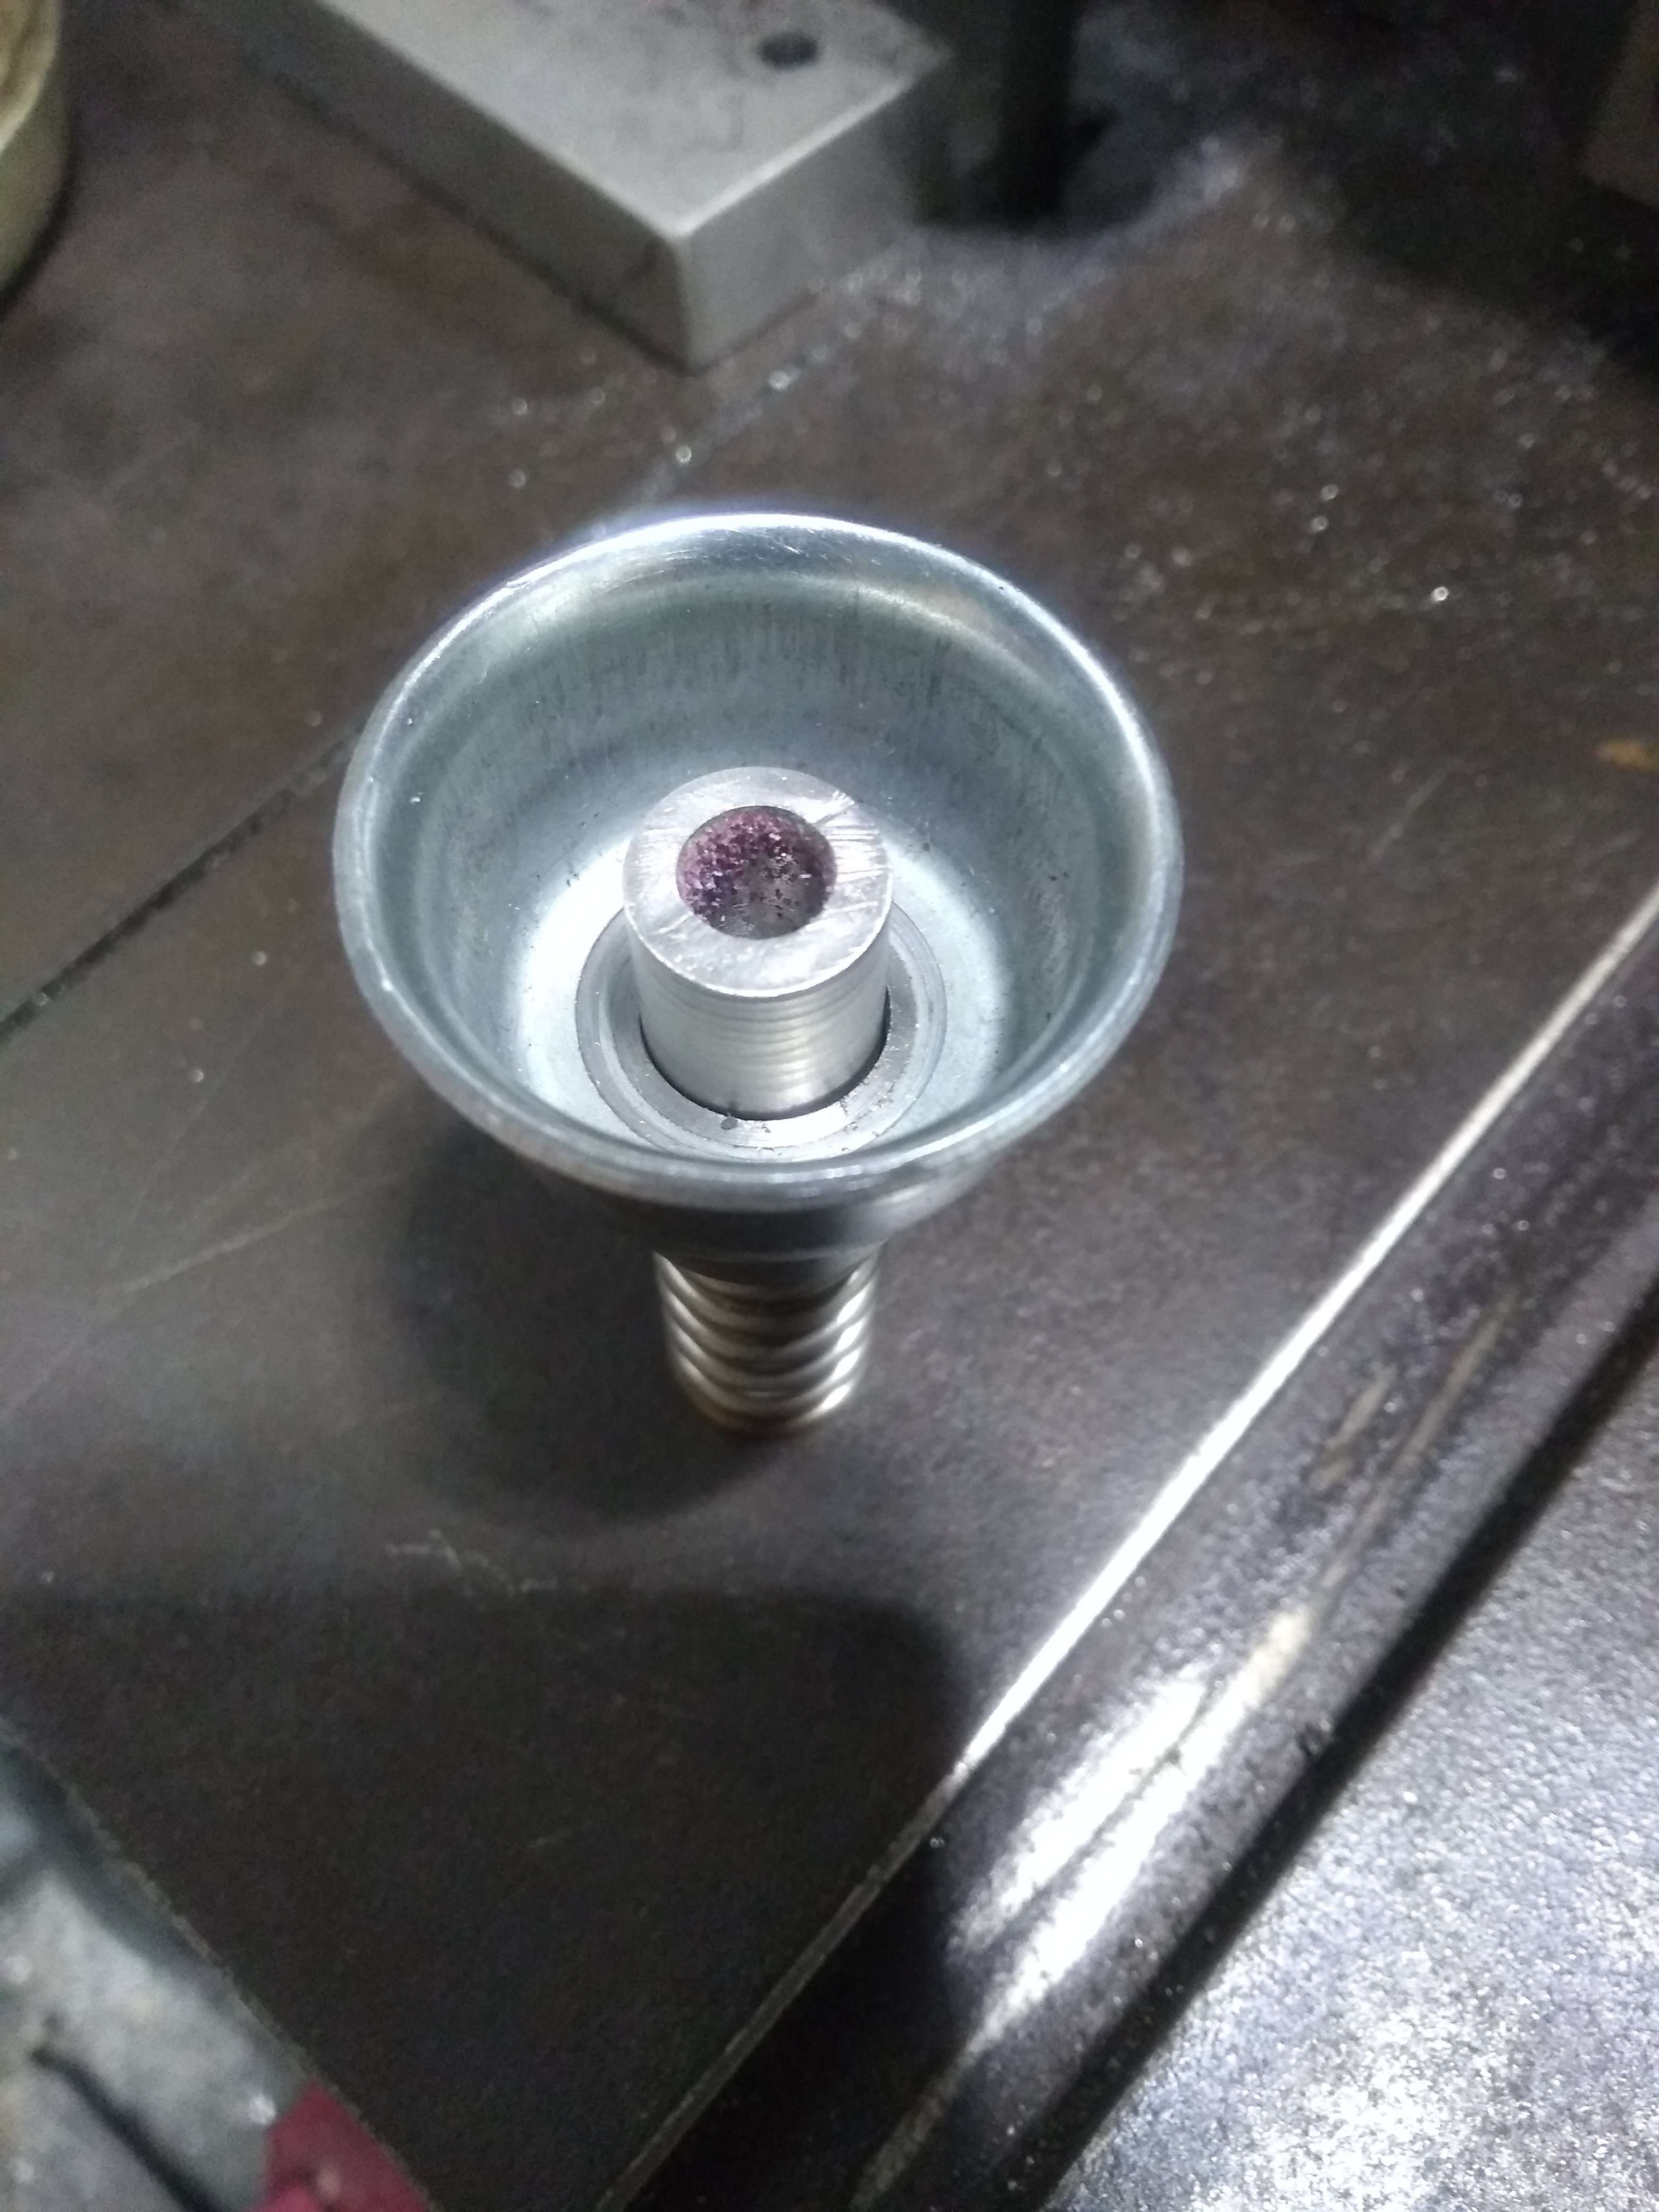


The new cylinder is much heavier, a little taller, and of course wider. Need to add beef to the structure, and New Years stands squarely in my way of getting crap done. SWMBO does not see the urgency in this project. Stay tuned...
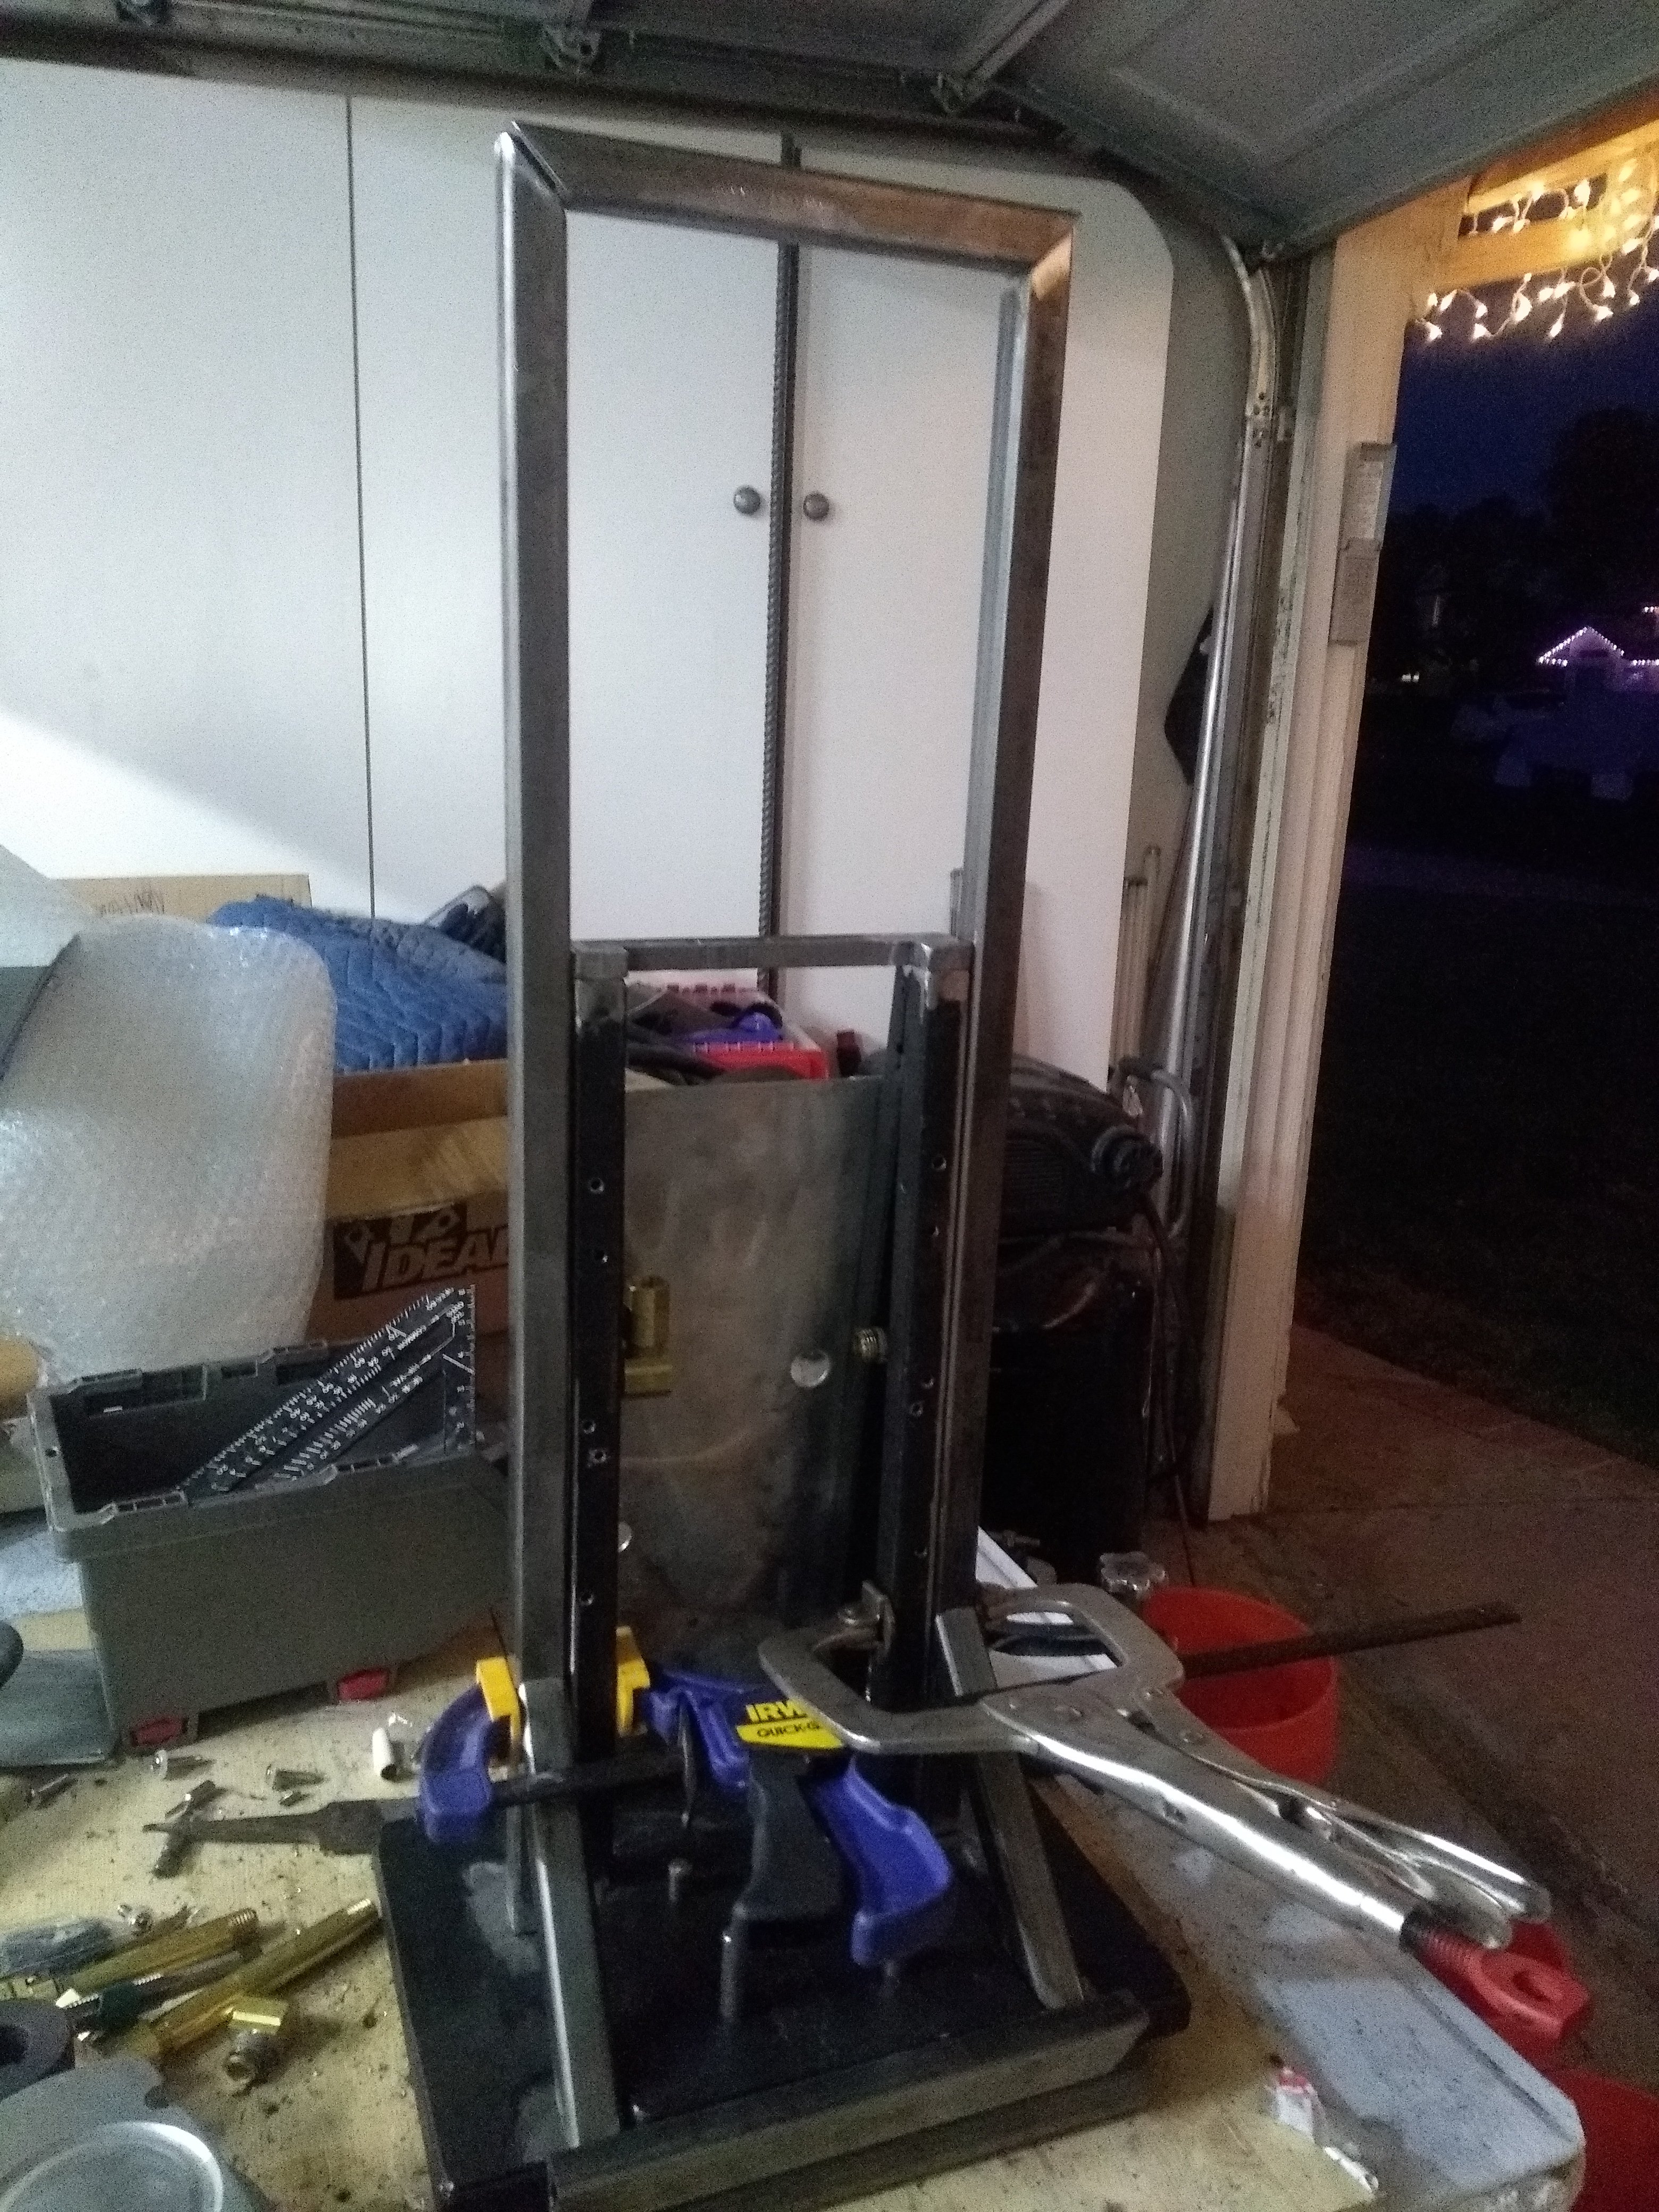

So... If a pneumatic capper is already gross overkill, would a 6-cap auto feeding cap cartridge be heresy? 'Cause I just came up with design that would cost about $8.00 and be simple to implement...
{Edit: It just became a rhetorical question. Already bought what I need on eBay for $8.50. It'll be an 8 cap autofeeder, and take about 3 hours to fab and install }
}
{Edit: It just became a rhetorical question. Already bought what I need on eBay for $8.50. It'll be an 8 cap autofeeder, and take about 3 hours to fab and install
Last edited:
BeardedBrews
Well-Known Member
So... If a pneumatic capper is already gross overkill, would a 6-cap auto feeding cap cartridge be heresy? 'Cause I just came up with design that would cost about $8.00 and be simple to implement...
Sounds like a mandatory upgrade to me...
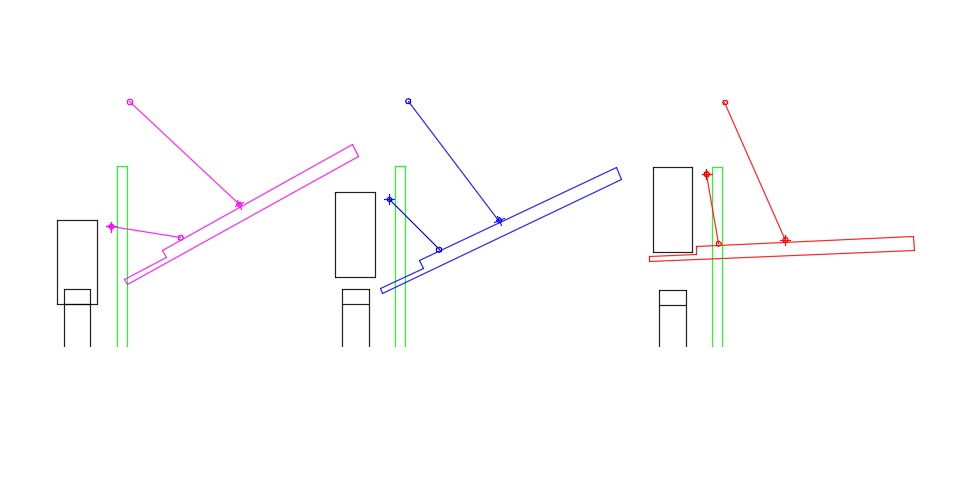
Here's the Genesis. I found that an un-crimped crown comes to rest on a hard drive magnet at exactly the same place, every time. Stupid simple to make a chute that flops up with a fresh cap for the capper bell to grab every cycle. God bless my wife for dealing with my madness.
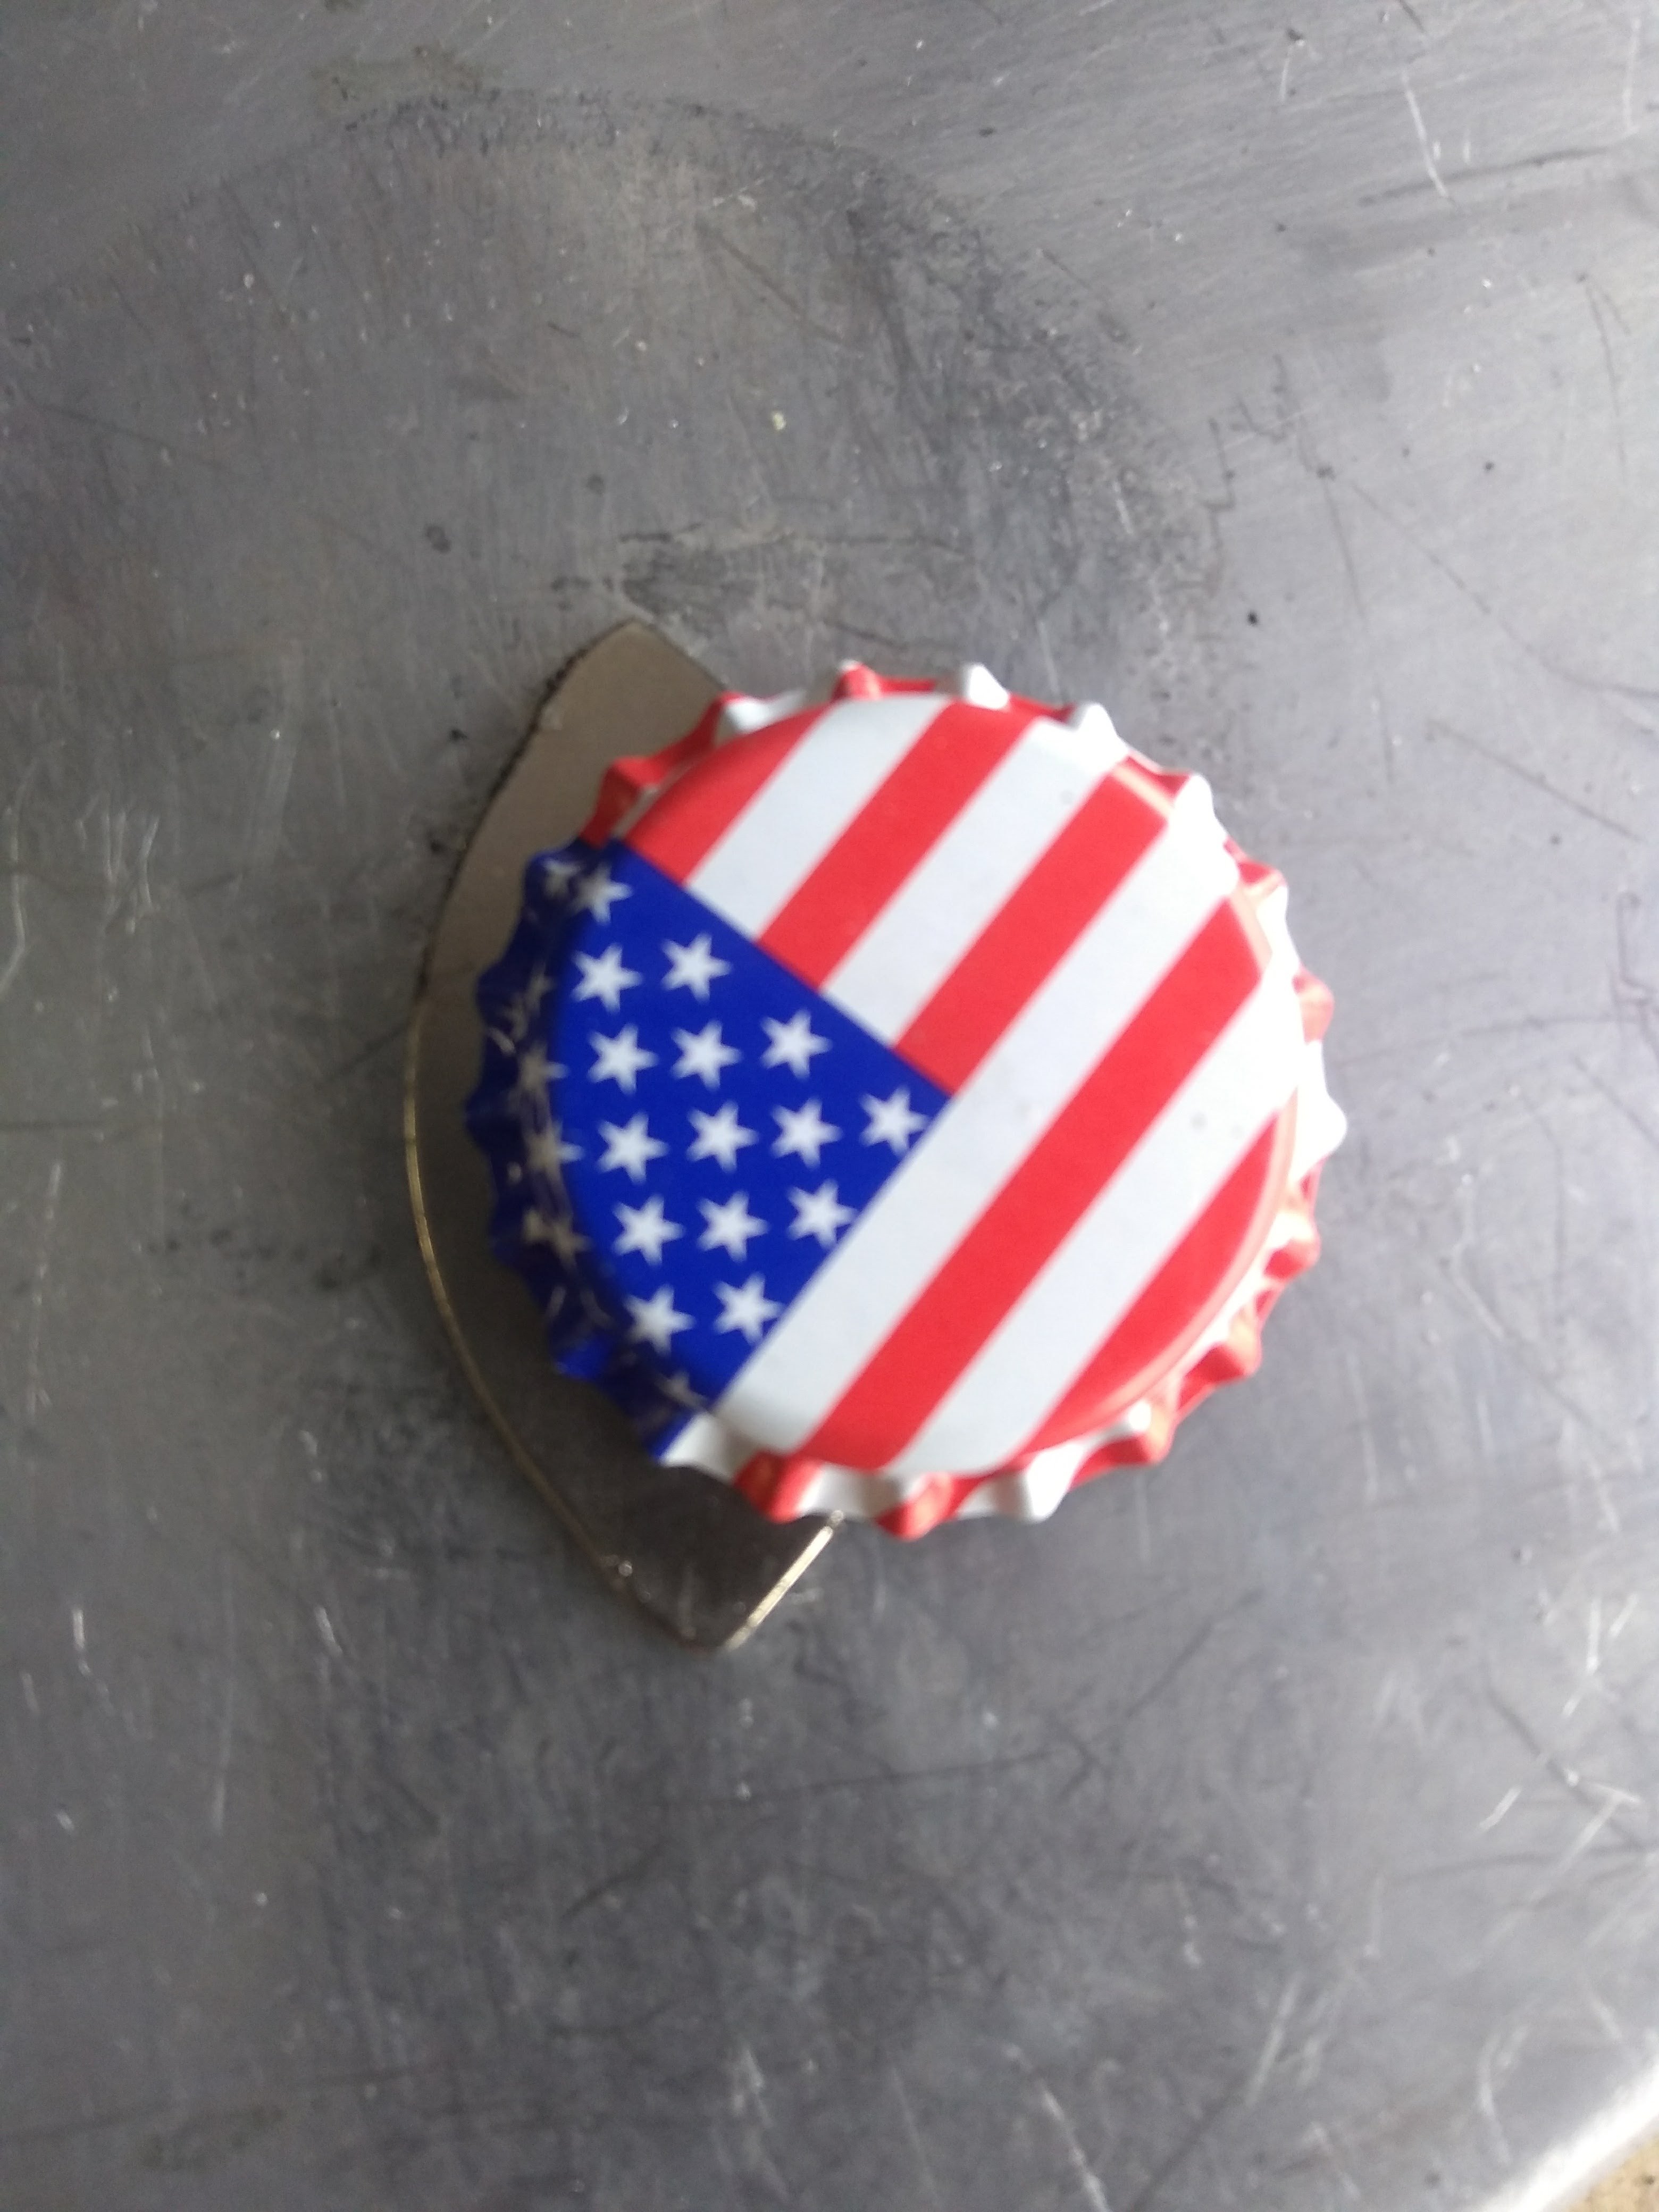

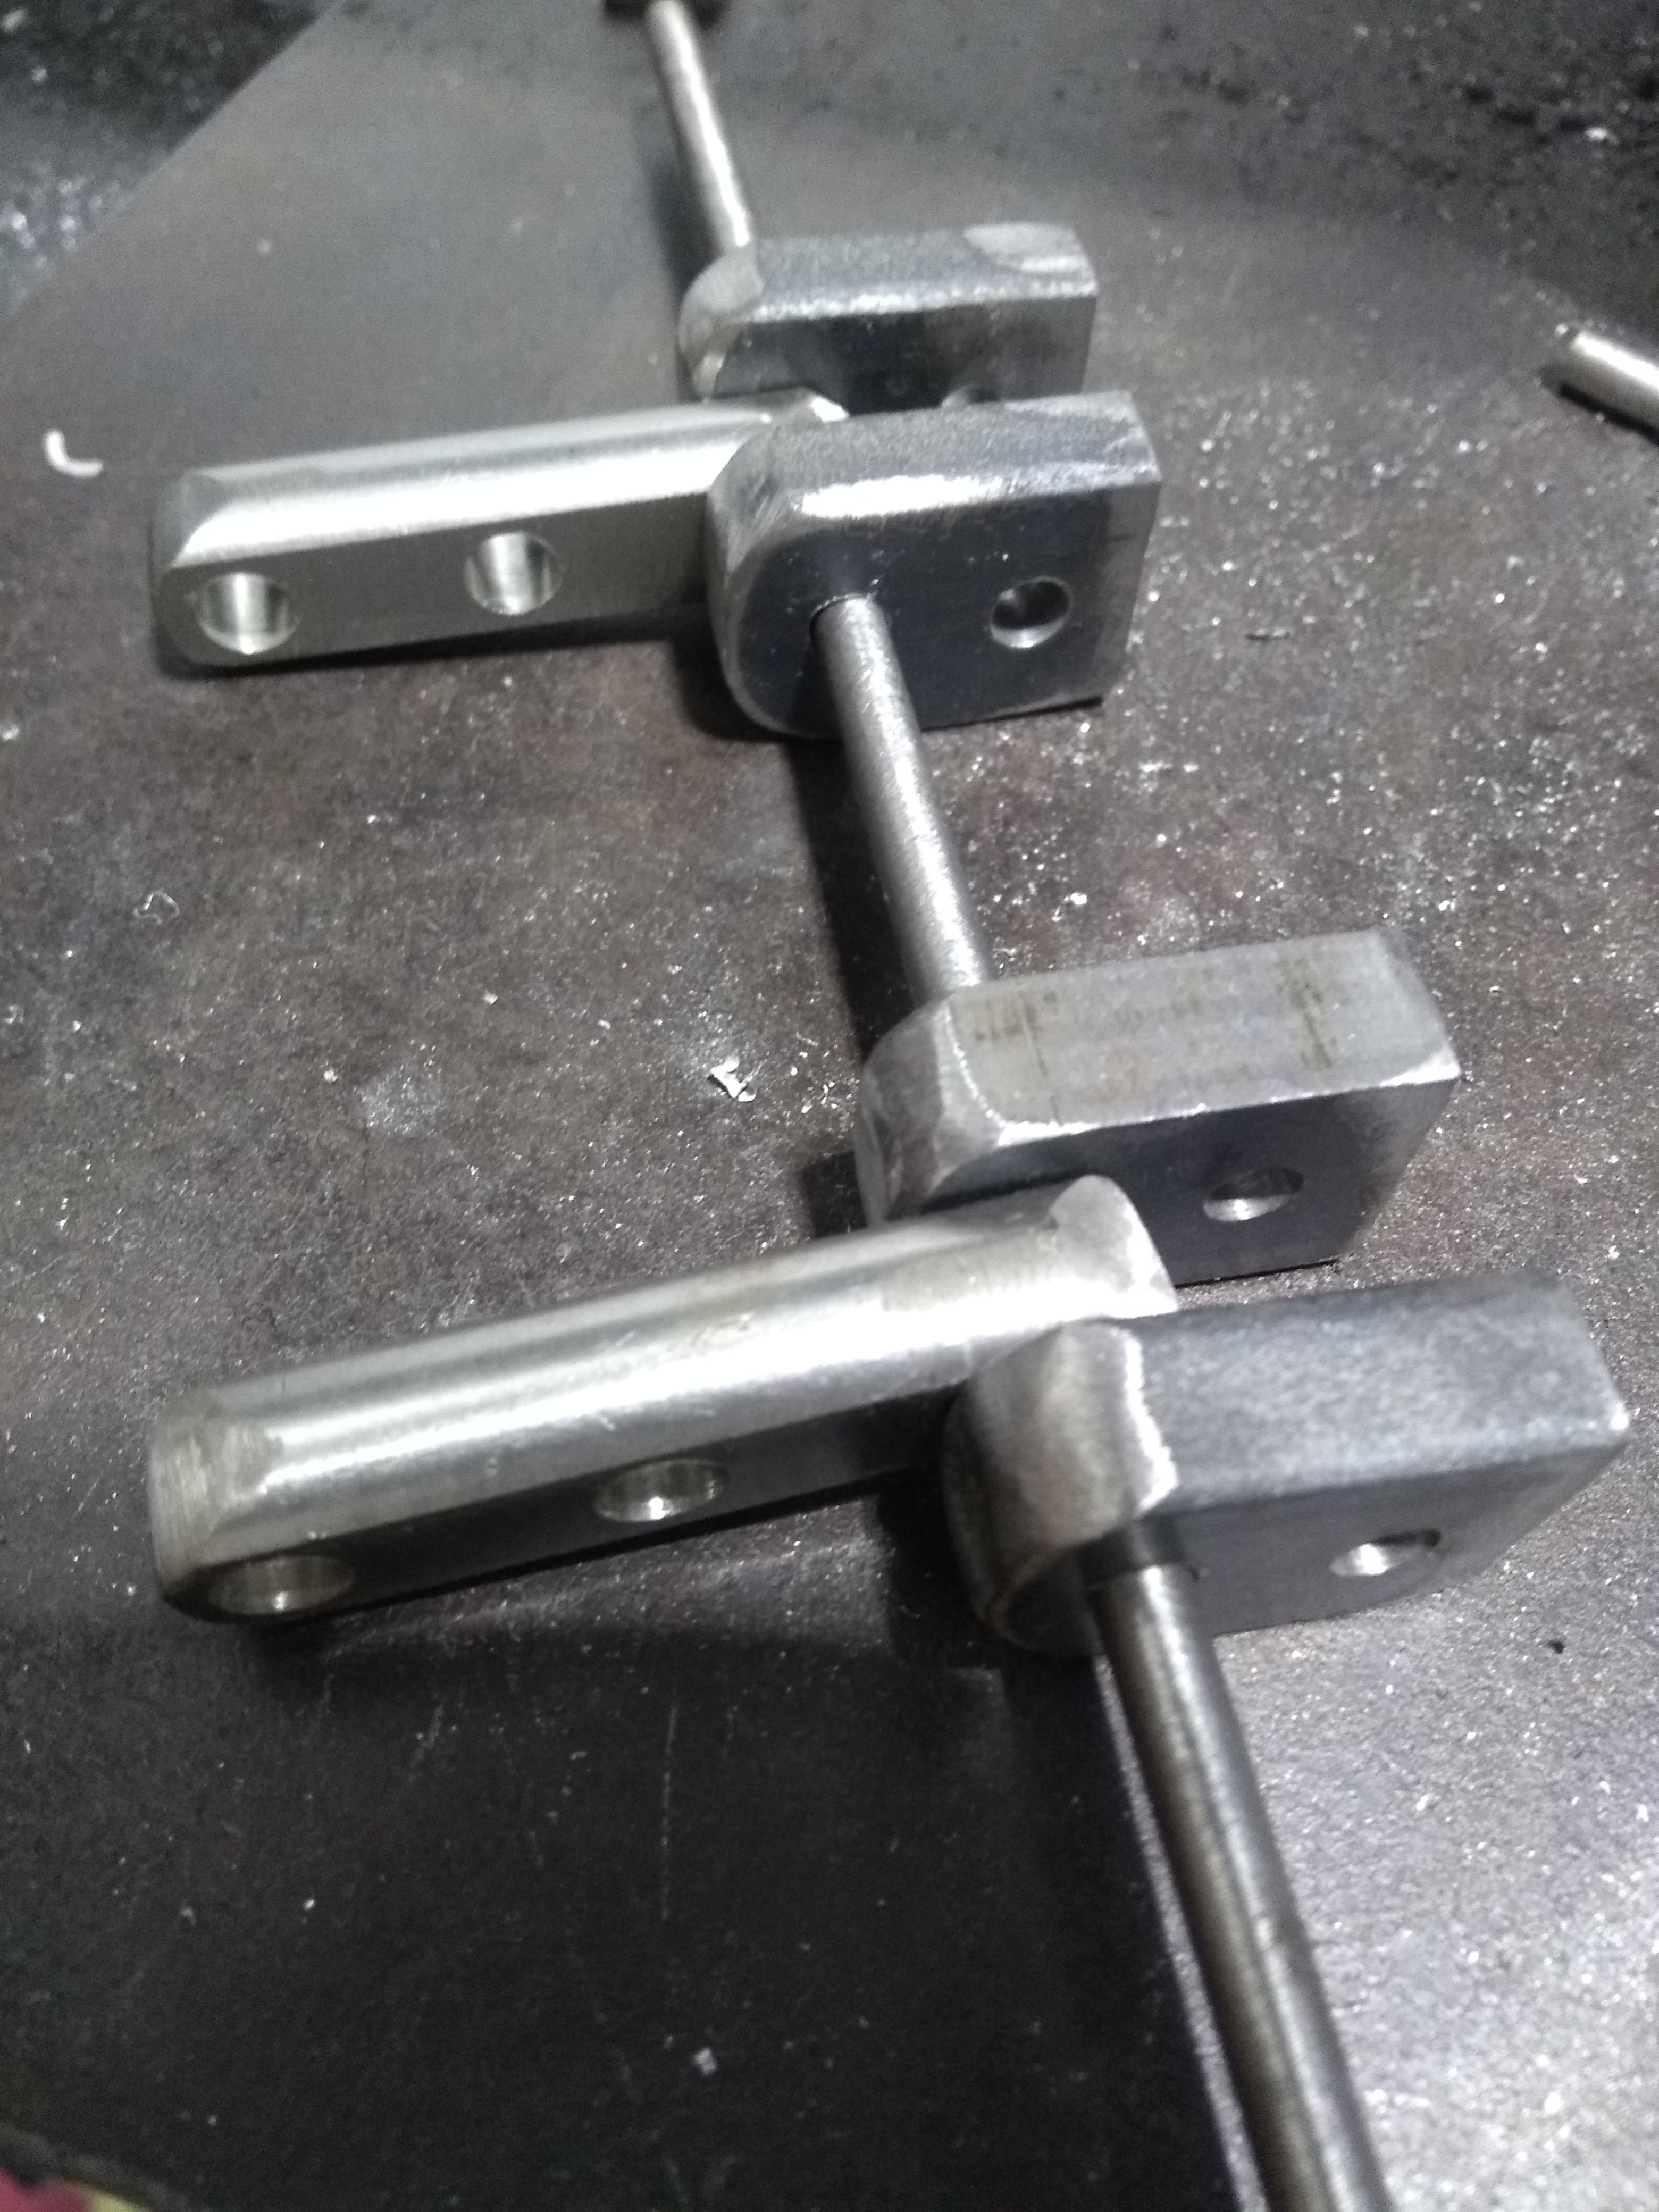
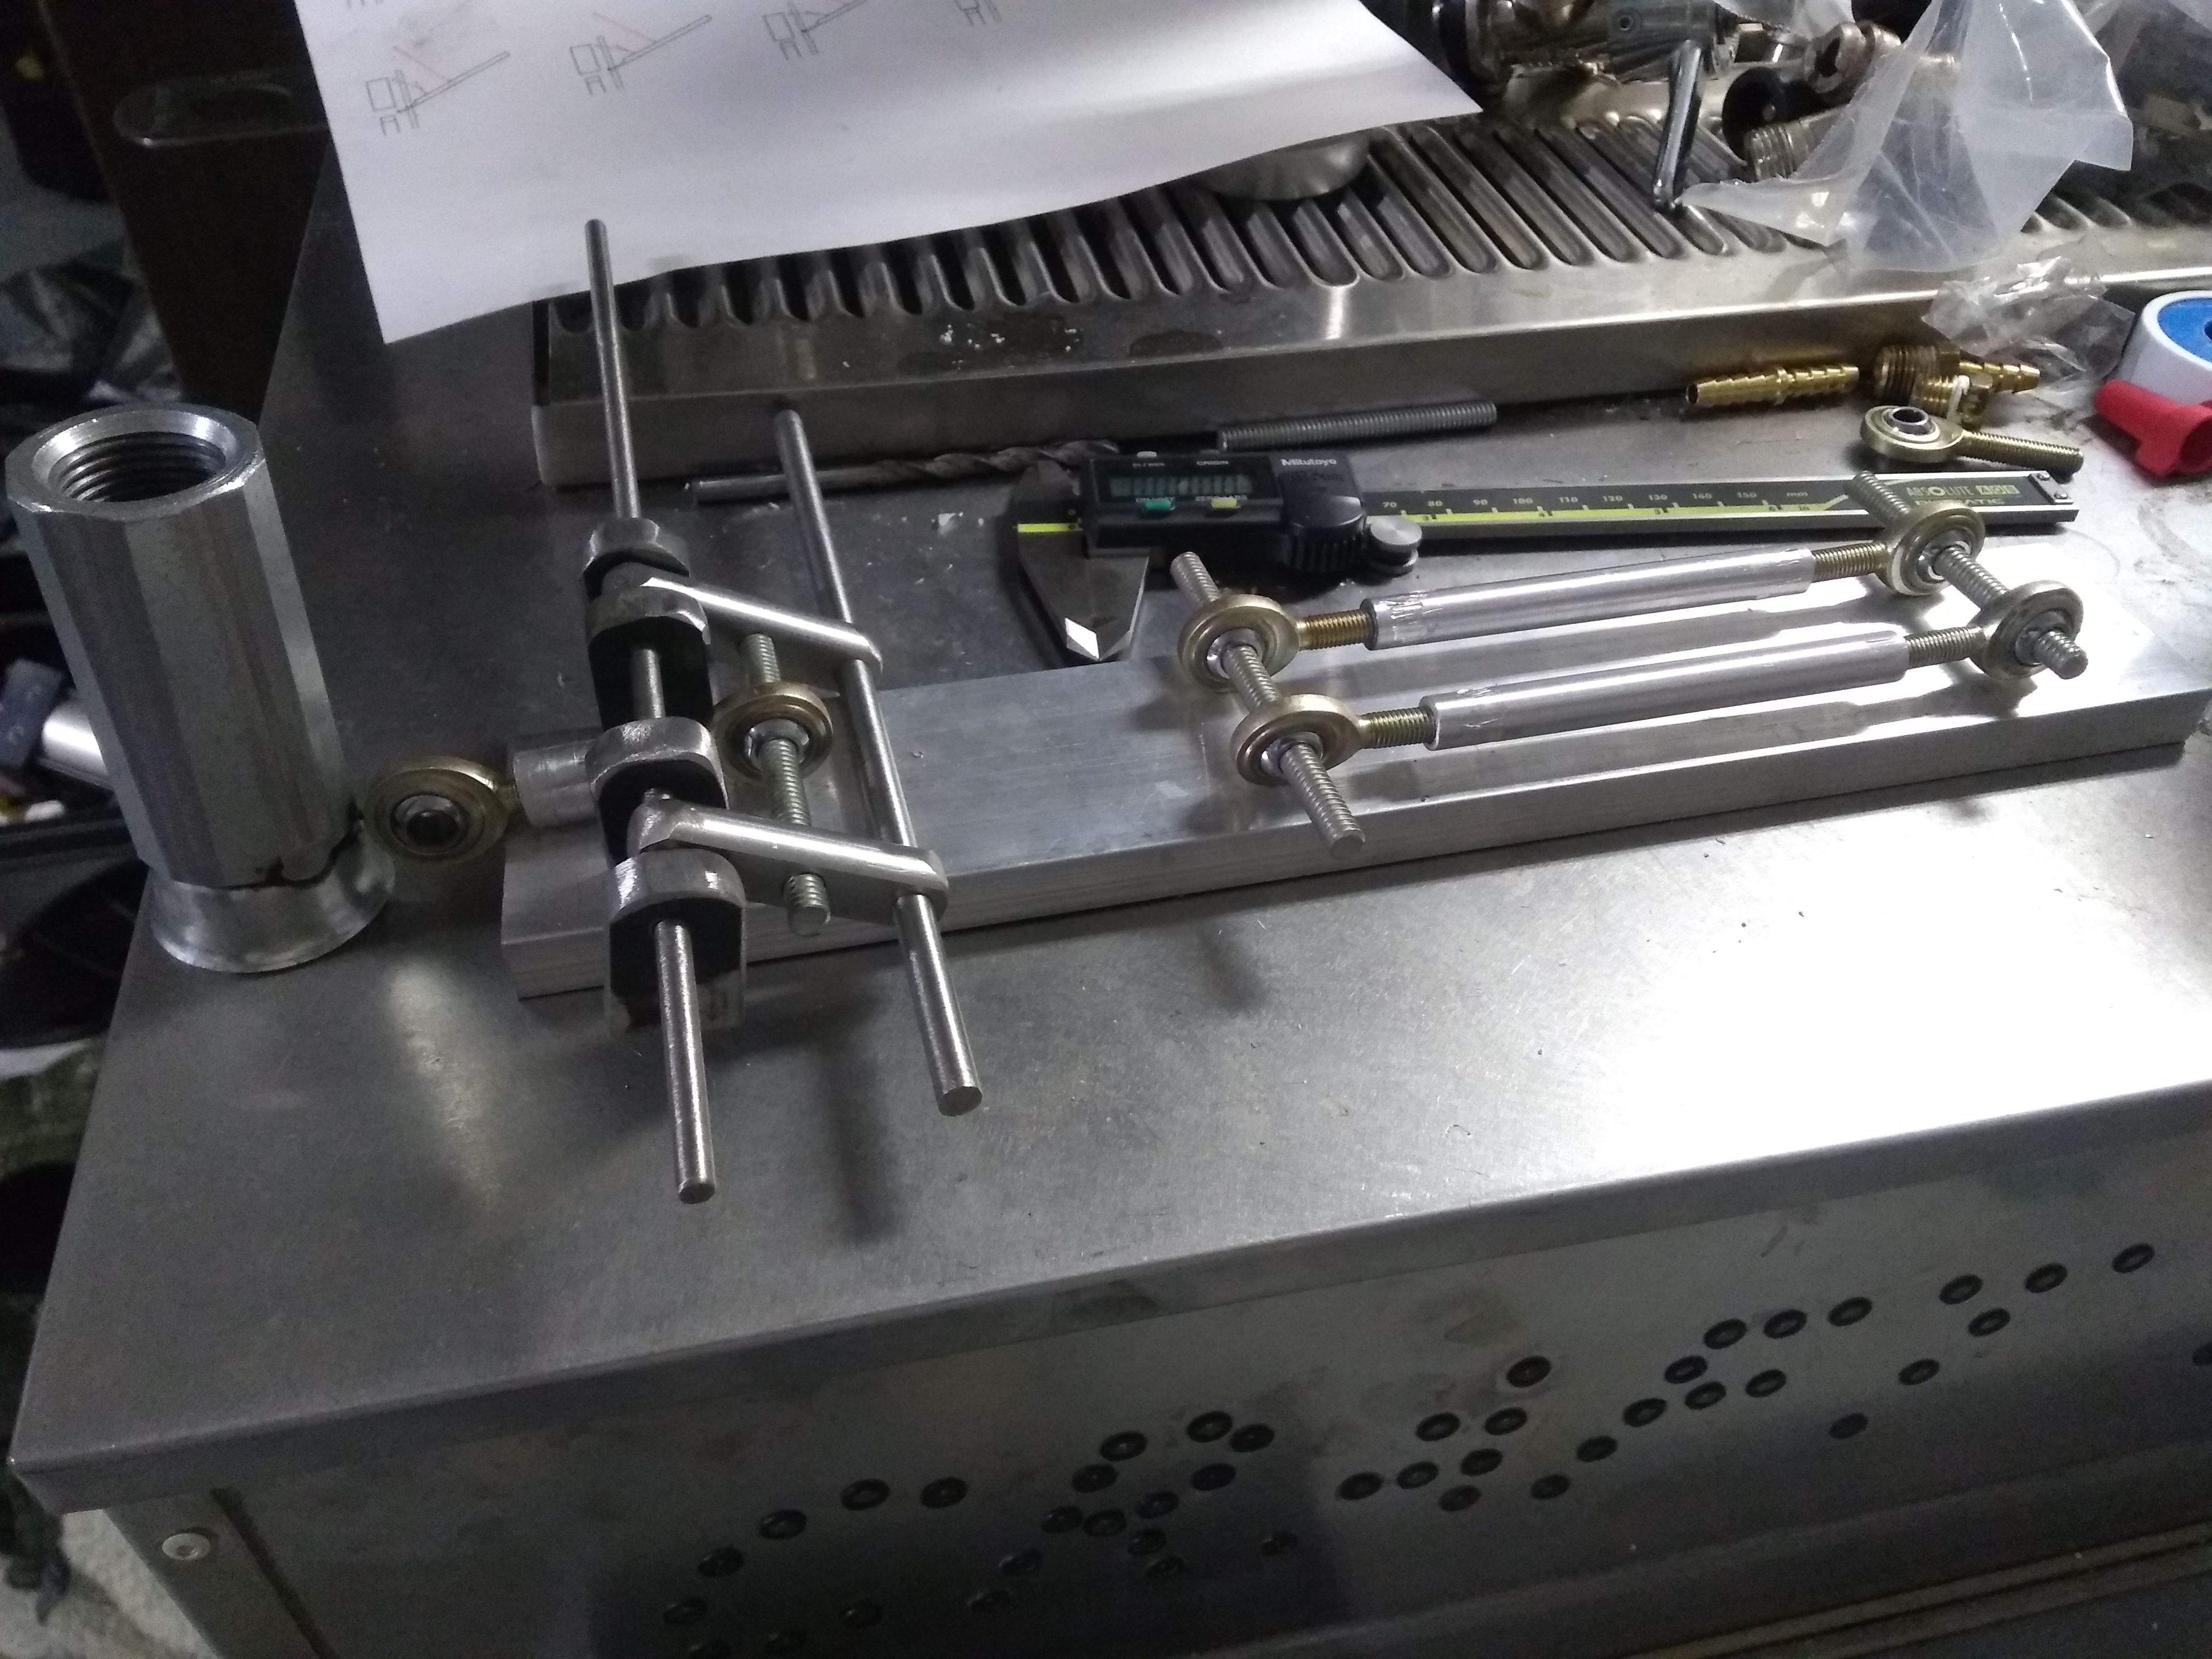
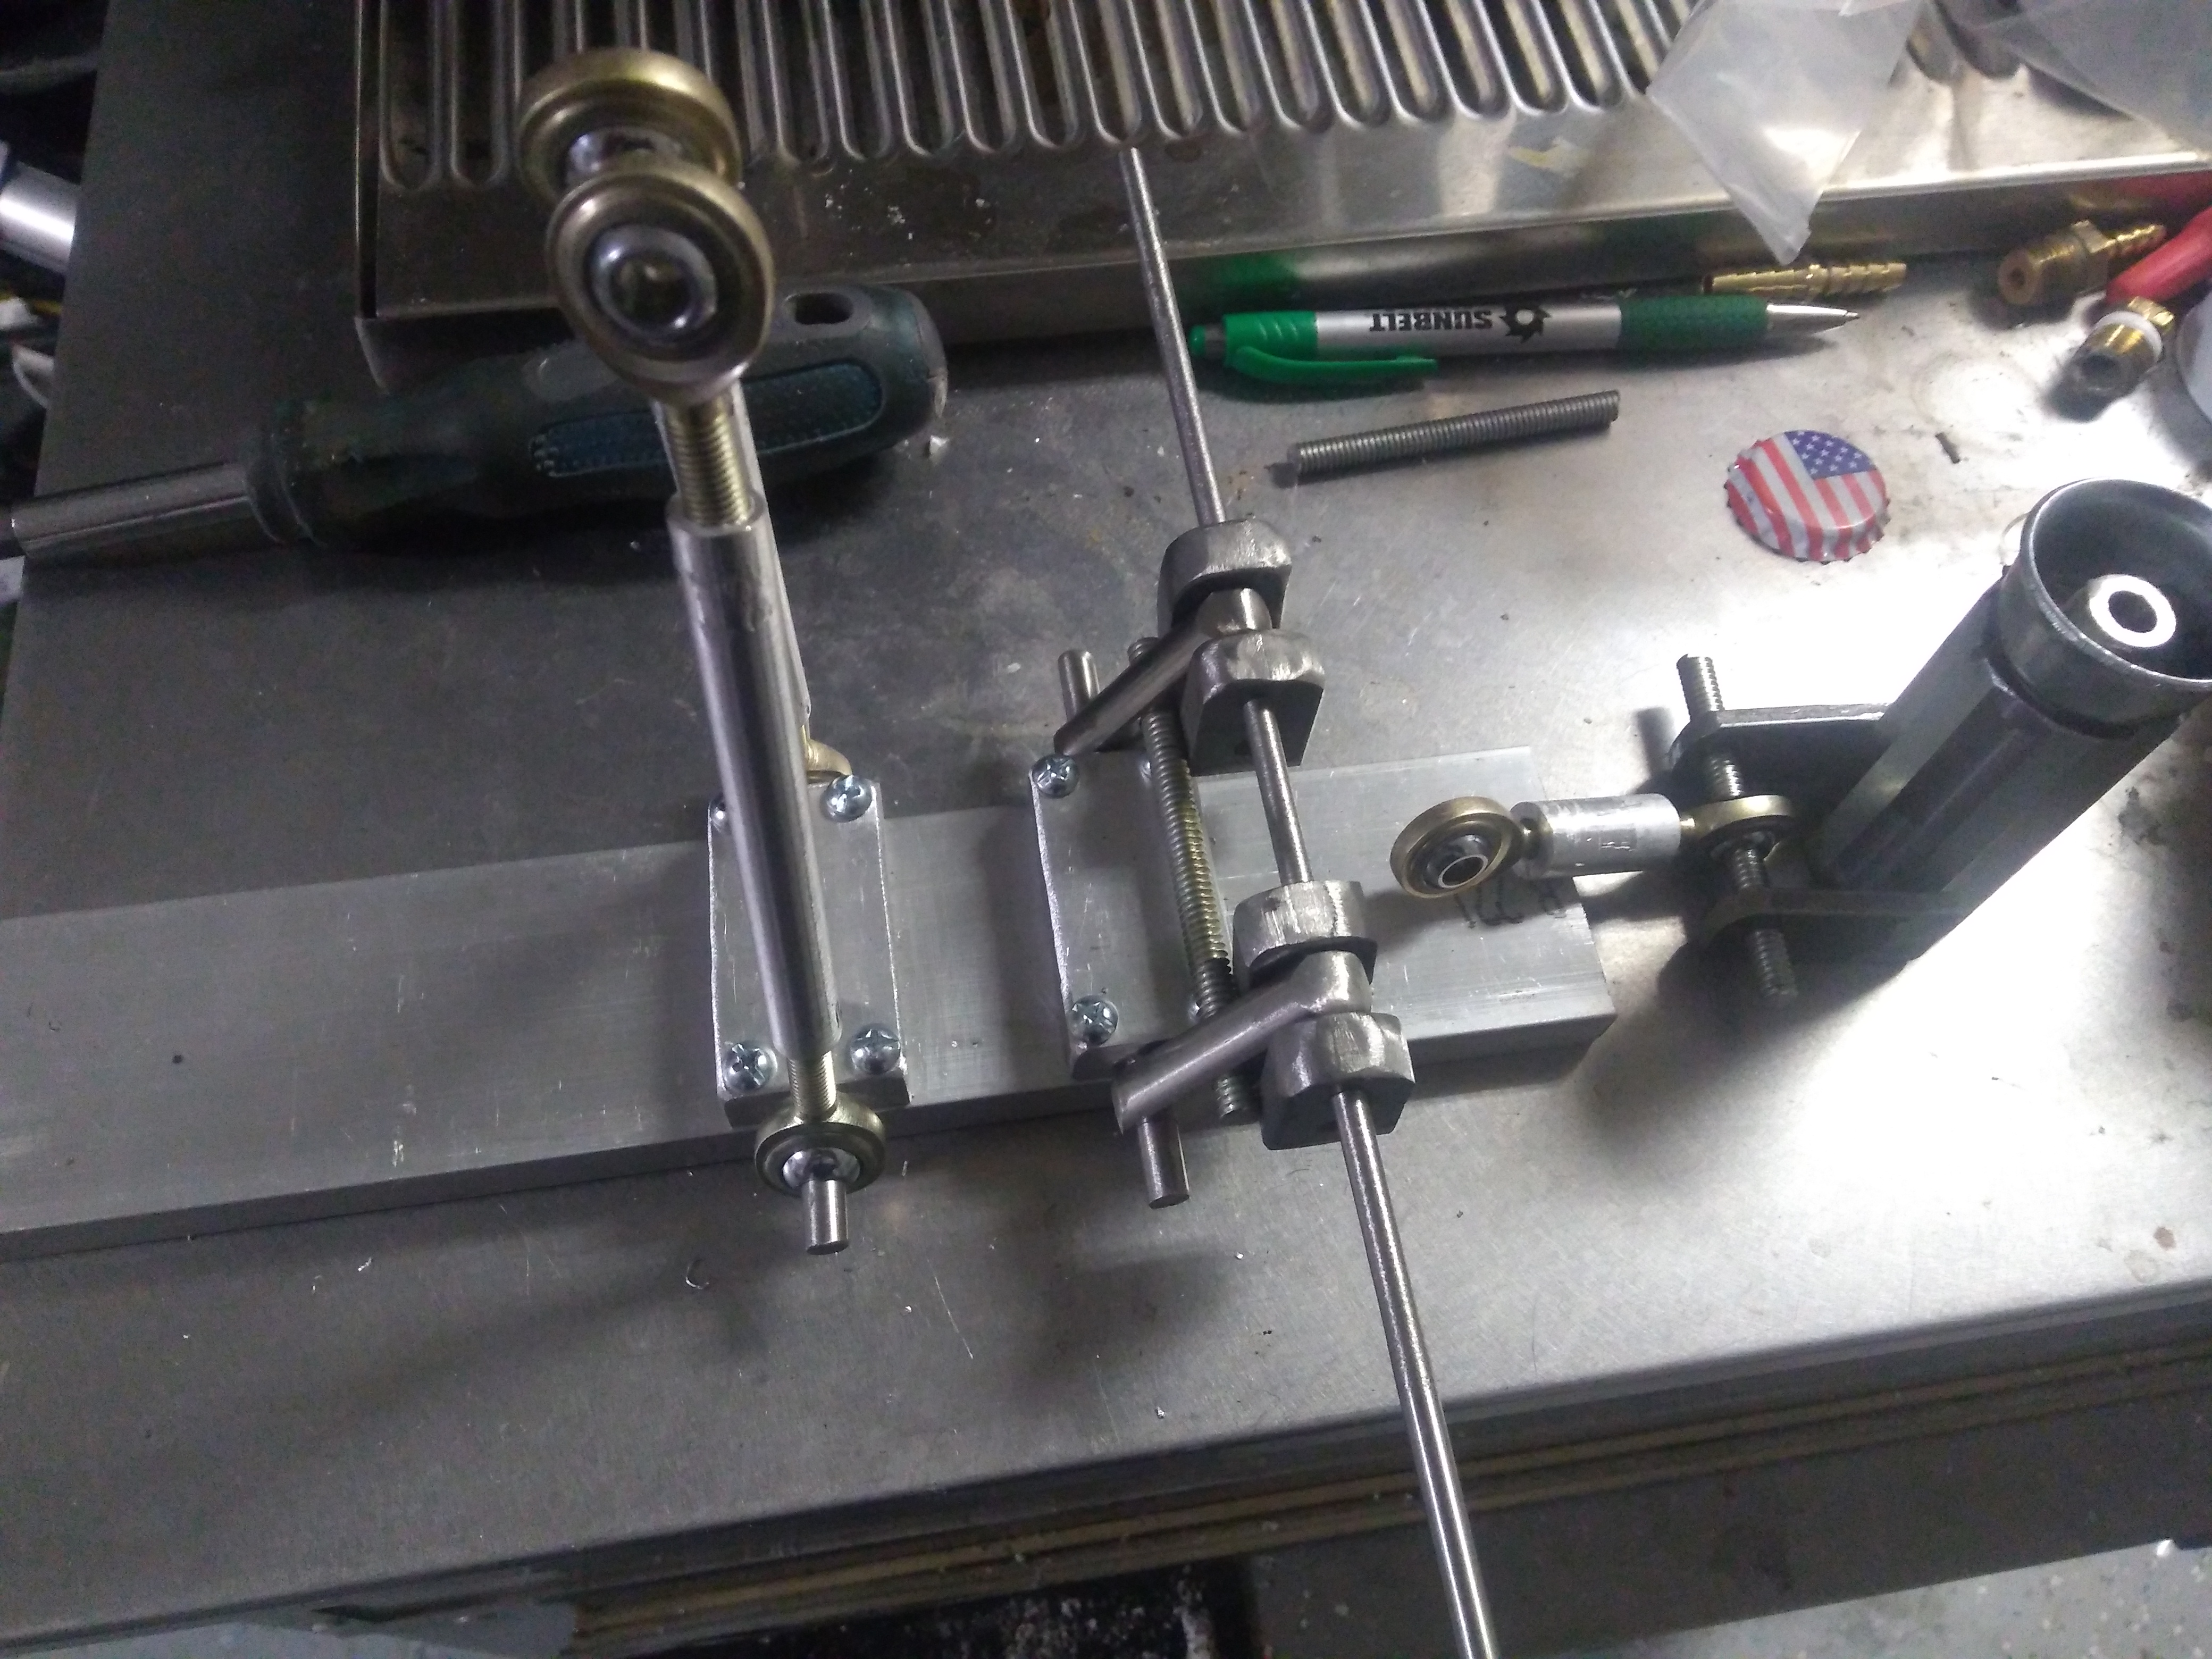
Here's how simple this is. Whether it works or not is undetermined.  A 10"x2"x1/2" aluminum bar cut out for the caps to slide down, a magnet at the end, and some linkage. So yea, I'm gonna end up spending 5 hours building this to save me 15 minutes over the course of my life loading caps one by one. But if it works, well, it's just cool.
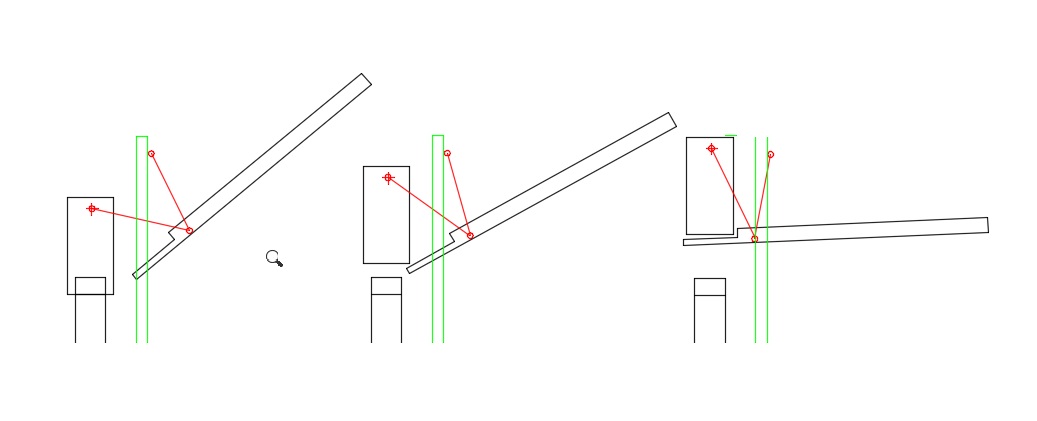

As an avid DIY guy, I've found this attempt at making an auto cap loader to be anything but a waste of time. I've had very little experience designing any moving parts requiring precise positioning, and admittedly underestimated the difficulty getting this linkage right on paper. But I'm getting a freshman education in linkage design, and as a guy that recently disassembled an old reclining chair because I was in awe of how one lever made 3 parts move in different trajectories, learning a little about the process of making parts move with linkage has been, well, kind of fun.
My point is, this part of the hobby for me is the most rewarding. A guy can learn a lot fabricating a machine like this.
I'm still waiting for the magnet for my bell to see how it behaves pulling the cap from the hard drive magnet, and the bar stock should arrive Friday, but then it's game on.
I'm cautiously optimistic about my chances of getting it to work flawlessly.
I just wanted to share my experience with this design, and more importantly encourage others who've hesitated to build their own widget. It can be a truly rewarding process.
Wish me luck...
BeardedBrews
Well-Known Member
You may have the most luck fabricating the cartridge with a lip instead of a magnet so that the caps are not held onto the cartridge in opposition to the bell magnet:
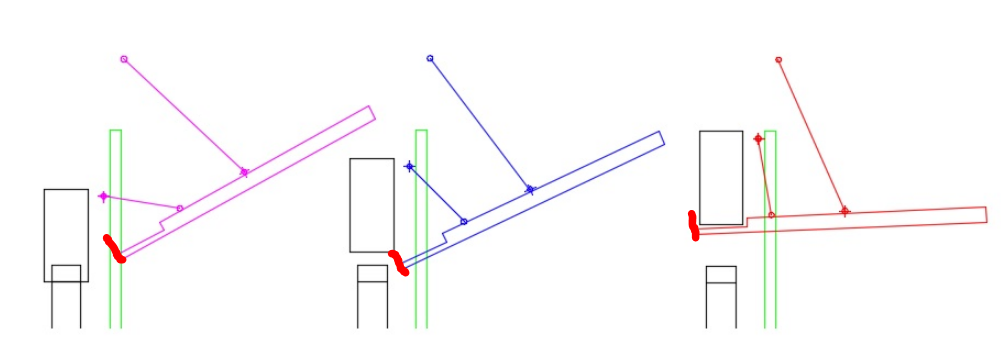
You could also consider shortening the cartridge and using it to index a single cap out of a vertical stack of stationary caps. Each down cycle of the bell would then release one cap into the cartridge to be positioned on the up cycle. Stacking the caps vertically will make it much easier to pre-load an entire bottling session of caps, and they'd be positioned correctly to stay fairly sanitary during the process.


You could also consider shortening the cartridge and using it to index a single cap out of a vertical stack of stationary caps. Each down cycle of the bell would then release one cap into the cartridge to be positioned on the up cycle. Stacking the caps vertically will make it much easier to pre-load an entire bottling session of caps, and they'd be positioned correctly to stay fairly sanitary during the process.

You may have the most luck fabricating the cartridge ...
That's great input. You may be right about the lip. My bell magnet is an N42 1/4" dia x 1/2 long cylinder, which should, given the fact that it'll have substantially more surface area contact, easily overpower the cartridge mag. Frankly I avoided the lip for clearance issues, but I think now after seeing linkage in my sleep for two days, I can work around those. I'm certainly going to experiment before I remove too much material.
With respect to your vertical loader idea... Haha, I like the way you think. Not sure my wifey does though!
I ended up with an extra pneumatic cylinder, 2-1/2" bore, 2" stroke, selling for $35 + shipping on eBay if anyone is interested in building there own!
https://www.ebay.com/itm/263421391519?ssPageName=STRK:MESELX:IT&_trksid=p3984.m1558.l2649
https://www.ebay.com/itm/263421391519?ssPageName=STRK:MESELX:IT&_trksid=p3984.m1558.l2649
You were right about the magnets interfering. The bell picks it up ok, but it kinds of drags of the other. No worries. And I've drawn my linkage for the 4th and final time! It's going to be so critical how that cartridge not only escapes the bell, but reapproaches it too. Down and out quick.
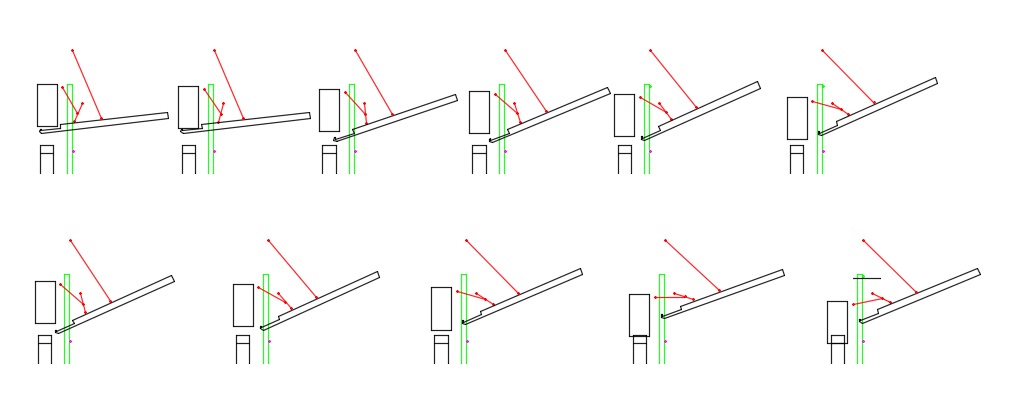

-TH-
Well-Known Member
Waiting for the 2-1/2" cylinder; decided to address the magnetic crown holder. After messing around will all kinds of magnets in the bell, realized the only solution is a magnet that captures the crown to center it in the bell and spring loads into the bell. I saw this design in a hand crimper, wanted to avoid it because of it's complexity fabbing a one-off, but what the hell... should work swimmingly. Ordered a 1/4" dia x 1/2" long cylinder magnet from KJ Magnetics, some JB Weld should hold it in place...View attachment 551847 View attachment 551848
FYI I made a capper recently with a magnetic cap holder, but the way I did it was to bore a hole in the end of the cylinder rod in a lathe. This allowed me to use a spring loaded plunger that I made out of plastic. The plunger is cylindrical but has a shoulder on it so that the wider end is retained by the capper bell. In the center of the narrow end I pressed in a strong magnet.
Sorry I don't have pics, I don't have that capper anymore.
FYI I made a capper recently with a magnetic cap holder....
Pretty much the same route I went. It's still going to be dicey getting that Bell to come down on that cap so it centers right everytime. Early experiments are promising, but all the stars have to align.
Similar threads
- Replies
- 23
- Views
- 986
- Replies
- 1
- Views
- 2K



![Craft A Brew - Safale BE-256 Yeast - Fermentis - Belgian Ale Dry Yeast - For Belgian & Strong Ales - Ingredients for Home Brewing - Beer Making Supplies - [3 Pack]](https://m.media-amazon.com/images/I/51bcKEwQmWL._SL500_.jpg)


