• Please visit and share your knowledge at our sister communities:
  • If you have not, please join our official Homebrewing Facebook Group!

    Homebrewing Facebook Group

Show us your sculpture or brew rig

Homebrew Talk

Help Support Homebrew Talk:

This site may earn a commission from merchant affiliate links, including eBay, Amazon, and others.
I love the float ball where'd you aquire that little thing?

Since I didn't have the 3/8" silicone tubing, I got this which comes with the float ball and hose: http://www.williamsbrewing.com/SPARGE-FLOAT-BALL-ASSEMBLY-FOR-MASH-WATER-HEATER-P3720.aspx

Or, if you have tubing and want to save a little cash, you can buy the stainless steel float here: http://www.amazon.com/gp/product/B00843JRW2/?tag=skimlinks_replacement-20

the 3/8" Silicone hose fit snugly over the 1/2" barbed nipple I have in the MT.

If you get the kit, the float is not installed on the hose and you have to insert the hose. It may feel impossible to do but if you wet the hose and the inside of the float, it will go in.

I like the float as it keeps the hose above the grain bad where as before, the hose would sometimes sink into the grain bed and make a channel.
 
Last edited by a moderator:
Thanks. Looks nice, I guess I'd have to downgrade from 1/2" to use 1.

Definitely. I tried to install the float ball from the amazon page to fit on my 1/2" tubing and it was going no where. You won't loose anything going from 1/2" to 3/8" since when you fly sparge, you're not looking for maximum flow, just a trickle. The good thing is that the 3/8" does fit over a 1/2" barb, just need to wet it with some water first.
 
Ha ha ha. I recirculate in my HERMS setup. So i do tend to run my pump on full. I fly sparge at about half. But yeah I don't think 2' of 3/8 hose is going to make that much of a difference. I currently use the lock line setup that brewhardware sells.
 
Yay! I finally have something to add to this thread! I know it's not as nice as many of the rigs here, but it's mine and I'm proud of it. :mug:

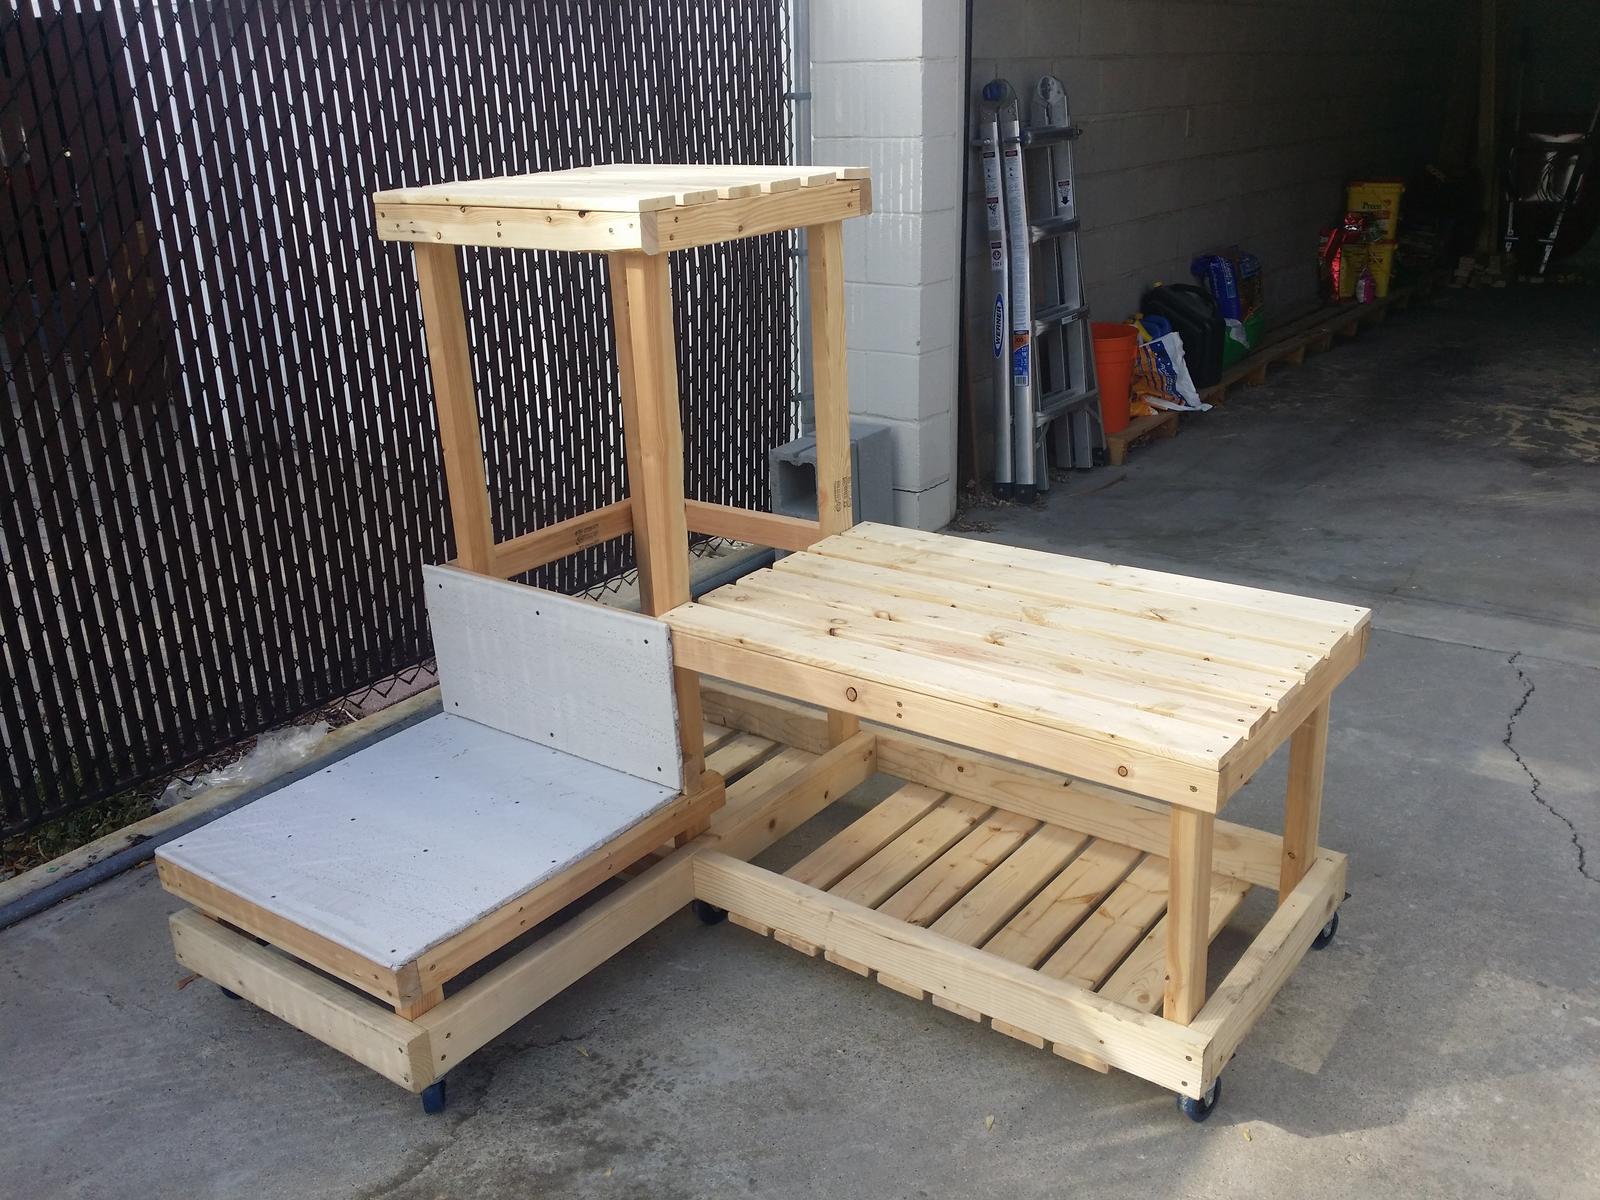
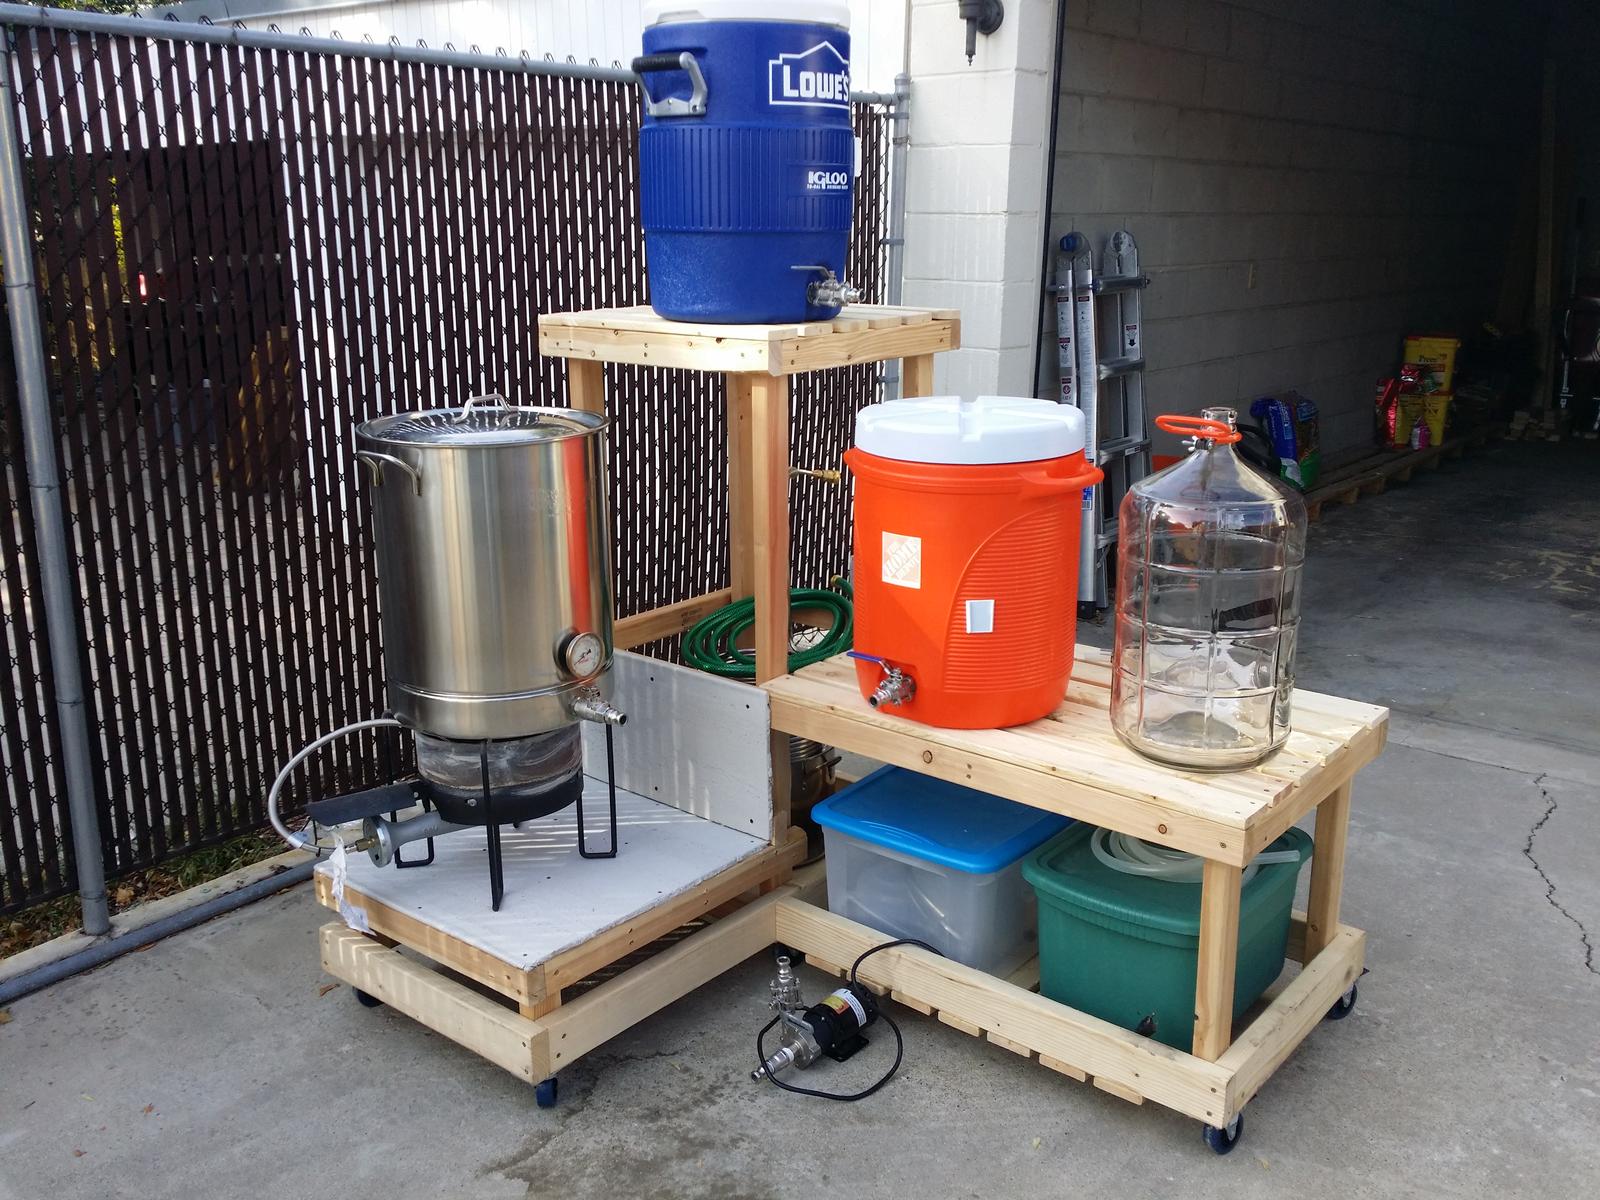
I just built this last week after using cinder blocks and a folding table since moving to all-grain this summer. I call it my Crooked Woody. ;) The base is 2x4's and the rest of the structure is 2x3's. It's solid as a rock. The burner tier is covered in cement backer board. The studs above the backer board weren't even hot after a full brew day.

With my banjo burner (KAB4) on the left tier, the BK and MLT are at the same height making it a two-tier, one pump stand. BK is Bayou Classic 16 gal. Pump is Chugger SS center inlet. All fittings are camlocks. Water is filtered with an RV filter. Wort is cooled with a 3/8"x50' stainless IC. The bottom shelf serves as storage for all the small bits, and both the HLT and MLT can fit on the right tier for storage. During the brew day this added space on the right tier is useful for setting down my digital scale, notebook, refract/hydro, beer, etc. I have parts on order from brewhardware and bargain fittings to add thermometer, sightglass and fill port to the HLT and a whirlpool port to the BK.

Still to be added are mounting the pump and wiring it into a switch in a weatherproof electrical box, adding some hooks and the like for hanging accessories, and adding plumbing to turn water off and on right at the brew stand.

2014-10-17 15.42.56.jpg


2014-10-17 15.58.28.jpg
 
Last edited by a moderator:
3/4" = 19.05mm. The listed I.D. of this float is 0.86" or 23mm. That's considerably larger. I saw this float as well yesterday in my search of Amazon. I decided not to purchase it right now, but if I had, I was going to use 2 hose clamps tightened very lightly on the hose to trap the float in place on the return hose. It will not stay put by itself on a 1/2" silicone hose.
 
The burner tier is covered in cement backer board. The studs above the backer board weren't even hot after a full brew day.


How does the cement board do when it gets wet? I have a similar design. As careful as I am I still get some wort or water on the burner tier.
 
How does the cement board do when it gets wet? I have a similar design. As careful as I am I still get some wort or water on the burner tier.

Well after only one brew it seems fine. I did manage to get both wort and water on the backer board. I wiped the spills with a damp rag and haven't noticed anything wrong with it.

The burner tier is exactly 24x24", so one thought I had was picking up two 24"² ceramic tiles from home depot to cement to the backer board. The bottom tile would fit as is, and I'd only have to make a single cut on the side tile to make it fit. But I likely wont even do that because I still have half the sheet of backer board and can just replace it if it gets too grody.
 
I have four carry tiles on OSB on my stand. I've not glued it and groated it so liquid gets under it a little. I'm still making adjustments.
 
Well after only one brew it seems fine. I did manage to get both wort and water on the backer board. I wiped the spills with a damp rag and haven't noticed anything wrong with it.

Shouldn't be an issue. The main reason for its existence is as a water barrier behind tile showers. Not all of them are waterproof (depending on the construction/materials of the board), but they're all at least water resistant and have good drying time. Worrying about their response to water is like worrying about your driveway or patio's response to water. RDWHAHB. ;)
 
3/4" = 19.05mm. The listed I.D. of this float is 0.86" or 23mm. That's considerably larger. I saw this float as well yesterday in my search of Amazon. I decided not to purchase it right now, but if I had, I was going to use 2 hose clamps tightened very lightly on the hose to trap the float in place on the return hose. It will not stay put by itself on a 1/2" silicone hose.

I thought about that as well. The 3/8" hose float ball is .09" larger diameter than the hose. The 1/2" float ball is .11" larger than the hose. I figured if the smaller one worked with smaller hose then the larger would work with larger and the extra .02" would not make a difference functionally in the low flow environment of a mash tun. Ill report back with results on my next brew day
 
3/4" = 19.05mm. The listed I.D. of this float is 0.86" or 23mm. That's considerably larger. I saw this float as well yesterday in my search of Amazon. I decided not to purchase it right now, but if I had, I was going to use 2 hose clamps tightened very lightly on the hose to trap the float in place on the return hose. It will not stay put by itself on a 1/2" silicone hose.

Tightening clamps down on a silicone hose without something inside of it, like a barb, would pinch/crush the hose.

I'm new to all grain brewing, but, what's the difference between using 1/2" tubing versus 3/8" tubing inside your MT? Don't you want a slow steady stream going back over the grain bed?
 
I thought about that as well. The 3/8" hose float ball is .09" larger diameter than the hose. The 1/2" float ball is .11" larger than the hose. I figured if the smaller one worked with smaller hose then the larger would work with larger and the extra .02" would not make a difference functionally in the low flow environment of a mash tun. Ill report back with results on my next brew day

If you're using 3/8" ID (5/8" OD) tubing the 15mm float is 0.03" smaller than the tubing.
 
I thought about that as well. The 3/8" hose float ball is .09" larger diameter than the hose. The 1/2" float ball is .11" larger than the hose. I figured if the smaller one worked with smaller hose then the larger would work with larger and the extra .02" would not make a difference functionally in the low flow environment of a mash tun. Ill report back with results on my next brew day

You will have almost a 1/16" gap all the way around the hose. It's just not tight enough to keep the float in one place.

Tightening clamps down on a silicone hose without something inside of it, like a barb, would pinch/crush the hose.

I'm new to all grain brewing, but, what's the difference between using 1/2" tubing versus 3/8" tubing inside your MT? Don't you want a slow steady stream going back over the grain bed?

Nope. All I'm talking about is snugging it up on the tubing. Not cranking down on it. Should work just fine and should not effect the buoyancy of the float at all.

I have 1/2" plumbing throughout my brewery. I want to get as much flow through my HERMS coil as possible. If I switched to a 3/8 silicone hose for my mash return, I'd be choking down the flow considerably. It really helps in step mashing and raising up to mash-out temps to have as much heated volume as possible circulating through the grainbed. If I choke down the flow that much, I'm afraid I would not see the same rate of temperature rise.
 
Finally have a rig to post. 5 gallon batches with 7.5gal hlt, 10 gal Home Depot MLT, and 11 gal Bayou Classic kettle. First all grain batch today, wish me luck!ImageUploadedByHome Brew1414263153.245146.jpg


Sent from my iPhone using Home Brew
 
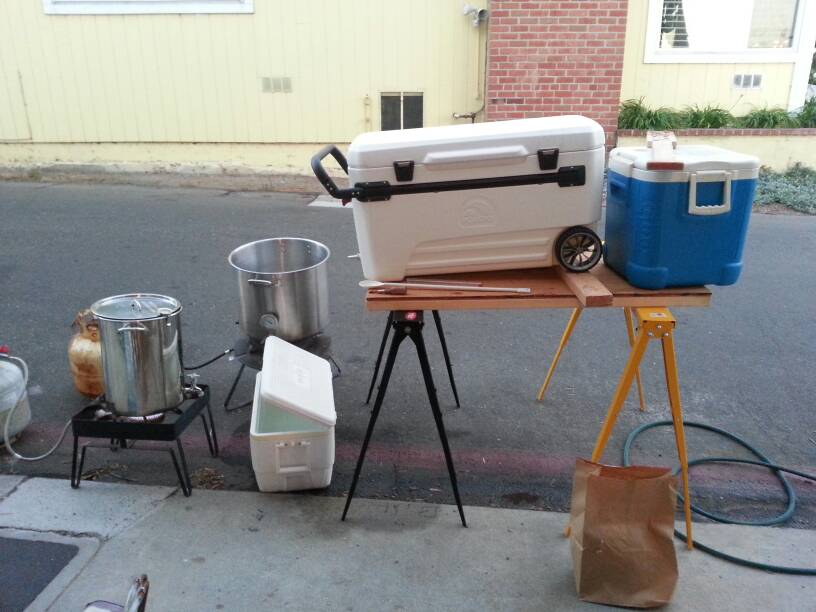
Still fine tuning everything but I'm finally happy with the CFC setup. Also didn't want to make a control box so I'm using a wireless appliance remote control like the ones for lamps, etc. for the pumps and it works great. The only issue I've had is that I can't seem to keep the high temp paint from peeling everytime I brew. Also, NG conversion was the best upgrade ever.

So I just want to say that I love this rig. I don't want a control box, because it feels like I'm steering away from "manual transmission". I have thoughts of making something fairly similar, but with a few minor differences. Drop the BK down to the level of your diamond plate, so I can gravity feed from the MLT. I have a pump, so I could conceivably do recirculating from the HLT or the BK if necessary.

Any issues with the burners going next to the cooler? Obviously cannot direct fire... but I was worried about heat from burners nearby.

EDIT: Pic didn't copy in with the quote. It's the rig in post #3332.

Thanks. Generally the igloo is fine where it is but there is a little bit of plastic that is melted on the bottom right side. This past weekend, I did a couple things to upgrade the rig. I cut a square piece of wood to put underneath the igloo so it won't touch the brewstand at all. I bought some thin 13" x 5" SS sheets and screwed one on each side of the igloo as a shield so now it should be protected. Good luck with your future brewstand. Not sure how you'd mount your BK burner if it's set that low. If you decide to go single tier, you can definitely get away with using one pump for everything.
 
Back
Top