You are using an out of date browser. It may not display this or other websites correctly.
You should upgrade or use an alternative browser.
You should upgrade or use an alternative browser.
Show us your sculpture or brew rig
- Thread starter Onescalerguy
- Start date

Help Support Homebrew Talk:
This site may earn a commission from merchant affiliate
links, including eBay, Amazon, and others.
[...]As I explained to my wife, he made me buy it at that price.
Yeah he did.
Gotta wonder how he 'splained that fire sale to his SO.
If he didn't handle it carefully I bet she carved him a new orifice...
Cheers!
wi_brewer
Well-Known Member
Yeah he did.
Gotta wonder how he 'splained that fire sale to his SO.
If he didn't handle it carefully I bet she carved him a new orifice...
Cheers!
He said that he enjoys building things and spent 2 years putting it together, but that 10 gallon batches are too big for his consumption levels. He needed to get rid of it to make room in the garage for his next project, building a kit car.

I run a 4 vessel system, HLT, dedicated herms tank, MT and BK. So that I can do a second mash while I start the first boil. The far end is for a prechiller pot and coil and a plate chiller. The front plated top is for the water filter and control panel. I put it up on casters and painted it. I haven't finished the panel yet but it's going to be at lot easier to work with and move around than this previous rig.

Sent from my iPhone using Home Brew
Yeah he did.
Gotta wonder how he 'splained that fire sale to his SO.
If he didn't handle it carefully I bet she carved him a new orifice...
Cheers!
If he's like most of us, his SWMBO probably thinks he made a profit!
Sent from my iPad using Home Brew

$22.00 ($623.23 / Ounce)
AMZLMPKNTW Ball Lock Sample Faucet 30cm Reinforced Silicone Hose Secondary Fermentation Homebrew Kegging joyful
无为中南商贸有限公司

$176.97
1pc Commercial Keg Manifold 2" Tri Clamp,Ball Lock Tapping Head,Pressure Gauge/Adjustable PRV for Kegging,Fermentation Control
hanhanbaihuoxiaoshoudian

$53.24
1pc Hose Barb/MFL 1.5" Tri Clamp to Ball Lock Post Liquid Gas Homebrew Kegging Fermentation Parts Brewer Hardware SUS304(Liquid Hose Barb)
Guangshui Weilu You Trading Co., Ltd

$33.99 ($17.00 / Count)
$41.99 ($21.00 / Count)
2 Pack 1 Gallon Large Fermentation Jars with 3 Airlocks and 2 SCREW Lids(100% Airtight Heavy Duty Lid w Silicone) - Wide Mouth Glass Jars w Scale Mark - Pickle Jars for Sauerkraut, Sourdough Starter
Qianfenie Direct

$10.99 ($31.16 / Ounce)
Hornindal Kveik Yeast for Homebrewing - Mead, Cider, Wine, Beer - 10g Packet - Saccharomyces Cerevisiae - Sold by Shadowhive.com
Shadowhive

$479.00
$559.00
EdgeStar KC1000SS Craft Brew Kegerator for 1/6 Barrel and Cornelius Kegs
Amazon.com

$53.24
1pc Hose Barb/MFL 1.5" Tri Clamp to Ball Lock Post Liquid Gas Homebrew Kegging Fermentation Parts Brewer Hardware SUS304(Liquid Hose Barb)
yunchengshiyanhuqucuichendianzishangwuyouxiangongsi

$20.94
$29.99
The Brew Your Own Big Book of Clone Recipes: Featuring 300 Homebrew Recipes from Your Favorite Breweries
Amazon.com

$7.79 ($7.79 / Count)
Craft A Brew - LalBrew Voss™ - Kveik Ale Yeast - For Craft Lagers - Ingredients for Home Brewing - Beer Making Supplies - (1 Pack)
Craft a Brew

$58.16
HUIZHUGS Brewing Equipment Keg Ball Lock Faucet 30cm Reinforced Silicone Hose Secondary Fermentation Homebrew Kegging Brewing Equipment
xiangshuizhenzhanglingfengshop

$719.00
$799.00
EdgeStar KC2000TWIN Full Size Dual Tap Kegerator & Draft Beer Dispenser - Black
Amazon.com
- Joined
- Nov 8, 2012
- Messages
- 108
- Reaction score
- 43
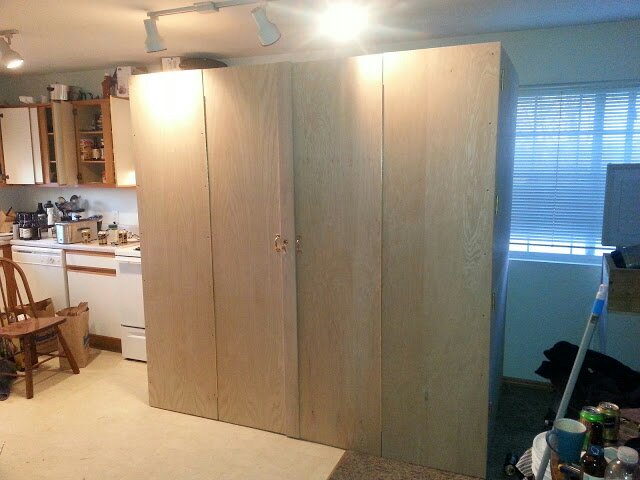
Holy moly, are you married? Your spouse just let you put that in the kitchen?
- Joined
- Nov 8, 2012
- Messages
- 108
- Reaction score
- 43
No not married this brewery is almost bigger than the kitchen
Awesome! You answer to no one! You make your man-kitchen how you want it!
- Joined
- Nov 8, 2012
- Messages
- 108
- Reaction score
- 43
Well I live in a duplex and not allowed to use propane for brewing so I went all electric. Adding bottom drain mash tun with rims and brew kettle with bottom drain for cleaning.
brewery_fixer
Brewing Maintenance
- Joined
- Dec 29, 2012
- Messages
- 58
- Reaction score
- 18
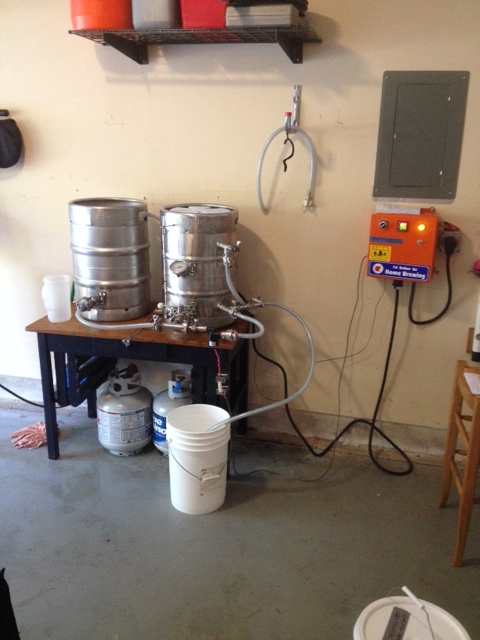
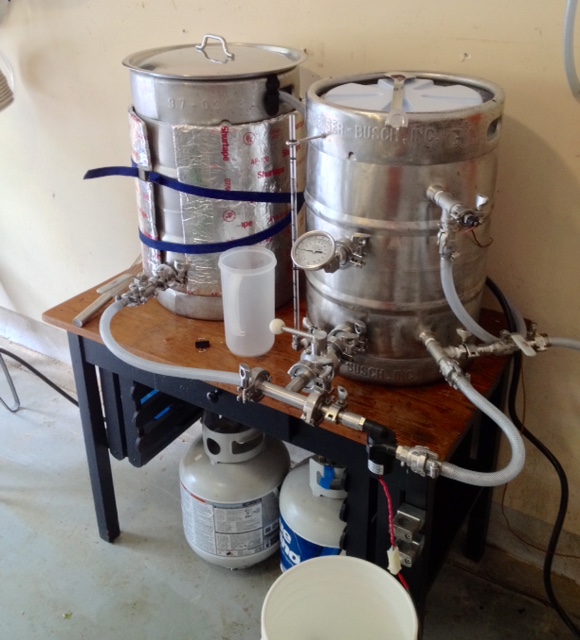
I know these aren't the best pics, but I just wanted to post some to show my new setup I just finished building. When I was doing my research I could hardly find a setup like it (maybe I just didn't look hard enough). I have to give credit though to High Gravity Brewing for the piping configuration. Their HERMS setup was really the only one I could find using a single pump. I brewed with this recently and I have to say I am very happy with how it performed. I hope that this shows anyone who cares that you can configure a setup with a single pump and it will work.


brewery_fixer
Brewing Maintenance
- Joined
- Dec 29, 2012
- Messages
- 58
- Reaction score
- 18
I also only use one PID controller in the system.
mikescooling
Well-Known Member
wbarber69
Well-Known Member
- Joined
- Oct 13, 2013
- Messages
- 2,191
- Reaction score
- 263
I know these aren't the best pics, but I just wanted to post some to show my new setup I just finished building. When I was doing my research I could hardly find a setup like it (maybe I just didn't look hard enough). I have to give credit though to High Gravity Brewing for the piping configuration. Their HERMS setup was really the only one I could find using a single pump. I brewed with this recently and I have to say I am very happy with how it performed. I hope that this shows anyone who cares that you can configure a setup with a single pump and it will work.
I'm guessing that you boil in a separate pot. I'd like to see some details on exactly how the flow of wort moves through this system I'm trying to see it in my head but I must be missing something.
brewery_fixer
Brewing Maintenance
- Joined
- Dec 29, 2012
- Messages
- 58
- Reaction score
- 18
Yes, sorry, I do indeed boil in a seperate pot, it sits to the left, out of sight in this pic. I will quote what I just wrote about the setup in the other forum I posted it in. Hopefully this isnt bad etiquette to have multiple posts of the same thing going on.
"Sure, I guess I should have thought of that. I fill the HLT with cold water and I also go ahead and fill the mash tun with the amount of strike water I will need. I have the valve on the output of the HLT closed and I open the valve on the output of the MLT. I set the PID at whatever I want the mash temp to be and I begin heating and recirculating the strike water from the mash tun thru the HERMS coil at the same time. By going ahead and filling the MLT up with the amount of strike water I will need and also having the HLT full, I do not have to add any more water to the HLT during the day. Once I hit my set point on the recirculating MLT water, I dough in. Before I do this though, I kill the pump for just a few minutes until I get the grain completely mixed in. Then I turn the pump back on and I constantly recirculate throughout the entire mash. Once the mash is over, I like to do a mash out. I change the setpoint on the PID to 168 or so and continue to recirculate the runnings thru the HERMS coil. Once Ive completed my mash out, I disconnect the hose from the MLT and direct it into the Boil Kettle. I cap off the open end of the tee that I just exposed by doing this and then I open the valve on the output of the HLT. I like to fly sparge, so at this point I begin pumping water from the HLT thru the HERMS coil and then over onto the top of the grain bed in the MLT. I do not change any of the piping configuration throughout all of this, the only change that is made is disconnecting the output from the MLT once I start collecting my runnings. After all of this, the brew day is just the same as any other. That seems like a lot, does that all make sense?
Also, I forgot to mention that the valve coming out of the tee just before the input to the HERMS coil is mostly for purging the pump. This works wonders, before I added this, it was hard to get the pump working the way it should."
https://www.homebrewtalk.com/f11/single-pump-single-pid-e-herms-494771/
brewery_fixer
Brewing Maintenance
- Joined
- Dec 29, 2012
- Messages
- 58
- Reaction score
- 18
Also, it may be hard to tell but the hose coming out of the output of the HERMS coil is run behind the the HLT and into the top of the MLT. I did this simply to keep the hose out of the way.
wbarber69
Well-Known Member
- Joined
- Oct 13, 2013
- Messages
- 2,191
- Reaction score
- 263
Ok I get it now. I have a pretty similar setup. Only I have a recirculating pump on my HLT at all times to prevent temperature stratification. And I'm single tier so I use my mlt pump to recirculate through my HERMS then out to my boil pot. I have a 3gpm solar pump for both my HLT and mlt. And a 6gpm solar pump on the bk to whirlpool. I love your single pump idea and was going to try to do a 2 pump system. Which would have worked but I wanted to be able to do back to back mashes and the 3gpm pumps weren't cutting it for my whirlpool.
brewery_fixer
Brewing Maintenance
- Joined
- Dec 29, 2012
- Messages
- 58
- Reaction score
- 18
Thanks, yeah I am cheap and I try to be thrifty, I had a lot of the fittings and parts already on hand, I just had to do a few modifications and such. I really didnt want to buy another pump if I didnt have to. I feel like I have adequate flow with the solar pump, plus it is kind of clean looking mounted inline like it is.
And as you put it, I guess mine would technically be two tier since I gravity feed into the boil kettle.
And as you put it, I guess mine would technically be two tier since I gravity feed into the boil kettle.
wbarber69
Well-Known Member
- Joined
- Oct 13, 2013
- Messages
- 2,191
- Reaction score
- 263
Yeah the speed is perfect for mash recirculation and it does a great job inline from the bottom drain to the top whirlpool port on my HLT. But in order to get a good trub pile and push through a plate chiller and maintain a good whirlpool from bottom whirlpool return was just too much for it. So I convinced ussolarpumps to come up with the TD-5 design. 12V pump, 6gpm, all stainless head with manual built in speed control. I love it.
brewery_fixer
Brewing Maintenance
- Joined
- Dec 29, 2012
- Messages
- 58
- Reaction score
- 18
Very Nice!
Here is my current build! Strut frame, chugger pumps. Waiting for a 3rd banjo burner for the MLT. False bottoms, and the cross style sparge arm (pic3) are all from Norcal Brewing Solutions ( good guys, awesome stuff).


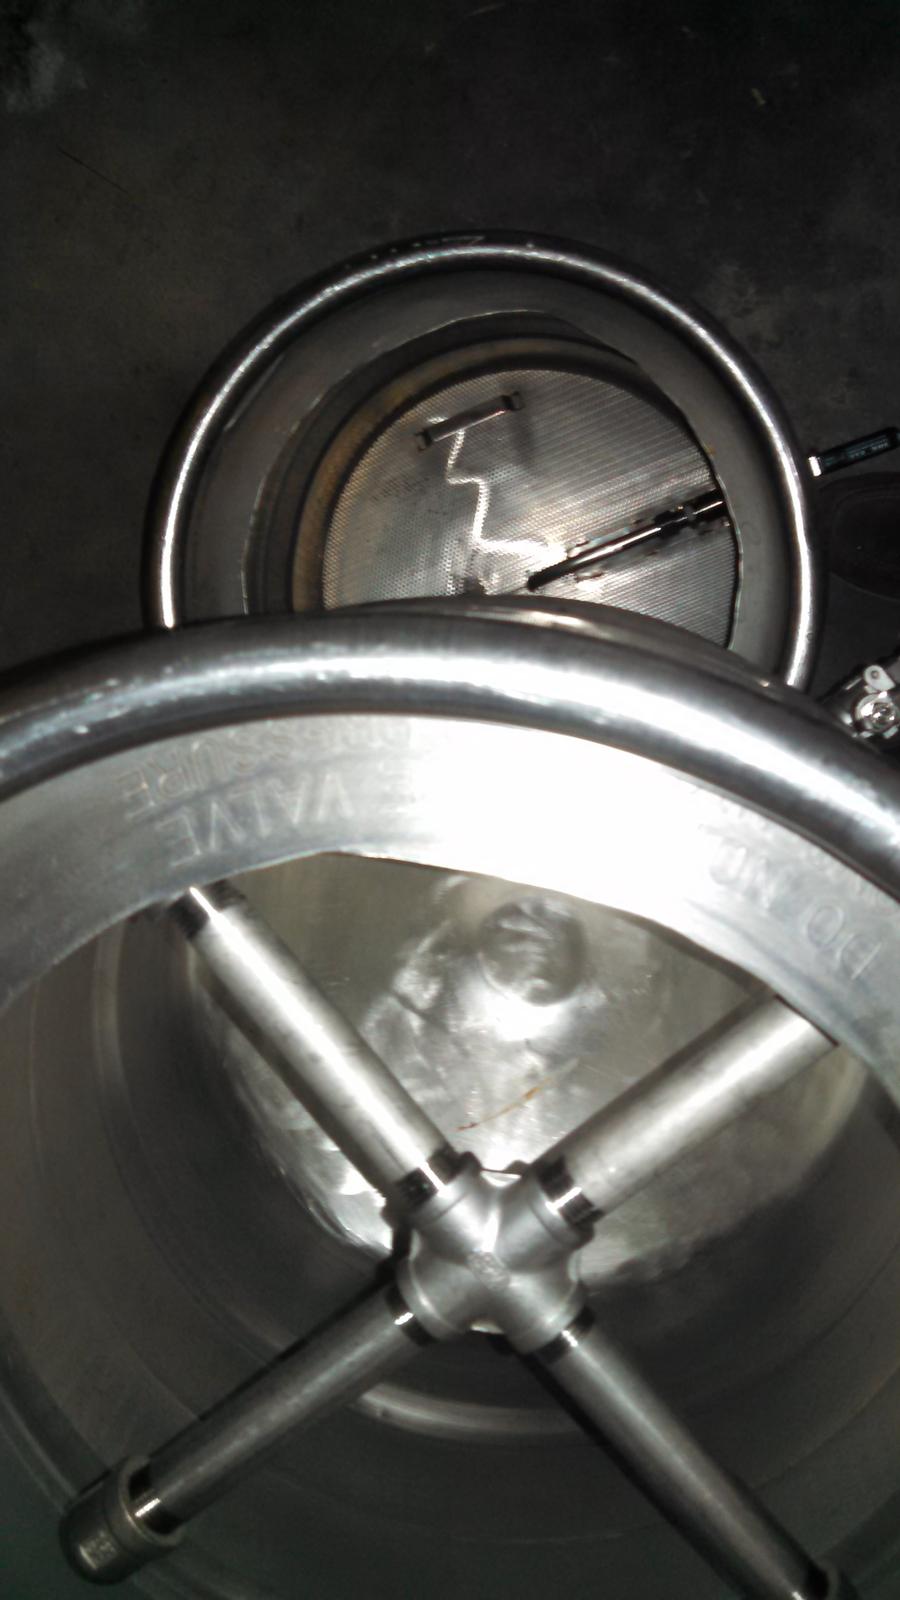


Two tier natural gas 10+ gal brewstand. Waiting on mash tun false bottom to send cooler to the bench, but hooked up the gas on Saturday and couldn't wait to brew. Other than the FB mash tun planning to change out the hose barbs for camlocks and add a waterproof switch for the pump. Probably add a second pump in the future for double batch. Designed around 15 gallon Bayou Classic kettles but will accommodate up to 25 gal kettles for future expansion. Chilling with home built CFC, not mounted to the stand yet.
Here is my current build! Strut frame, chugger pumps. Waiting for a 3rd banjo burner for the MLT. False bottoms, and the cross style sparge arm (pic3) are all from Norcal Brewing Solutions ( good guys, awesome stuff).
I would be concerned with your pumps so close to the burners. Heat wash coming out from under the kettles will heat up your pumps and likely cause problems with them either stalling or not starting and will shorten the life of them. I'd move them to the bottom rail of the stand. This will also help in priming them as the head pressure from the elevation difference will help flood the pump head space. I would also move the casters a bit further towards the ends or at least centered on the end kettles.
I would be concerned with your pumps so close to the burners. Heat wash coming out from under the kettles will heat up your pumps and likely cause problems with them either stalling or not starting and will shorten the life of them. I'd move them to the bottom rail of the stand. This will also help in priming them as the head pressure from the elevation difference will help flood the pump head space. I would also move the casters a bit further towards the ends or at least centered on the end kettles.
I just moved/added casters last night, casters are now under each kettle. Thanks for the tip on the pumps, with the addition of a third burner in the center they will have to be moved anyways. I might install some discharge piping to at least have the ball valves higher than floor height.....

lpdjshaw
Well-Known Member
Here is my current build! Strut frame, chugger pumps. Waiting for a 3rd banjo burner for the MLT. False bottoms, and the cross style sparge arm (pic3) are all from Norcal Brewing Solutions ( good guys, awesome stuff).
Nice rig, but your pump heads are upside down. There designed so that any air in the pump will rise and help prevent cavitation
HiImBrian
Well-Known Member
- Joined
- Aug 15, 2014
- Messages
- 273
- Reaction score
- 67
Stumbled upon this little gem a few weeks ago as well as a new conical. Refinished and reran all the hoses as well as mounted the motor and plate chiller a little nicer than before. Just finished up my first brew on it last weekend and wow that was easy! I sure didn't expect to have my own rig quite this early!
p.s. sorry for the sideways pic.
p.p.s if you don't have a plate chiller, go buy one now!

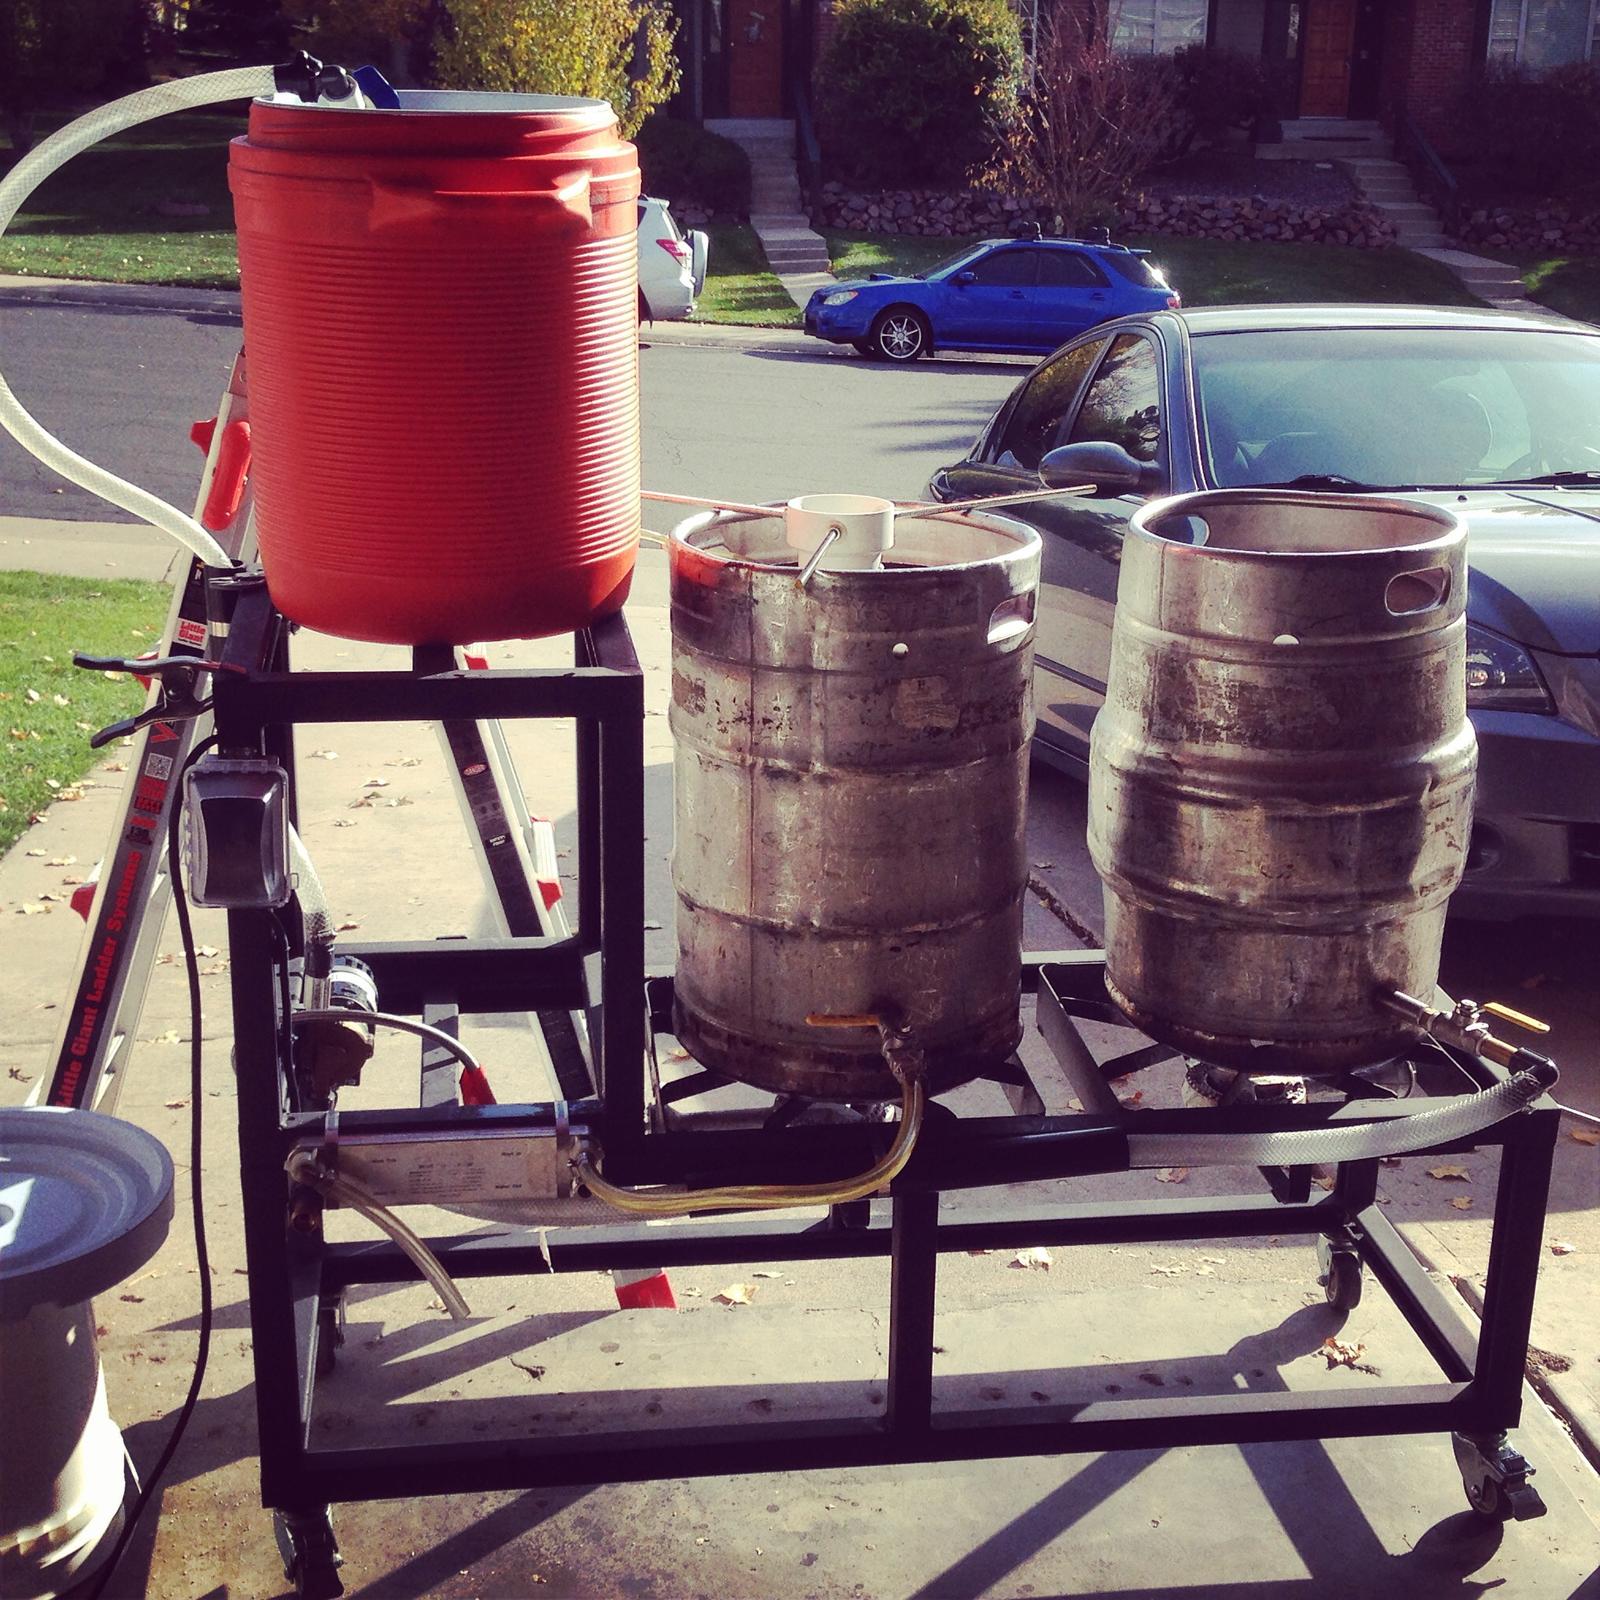
p.s. sorry for the sideways pic.
p.p.s if you don't have a plate chiller, go buy one now!


dmcman73
Well-Known Member
- Joined
- Apr 28, 2013
- Messages
- 936
- Reaction score
- 184
Since my last posting months ago in this thread, I've since stained my brew stand and added quite a number of upgrades. A sight Guage on my HLT, whirlpool in my BK, a stainless steel CFC, a hop spider and a stainless float ball for my fly sparge in my MT.


BadDeacon
Well-Known Member
Nice looking rig!!!
Similar threads
- Replies
- 11
- Views
- 1K
- Replies
- 130
- Views
- 7K
- Replies
- 45
- Views
- 4K


![Craft A Brew - Safale BE-256 Yeast - Fermentis - Belgian Ale Dry Yeast - For Belgian & Strong Ales - Ingredients for Home Brewing - Beer Making Supplies - [3 Pack]](https://m.media-amazon.com/images/I/51bcKEwQmWL._SL500_.jpg)


