You are using an out of date browser. It may not display this or other websites correctly.
You should upgrade or use an alternative browser.
You should upgrade or use an alternative browser.
Robobrew/Brewzilla Discussion
- Thread starter rjhoff
- Start date

Help Support Homebrew Talk:
This site may earn a commission from merchant affiliate
links, including eBay, Amazon, and others.
I'll go back and read through this entire thread, but would you happen to have a part number and supplier? I assume my local Home Depot won't carry it.
I don't have it, but it is posted earlier in the thread. I think it was off-the-shelf from the hardware store, and is maybe around the middle of the thread.
cactusgarrett
Well-Known Member
Should be a standard 1/2-20 stainless screw.
CUSTOM-441
Robobrew v3.1 35L
I purchased a 65L Brewzilla a few months ago, and Saturday I finally used it for the first time. Previously, I had been mashing in a cooler and using keggles for the HLT and boil.
Things I liked:
No more propane!
Cleanup is a lot easier when everything is in one self-contained unit. Not so many hoses and pumps to clean individually.
It seemed to hold the temperature ok, but I want to pick up a thermometer with a long probe to measure the temperature in the center of the mash.
I hit 80% efficiency, so no complaints there.
Things I didn't like:
That lousy malt pipe handle. It's so fiddly, and I knocked it into the mash at one point.
The flimsy overflow pipe. I decided to stir the mash halfway through, and I managed to knock off the part that was held on by the clip, resulting in about a cup of grain getting into the pump. It ran ok most of the time, but eventually clogged and stopped running. I have a sight glass, and the stuff that was suspended was fairly fine, not large pieces of husk. (I grind fairly aggressively.)
The top screen was difficult to remove when I wanted to stir the mash. It was under very hot wort, but even with insulated gloves I had a hard time grabbing the tiny tabs that are welded to the screen. A large loop would make it much easier to remove.
It took FOREVER for the malt pipe to drain. I finally gave up and just stirred like crazy while sparging to help the flow as much as possible. I guess I could change my crush, but if I'm going to take an efficiency hit I'll just do away with the screen(s) and malt pipe and just use a bag. Would there be any issues with doing so? I guess I'd lose out on the overflow protection. Would it be ok to rest the bag on the bottom of the Brewzilla while the elements are firing?
The biggest disaster was that I didn't have all the necessary connectors for my new Exchilerator Maxx, so I tried using my immersion chiller. It was leaking water like crazy, so I shut it off before I could electrocute myself. I was stuck with 12 gallons of 160-degree wort and a clogged pump, so I just left it in the garage overnight until i was cool enough to lift and drain by gravity. The wort was still at 110 degrees after 16 hours in my (warm) garage, so I guess I should have removed the insulation jacket.
All in all, I think I'm going to enjoy the Brewzilla. I'm expecting my next brew day to go much more smoothly.
Glad to hear you like the unit overall! It's certainly not perfect, and your complaints are pretty unanimous across this message board. Here's how most of us address some of those issues:
- The malt pipe handle does suck. Not much you can do here, just be careful!
- Create your own handle for the top screen with stainless wire through the two loop holes. Or ditch the top screen altogether. Much easier to stir the mash this way too.
- The malt pipe isn't very big in relation to the mash, so the grain bed can compact fairly easily and sparging takes an eternity. You may need to adjust your crush, but alot of us toss in a couple handfuls of rice hulls into every mash, regardless of the grain bill. With rice hulls alone I went from a 1hr sparge down to 10-20mins.
Personally, I've found that removing the top screen, stirring the mash, using rice hulls, understanding how the pump works & adding a small strainer over the pump inlet have given me the best results with this unit. The jacket helps too, and I swear by the whirlpool arm. Since using it I've never had issues with clogged pumps and I toss my hops straight in. Cheers!
Derp
Well-Known Member
Thanks! I just placed an order.Should be a standard 1/2-20 stainless screw.
Derp
Well-Known Member
- Create your own handle for the top screen with stainless wire through the two loop holes. Or ditch the top screen altogether. Much easier to stir the mash this way too.
- The malt pipe isn't very big in relation to the mash, so the grain bed can compact fairly easily and sparging takes an eternity. You may need to adjust your crush, but alot of us toss in a couple handfuls of rice hulls into every mash, regardless of the grain bill. With rice hulls alone I went from a 1hr sparge down to 10-20mins.
Personally, I've found that removing the top screen, stirring the mash, using rice hulls, understanding how the pump works & adding a small strainer over the pump inlet have given me the best results with this unit. The jacket helps too, and I swear by the whirlpool arm. Since using it I've never had issues with clogged pumps and I toss my hops straight in. Cheers!
I like to tell myself that the top screen will help to evenly distribute the recirculation, so I'll try making a handle and see if it's not too much of a pain to remove it for stirring. The manufacture should add a rig similar to the false bottom that could easily be lifted by using the malt pipe handle.
I think I still have some rice hulls on hand, so I can give them a try next time. Whatever it takes in order to reduce the drip...drip...dripping.
I have the whirlpool arm, but I couldn't use it due to the clogged pump. Next time!
I have a small strainer that I plan to use. Does it stay in place well? I guess the false bottom should keep it from being dislodged, but I wasn't sure if the boil would bounce it around.
Thanks for your reply. I'm looking forward to my next brewing session.


$49.95 ($0.08 / Fl Oz)
$52.99 ($0.08 / Fl Oz)
Brewer's Best - 1073 - Home Brew Beer Ingredient Kit (5 gallon), (Blueberry Honey Ale) Golden
Amazon.com

$20.94
$29.99
The Brew Your Own Big Book of Clone Recipes: Featuring 300 Homebrew Recipes from Your Favorite Breweries
Amazon.com


$44.99
$49.95
Craft A Brew - Mead Making Kit – Reusable Make Your Own Mead Kit – Yields 1 Gallon of Mead
Craft a Brew


$53.24
1pc Hose Barb/MFL 1.5" Tri Clamp to Ball Lock Post Liquid Gas Homebrew Kegging Fermentation Parts Brewer Hardware SUS304(Liquid Hose Barb)
yunchengshiyanhuqucuichendianzishangwuyouxiangongsi


$33.99 ($17.00 / Count)
$41.99 ($21.00 / Count)
2 Pack 1 Gallon Large Fermentation Jars with 3 Airlocks and 2 SCREW Lids(100% Airtight Heavy Duty Lid w Silicone) - Wide Mouth Glass Jars w Scale Mark - Pickle Jars for Sauerkraut, Sourdough Starter
Qianfenie Direct


$53.24
1pc Hose Barb/MFL 1.5" Tri Clamp to Ball Lock Post Liquid Gas Homebrew Kegging Fermentation Parts Brewer Hardware SUS304(Gas MFL)
Guangshui Weilu You Trading Co., Ltd


$719.00
$799.00
EdgeStar KC2000TWIN Full Size Dual Tap Kegerator & Draft Beer Dispenser - Black
Amazon.com


$479.00
$559.00
EdgeStar KC1000SS Craft Brew Kegerator for 1/6 Barrel and Cornelius Kegs
Amazon.com

![Craft A Brew - Safale S-04 Dry Yeast - Fermentis - English Ale Dry Yeast - For English and American Ales and Hard Apple Ciders - Ingredients for Home Brewing - Beer Making Supplies - [1 Pack]](https://m.media-amazon.com/images/I/41fVGNh6JfL._SL500_.jpg)
$6.95 ($17.38 / Ounce)
$7.47 ($18.68 / Ounce)
Craft A Brew - Safale S-04 Dry Yeast - Fermentis - English Ale Dry Yeast - For English and American Ales and Hard Apple Ciders - Ingredients for Home Brewing - Beer Making Supplies - [1 Pack]
Hobby Homebrew

$176.97
1pc Commercial Keg Manifold 2" Tri Clamp,Ball Lock Tapping Head,Pressure Gauge/Adjustable PRV for Kegging,Fermentation Control
hanhanbaihuoxiaoshoudian


$22.00 ($623.23 / Ounce)
AMZLMPKNTW Ball Lock Sample Faucet 30cm Reinforced Silicone Hose Secondary Fermentation Homebrew Kegging joyful
无为中南商贸有限公司


$58.16
HUIZHUGS Brewing Equipment Keg Ball Lock Faucet 30cm Reinforced Silicone Hose Secondary Fermentation Homebrew Kegging Brewing Equipment
xiangshuizhenzhanglingfengshop


$7.79 ($7.79 / Count)
Craft A Brew - LalBrew Voss™ - Kveik Ale Yeast - For Craft Lagers - Ingredients for Home Brewing - Beer Making Supplies - (1 Pack)
Craft a Brew


$76.92 ($2,179.04 / Ounce)
Brewing accessories 1.5" Tri Clamp to Ball Lock Post Liquid Gas Homebrew Kegging Fermentation Parts Brewer Hardware SUS304 Brewing accessories(Gas Hose Barb)
chuhanhandianzishangwu


I didn't have a plug but I had a reducer that allowed me to stick one of my unused hop screens in replacement of the malt pipe. Figured that the extra surface area can't hurt while mashing.@Derp - several posters in this thread just removed the center pipe and filled the hole with a stainless bolt. If you do that, You could just set a BIAB inside the malt pipe, over the top, under the lid.

I did BIAB for four years before switching to the Brewzilla so I understand a lot of the headaches new users have. I didn't like mine initially but it's great now that I've gotten used to it.
Attachments
CUSTOM-441
Robobrew v3.1 35L
I have a small strainer that I plan to use. Does it stay in place well? I guess the false bottom should keep it from being dislodged, but I wasn't sure if the boil would bounce it around.
I'd imagine it does bounce around a little bit, but like you said the false bottom does a decent job of keeping it in place. It's only ever dislodged once on me
DuncB
Well-Known Member
@dorp
A slow recirc and no jacket would have sped up the cooling.
I don't bother with the top screen most of the time. Guten has a telescopic centre drain pipe so it's easy to pull up out of the way if needed.
A tea strainer over the top of the drain pipe stops any grain escapees.
A slow recirc and no jacket would have sped up the cooling.
I don't bother with the top screen most of the time. Guten has a telescopic centre drain pipe so it's easy to pull up out of the way if needed.
A tea strainer over the top of the drain pipe stops any grain escapees.
Quick update: I finally had time to flush fresh water through my pump again. It ran clear and appeared to be at full volume. So I'm optimistic I will get to avoid disassembling the brewzilla and pump.
Also, given the amount and size of grains in the upper recirc pipe and tube (and seemingly lack of any in the pump itself), I think DuncB was right that grain got sucked back up the tube when I shut the pump off (which I did a couple of times while stirring). -So that should be easy enough to avoid in the future.
Also, given the amount and size of grains in the upper recirc pipe and tube (and seemingly lack of any in the pump itself), I think DuncB was right that grain got sucked back up the tube when I shut the pump off (which I did a couple of times while stirring). -So that should be easy enough to avoid in the future.
DuncB
Well-Known Member
I suppose if you fitted the tube into one of those mesh things ( as seen fitted to the bottom plate on Henbrews setup that would also stop the big grains.
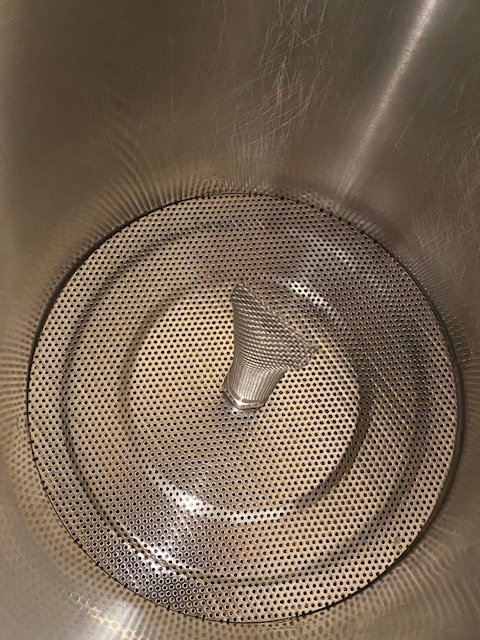
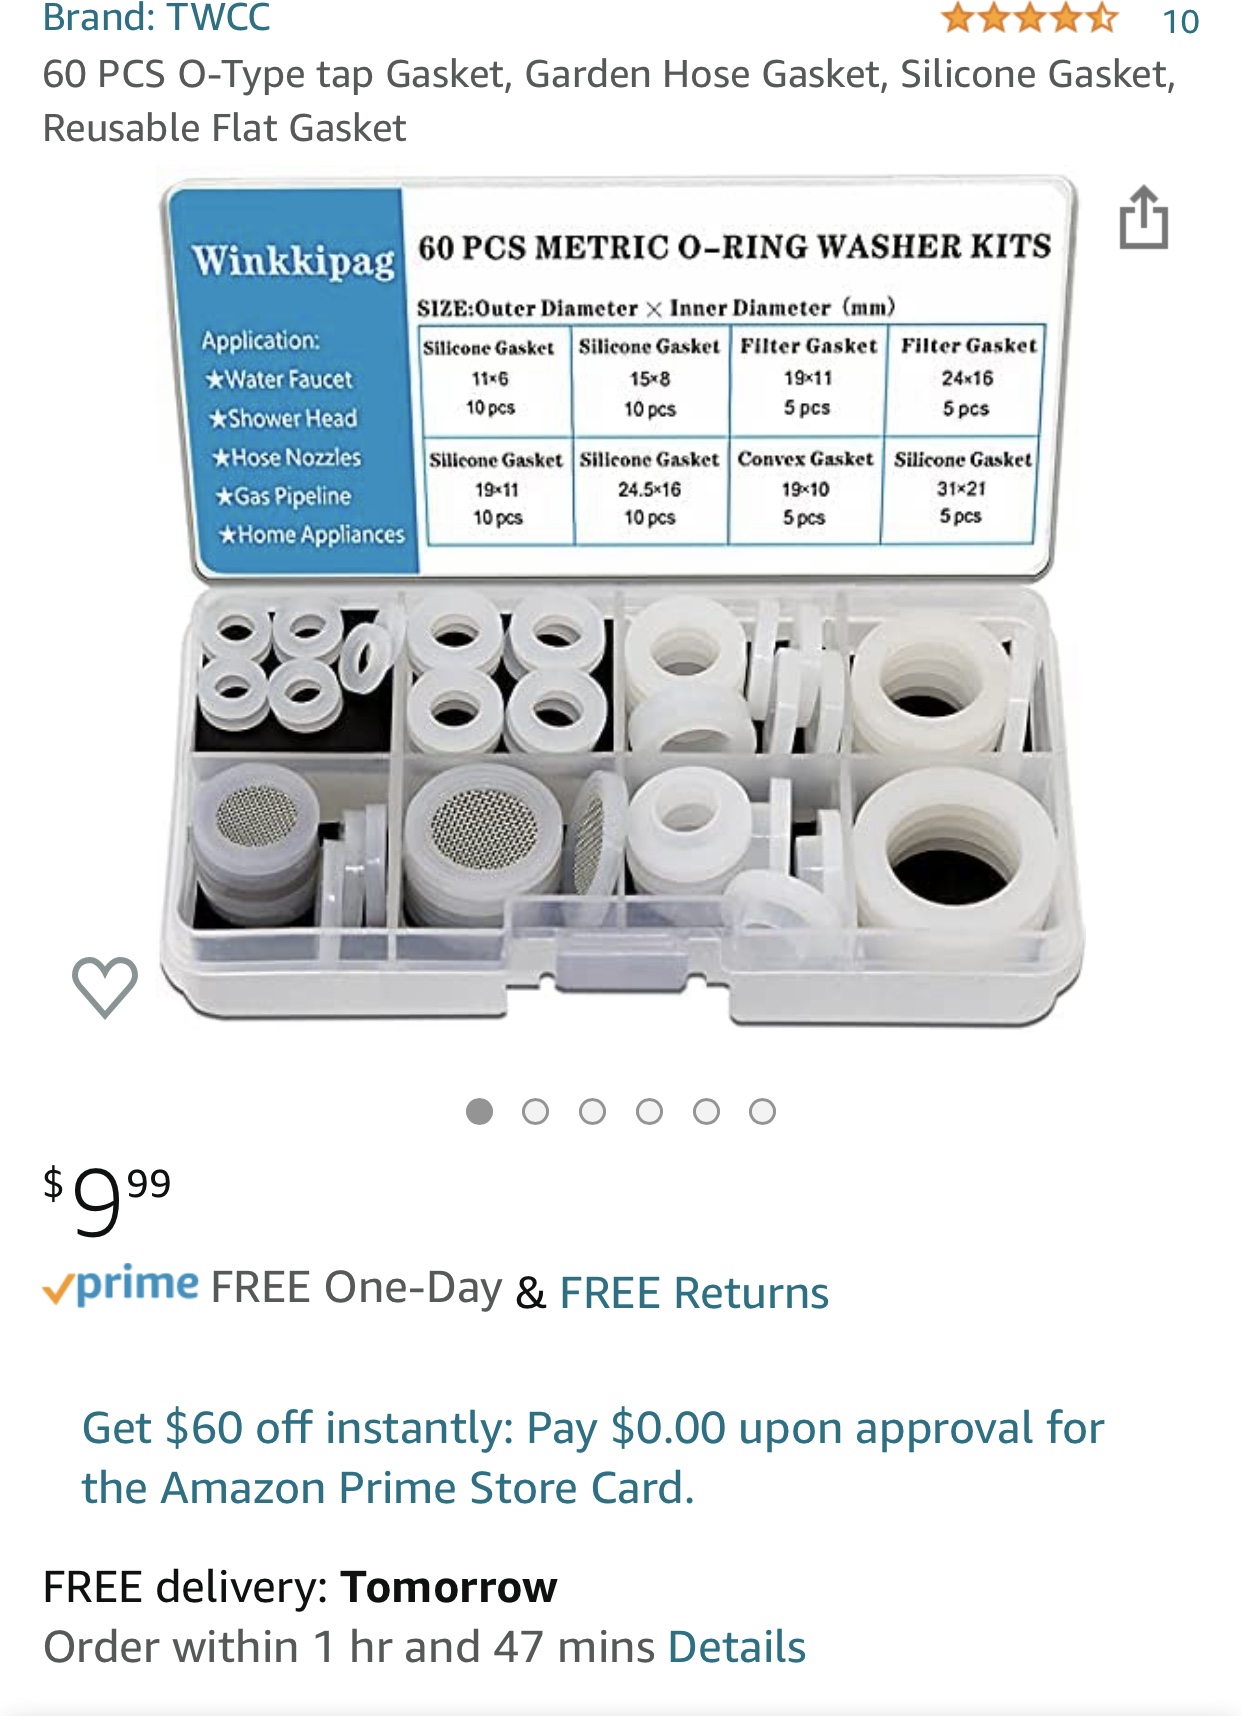
My new sight glass arrived, but alas, it did not have the new gaskets listed in the description, and ordering from MoreBeer would take 10 more days. So I ordered this silicon gasket set from Amazon for $10 (delivered 1 day). The 19-11 size seems to fit the recirc pipe perfectly (and some of the others may also have interesting use with the brewzilla).

Also, I decided to wrap the new sight glass in a thin layer of paper towel inside the new bracket and leave the screws a little loose. Hoping that will prevent the torque/pressure that cracked the last one.

Also, I decided to wrap the new sight glass in a thin layer of paper towel inside the new bracket and leave the screws a little loose. Hoping that will prevent the torque/pressure that cracked the last one.
Attachments
cactusgarrett
Well-Known Member
Just received mine yesterday, and it didn't have them either. Weird.it did not have the new gaskets listed in the description,
DuncB
Well-Known Member
Maybe some of those bigger silicone gaskets could slip over the sight glass tube to act as a cushion?
Maybe some of those bigger silicone gaskets could slip over the sight glass tube to act as a cushion?
Good suggestion. I'll check to see if any fit.
Also, the 19-10 convex gasket seemed to fit perfectly up into and along the bottom of the recirc tube. But it seemed just as likely to cause a problem as to improve anything. So I probably won't test it.
I was also hoping one of the filter gaskets might magically fit perfectly over the pump inlet. And they do "fit" over it, but not snug enough to suspect it will stay put during brewing.
Just received mine yesterday, and it didn't have them either. Weird.
If you need them, send me your address. I have 9 extra. =c)
I ended up jumping on the Brewzilla train last week and it got delivered today! Hadn't really planned to get until the new year, but had been checking them out from time to time on the website for my flhbs. They'd been sold out for a while and then I noticed that the price on them jumped a fair amount. I've been reading of the insane increase in shipping costs lately, and these are bulky items so figured that the price hikes would prob slowly be hitting all the other retailers so jumped into action to still find a reasonably priced one. Found a small shop not too far away with reasonable shipping rates and a good price. For less than the new base price at my closer shop, I was able to get the unit and jacket, plus shipping and taxes. There was a snafu where it showed in stock, but they were actually still stuck at the other end of the country waiting to clear customs. Shop contacted me to let me know and said they would cover upgraded shipping to get it to me as fast as possible which was nice. While waiting I anxiously read this thread and watched some videos and decided I should get the whirlpool arm as well. Emailed them back to ask if I could add it to my order since the unit hadn't arrived yet and they graciously offered to throw it in for free as well. Great customer service, will def be continuing to give them business in the future!
Unboxed everything this afternoon and filled it with water. Tested the elements,pump and both the recirc and whirlpool arms, then added some oxyclean and gave everything a once over.
Plan to do my first brew with it on Saturday. I am an early morning brewer and I think the thing I am most excited about is being able to set it up so that I have the mash water already ready and waiting for me at strike temp when I wake up!
DuncB
Well-Known Member
Magic, don't forget to throw your salts in the night before.
Don't go to big on your first effort and keep good records as you go.
*** Check that the temp reading is good and calibrate if necessary****
Don't go to big on your first effort and keep good records as you go.
*** Check that the temp reading is good and calibrate if necessary****
Thanks! I have salts measured and ready to throw in in the morning. I would rather add when water is hot and I don't have to worry about them precipitating out of solution overnight (anal, i know). Set it to start pre-heating in 6 hours so it should be at temps when I wake up. First step will be to start pump and verify temps, second step will be to add the salts.Magic, don't forget to throw your salts in the night before.
Don't go to big on your first effort and keep good records as you go.
*** Check that the temp reading is good and calibrate if necessary****
just doing a simple Bock to start. It's only going to be a 2.5 gallon batch so I'm not even going to start with a sparge but keep it simple and do a full volume mash and recirc.
I finally got to brew with my 35L again today. Following up on earlier discussion, I made sure to lift the recirc tubing out the mash whenever turning off the pump. Except I didn't quite get it all the way out once, and I was really surprised how much grains I saw get sucked back into the recirc tube/sightglass. Just confirms that was indeed the problem last time (the one instance didn't cause any problems today, the grain just pushed back out when I turned the pump back on).
Wound up with a pretty surprising 80% efficiency today.
Wound up with a pretty surprising 80% efficiency today.
Cloud Surfer
Well-Known Member
I’m filling my BrewZilla 65 now for a Belgian Dark Strong Ale brew tomorrow. I haven’t settled on when to add the salts. Why do you add them the night before? CheersMagic, don't forget to throw your salts in the night before.
Don't go to big on your first effort and keep good records as you go.
*** Check that the temp reading is good and calibrate if necessary****
DuncB
Well-Known Member
I don't do any delay brews as I hot fill from our solar water heater. But the salts won't disappear if you put them in and fill the brewzilla and program to heat in the am. Some will dissolve in cold water anyway. It's just so you don't forget in the excitement.
Cloud Surfer
Well-Known Member
That sounds like as good a reason as any. So you get excited on brew morning too? That’s cool, I thought it was just me.
chordwizard
Active Member
- Joined
- Jan 11, 2016
- Messages
- 33
- Reaction score
- 3
So has anyone tried any of the oxygen mitigation methods with these systems? Pre boil, mash cap etc? I'm not a strict lodo person by any means but I have implemented some of the methods on my 3 vessel system and feel that they have helped improve my beer (completely anecdotal). I'm looking at one of these systems mostly to simplify my set up and clean up and maybe even shorten my brew days.
- Joined
- Jan 28, 2013
- Messages
- 3,926
- Reaction score
- 3,026
So has anyone tried any of the oxygen mitigation methods with these systems? Pre boil, mash cap etc? I'm not a strict lodo person by any means but I have implemented some of the methods on my 3 vessel system and feel that they have helped improve my beer (completely anecdotal). I'm looking at one of these systems mostly to simplify my set up and clean up and maybe even shorten my brew days.
Haven't tried any myself but you can underlet with the system if you have a pulley or not very big grain bill.
Other than that there has been some discussion on it here but not very much.
Cloud Surfer
Well-Known Member
I boil my strike water first to remove the O2. Then quickly cool it to mash in temperature with my counter flow chiller, then add the sodium metabisulphite, and then mash in.So has anyone tried any of the oxygen mitigation methods with these systems? Pre boil, mash cap etc? I'm not a strict lodo person by any means but I have implemented some of the methods on my 3 vessel system and feel that they have helped improve my beer (completely anecdotal). I'm looking at one of these systems mostly to simplify my set up and clean up and maybe even shorten my brew days.
I’ve dialed my boil down a bit to a less vigorous rolling boil. On my 65L system I use the 2500W heaters to maintain my boil.
That’s about all I do during that stage. I’ve become LODO obsessed from primary through to bottling.
DuncB
Well-Known Member
I only worry about the oxygen from the moment I add it pre yeast pitching then try and keep it out all the time, with one way ferment off gassing and then pressure ferment towards the end and closed transfers into purged kegs.
English ales I leave open and rouse some of them as per the brewerys' method.
I add my sod met then fill with warm water bring to mash temp and near that temp add the salts so they are dissolved by the time I dough in.
English ales I leave open and rouse some of them as per the brewerys' method.
I add my sod met then fill with warm water bring to mash temp and near that temp add the salts so they are dissolved by the time I dough in.
I managed to brew twice (!) this weekend with the 35L. I tried a new approach the second time where I used the brewzilla as designed (malt pipe, top screen, overflow cone) but I also set a nylon mesh BIAB inside the brewzilla, under and along the outside of the malt pipe.
The idea was to provide another layer of finer filter as a backup to the malt pipe, and then be able to leave the bag in place after removing the malt pipe (to help with hop residue, hot break material, and whatever else particulate may wind up in there). It worked as intended. The bag caught a bit of grain material that ran down the overflow cone and a lot of hop material (it would also catch tiny gnats if you brew outdoors).
The only slight hiccup was that the bag stuck to the side of malt pipe a bit when I lifted it out. It was not from the heat, just wort stickiness. But it was easy to separate using a small mash paddle.
My efficiency also dropped from 80% to 65%. That may be related to this setup, something else, or just a fluke. I've had pretty good efficiency with the brewzilla before, but usually skipping the malt pipe for a BIAB. But this was also an 11% abv beer (OG - 1.100). So it may just be the recipe leading to less efficiency.
I think I will use this setup going forward because it gives me a little more peace of mind about potential grain escape/clogged pump (it's literally brewing with a net!). I'll update if efficiency stays low.
Last edited:
DuncB
Well-Known Member
@GoodTruble
All good info. I'd suspect the efficiency drop due to the high gravity. I tend to partigyle the mash when I'm doing a big beer and then get a surprising extra brew!
Put a tea strainer on the top of the overflow pipe, that will stop the grains going down there.
I only like the midges in the mash as they add a bit of protein to the wort, but try to keep them out after that. Did have a moth commit hari kari into the fermenter which was a worry but I fished it out and had no side effects.
I just received my 35l Brewzilla today. I assembled it with online instructions, plugged it in and the display works. I'm pretty busy with boat work right now and have beer on tap. But I'll check back in when I brew. Thank you all for posting results and suggestions. This is my first foray into electric brewing since my stove top days.
- Joined
- Jan 28, 2013
- Messages
- 3,926
- Reaction score
- 3,026
I just received my 35l Brewzilla today. I assembled it with online instructions, plugged it in and the display works. I'm pretty busy with boat work right now and have beer on tap. But I'll check back in when I brew. Thank you all for posting results and suggestions. This is my first foray into electric brewing since my stove top days.
You're going to love it! I'm firing my 65L up this Saturday for a 12 gallon split batch. Looking forward to it!
@DuncB - okay, after reading up on "partigyle", I realized I already do a variation of that by pulling the grain and putting them into 1-2 gallons of hot water. But I then dump the extra 1-2 gallons into the main wort and boil off the excess for a higher gravity overall (maybe why my efficiency numbers are usually pretty good). But next big beer, I may just make 3 gallons of second-wort, add DME if needed to hit a desired gravity, and use it to experiment with different hops, yeast, etc.
It will be a little extra work, but it should be interesting (and result in 2-3 extra gallons of beer =c) ).
It will be a little extra work, but it should be interesting (and result in 2-3 extra gallons of beer =c) ).
CUSTOM-441
Robobrew v3.1 35L
A question for those of you with a loootttt of batches on your systems: Do you have a long interval cleaning routine?
After each brew I always use green oxi-clean, scrub with a non-abrasive pad, and rinse on all parts. Now that it's been a few years, I've noticed I'm starting to get some beer stone, and brownish residue that gets left behind after my standard cleaning. I don't think it affects the quality of my brews at all, but it's there and it bothers me. What's everyone been doing?
After each brew I always use green oxi-clean, scrub with a non-abrasive pad, and rinse on all parts. Now that it's been a few years, I've noticed I'm starting to get some beer stone, and brownish residue that gets left behind after my standard cleaning. I don't think it affects the quality of my brews at all, but it's there and it bothers me. What's everyone been doing?
DuncB
Well-Known Member
Have to admit, I give the whole thing a good rinse out and rub over with a microfibre cloth. Then fill with warm water ( from our solar hot water ) and recirculate some homemade PBW at 50 celsius with any other bits that need a good clean such as the condenser and trubtrapper. It's keeping mine pretty clean.
CUSTOM-441
Robobrew v3.1 35L
Have to admit, I give the whole thing a good rinse out and rub over with a microfibre cloth. Then fill with warm water ( from our solar hot water ) and recirculate some homemade PBW at 50 celsius with any other bits that need a good clean such as the condenser and trubtrapper. It's keeping mine pretty clean.
I like it. I'll give that a go - thanks!
DuncB
Well-Known Member
I don't fill it full just 10 litres or so and then recirculate and wash the side walls down. Sometimes put the CIP ball in thru the hole in the lid ( my guten has a metal lid with a central hole ).
- Joined
- Jan 28, 2013
- Messages
- 3,926
- Reaction score
- 3,026
Well fellow Robobrew/Brewzilla friends, another successful brew day in the books!
1.044 Vienna Lager/Altbier 12 gallon split batch in the FV chilln at 60°. Missed my OG by .004 mainly because I backed off grain mill a tad to get less muck/dust (73% Efficiency down from 84%).
Mashed in at 6:30 AM started chilling the wort at 10:00, cleanup took about 45 minutes. Now the rest of the day to hang with the fam!
Some pics for your brewing pleasure:
- Joined
- Jan 28, 2013
- Messages
- 3,926
- Reaction score
- 3,026
@Sammy86 - Nice schedule management. My brew days seem to simply take "all day" regardless.
Thanks! With a 5 yo and twin almost 2 yo have to get things done early and quickly LoL
Similar threads
- Replies
- 7
- Views
- 1K
- Replies
- 2K
- Views
- 203K
- Replies
- 32
- Views
- 13K

Latest posts
-

-

-

-

-

-

-
How are You Measuring Fermentation Temperature?
- Latest: betarhoalphadelta
-
