Too cool, Too cool!!!


 Oh well, I guess I will just live with my 6" wide 2" diameter triple roller monster mill....
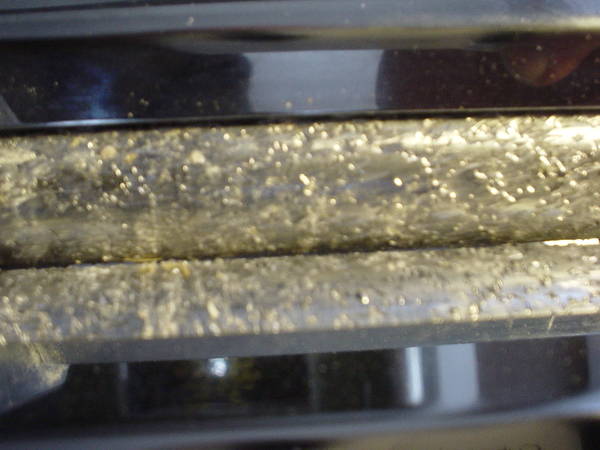
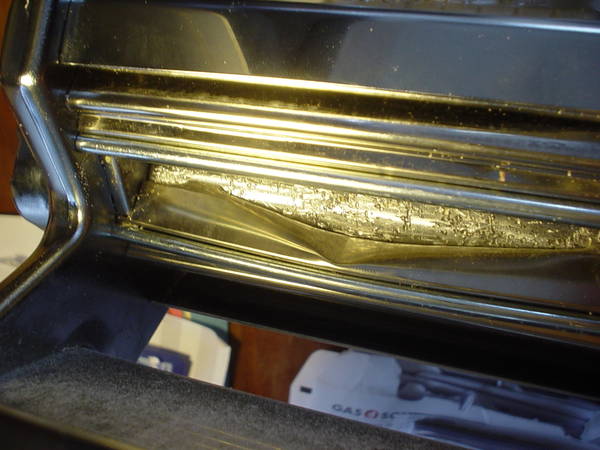
My buddy that knurled them said they did a .0050" (50 thousandths) depth on the knurl.
Great job! I didn't expect knurling to work. Those are very hard rollers and yet hollow. I thought they'd need too much pressure on a lathe. My guy was hesitant to knurl.
By the way I think you meant 0.050".
This is great, I have an old pasta machine somewhere around the house I will have to dig out. Might try some different methods to see what kind of traction I can get on the rollers.
FWIW, Hobby Lobby usually has a 40% off coupon every other week. Just go to hobbylobby.com and click on "Weekly Specials". I picked up some rare earth magnets while I was there too for a stir plate.


![Craft A Brew - Safale S-04 Dry Yeast - Fermentis - English Ale Dry Yeast - For English and American Ales and Hard Apple Ciders - Ingredients for Home Brewing - Beer Making Supplies - [1 Pack]](https://m.media-amazon.com/images/I/41fVGNh6JfL._SL500_.jpg)


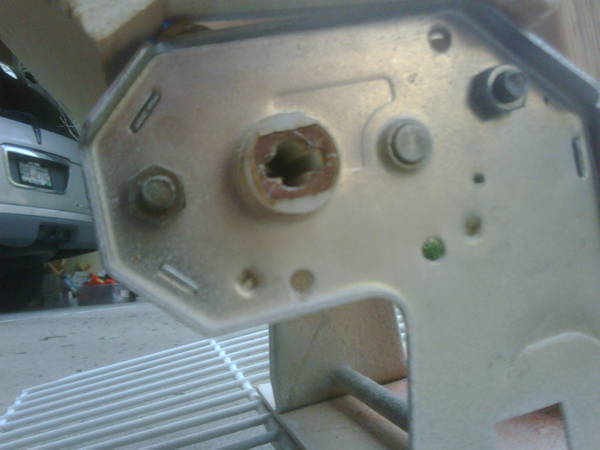
Can anyone tell me how to get the rollers off of the machine? I got one of the sides off but can't for the life of me figure out how to pull the rollers off. Thanks
so this is what i want?
Amazon.com: Pasta Maker: Toys & Games
what do i need to make it automatic instead of hand crank?
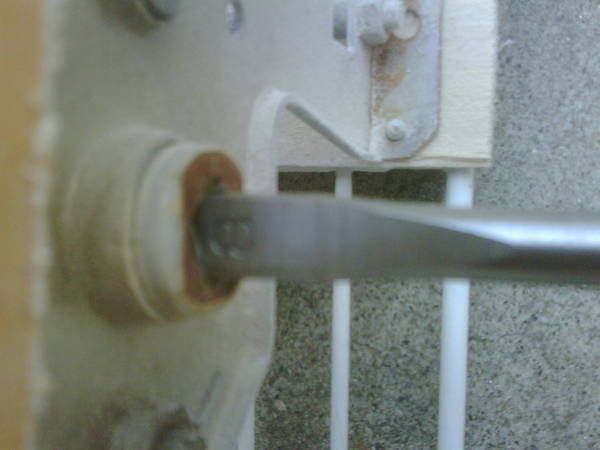
Most people have used a drill to automate their mill. You can modify the crank arm that comes with it or use a 3/8 inch paddle bit like this: http://www.irwin.com/irwin/consumer/jhtml/detail.jhtml?prodId=IrwinProd100186
The paddle bit fits right into the slot the crank arm goes in.
Can anyone tell me how to get the rollers off of the machine? I got one of the sides off but can't for the life of me figure out how to pull the rollers off. Thanks
I found the same thing when I was working on mine. Unfortunately since it is a drill bit there was no way for me to drill a small hole through it to pin it. I'm not using a drill to automate so needed a way to put a couple pins through to attach it to the motor I am using.
Use a section on the motor side and pin it, then use a coupler to join it and the drill bit together. I know it would need to be balanced pretty well but you'd get it figured out.
So far I have $18 into the whole build. If I had a coupler around I would have done what you mentioned. Instead I just cut and straightened the handle that came with the pasta roller.True, I thought about that but I'm doing super-cheap

You guys are awesome. Thanks for the idea.
YouTube - Grain Mill
)Mine is done and I used it last weekend (very first all-grain brew). My crush looked identical to what I received from Midwest so I considered it "working fine". I might tighten it a bit more next time to get it a little finer.
I can post pictures if people are interested.

Is there a verdict on whether the rollers need to be knurled?
I'd like to try this project, but I'm not sure about where I'd get the knurling done.
Thanks
Offer is still open to have your rollers knurled by my buddy, $20 including shipping round trip. Let me know.
EDIT: There does need to be some roughness to the rollers. They are too small in diameter to remain flat. This was tested by yuri_rage.