• Please visit and share your knowledge at our sister communities:
  • If you have not, please join our official Homebrewing Facebook Group!

    Homebrewing Facebook Group

My Ugly Junk- Corona Mill Station...

Homebrew Talk

Help Support Homebrew Talk:

This site may earn a commission from merchant affiliate links, including eBay, Amazon, and others.
Last 2 times i brewed, i got a stuck sparge because of a little flour... I am going to back off of the spacing to reduce the amount of flour, but am concerned about efficiency. The last time I was at 70% and happy. I buy grain by the 50lb bag and am not really concerned about dropping efficeincy to 65%, but would rather not.

Were you using a lot of wheat? Just like rico567, I use a stainless steel braid in a cooler and have had only 1 stuck sparge 20+ batches with my corona. And I grind pretty finely, lots of flour. Recently I started conditioning my grain, just for kicks, and it has reduced the husk shredding considerably.
 
Thanks for the feedback on my test grind. Glad to know I didn't do anything really bad. I'll crank down the plates and give it another try. Would it be OK to run the sample batch through the grinder again to crush some of the larger chunks into smaller pieces?


Jack

I've read people who say they've reground their grist, but never done it myself.
 
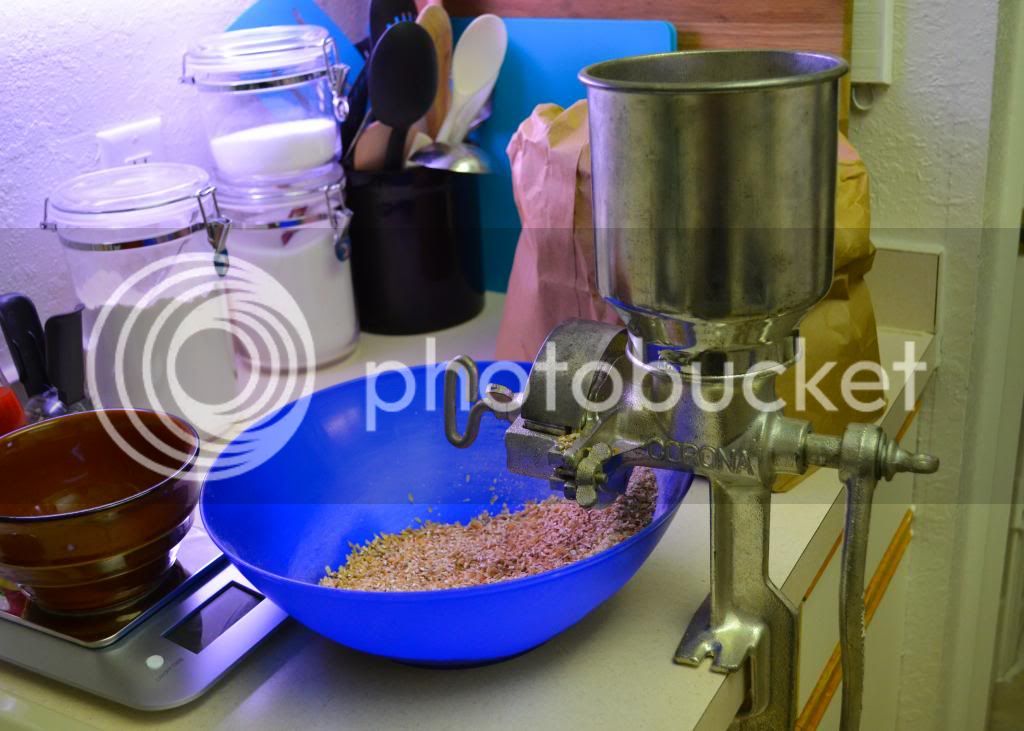
Here's my version of this mill and a youtube video of it.

https://www.homebrewtalk.com/f51/my-ugly-corona-mill-project-402037/

04012013 023.jpg
 
Thanks for the feedback on my test grind. Glad to know I didn't do anything really bad. I'll crank down the plates and give it another try. Would it be OK to run the sample batch through the grinder again to crush some of the larger chunks into smaller pieces?


Jack

I just did my first batch through a POS Weston mill. Looked a lot like your pictures. Decided to run it through again at a finer setting. Quite a bit of flour but no stuck sparge and about 75% eff. Using a cooler with toilet line SS braid.
 
I used mine for the first time today finally. Did 8.5 lbs through it by hand. It took a little longer than I thought it would but it wasn't too bad. It looked like a pretty fine crush but I had a real smooth sparge going and it didn't stick. We'll see how things turn out.
 
I have mine cranked down pretty good, I would say a fair amount of flour. I cranked it down until I had no intact grain. I have a direct fired MLT and use a pump to recerculate the mash. As long as I keep the pump output turned down I don't compact the grain bed to bad and if flows good, if I pump it wide open it will slow or stop the output of the pump from the bed compacting. I do stir the mash every 10 to 15 minutes and when sparging I turn the output down to a pretty slow rate. No stuck sparges for me as of yet and that might be 20 to 30 batches.
I am very happy with mine, I have made some modifications to my bucket in a bucket setup that I haven't posted pictures of and at some point will do that. basically changed the top bucket cover with a new one and added a 5 gal water bottle as the hopper, no more stopping the drill to refill the hopper with grain.
My MLT is a keggle with a false bottom from my original setup, a round cooler.
 
This is the correct approach- don't be afraid to crank this mill down until you find a grist that works for your setup. It can always be changed.
 
Question for a newbie. Is the outside girding plate supposed to spin when rotating? Or should it be tight enough so that does not spin.
 
Note: after launching my own thread - i was wisely advised to re-post this here. probably the natural home for this creation/monstrosity.

i'm way more into functional junk, than pretty junk. i've just started a mini-fridge kegerator build; will keep you posted. promises to be just as fugly
-beermethatbeer

Orig Post:

Hey All - figured I'd post this up for those of us who are not in the least DIY-Savvy, but still like to give it a shot!

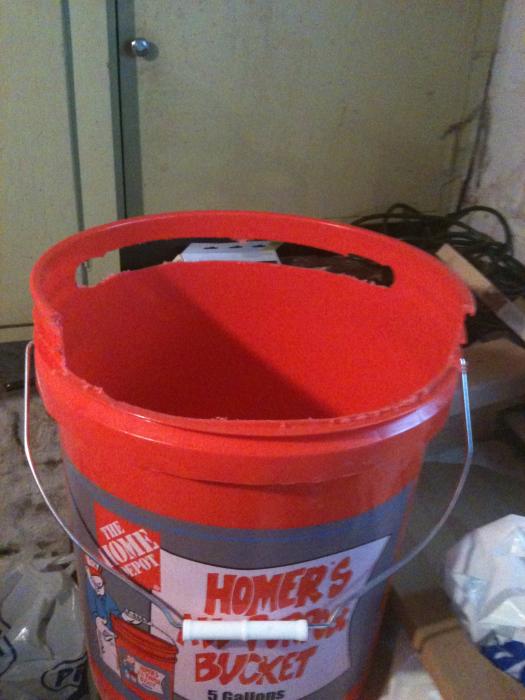
Been wanting to mill my own for awhile, picked up a $25 corona mill and a homer bucket and here you go. (pics at bottom)

Step1: massacre a homer bucket. notch the top on one side so a board sits flat, and make an opening in the other.

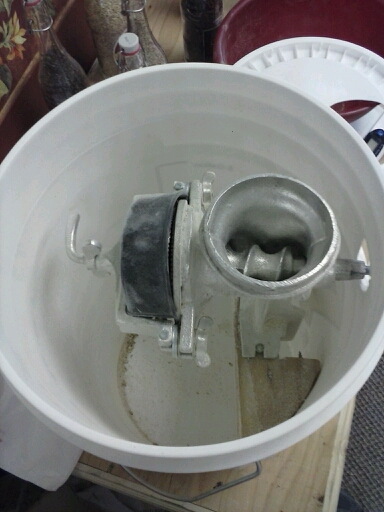
Step2: cut a hole in a board. attach Corona mill; grocery store bag attached to bottom to direct grains into homer bucket.

Step3: massacre a vinegar bottle for hopper. attach with post office tape.

Step4: is a little tilty, so counter weight on left side with something; random basement wood will do.

What do you think? my efficiency has been unpredictable (from the 60's to the 80's) - - so looking forward to crushing my own to pin down that variable.

Have an Amarillo Pale Ale planned for about 2 weeks; so hopefully I can report back that this mess didn't fall apart after 10lbs. (tests are looking positive).

_beermethatbeer

099.jpg


100.jpg


101.jpg
 
I finally got some pics of my ugly junk and my grind, so I thought I'd contribute them to one of my favorite HBT threads. Many thanks to Revvy, wilserbrewer, and all the other awesome contributors!

First, the junk:
4.JPG


Then the grind:
5.JPG


The bucketful:
6.JPG


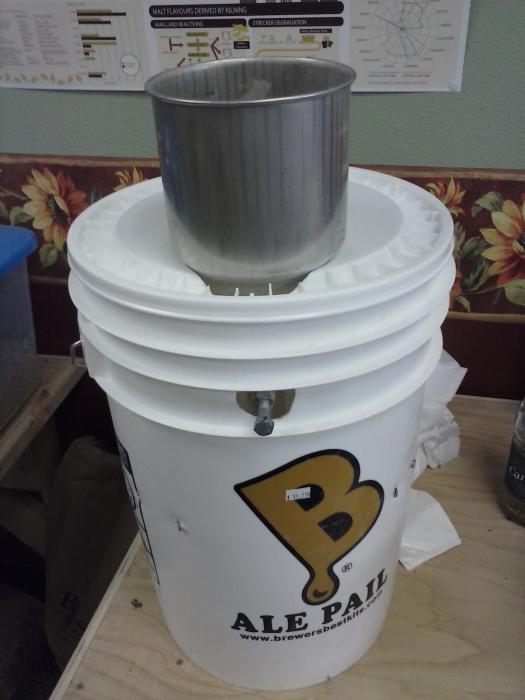
Next comes the drill attachment (boy are my arms tired), the bucket lid, and the water bottle hopper!

Please do comment on the grind and any adjustments you'd recommend!
 
Shakybones said:
I finally got some pics of my ugly junk and my grind, so I thought I'd contribute them to one of my favorite HBT threads. Many thanks to Revvy, wilserbrewer, and all the other awesome contributors!

First, the junk:

Then the grind:

The bucketful:

Next comes the drill attachment (boy are my arms tired), the bucket lid, and the water bottle hopper!

Please do comment on the grind and any adjustments you'd recommend!

Don't be afraid to crank that thing down some more. It looks like quite a few whole grains are getting through.
 
Ya I read somewhere "crank down till your scared, then just a little more" it's good advise. Haven't stuck a sparge yet and my stuff gets pretty floury.
 
I'm lazy, so I went ahead and mashed it, batch sparged. Got 63% efficiency. I'll definitely crank it down next time. Thanks, guys!
 
Just curious where did you guys get that metal cover that goes over the grinding area? Mine didn't come with one.
 
I use a milk jug, cut the top off then cut a U-shaped channel about halfway down lengthwise, slid that over grinding plates. Keeps everything channeled downward.
 
Yeah, mine came without a cover as well, and that's what I did; cut up a milk jug to direct the grain. Angled it to accomodate for the adjustment in the front, and then clamp it down with the wing nuts on the back. Cut the bottom out of an old pretzel bucket to use as a hopper too. Fits perfectly. I can get 10# of grain in the hopper at a time.

2013-05-27 19.08.56.jpg
 
Bucket grinder built this morning.....awesome idea! Thanks Homebrewtalk!!!!! Pictures coming soon as they arrive from cyber space somewhere!
 
Needs a little more "ugly," but I bet it performs! I use the same design- I duct-taped an old water bottle to the funnel so I could load the whole grain bill at once (it will hold >20 lbs), and for a lot of my beers I cut a hole in the bottom of the bucket with the mill in it and set it into another bucket so I can mill the whole thing.
 
It is the only mill i have in my shop....got to grind 1 recipe so far today! This thing sings with a 4.2 amp motor drill on it though the drill heats up. But I bet I wont wear out the drill between uses....I hope I do, means business is great.....but prolly wont.!
 
I got a victoria mill for christmas and I am just now starting to tinker with it. I have it all put together but the crank is VERY difficult to turn. It is set pretty loose so that can't be the problem. The plates are not touching. I'm thinking it could be a slightly off casting and something is rubbing causing it to stick. I feel like if I can grind it down slightly where the rubbing is happening then that could solve my problem. Any reason why I shouldn't do this?
 
Try loosening and repositioning the two wing nuts at the front of the mill... My guess is the burr shaft is binding and it is clamped out of alignment
 
wilserbrewer said:
Try loosening and repositioning the two wing nuts at the front of the mill... My guess is the burr shaft is binding and it is clamped out of alignment

Thanks! Ill give it a shot.
 
Back
Top