• Please visit and share your knowledge at our sister communities:
  • If you have not, please join our official Homebrewing Facebook Group!

    Homebrewing Facebook Group

My Ugly Junk- Corona Mill Station...

Homebrew Talk

Help Support Homebrew Talk:

This site may earn a commission from merchant affiliate links, including eBay, Amazon, and others.
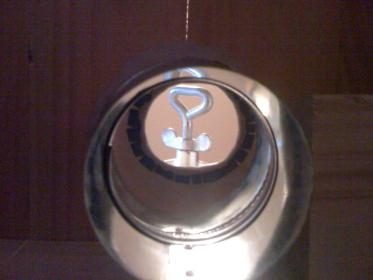
Is this how close the plates are going to be when I crush my grain? I thought I'd need them to be a bit further apart (caveat being, I just got my knock off mill and put it together last night. I'll be getting some cheap base grain and messing around with it this weekend).

it does look like it, but they aren't touching, took the pic with my phone... which is fine for normal pics, but of course wont show the detail that it needs :) lol its about a credit cards width apart though,
:ban:
 
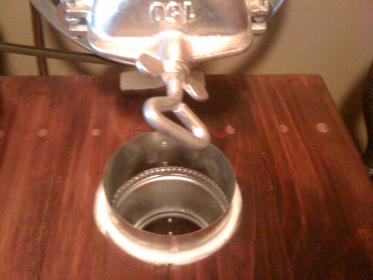
the layout so you can see that weird bolt thing (and the washer i got for it, i can't find a measuring tape for it, so i can't get the ID)
5487894618_85533bc12f_b.jpg


and here is the weird bolt without the washer on it so you can see how it connects and how it looks
5487895960_da988134ba.jpg

Just got mine and it is also this design. Glad to know I'm not the only one!
 
have fun with it! :D it's a great little thing.. and your right arm will grow immensely very quickly haha
 
so everyone thats ground up grain and forgot to put the catch bucket underneath, raise your hand


<raises hand>

:D
 
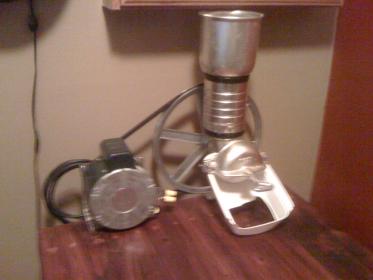
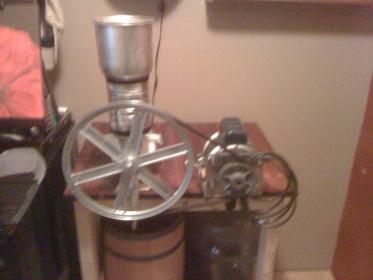
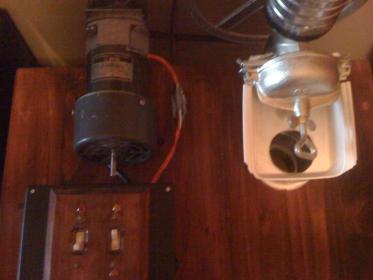
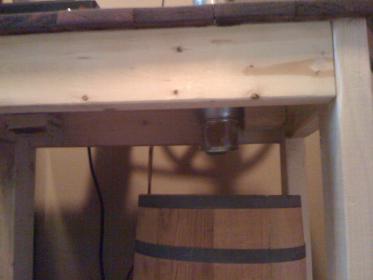
Just wanted to show my almost finished corona mill. I haven't cut a hole yet for the grain to fall threw. Does anyone have a idea on how to direct the grain. Some kind of funnel.... I'm stumped on what to do. I have a cut up chinese take out container on it right now. But looking for a better idea. Cheers

image-1458273891.jpg


image-829231173.jpg


image-3474211240.jpg
 
Well, I employ the "totally enclosed in a bucket mount" (as illustrated in numerous examples, including mine, in this thread. I don't think that sort of mount would be workable with the drive system you're using on the mill.

While I'm sure your drive system is efficient, I'm not sure how durable it's going to be. If your "Corona" type mill is like mine, there's not much in the way of a bearing between the shaft of that mill and the housing, and the sideways pull is going to wear that hole out pretty quickly.
 
rico567 said:
Well, I employ the "totally enclosed in a bucket mount" (as illustrated in numerous examples, including mine, in this thread. I don't think that sort of mount would be workable with the drive system you're using on the mill.

While I'm sure your drive system is efficient, I'm not sure how durable it's going to be. If your "Corona" type mill is like mine, there's not much in the way of a bearing between the shaft of that mill and the housing, and the sideways pull is going to wear that hole out pretty quickly.

Ya know never really thought about no brearings. I'm not gonna worry to much. The steel should last a while. And if and when it goes out, guess I'll have to buy a roller mill. Thanks for the input tho.
 
Can you post more deets on how you connected the drive wheel to your corona mill?

I want to set one up to be pedal powered and wonder how to connect the gear.
 
Does anyone have a idea on how to direct the grain.

Cut a 4" hole in the table below the mill. Shroud the mill w/ a plastic bag, or a heavier roll of sheet plastic that goes through the hole in the table to nearly the bottom a catch bucket below. Sort of a grain chute.

You could do the same w/ sheet metal or a length of PVC pipe, but a kitchen garbage bag and some tape would work if you like "ugly"
 
Thanks to everyone. This was a little bit of a few different threads. I went with another motor from my first pics( way lower rpm, better crush) used a 4in to 3in heating duct reducer for grain shoot. Has forward and reverse (no real need for reverse, but y not) ran thru 11 lbs of grain lastnight with no problem.

image-3947387934.jpg


image-1923401181.jpg


image-3545831798.jpg


image-2813338033.jpg


image-4292057695.jpg


image-2242300938.jpg
 
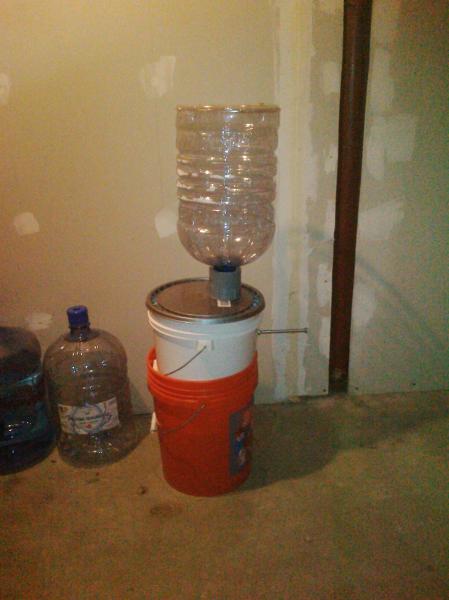
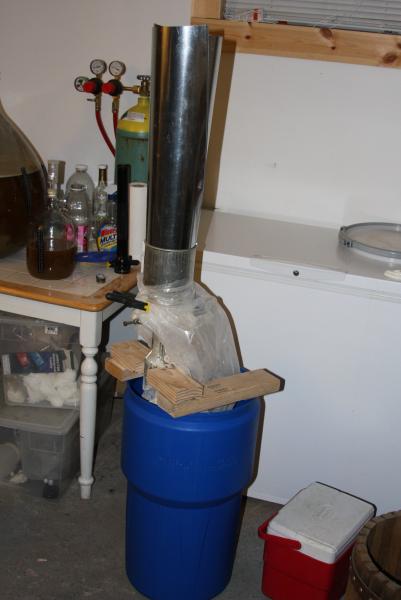
Thought I should post my beastly unit, hereby dubbed "the grain silo"

Plastic bag around the mill so the dust and grain pretty much all fall down into the bucket. Silo holds about 12+lbs of grain. 5/16'' stainless 2'' hex bolt for the drill to crank on.

IMG_4377.jpg
 
Cut a 4" hole in the table below the mill. Shroud the mill w/ a plastic bag, or a heavier roll of sheet plastic that goes through the hole in the table to nearly the bottom a catch bucket below. Sort of a grain chute.

You could do the same w/ sheet metal or a length of PVC pipe, but a kitchen garbage bag and some tape would work if you like "ugly"

When I used my corona style mill, I took an old salt bag from the water softener and used it to direct the grain into a pail, it was much stronger than a garbage bag.
 
Thought I should post my beastly unit, hereby dubbed "the grain silo"

Plastic bag around the mill so the dust and grain pretty much all fall down into the bucket. Silo holds about 12+lbs of grain. 5/16'' stainless 2'' hex bolt for the drill to crank on.

Magnificently Ugly Junk :mug:
 
Sweet!!! I'm so glad I saw a link to this page. The house I purchased a little over a year ago was an estate sale, long story short they left a ton of stuff in the house/garage, one item being a decent electric motor. I now know what I'll be using that for. :D

Now to pick up the corona mill. :D
 
....one item being a decent electric motor. I now know what I'll be using that for. :D

Now to pick up the corona mill. :D

Just a friendly prewarning, free motor is not the same as free power. By the time you purchase two pulleys, a belt and misc. hardware, a simple cheap 1/2 drill might be a better option. I have the drill linked below, and feel that for $33, it's a great value. The photos don't do justice, the thing is a beast w/ a 10 amp motor, variable speed reversible!

http://www.harborfreight.com/power-...le-speed-reversible-d-handle-drill-47991.html

I have to agree with the above post. Not necessarily that particular drill- I was fortunate enough to have an ancient Craftsman 1/2" drill around that's pretty much ideal for driving the Corona mill. I also concur with the "cheap drill" philosophy being consistent with the whole "Ugly Junk" concept. Fancy motor / drive systems aren't what we're about in this thread. Besides, unless you've got most of that stuff lying around, you can easily have far more money tied up in it than in the whole UJ system.

I've got $23 in the mill, $ .50 cents in the bolt, nothing in the two buckets or the hopper, maybe another $ .50 cents in duct tape and screws I already had around to put the thing together. So, let's say $25. I think the easiest alternative drive system would be some kind of a gearmotor, and the cheapest thing I've found on the Internet would be around 3 times what I've got invested so far. Not going there.
 
...I think the easiest alternative drive system would be some kind of a gearmotor, and the cheapest thing I've found on the Internet would be around 3 times what I've got invested so far. Not going there.

I'm still trying to figure out if this wiper motor has enough torque at only $16. I need to find a torque wrench in the right range to test the mill.
 
I'm still trying to figure out if this wiper motor has enough torque at only $16. I need to find a torque wrench in the right range to test the mill.

From the specs, and since the translation from foot-pounds (3.98) to inch-pounds is 47.76, I'd say it may be in the ballpark for sufficient working torque. Where you may be in trouble would be sufficient starting torque. You may be able to get around that by starting the rig empty, and then feeding the grain. I've rejected the 12V idea (even though I have a 25A 12V power supply that weighs as much as a concrete block), because I don't want to dedicate space to something like that, neither do I want to set it up and tear it down each time I mill.
 
I just got my mill recently(inspired by this thread), i noticed that where the auger shaft comes through the base is poorly milled. I cut a piece of cardboard(from an empty 18pk of bud left by my buddy) wrapped this around the shaft then assembled the mill this took alot of the wobble out of my plates. When i get my pos computer to accept the memory card from my camera ill post pics of my mill.
 
From the specs, and since the translation from foot-pounds (3.98) to inch-pounds is 47.76, I'd say it may be in the ballpark for sufficient working torque. Where you may be in trouble would be sufficient starting torque. You may be able to get around that by starting the rig empty, and then feeding the grain. I've rejected the 12V idea (even though I have a 25A 12V power supply that weighs as much as a concrete block), because I don't want to dedicate space to something like that, neither do I want to set it up and tear it down each time I mill.

Since it only really needs 2A I'm thinking a used computer power supply I have lying around should be sufficient and not that heavy. Mounted on top of the mill bucket should be OK and hopefully I can figure out a way to mount the motor on the side of the bucket so it is all self contained.
 
I just got my mill recently(inspired by this thread), i noticed that where the auger shaft comes through the base is poorly milled. I cut a piece of cardboard(from an empty 18pk of bud left by my buddy) wrapped this around the shaft then assembled the mill this took alot of the wobble out of my plates. When i get my pos computer to accept the memory card from my camera ill post pics of my mill.

Hah, yes my mill has the same poor tolerance as the shaft is a sloppy undersized fit. Cardboard bushings...prefect solution. I bet they last a helluva lot long longer than you'd think.
 
Hah, yes my mill has the same poor tolerance as the shaft is a sloppy undersized fit. Cardboard bushings...prefect solution. I bet they last a helluva lot long longer than you'd think.

My 'Victoria' branded mill is as sloppy as the next, from what I've read. All I did was to take out the cotter pin and replace it with a tight-fitting SS bolt....after reaming out the hole in the shaft with a drill. That took the PLAY out of the front plate, but not by any means its eccentric rotation....and I don't think any bushing I can make would help.
OTOH, since I cranked down the clearance between the plates until they almost touch, I get all my numbers when I mash, and even though there's a certain amount of flour and shredded husks, no stuck sparges.
I'm just not sure there's all that much extreme precision involved in crushing grain. If I'm AB InBev, doing grain by the rail car, then these things matter a great deal. To me, a homebrewer making 5-gallon batches in plastic buckets, not so much.
 
I just scored a Weston mill on Warehousedeals.com for $26.00 shipped. Should be here by Monday. I talked SWMBO into it by mentioning we could use it to switch between barley crushing and flour milling. She uses our blender to make flour but would rather use a mill.

So how big of a pain is it going to be for me to tweak the crush every time? I figure I'll set it as flour by default for her since she'll use it more often than I will. I don't mind running a handfull of grain thorugh to tweak the crush each time.

It would be killer if I could find a spacer like an alluminum billet otr something of the correct width to set the gaps.


My wife had a Corona for milling flour already when I met her. Only I use it now.

I set the crush every time I mill. It is quick and easy. I make two-three turns of the crank with my hand under the mill. IMHO, this is the best way because it is easy to only see the chaff and coarse pieces of endosperm if you don't get your hand in there. I get a fair amount of flour and no whole kernels. I presoak the malt to avoid shredding the husks.
 
you presoak your grains before you mill?

That has to make quite the mess, I never heard of doing it that way. Did you have an issue with hull shredding before? I just keep my drill at a medium steady pace and I have had good efficiency and no stuck sparges.

props for milling your own flour. For the price of flour I am sure there isn't a cost advantage - is it the freshness you are going for?
 
you presoak your grains before you mill?

Yupp, learned about it here on HBT from BrewKaiser. I use 2% water by weight of the malt, soaking for 20-30 minutes before milling.

That has to make quite the mess, I never heard of doing it that way. Did you have an issue with hull shredding before? I just keep my drill at a medium steady pace and I have had good efficiency and no stuck sparges.

It is a little messier, but not bad. Presoaking allows me to use a more aggressive mill setting without shredding the husks. The husks get kind of leathery. I get about 86% brew house efficiency, give or take a few percent depending on recipe.
 
Back
Top