Hello,
I'm on my journey on creating my eHERMS system and I've read a lot of great resources and have gotten a lot of ideas. I'm posting my build to help generate answers and ideas for me and to help any other fellow home brewer. I know with all the knowledgeable people on this forum that I'll be in good hands, so I want to thank everyone in advanced for your input and help. Let the fun begin.
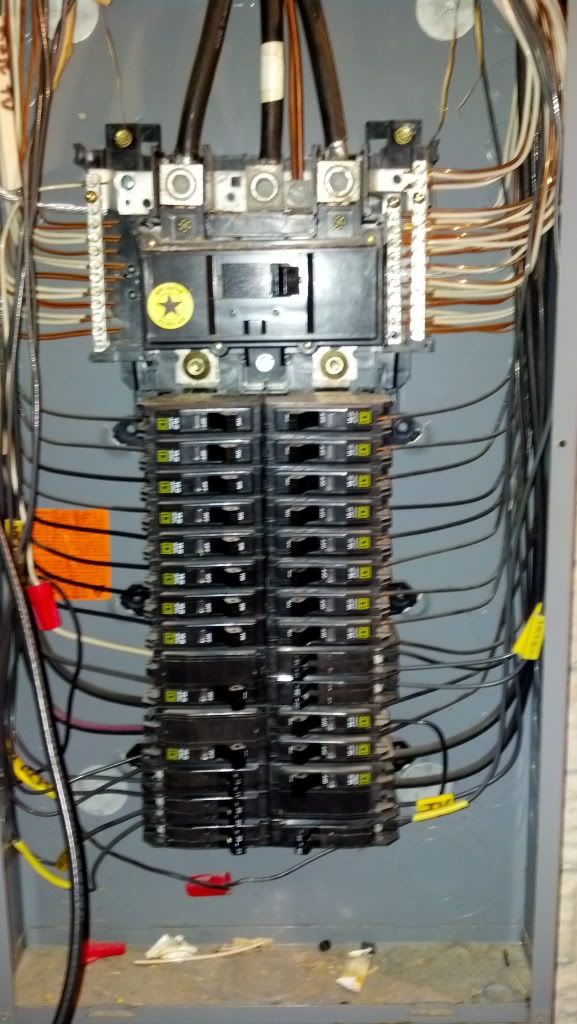
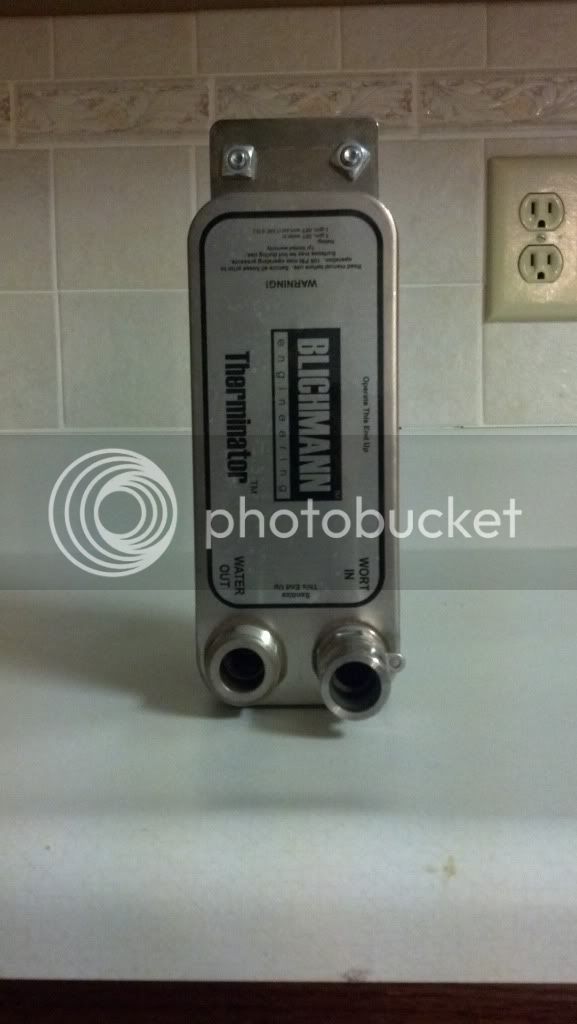
I've taken a lot of ideas from A4J, Tiber_Brew, and Kal. I don't have many specifics yet, but I do know that I will be using 2 5500W elements for the HLT and BK, PID's for monitoring temperatures, 2 March 09 pumps, and Blichmann Therminator for my plate chiller.
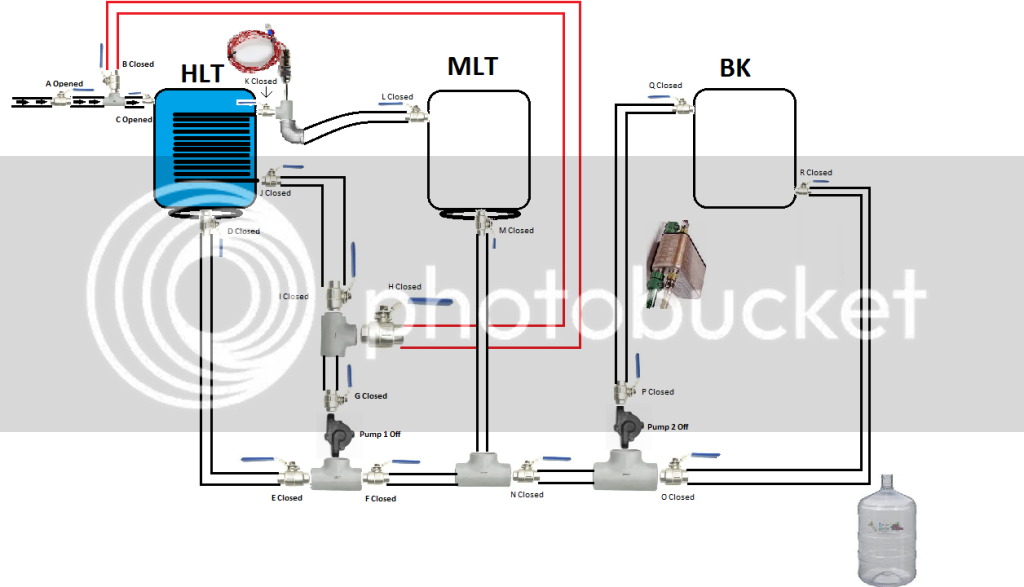
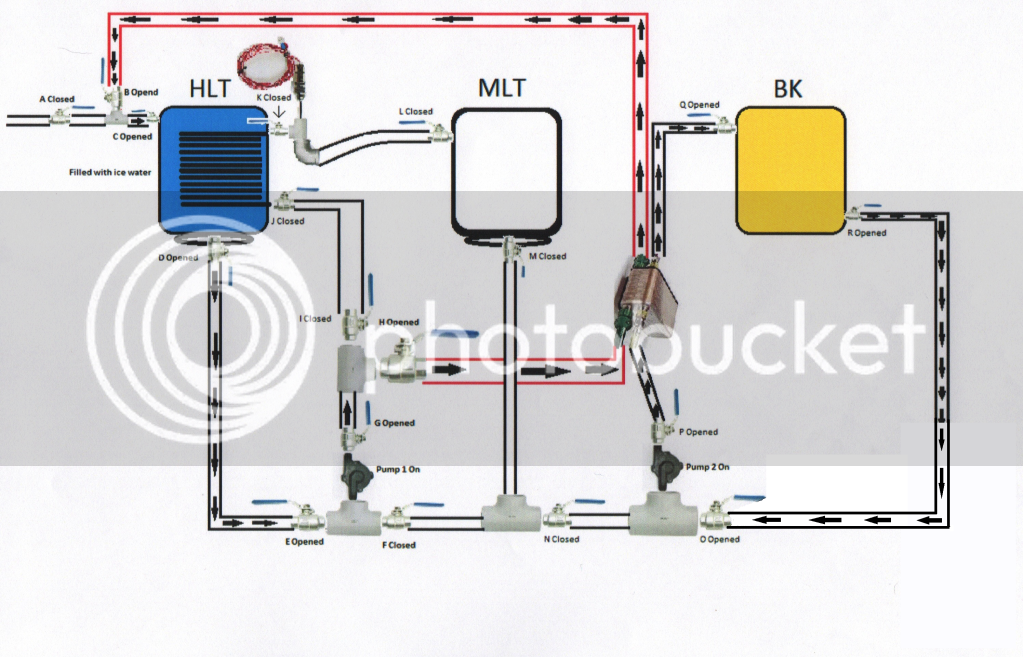
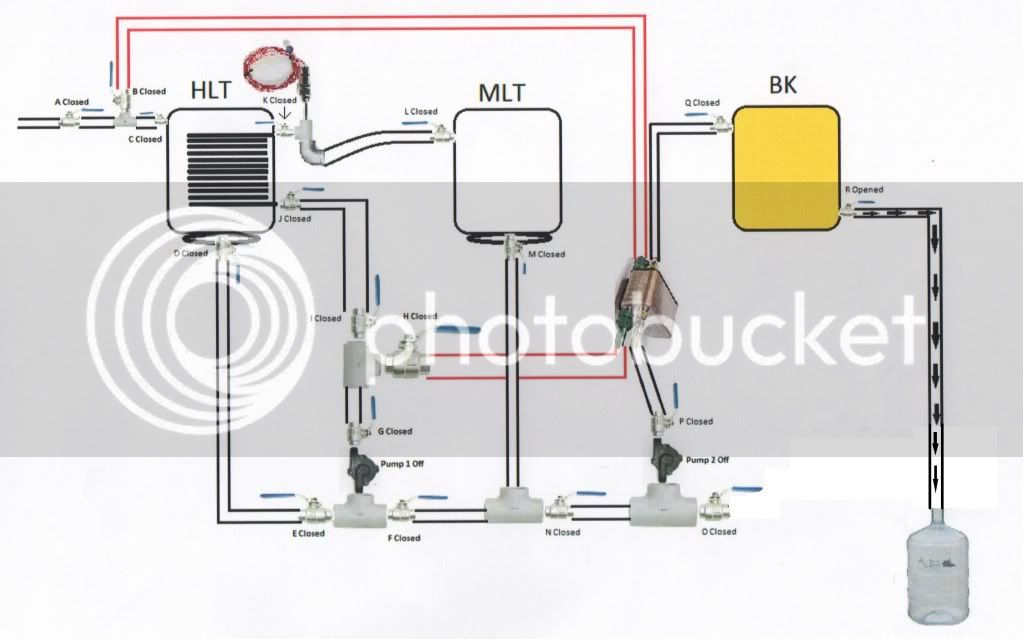
Right now I have created my brew rig diagrams (with my awesome MS Paint skills) and would love for people to take a look at them and give me your thoughts. One big thing that sticks out at me is if I really need all those ball valves and if I have them in the right spot.
Step 1: Filling With Water

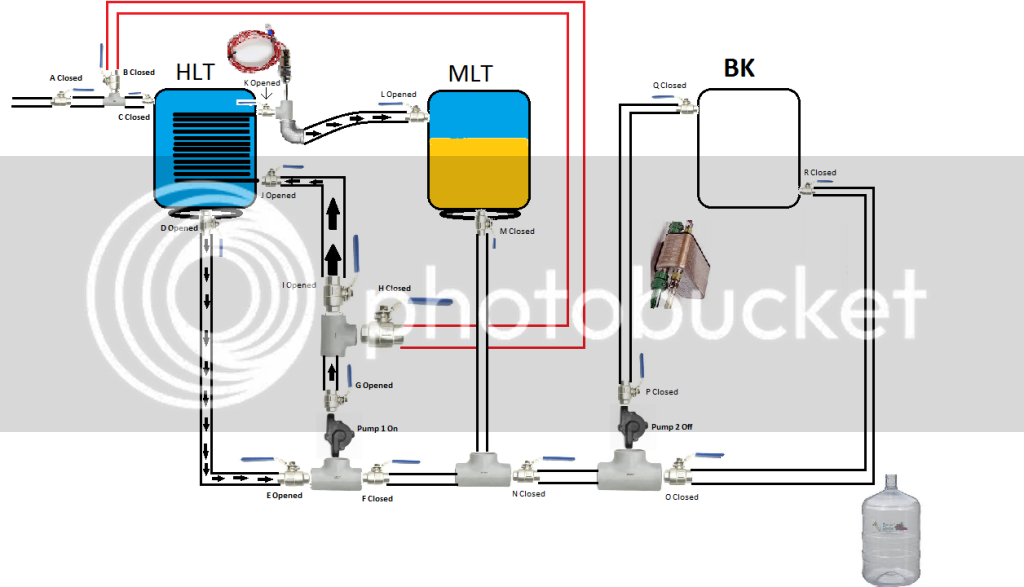
Step 2: Mash In

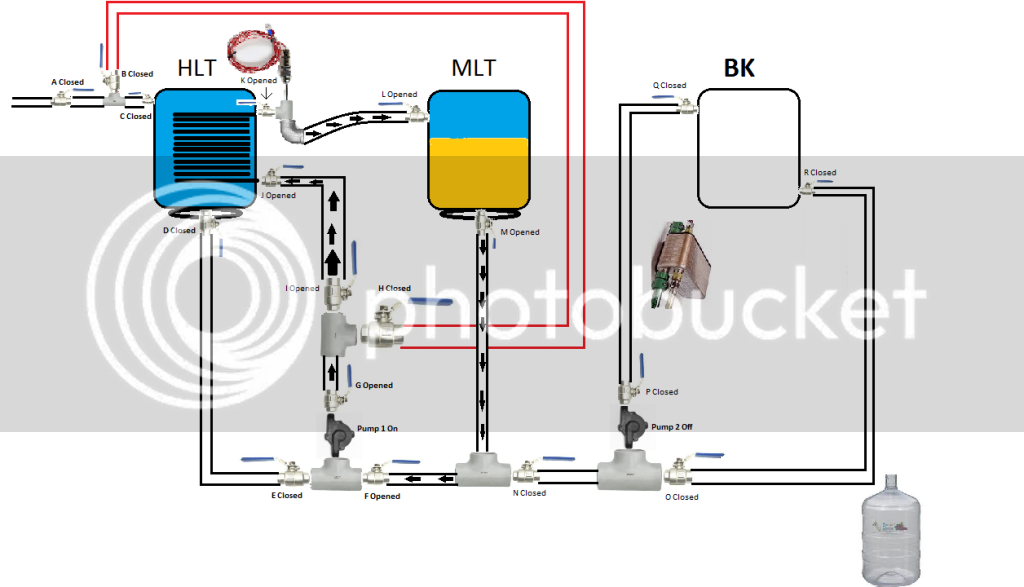
Step 3: Mash Out

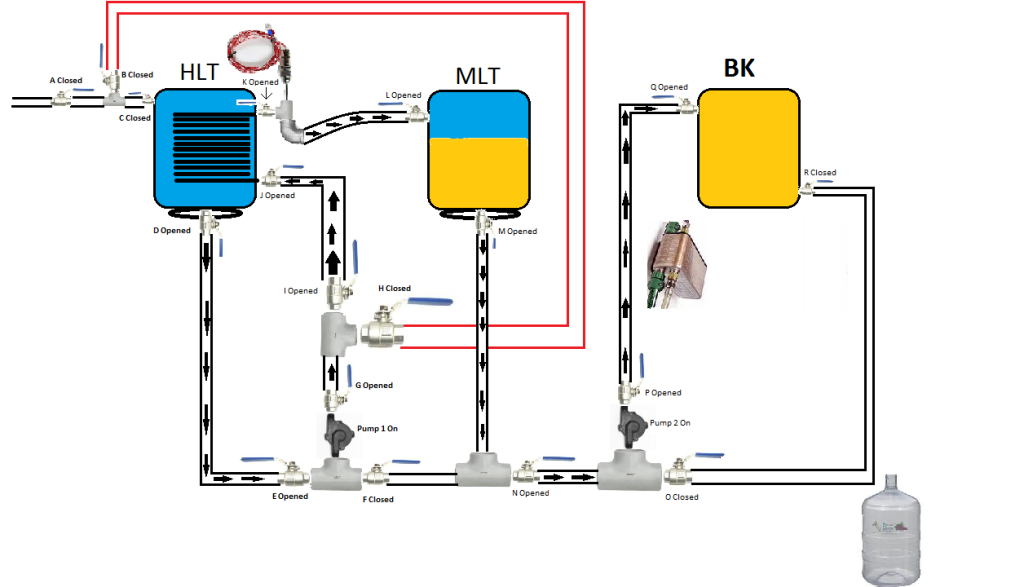
Step 4: Continuous Sparge

Step 5: Cooling

Step 6: Once Temperature is Reached Add to Fementor

I'm on my journey on creating my eHERMS system and I've read a lot of great resources and have gotten a lot of ideas. I'm posting my build to help generate answers and ideas for me and to help any other fellow home brewer. I know with all the knowledgeable people on this forum that I'll be in good hands, so I want to thank everyone in advanced for your input and help. Let the fun begin.
I've taken a lot of ideas from A4J, Tiber_Brew, and Kal. I don't have many specifics yet, but I do know that I will be using 2 5500W elements for the HLT and BK, PID's for monitoring temperatures, 2 March 09 pumps, and Blichmann Therminator for my plate chiller.
Right now I have created my brew rig diagrams (with my awesome MS Paint skills) and would love for people to take a look at them and give me your thoughts. One big thing that sticks out at me is if I really need all those ball valves and if I have them in the right spot.
Step 1: Filling With Water
Step 2: Mash In
Step 3: Mash Out
Step 4: Continuous Sparge
Step 5: Cooling
Step 6: Once Temperature is Reached Add to Fementor


![Craft A Brew - Safale S-04 Dry Yeast - Fermentis - English Ale Dry Yeast - For English and American Ales and Hard Apple Ciders - Ingredients for Home Brewing - Beer Making Supplies - [1 Pack]](https://m.media-amazon.com/images/I/41fVGNh6JfL._SL500_.jpg)