Point being, the premise was inaccurate...
Cheers!
Cheers!

Thanks Thorrak I am interested in building a Brewpi form your link below, but i know i have not read the full story but could you tell me how the temp probes would be attached?

Thanks for the drawing Thorrak, hope you don't mind but i have another few questions. 1. Like i said i control the operation of the brew fridge via a STC1000, could i still use the setup but without installing relays on the board. 2 Also you mention using brake out boards setup within the fridge and wire to mainboard. my question is would these be OK at lower temps i.e 1c for when i cold crash especially when i do lagers?Sure thing. Excuse my terrible handwriting/lack of artistic talent, but here's generally what a build looks like/how it works:
View attachment 656562
2 Also you mention using brake out boards setup within the fridge and wire to mainboard. my question is would these be OK at lower temps i.e 1c for when i cold crash especially when i do lagers?
The project is done in PlatformIO. You will find it much easier to modify it with PlatformIO as it will handle the libraries for you. They are all listed in the PlatformIO.ini file, and they will download automatically based on that configuration.It does help I think i found all the source files for the esp flash looks like i can maybe edit the main one include all the libraries and flash if I desire
Yes, it will be. Once you modify the code you own it forever and you would have to re-do your work if/when Thorrak makes a change.honestly it may be easier to add a second of these cheap wemos with seperate code to do what im wishing with the light and fan so I dont even mess with this source code at all.
As @day_trippr said, making an Uno wireless or adding BT is trivial, and you would have many more extra pins. WiFi is discussed here, and that thread should give you more than you need to get it going. I recommend using the jeelabs/esp-link code as the bridge. If you want to explore BT, I wrote that up here as well (based on day_trippr's excellent work!) If you use the Uno you can use the extra pins and existing code to control them without having to change the firmware or come up with your own code to do the other work.As far as using the unos i realize I could still use the unos but then Id be a slave to the usb cable for my pi location which is kinda limiting.
Your experience may be dated. RPi is still not perfect when it comes to Wireless, but it is much better and I have had a fridge running for over a year in the garage on WiFi with no issues. I don't know if Thorrak has a WiFi script in Fermentrack, but I have modified the one I put in BrewPi Remix to be a standalone project. You may find use for that.Especially in my experience the pi runnning the web server does far bettered in a hardwired location
I'm not sure I ever considered the ESP-8266 as an upgrade. It's absolutely handy when it comes to WiFi, and it does have more memory, but in comparison to the Uno running the same code I'd call it a compromise. If you are buying them anyway, you might find using them as a WiFi "dongle" a fair consideration. There's also an all-in-one option for the Uno that I wrote up which you may want to look at.having wireless sensor controllers at the chambers for the meezily price of 10 bucks for a three pack on amazon is a worthwhile upgrade in my opinion.
If you soldered up a proto-board I daresay that qualifies as a shield.As far as needing a shield Im not sure why you say the wemos need a shield to work and the unos don't? I was able to get my setup going and soldered my own i guess control board on a perma proto 1/4 size.
Well, since we are being pedantic here I'd point out that the 5V pin is definitely 5V tolerant.I just powered the ds18b20 with the 3.3 volt source from the wemos instead of 5 since none of the pins are 5v tolerant.
")
Sweet I haven’t heard of that. I’ll look into it.The project is done in PlatformIO. You will find it much easier to modify it with PlatformIO as it will handle the libraries for you. They are all listed in the PlatformIO.ini file, and they will download automatically based on that configuration.
definitely would be harder to update that’s a good point as I’d have to go back in and add my a custom bits again. That could be a deal breaker for suing the same hardware since this is in fact actively being developed unlike some other projects I’ve modified out there.Yes, it will be. Once you modify the code you own it forever and you would have to re-do your work if/when Thorrak makes a change.
I’ll have to look into this checker. My bad experiences with pi WiFi May be model specific but I had some issues with pi3 model b just being generally unresponsive especially one I had running my raspberry pints server. Im sure some models are better than others and maybe I got a dud with that one but there were tons of posts with similar issues if unresponsive strange WiFi behavior in some pi 3 b models. Even close to the router. But I second your notion that it can be good as I have a zero w clear out in the corner of my yard in my hottub cabinet running some speakers out there and controlling some lighting. That’s about as far away from the router as it gets in my house and that ones solid so it can be done. But the flaky ones have had 100 percent reliability as hardwired Ethernet devices in my network now. Is the 4 any better with WiFi? Or which model is in your garage?Your experience may be dated. RPi is still not perfect when it comes to Wireless, but it is much better and I have had a fridge running for over a year in the garage on WiFi with no issues. I don't know if Thorrak has a WiFi script in Fermentrack, but I have modified the one I put in BrewPi Remix to be a standalone project. You may find use for that.
is this statement merely because of the lack of extra pins? Like tons of analog and digital pins? Cause more memory is definitely big, built in WiFi is definitely big. Is an uno faster? I do realize the uno is more versatile with the extra pins but I’m trying to understand in a project where you might not need the pins what the advantage is? I always thought it was crazy that the brewpi script completely filled the uno. Especially as a new hobbiest programmer such as myself I may not be the most efficient coder so having some memory to spare definitely helps me with my C writing skills haha.I'm not sure I ever considered the ESP-8266 as an upgrade. It's absolutely handy when it comes to WiFi, and it does have more memory, but in comparison to the Uno running the same code I'd call it a compromise.
touchéWell, since we are being pedantic here I'd point out that the 5V pin is definitely 5V tolerant.
Thanks for pointing out this possibility. I never even thought of using the 3.3 as a pull-up only on the data line and powering the sensors on 5v... I didn’t have to extend the cables at all from the stock 1 meter length since everything is run into the fridges compressor hump but if I get any odd sensor behavior this will be my first fix. Seeing the cheap wires inside I can imagine the voltage drops quite quickly with any sensor wire of a decent length.The voltage drop on those Chinese leads is pretty high and given 3V3 is the low limit on voltage for the DS18B20's you might find powering them with 5V and using the 3V3 on the pull up a more solid proposition. Likewise, split the relay by removing the jumper and power the coils with 5V. The new shield design is done in this manner.


![Craft A Brew - Safale S-04 Dry Yeast - Fermentis - English Ale Dry Yeast - For English and American Ales and Hard Apple Ciders - Ingredients for Home Brewing - Beer Making Supplies - [1 Pack]](https://m.media-amazon.com/images/I/41fVGNh6JfL._SL500_.jpg)
Would be tough to have a 4 out there for a year.Is the 4 any better with WiFi? Or which model is in your garage?
The one out there is a 2 actually with an Edimax USB Wifi dongle.Yes, more pins. The ESP8266 does not have rotary encoder support for example, which is a deal-breaker for me but not for everyone. If you don't make changes you won't need more memory, and while the ESP8266 is faster, both run at the speed of the script which is 9600 baud. THe core processing speeds are more than fast enough for PID processing.is this statement merely because of the lack of extra pins? Like tons of analog and digital pins? Cause more memory is definitely big, built in WiFi is definitely big. Is an uno faster?
When Thorrak helped me adding the I2C, I had to remove exactly 26 letters from strings to get the thing to run without crashing. It's that close.I always thought it was crazy that the brewpi script completely filled the uno.
Thanks for the drawing Thorrak, hope you don't mind but i have another few questions. 1. Like i said i control the operation of the brew fridge via a STC1000, could i still use the setup but without installing relays on the board. 2 Also you mention using brake out boards setup within the fridge and wire to mainboard. my question is would these be OK at lower temps i.e 1c for when i cold crash especially when i do lagers?
Yeah - as @garzlok noted the advantage of the “breakout board” is that you can put it either inside or outside your chamber. Outside is preferable, but inside works as well. The temperature sensors themselves are rated from -67F to +257F* so you should be fine.
You can definitely use that setup with an STC1000 if you want to just monitor temperatures, but the control algorithm that will be applied will be that of the STC1000. You would need to use two types of temperature sensors in that case - one set hooked up to your BrewPi controller and the existing sensor you currently have hooked up to the STC1000. You will effectively have two completely separate devices - the BrewPi will be unaware of the STC1000 and vice-versa.
* - Although the DS18b20 sensor has a wide temperature range, I personally wouldn’t trust the cables/housing for direct exposure to high heat. I also wouldn’t immerse it in liquid and then freeze that liquid without some kind of thermowell/protection. Not an issue for fermentation temperatures, but something to think about.
I have to ask why? I mean in that configuration you've got an arguably superior temperature control system, just sitting there watching. Why not just have the Fermentrack handle it all?Hi Thorrak thanks for your reply I am thinking that my STC1000 is in a box next to the fermenting fridge and my thinking is that leave the STC1000 to control the heat/cool cycles and have Fermentrack display the fridge ambient temp with 1 probe and the second probe attached under sponge to the fermenter. Also temp and SG of brew and taken from an ispindel. with the box being close i was hoping i could get temp probes with leads of approx 2m in length. Does this make sense and is it doable.
Hi Thorrak thanks for your reply I am thinking that my STC1000 is in a box next to the fermenting fridge and my thinking is that leave the STC1000 to control the heat/cool cycles and have Fermentrack display the fridge ambient temp with 1 probe and the second probe attached under sponge to the fermenter. Also temp and SG of brew and taken from an ispindel. with the box being close i was hoping i could get temp probes with leads of approx 2m in length. Does this make sense and is it doable.
the only difference is the one running a Arduino Uno and the other is running a knock off. Could that be the culprit?


You've posted more on vacation than when you were working.
Thank Thorrak, awesome work as always. On the Brewfather support, can you only send gravity sensor data to Brewfather? I don't have the hardware right now to build a TiltBridge, so I am just using a Pi Zero W I had lying around and loaded TiltPi, the plan is to integrate this directly with Brewfather (unless I can get it into Fermentrack as well?). I would however like to pull the temp data from Fermentrack into Brewfather. I looked and couldn't find an idiots guide to doing this so wonder if its possible?
Yep! Brewfather support is currently tied to gravity sensors, which can work either on a standalone basis or tied to a BrewPi temperature controller.
If your gravity sensor is on its own, the gravity sensor’s gravity and temp readings are sent to Brewfather on their own. No BrewPi needed.
I did add a new feature last night for anyone with their gravity sensor paired to a BrewPi controller: In the dev branch, if your gravity sensor is tied to a BrewPi controller, the gravity sensor’s gravity readings are sent, but the BrewPi’s temp readings are sent - if available. If you don’t have a beer sensor on your BrewPi, the gravity sensor’s temp reading will still be sent.
I didn’t include this in the release as the behavior is potentially controversial. If you have a paired sensor + controller then this means the sensor’s temp readings won’t be cascaded so long as the sensor is reading beer temps. My thought is that if it’s good enough to control your chamber, it’s good enough to show up in Brewfather.
Assuming I don’t hear strenuous objections I’m going to mirror the functionality for the beer temp for Brewer’s Friend and pull it to master with the next release (probably Jan/Feb).
Over the weekend I assembled 3 iSpindel sensors. I set each iSpindel to use Fahrenheit as it's temperature. I then went on the search to find something to send the data to. After searching for quite a while I came across Fermentrack. It does exactly what I want. Except for one thing, the temperature is being converted to Fahrenheit even though the temp is being sent from the iSpindel in Fahrenheit.
The only reference I could find to this issue is here: https://github.com/thorrak/fermentrack/issues/253 from March 2018 Which shows that the problem was fixed.
That leaves me with two options. I set the wrong temperature when I configured the iSpindel's in Fermentrack or the problem from that ticket wasn't fixed.
Is there a way to check the iSpindel settings in Fermentrack? When I look at the iSpendel settings in Fermentrack it only shows the calibration settings. The main config settings in Fermentrac are set to Fahrenheit.
I could just set the temperature to Celsius on the Ispindel. But that doesn't seem like the right solution. Because the programmer in me says I should fix the problem. not just work around it.
Thanks in advance.
Hm, it's still there. Do you are saying the iSpindel is reporting F and Fermentrack is still doing the (temp-32) * 5 / 9 math?

Which firmware are you using for the iSpindel? Older ones didn’t send the units along with the reading - I submitted a pull to the iSpindel project, but I don’t know if it ultimately made it in.
The raw data coming from the iSpindel:
'{"name":"iSpindel001","ID":9390968,"token":"fermentrack","angle":68.81093,"temperature":73.175,"temp_units":"F","battery":4.103232,"gravity":22.80585,"interval":20,"RSSI":-41}'
Here is what Fermentrack is showing:
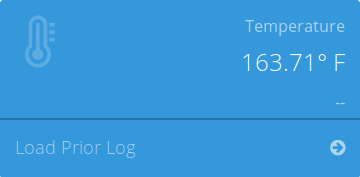
The App configuration in Fermentrack is set to Fahrenheit:
View attachment 657259
When I do the math to convert from C to F I get the same answer Fermentrack gives. (73.175°C × 9/5) + 32 = 163.715°F
I'm using the latest (as of this post) 6.2.0 firmware for the iSpindel.
Huh. Everything in the code looks right, but I've been fooled before. I just changed the handful of things I think might be causing the issue and pushed it to a new branch. I PM'ed you instructions for how to switch over and give that branch a try - if they solve the issue, I'll merge the changes into dev.
Sorry for the issue - we'll get it solved!
Yea I knew where the eeprom reset was. I did that, shut the controller down for a while then reinstalled everything. Let's see if it bugs out again.In Fermentrack the "Reset EEPROM" option is on the "Manage Device" page for the device you want to reset:
View attachment 657063

Hi guys, so I just updated fermentrack to the latest version released on the 16th and am keen to try out Ipsindel push to brewfather. But im not sure what the logging URL is that I have to put into fermentrack?
I have a server URL in Brewfather which is this. /ispindel?id=XXXXXXX
Is this what I need to put in to the logging URL field?

That’s what it looks like. What kind of relays are you using and how exactly do you have the relay wired?so...this happened last night. somehow the heater got stuck on even though the controller was saying "cool"
any ideas?
i'm assuming the relay went poop...again
View attachment 657340
That’s what it looks like. What kind of relays are you using and how exactly do you have the relay wired?
My Ispindel reports to fermentrack and I want to get it to pass this information on to Brewfather. Where is the customstream option?No - there are two ways to use Brewfather with iSpindels - through Fermentrack and directly.
If you do it directly, you would log into the iSpindel and add that to the config somewhere.
If you do it through Fermentrack you would set your iSpindel up in Fermentrack, then set up the “custom stream” option in Brewfather. You would then get a full URL from Brewfather that you could input into Fermentrack.
That’s what it looks like. What kind of relays are you using and how exactly do you have the relay wired?


