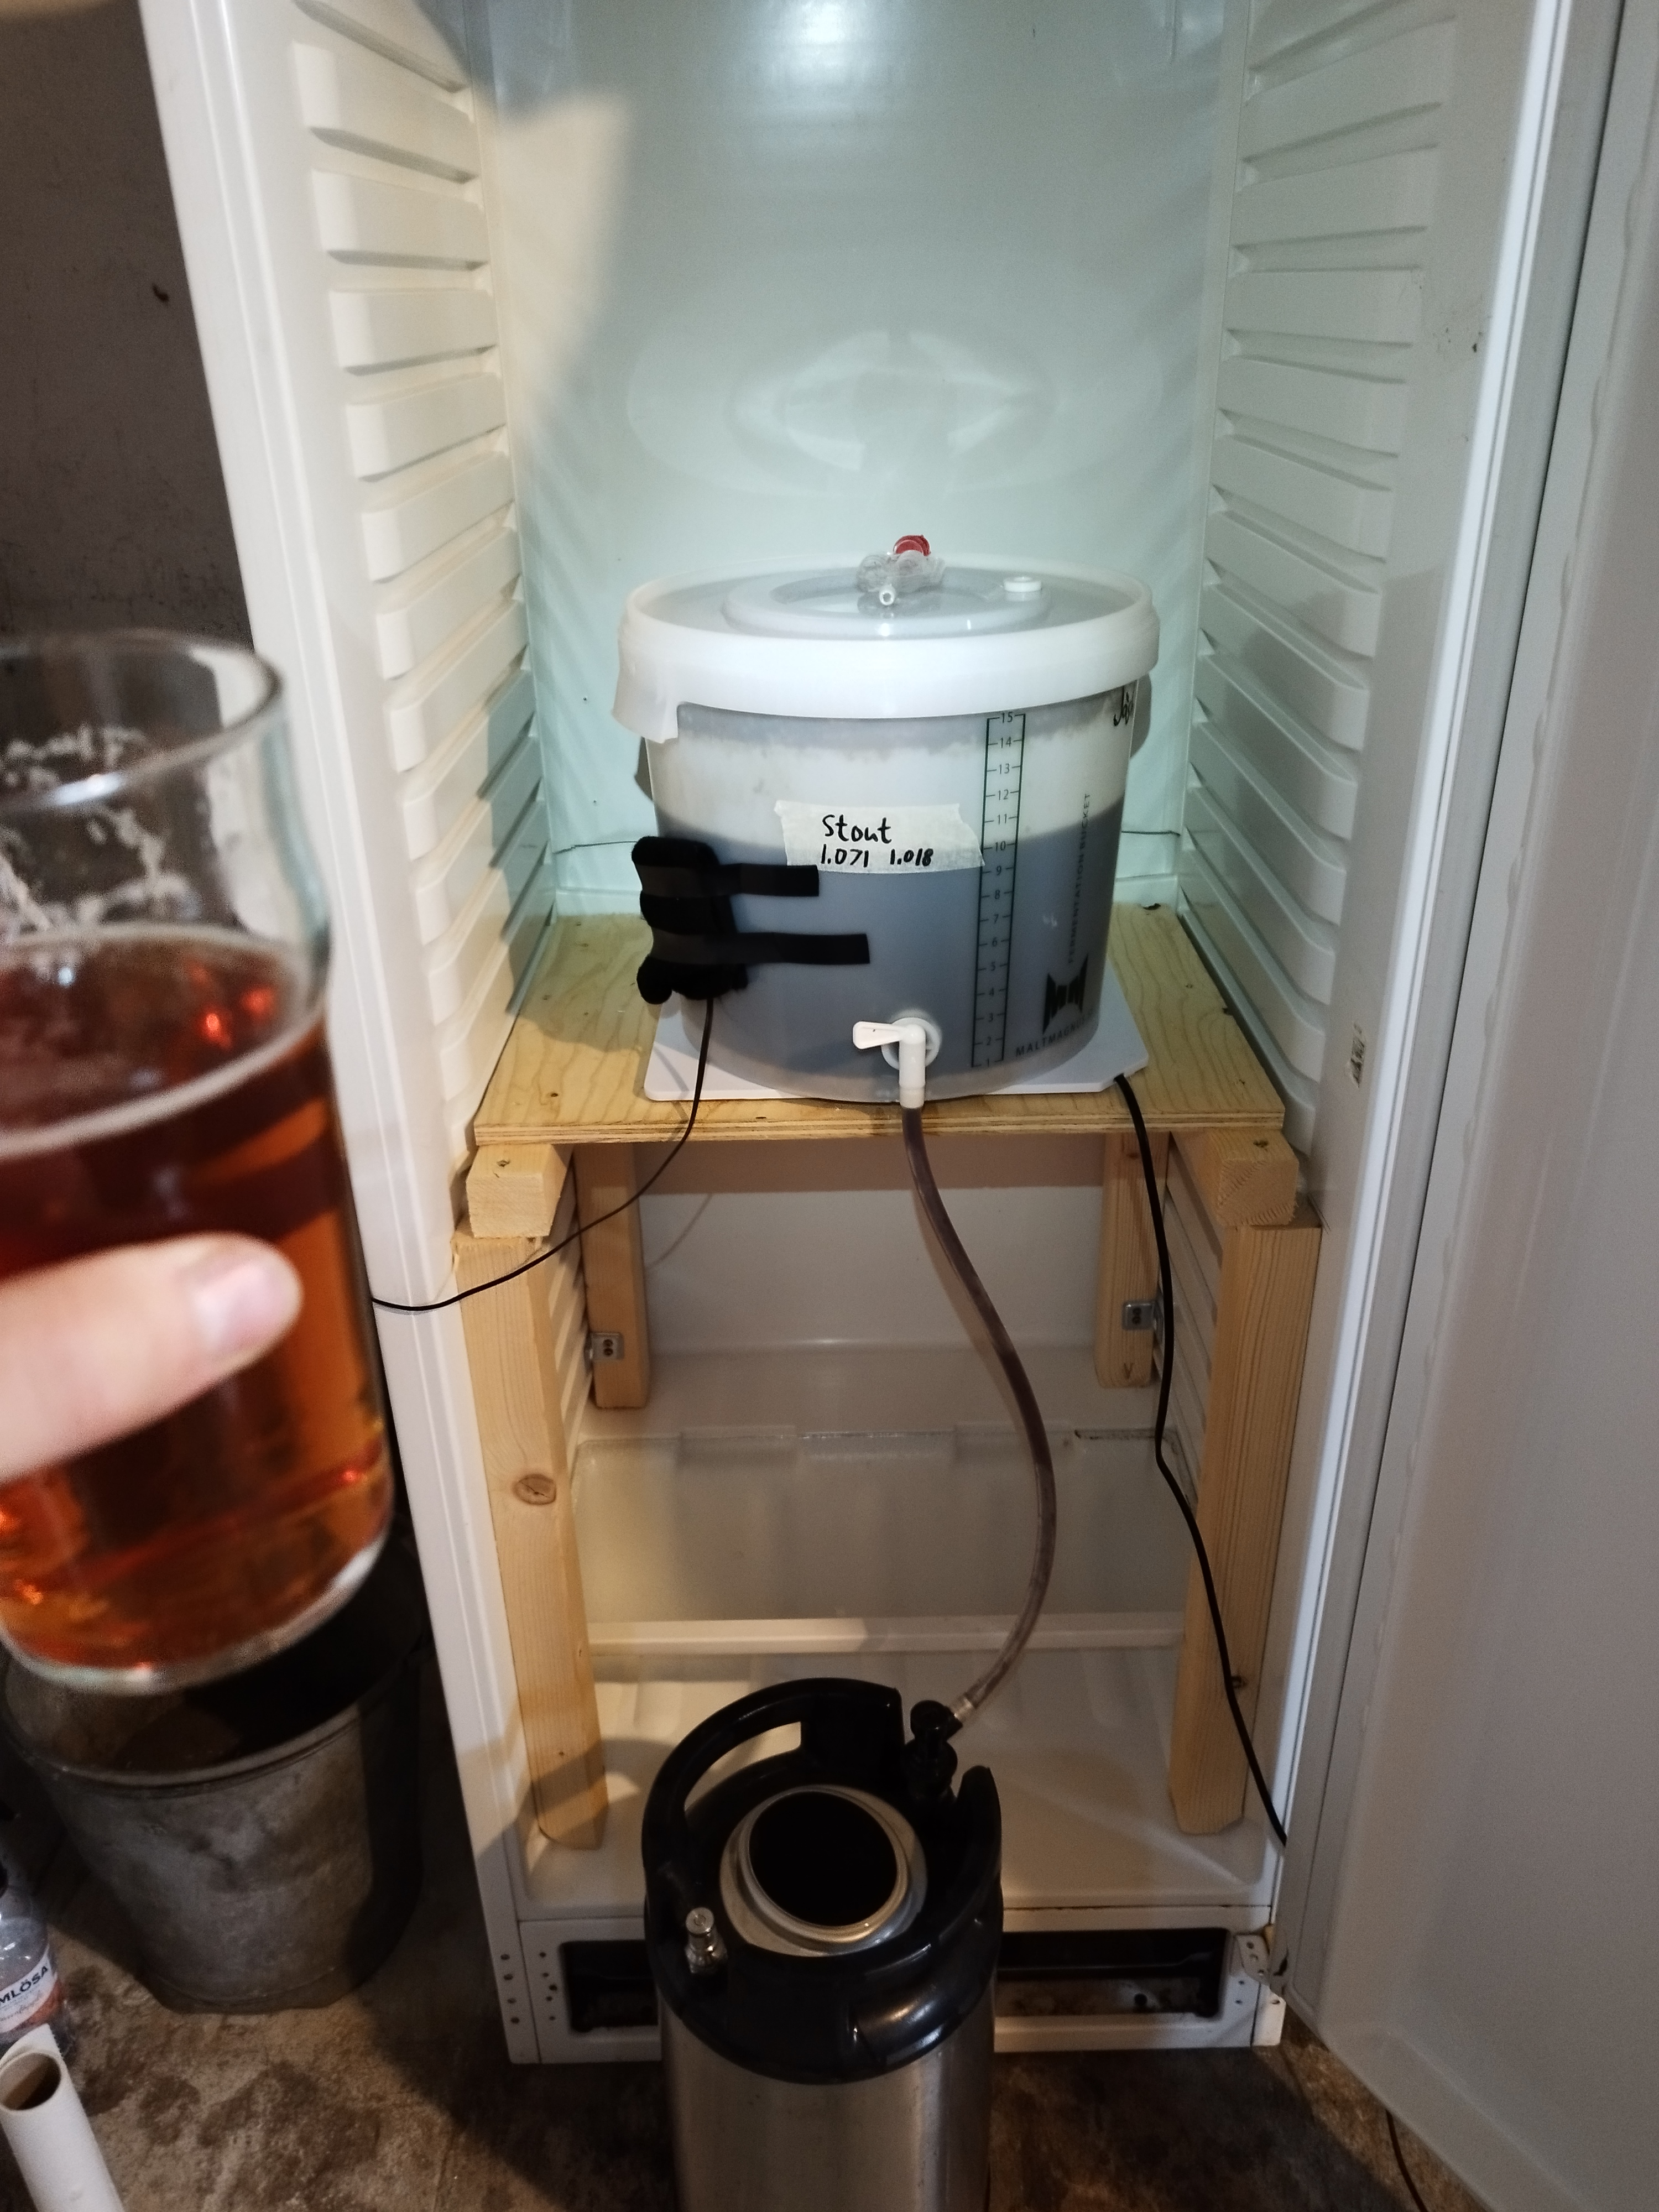
• Please visit and share your knowledge at our sister communities:
  • If you have not, please join our official Homebrewing Facebook Group!

    Homebrewing Facebook Group

English Ales - What's your favorite recipe?

Homebrew Talk

Help Support Homebrew Talk:

This site may earn a commission from merchant affiliate links, including eBay, Amazon, and others.
Yeah, so it's not a question of not believing. It's knowing it's not the true FG. But, yes, it will be perfectly serviceable in ascertaining whether it's stable.

Mine's still visibly effervescent!
Yeah mine was't flat at all.
But there didn't seem to be much activity, a few bubbles slowly rising to the top when I shined my flashlight through the carboy, wich may have been just off gassing.
It was rather clear aswell, and tasted pretty dry, and boozy.
It will definitely need some aging in bottles aswell.
 
Then I guess I need to change my plan. Maybe I'll take my chances with Nottingham at room temps and see what happens; roll the dice.
Honestly, a lot of the British strains are pretty resilient. I've fermented with S-04 at ~28°C without it throwing much, if any, weirdness. Do a big pitch to minimise stress and you'll probably be fine.

Or failing that, the lowest attenuating Kveik you can find.
 
Last edited:
I have a bitter fermenting right now with Nottingham. I normally use Lallemand dry ESB, but my LHBS was sold out. Since I already had Nottingham in my fridge I decided to just go with it.
 
Honestly, a lot of the British strains are pretty resilient. I've fermented with S-04 at ~28°C without it throwing much, if any, weirdness. Do a big pitch to minimise stress and you'll probably be fine.

Or failing that, the lowest attenuating Kveik you can find.
No Kveik, would be same storry as with a saison yeast, obviously a farmhouse beer.

I agree with the room temperature notti. S04 can be sour at too high temperature, but that might have changed as they have somehow changed the yeast compared to the old version.

I am going to brew a 40/40/10 Notti/Windsor/t58 blonde, starting the boil atm. Will be room temp as well.
 
Last edited:
No Kveik, swould be same storry as with a saison yeast, obviously a farmhouse beer.

I agree with the room temperature notti. S04 can be sour at too high temperature, but that might have changed as they have somehow changed the yeast compared to the old version.

I am going to brew a 40/40/10 Notti/Windsor/t58 blonde, starting the boil atm. Will be room temp as well.
You going to stage the yeasts? What average temp are we talking about right now in... what North East Germany? Not to many triple yeast combos, might be fun to see how that turns out.
 
You going to stage the yeasts? What average temp are we talking about right now in... what North East Germany? Not to many triple yeast combos, might be fun to see how that turns out.
I have done notti/s04/t58/br8 in the past. Resulted in a nice and complex imperial stout + a strong wheat stout from the yeast cake.

I just threw them in alltogether. No staging this time. I just want them all to go to work. About 20 to 22 C° in my basement. I placed the fermenter in a big tub of water to keep the temperature more stable.

I have used my new corona mill the first time and I had small problems dialing in the gap size. Quite some kenels came out uncracked but still managed to hit about 72% efficiency. Will be about 10 % higher once I figured the whole corona mill thing out.

So this time, it´s a 1.04 OG blonde bitter with about 35 ibus from Goldings 2g/l 30 minute addition and 3g/l whirlpool @65C°.
 
Last edited:
once I figured the whole corona mill thing out.

Have you seen the suggestions of stabilizing the rotor plate? The way they come they wibble wobble. Once that's done, I tightened mine until the plates' teeth just barely do not rub with no grain running through. Another eigth turn, the would be metal to metal. With grain, they push apart just enough. BIAB, of course.
 
Have you seen the suggestions of stabilizing the rotor plate? The way they come they wibble wobble. Once that's done, I tightened mine until the plates' teeth just barely do not rub with no grain running through. Another eigth turn, the would be metal to metal. With grain, they push apart just enough. BIAB, of course.
Exactly my experience!

Where can I find the suggestions for stabilization?
 
Exactly my experience!

Where can I find the suggestions for stabilization?

Lots of suggestions in this here thread, but the washers as shown in this post are key. Also, adjusting or replacing the cotter pin with a plain bolt so the rotor plate sits and stays parallel with the stator plate.

Post in thread 'My Ugly Junk- Corona Mill Station...' My Ugly Junk- Corona Mill Station...
Thank you very much for the link!

My mill looks a bit different to what is shown on the pictures, the screws for the washers are on the side, but they should actually serve the same function. I do not understand how replacing the pins should help with the stability of the rotor plate though. Maybe I just do not understand the technical terms here, not quite sure what the rotor and stator plates are. ...wild guess, rotor plate is the plate that is connected with the whole part that turns and guides the grains in between the grinding plates and the stator plate is the static counterpart of the rotor plate? Would make sense actually.


Replacing the cotter pins with bolts just to get more stability maybe? Mine are actually quite stable but I could see quite some movement of the part that shields the rotor and stator plate from above (the part that is being held in place be the screws with the cotter pins). But to be fair, I am not certain that I tightened the cotter pin screws tight enough.

Thanks for the help!

Cheers!
 
Last edited:
Took a refractometer sample of my stock ale earlier today @DBhomebrew
It said it was 1.035, I have a hard time believing it...
But at least it will show if the gravity has moved when I check again in 3-4 weeks...
Guess I'll have to use a hydrometer at bottling time to see the real FG. Likely somewhere just under 1.010.
Am I missing something? If you know the OG there are plenty of calculators that will help you approximate the gravity from your refractometer reading.
 
.
 

Attachments

  • IMG_20230917_133508.jpg
    IMG_20230917_133508.jpg
    3.3 MB
Thank you very much for the link!

My mill looks a bit different to what is shown on the pictures, the screws for the washers are on the side, but they should actually serve the same function. I do not understand how replacing the pins should help with the stability of the rotor plate though. Maybe I just do not understand the technical terms here, not quite sure what the rotor and stator plates are. ...wild guess, rotor plate is the plate that is connected with the whole part that turns and guides the grains in between the grinding plates and the stator plate is the static counterpart of the rotor plate? Would make sense actually.


Replacing the cotter pins with bolts just to get more stability maybe? Mine are actually quite stable but I could see quite some movement of the part that shields the rotor and stator plate from above (the part that is being held in place be the screws with the cotter pins). But to be fair, I am not certain that I tightened the cotter pin screws tight enough.

Thanks for the help!

Cheers!

Correct re: rotor/stator. Terms used very often in regards to generators, etc.

Not knowing what you have in front of you, here's a marked up pic of mine. The gist is that you have to stabilize the position of the rotor in relation to the stator.

1) Add washers so the whole apparatus that holds the rotor has something to tighten onto other than grain running through the mill. Otherwise, it's just free floating.

2) Adjust and/or replace the cotter pin so the rotor is stable on the shaft and parallel to the stator. I was able to tap the malleable pin into a good position that worked, brewers that I was following were replacing the pin with a bolt.

3) Adjust the length of the shaft so the rotor barely, barely makes contact with the stator when the mill is empty.

20230917_061915.jpg
 
Replacing the cotter pins with bolts just to get more stability maybe? Mine are actually quite stable but I could see quite some movement of the part that shields the rotor and stator plate from above (the part that is being held in place be the screws with the cotter pins). But to be fair, I am not certain that I tightened the cotter pin screws tight enough.

Thanks for the help!

Cheers!

Correct re: rotor/stator. Terms used very often in regards to generators, etc.

Not knowing what you have in front of you, here's a marked up pic of mine. The gist is that you have to stabilize the position of the rotor in relation to the stator.

1) Add washers so the whole apparatus that holds the rotor has something to tighten onto other than grain running through the mill. Otherwise, it's just free floating.

2) Adjust and/or replace the cotter pin so the rotor is stable on the shaft and parallel to the stator. I was able to tap the malleable pin into a good position that worked, brewers that I was following were replacing the pin with a bolt.

3) Adjust the length of the shaft so the rotor barely, barely makes contact with the stator when the mill is empty.

View attachment 829419

Exactly what I was going to say. This is what I had to do. **HOWEVER**, I had to file some of the cast metal on the cap-with-cotter-pin to make the rotating plate parallel to the stationary plate. I used a bolt instead of the cotter pin, and I 5 min epoxied it once I had it parallel. It's been going great for over 200 batches (5 gal batch size).

[best descr was in that thread, this message My Ugly Junk- Corona Mill Station...]
 
Correct re: rotor/stator. Terms used very often in regards to generators, etc.

Not knowing what you have in front of you, here's a marked up pic of mine. The gist is that you have to stabilize the position of the rotor in relation to the stator.

1) Add washers so the whole apparatus that holds the rotor has something to tighten onto other than grain running through the mill. Otherwise, it's just free floating.

2) Adjust and/or replace the cotter pin so the rotor is stable on the shaft and parallel to the stator. I was able to tap the malleable pin into a good position that worked, brewers that I was following were replacing the pin with a bolt.

3) Adjust the length of the shaft so the rotor barely, barely makes contact with the stator when the mill is empty.

View attachment 829419
Thank you very very much, now I finally understand the purpose of the washers. Mine looks a bit different, but it should be possible to tweak it the same way. I'll provide a picture later on.

Cheers!
 
I actually have some washers on it, I just happened to have three on one side and two on the other, that probably didn't help stabilizing it :D.

I'll remove the additional one and see were I can get this way.

IMG_20230917_161657.jpg
 
I actually have some washers on it, I just happened to have three on one side and two on the other, that probably didn't help stabilizing it :D.

I'll remove the additional one and see were I can get this way.

View attachment 829426
I put teflon tape in the correct turning wind direction, on the back part of the shaft that is near the handle. This further stabilized the front grind. I no longer get any uncrushed grain. This because I motorize.
 
Back
Top