I'd really like to do this... what is the deal with the fermentation chambers though? How much $$ would you need to put into a chamber and how would I go about constructing one? Cheapest options that I could double with this nifty little gadget? Good work!
You are using an out of date browser. It may not display this or other websites correctly.
You should upgrade or use an alternative browser.
You should upgrade or use an alternative browser.
ebay aquarium temp controller build
- Thread starter android
- Start date

Help Support Homebrew Talk:
This site may earn a commission from merchant affiliate
links, including eBay, Amazon, and others.
shortyjacobs
Well-Known Member
I'd really like to do this... what is the deal with the fermentation chambers though? How much $$ would you need to put into a chamber and how would I go about constructing one? Cheapest options that I could double with this nifty little gadget? Good work!
I built mine with an old small dorm fridge, (free from craigslist if you watch), a couple computer fans (lying around) to blow the air into the chamber, an old laptop power supply, (free), 2" styrofoam, ($10), and a lot of tape, and the controller. So $40 all up.
It works great, but it's very leaky. I'm going to improve it by getting some 1/2" OSB to make a real box to mount the styrofoam in, (instead of just taping the styrofoam together), some spray insulation foam, and some weatherstripping gasket. Also, a dolly to slide the carboys in and out with. All told, i'll escape for well under $100 total, (including the $40 I've already spent).
Money well spent in my opinion.
For even cheaper, (although not as much storage), get a full sized fridge off craigslist for $25-50. Hook it up to this thing, and the fridge alone will hold 2-3 carboys, (my box holds 6). No extra money required.
Here's mine:

Basically extended a dorm fridge I had "laying around". I used 1/2 OSB, 1 1/2 rigid insulation, and lined it with a water proof wall panel. Materials for that cost about $80. It sits in my basement so I'm not worried about over taxing the compressor. It will probably never see more than a 15*-20* differential anyways.


Still need to hook up a fan and a heater (just in case).
Thanks for this thread :rockin:
Basically extended a dorm fridge I had "laying around". I used 1/2 OSB, 1 1/2 rigid insulation, and lined it with a water proof wall panel. Materials for that cost about $80. It sits in my basement so I'm not worried about over taxing the compressor. It will probably never see more than a 15*-20* differential anyways.
Still need to hook up a fan and a heater (just in case).
Thanks for this thread :rockin:
Brewing Clamper
Well-Known Member
Out of curiosity, has anyone tried to modify the sensor to work with a thermowell or to waterproof it to go directly into the wort? I'm assuming the probe is a thermistor, anyone know what kind?
seanoj
Well-Known Member
I believe the probe is waterproof. I am planning on putting it in a container of antifreeze (White Labs test tube) so it will measure liquid temperature (less variability). It will not, however, measure the exact temperature of your beer as the yeast activity should keep the temperature a bit higher.
I am guessing something like these would work (with some good thermal compound): http://www.brewershardware.com/Thermowells/
I am guessing something like these would work (with some good thermal compound): http://www.brewershardware.com/Thermowells/
shortyjacobs
Well-Known Member
The probe looks sealed. I'm not sure about "waterproof"....might be good to embed it in a plug of silicone or something...
I found it easier to just dangle it inside my ferm chamber. I set the temp differential at a rather big 0.5C, so the temp can swing a bit before the fridge kicks on. That, plus a 10 min compressor delay seems to work nicely.
I found it easier to just dangle it inside my ferm chamber. I set the temp differential at a rather big 0.5C, so the temp can swing a bit before the fridge kicks on. That, plus a 10 min compressor delay seems to work nicely.


$44.99
$49.95
Craft A Brew - Mead Making Kit – Reusable Make Your Own Mead Kit – Yields 1 Gallon of Mead
Craft a Brew


![Craft A Brew - Safale BE-256 Yeast - Fermentis - Belgian Ale Dry Yeast - For Belgian & Strong Ales - Ingredients for Home Brewing - Beer Making Supplies - [3 Pack]](https://m.media-amazon.com/images/I/51bcKEwQmWL._SL500_.jpg)


$719.00
$799.00
EdgeStar KC2000TWIN Full Size Dual Tap Kegerator & Draft Beer Dispenser - Black
Amazon.com

$22.00 ($623.23 / Ounce)
AMZLMPKNTW Ball Lock Sample Faucet 30cm Reinforced Silicone Hose Secondary Fermentation Homebrew Kegging joyful
无为中南商贸有限公司


$33.99 ($17.00 / Count)
$41.99 ($21.00 / Count)
2 Pack 1 Gallon Large Fermentation Jars with 3 Airlocks and 2 SCREW Lids(100% Airtight Heavy Duty Lid w Silicone) - Wide Mouth Glass Jars w Scale Mark - Pickle Jars for Sauerkraut, Sourdough Starter
Qianfenie Direct


$58.16
HUIZHUGS Brewing Equipment Keg Ball Lock Faucet 30cm Reinforced Silicone Hose Secondary Fermentation Homebrew Kegging Brewing Equipment
xiangshuizhenzhanglingfengshop

$159.99 ($26.66 / Count)
3M High Flow Series System BREW120-MS, 5616001, For Brewed Coffee and Hot Tea, Valve-in-Head Design
SpaceCityProviders


$20.94
$29.99
The Brew Your Own Big Book of Clone Recipes: Featuring 300 Homebrew Recipes from Your Favorite Breweries
Amazon.com


$53.24
1pc Hose Barb/MFL 1.5" Tri Clamp to Ball Lock Post Liquid Gas Homebrew Kegging Fermentation Parts Brewer Hardware SUS304(Liquid Hose Barb)
yunchengshiyanhuqucuichendianzishangwuyouxiangongsi


$7.79 ($7.79 / Count)
Craft A Brew - LalBrew Voss™ - Kveik Ale Yeast - For Craft Lagers - Ingredients for Home Brewing - Beer Making Supplies - (1 Pack)
Craft a Brew

$10.99 ($31.16 / Ounce)
Hornindal Kveik Yeast for Homebrewing - Mead, Cider, Wine, Beer - 10g Packet - Saccharomyces Cerevisiae - Sold by Shadowhive.com
Shadowhive

$53.24
1pc Hose Barb/MFL 1.5" Tri Clamp to Ball Lock Post Liquid Gas Homebrew Kegging Fermentation Parts Brewer Hardware SUS304(Gas MFL)
Guangshui Weilu You Trading Co., Ltd


$176.97
1pc Commercial Keg Manifold 2" Tri Clamp,Ball Lock Tapping Head,Pressure Gauge/Adjustable PRV for Kegging,Fermentation Control
hanhanbaihuoxiaoshoudian


$479.00
$559.00
EdgeStar KC1000SS Craft Brew Kegerator for 1/6 Barrel and Cornelius Kegs
Amazon.com


$76.92 ($2,179.04 / Ounce)
Brewing accessories 1.5" Tri Clamp to Ball Lock Post Liquid Gas Homebrew Kegging Fermentation Parts Brewer Hardware SUS304 Brewing accessories(Gas Hose Barb)
chuhanhandianzishangwu


Jhenjum
Well-Known Member
The jack I'm attempting to harvest is attached to a small circuit board. Did you use the whole thing or just the jack?
Built mine this weekend.
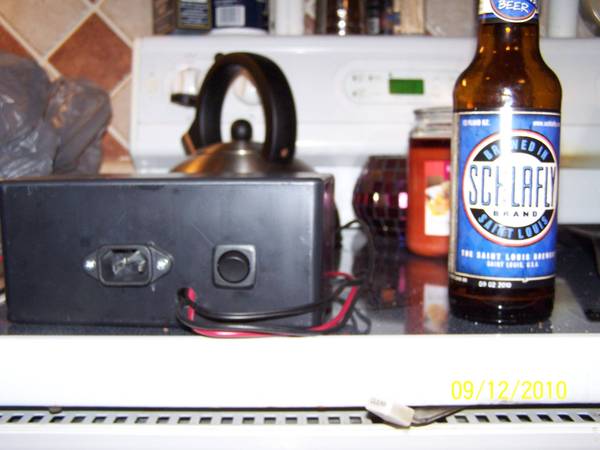

I used a jack from a computer power supply for the power. I tried using the relay but something went wrong and I smoked the relay. So i just wired the fan to come on when either heat or cool was called for.
elproducto
Well-Known Member
The only project box I can find in Canada looks to be too small. Can anyone confirm?
http://www.thesource.ca/estore/prod...Online&category=Project_Boxes&product=2701803
Also, noob question but why are people wiring fans into this?
http://www.thesource.ca/estore/prod...Online&category=Project_Boxes&product=2701803
Also, noob question but why are people wiring fans into this?
Trouble_Brewing
Well-Known Member
Out of curiosity, has anyone tried to modify the sensor to work with a thermowell or to waterproof it to go directly into the wort? I'm assuming the probe is a thermistor, anyone know what kind?
It's an aquarium temperature controller, so I'd guess it's water proof. I just tape mine to the side of my carboys with a bit of bubble wrap for insulation. Seems to work very well for me.
Brewing Clamper
Well-Known Member
It's an aquarium temperature controller, so I'd guess it's water proof...
LOL! I totally forgot these were made for aquariums! Now the question is, is it food safe?

OP
OP
android
Well-Known Member
there is some discussion elsewhere in this thread about using it submerged. i think someone tried it successfully, but the overall consensus is that perhaps since it's made in china, it might not last as long as it would otherwise if always submerged.
chrispykid
Well-Known Member
there is some discussion elsewhere in this thread about using it submerged. i think someone tried it successfully, but the overall consensus is that perhaps since it's made in china, it might not last as long as it would otherwise if always submerged.
I've got mine submerged in a water fermentation chamber with no problems so far, but it's only been a few months so I can't really speak to how long it will last yet (I'll take my chances though).
shortyjacobs
Well-Known Member
It's an aquarium temperature controller, so I'd guess it's water proof. I just tape mine to the side of my carboys with a bit of bubble wrap for insulation. Seems to work very well for me.
LMAO
Totally forgot about that. 
Bjornbrewer
Well-Known Member
- Joined
- Jul 31, 2008
- Messages
- 417
- Reaction score
- 3
Also, noob question but why are people wiring fans into this?
I guess the obvious answer would be: to circulate air.
For some of these builds, people are making a fridge cool a much larger area than what it's was designed, so the best way keep everything the same temp is to move the air. Same thing goes with heating. Just a simple way to prevent cool/warm spots and keep everything homogeneous.
elproducto
Well-Known Member
I guess the obvious answer would be: to circulate air.
For some of these builds, people are making a fridge cool a much larger area than what it's was designed, so the best way keep everything the same temp is to move the air. Same thing goes with heating. Just a simple way to prevent cool/warm spots and keep everything homogeneous.
Thanks.. just wasn't sure if it was a safety feature or something.
Out of curiosity, has anyone tried to modify the sensor to work with a thermowell or to waterproof it to go directly into the wort? I'm assuming the probe is a thermistor, anyone know what kind?
I wouldn't put it directly into the wort. I plan to put mine in a sealed jar of water by drilling a hole through the lid, inserting the probe, and sealing it up. I'm going to coat the probe with Plasti Dip just to be sure that it stays waterproof. http://www.plastidip.com/home_solutions/Plasti_Dip
elproducto
Well-Known Member
Alright my unit showed up quite quickly actually, considering it came from Hong Kong.
My problem is I don't have access to any project boxes. i went to my local Radio Shack and they only had 2 sizes which look way too small.
I'm in Canada so I don't have access to the same stuff you Yanks do. Any suggestions on how to enclose this thing??
My problem is I don't have access to any project boxes. i went to my local Radio Shack and they only had 2 sizes which look way too small.
I'm in Canada so I don't have access to the same stuff you Yanks do. Any suggestions on how to enclose this thing??
Brewing Clamper
Well-Known Member
Alright my unit showed up quite quickly actually, considering it came from Hong Kong.
My problem is I don't have access to any project boxes. i went to my local Radio Shack and they only had 2 sizes which look way too small.
I'm in Canada so I don't have access to the same stuff you Yanks do. Any suggestions on how to enclose this thing??
How about a junction box from your local hardware store. I imagine you Canooks still have to run your electrical wires into junction boxes, right?

sharpstick
Well-Known Member
- Joined
- Oct 23, 2007
- Messages
- 177
- Reaction score
- 9
I'm in Canada so I don't have access to the same stuff you Yanks do. Any suggestions on how to enclose this thing??
any container would work. all it has to do is keep the components fairly rigidly installed and prevent you from sticking your fingers in the hot wires. a wide mouth plastic gallon pickle jar would work.
i used a wooden cigar box. i wish i had used a bigger one, though, my cord was 12 ga and hard to loop around inside the box.
elproducto
Well-Known Member
OK thanks. I'm no electrician, so I'll head over to Home Depot and see what they've got.
seanoj
Well-Known Member
I have seen people mount these in tupperware. I would go with the J-Box as suggested above. You should be able to get your local Radio Shack to order one for you (delivered free to the store). Assuming you have a local Radio Shack.
The box I used was a bit of a tight fit. I could not mount the little wire protector to the back of the unit as it would not fit. I used one of the big junction boxes for outdoor applications to mount my switches for my pumps. You can see it on my blog.
The box I used was a bit of a tight fit. I could not mount the little wire protector to the back of the unit as it would not fit. I used one of the big junction boxes for outdoor applications to mount my switches for my pumps. You can see it on my blog.
I have seen people mount these in tupperware. blog.
Holy Batman! People reading these forum builds need to realize that just getting a controller does NOT get you something that is UL approved. What that means is that safety is up to the builder!
This is like wiring up electrical boxes in your house. The building codes used in wiring electrical boxes, which includes the types of wires, the boxes, and how the wires are connected, are there to prevent fires. The wiring methods and ground connections are designed to prevent shorts, and the box is designed to contain the heat/spark if one does occur.
Product design has a similar set of requirements in order to get UL or CSA approval. I highly recommend that those who question their abilities or knowledge of wiring either buy a plug and play unit or get help in building one of these. It's tempting, I know, to save a buck but house currents and voltages have caused homes to burn down.
Rich
Bjornbrewer
Well-Known Member
- Joined
- Jul 31, 2008
- Messages
- 417
- Reaction score
- 3
Holy Batman! People reading these forum builds need to realize that just getting a controller does NOT get you something that is UL approved. What that means is that safety is up to the builder!
I agree with you, but safety is ALWAYS up to the builder. Having UL listed components doesn't mean you can screw up the wiring/build and still make a little instrument of death.
elproducto
Well-Known Member
This is the cheapest I can find here in Canuckistan.
http://www.homedepot.ca/webapp/wcs/...artial&Ntx=mode+matchall&N=0&Ntk=P_PartNumber
This project is getting more expensive by the minute. maybe should have just purchased a pre-made one.
http://www.homedepot.ca/webapp/wcs/...artial&Ntx=mode+matchall&N=0&Ntk=P_PartNumber
This project is getting more expensive by the minute. maybe should have just purchased a pre-made one.
sharpstick
Well-Known Member
- Joined
- Oct 23, 2007
- Messages
- 177
- Reaction score
- 9
Your local cigar store will sell you a nice box for under $5
I agree with you, but safety is ALWAYS up to the builder. Having UL listed components doesn't mean you can screw up the wiring/build and still make a little instrument of death.
If there is no cord, there is no UL approval. If there is a UL approval, then there is no build. Ergo, as you say, safety is up to the builder.
There are alot of people who know what they are doing, but those that are ignorant (lacking knowledge) could hurt themselves.
Maybe what we really need is a safety sticky in this section. Alot of flame, electrical and propane in play.....
Hermit
fuddle
UL charges to have things tested and there are several levels of UL 'approval'. Some pay for the least expensive because people only see "UL" and don't understand the difference in the levels. Even a major manufacturer I worked for didn't get the top listing for their appliances.
Bjornbrewer
Well-Known Member
- Joined
- Jul 31, 2008
- Messages
- 417
- Reaction score
- 3
haha....I know ALL about UL and all that jazz...man those guys are blood sucking thieves. (personal opinion of course).
.....ETL is worse though.
.....ETL is worse though.
I have mine and after a failed attempt at mounting in the super cheap tool box and procrastination, I now have a march pump to mount as well. I thought I may as well mount them all up in the same "box" I chose the Stanley mobile tool chest for $20.00 from Lowes. When the build is completed, I will post up some pics.
There are lots of little project boxes, like this one:
http://www.mcmelectronics.com/product/28-8678
from manufacturers like Hammond, Bud Industries, etc. that are flame rated to handle heating from a short. You can get them from MCMElectronics, Amazon, PartsExpress, or a local electronics distributor or even ebay. I'm doing something like this, with in/out cord out the back, and display out the front.
seanoj
Well-Known Member
Holy Batman! People reading these forum builds need to realize that just getting a controller does NOT get you something that is UL approved. What that means is that safety is up to the builder!
This is like wiring up electrical boxes in your house. The building codes used in wiring electrical boxes, which includes the types of wires, the boxes, and how the wires are connected, are there to prevent fires. The wiring methods and ground connections are designed to prevent shorts, and the box is designed to contain the heat/spark if one does occur.
Product design has a similar set of requirements in order to get UL or CSA approval. I highly recommend that those who question their abilities or knowledge of wiring either buy a plug and play unit or get help in building one of these. It's tempting, I know, to save a buck but house currents and voltages have caused homes to burn down.
Rich
Amen to that. I am not advocating Tupperware enclosures. In fact, I have done belt and suspenders safety on my stuff (fuses, GFCI, waterproof enclosures, outdoor rated switches, etc.) and still work with a lot of caution.
Just do what you think is right, and if you don't know, ask someone who does. Advice found here, and elsewhere on the internet, is often very valuable, but sometimes misguided and/or dangerous.
Here is mine thanks to the great info in this thread. I am running two controllers, one for the cold side that my kegs are in and the other is for the warmer side for fermenting lagers etc... It's fairly simplistic in that it's two controllers, two outlets, and a big project box from Radio Hack. Here are some pics....


sharpstick
Well-Known Member
- Joined
- Oct 23, 2007
- Messages
- 177
- Reaction score
- 9
my controller died last week while i was on vacation, i don't know how many days it was down. the mead and cider is prolly all right, but the cheese, yeast and milk in the freezer is probably compost.
everything looks okay, display is on, but no power out to the plug.
i'll troubleshoot it tomorrow.
everything looks okay, display is on, but no power out to the plug.
i'll troubleshoot it tomorrow.
Bjornbrewer
Well-Known Member
- Joined
- Jul 31, 2008
- Messages
- 417
- Reaction score
- 3
Here is mine thanks to the great info in this thread. I am running two controllers, one for the cold side that my kegs are in and the other is for the warmer side for fermenting lagers etc... It's fairly simplistic in that it's two controllers, two outlets, and a big project box from Radio Hack. Here are some pics....
It looks really good!
just FYI, you have your receptacles wired incorrectly. The wire is not supposed to go around the screw, but rather go in the hole and then tighten the screw.
It looks really good!
just FYI, you have your receptacles wired incorrectly. The wire is not supposed to go around the screw, but rather go in the hole and then tighten the screw.
That's not true; you can either push it in the hole (screw need not be tightened) or wrap around terminal like he did. I've done both when I have multiple wires coming into one recepticle. He's fine.
Note: Some recepticles do have a plate that squeezes the wire when the screw is tightened, but most just push in the hole and stay.
sharpstick
Well-Known Member
- Joined
- Oct 23, 2007
- Messages
- 177
- Reaction score
- 9
Note: Some recepticles do have a plate that squeezes the wire when the screw is tightened, but most just push in the hole and stay.
some do have the option of sticking the wire in (lazy electrician option), but i think that particular design does require that the screw be tightened.
Hermit
fuddle
The holes are only good for solid(non-stranded) wire.
Bjornbrewer
Well-Known Member
- Joined
- Jul 31, 2008
- Messages
- 417
- Reaction score
- 3
wrapping stranded wire around a screw and tightening it does not make a good secure contact.
wyzazz
Well-Known Member
wrapping stranded wire around a screw and tightening it does not make a good secure contact.
If you can pull on the wire & it doesn't move than I'd say it's just fine. It is in a sealed box after all, as long as there is some strain relief provided for the cords everything will be just peachy.

Keep in mind, this isn't a UL Listed appliance. We're just a bunch of folks making beer with inventive, DIY equipment in our garages.
Similar threads
- Replies
- 14
- Views
- 3K
