Since this thread helped immensely, and since I do brew on the side and love HBT, I thought I'd add my project to this thread, even though it isn't brew related. Others might find it useful for making a fermentation chamber.
My wife is a public school teacher in California and has gone through the training in order to participate in the "Salmonids in the Classroom" program put on by the California Department of Fish and Wildlife. This program provides salmon or trout eggs to be raised in the classroom then released in a local river. It is a good experience for the kids: very memorable and instills a sense of stewardship of their natural environment.
https://www.wildlife.ca.gov/CAEP/R4
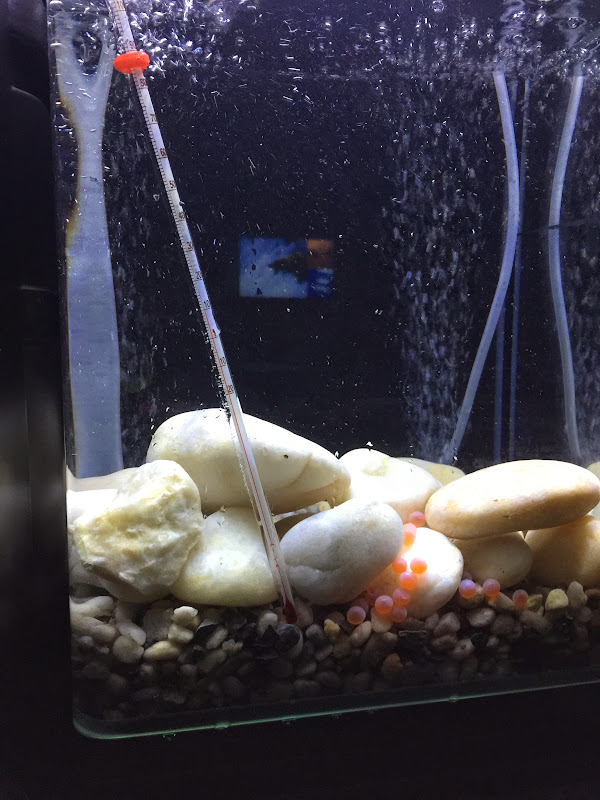
In order to not kill them as eggs or babies, they need to be in highly oxygenated water kept at a constant temperature around 10°C/50°F. It is very important that temperature fluctuation remain extremely minimal.
So I need a precise temperature regulation of a small refrigerator based on the temp of the tank's water, not on the airspace: which brings me to this thread.
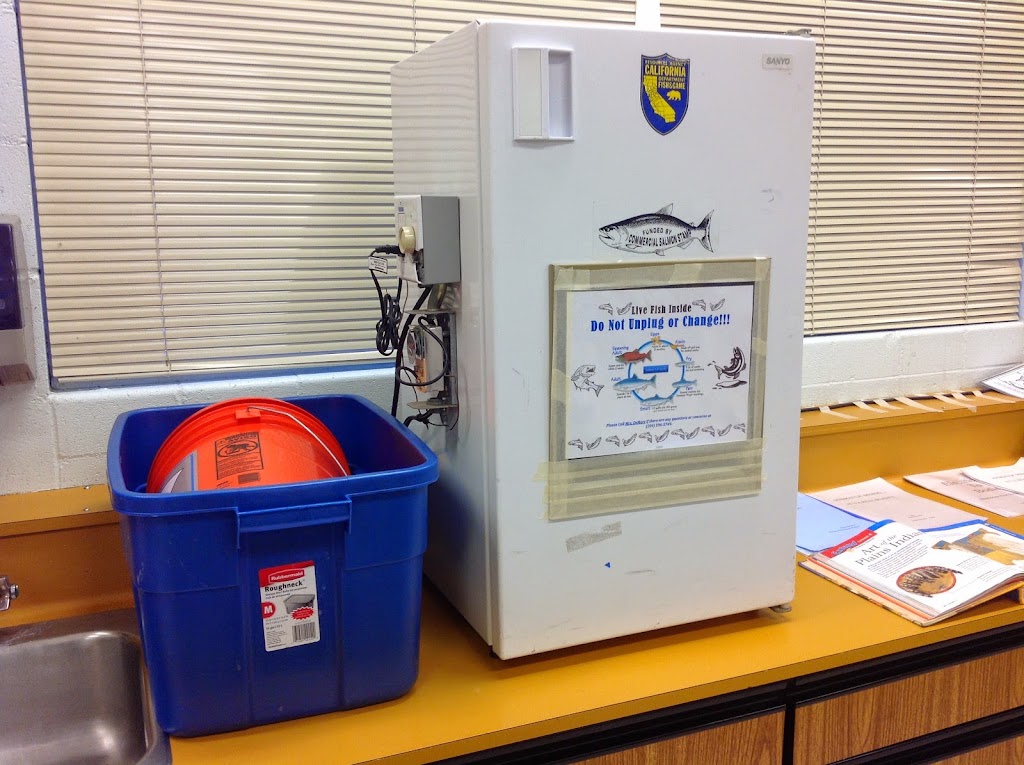
Last year CDFW provided my wife with a loaner fridge:
Things wrong with this fridge:
* analog thermostat with the copper bulb in the tank couldn't hold a consistent temp: my wife had to constantly fiddle with it.
* the setup on the side with the power and thermostat was badly constructed: my wife got shocked several times while fiddling with the temp. Electricity + water + shocking + kids = not good.
* the compressor hump in the back made fitting a tank hard: we had to balance it on a lap whiteboard on a large coffee can.
* they cut a hole in the door for a window so you could see the fish when they stop being light sensitive, but it is a small piece of plexiglass, so hard for lots of kids to see at once.
* between the plexiglass window and holes in the side for electrical cords to pass, it leaked heat like a sieve, probably adding to the temp control problem.
* the freezer portion would shed ice onto the tank which sucks for temp regulation and keeping contamination out.
* it is hella ugly
This year I decided to do better.
The most important thing is to get the right fridge from the start. Sure you could get a dorm fridge for $0-$50 on craigslist, but you'd have many of the problems that came with the old setup: crappy window, heat leakage, ugliness...
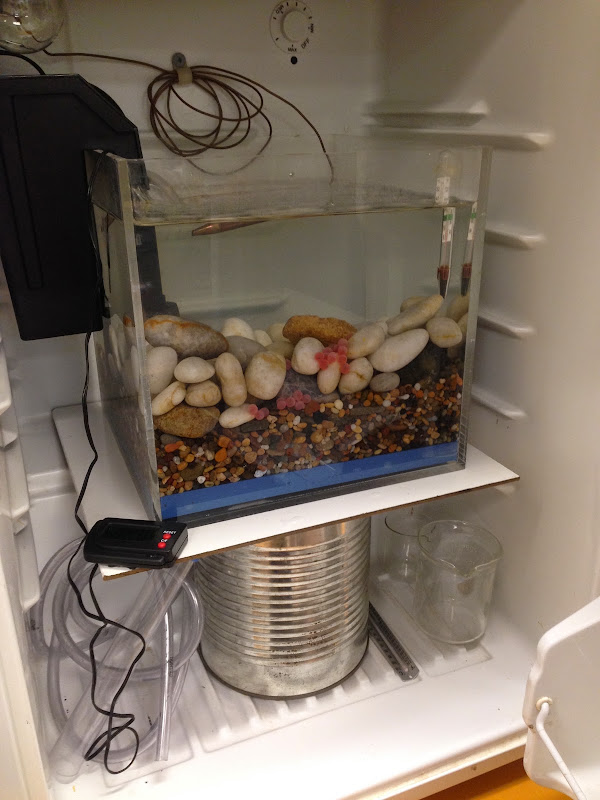
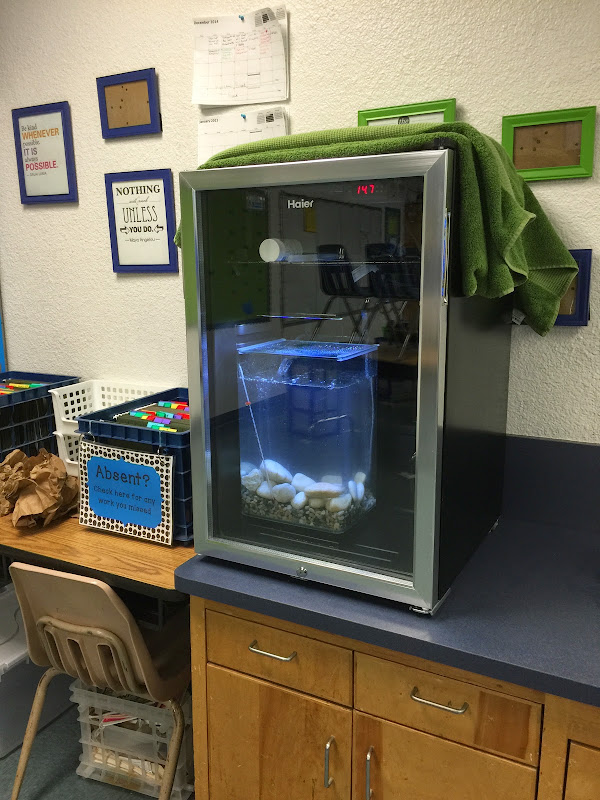
The solution is a beverage fridge with a glass door. I got a Haier 150-Can Beverage Entertainment Cooler because it was the cheapest glass door fridge I could buy with credit card points. Price ranges from $170 at Sam's Club to $300 at amazon. In addition to the glass door, this fridge has a big enough floor to fit a tank, black interior to look snazzy, and a lock to keep people from opening the door.
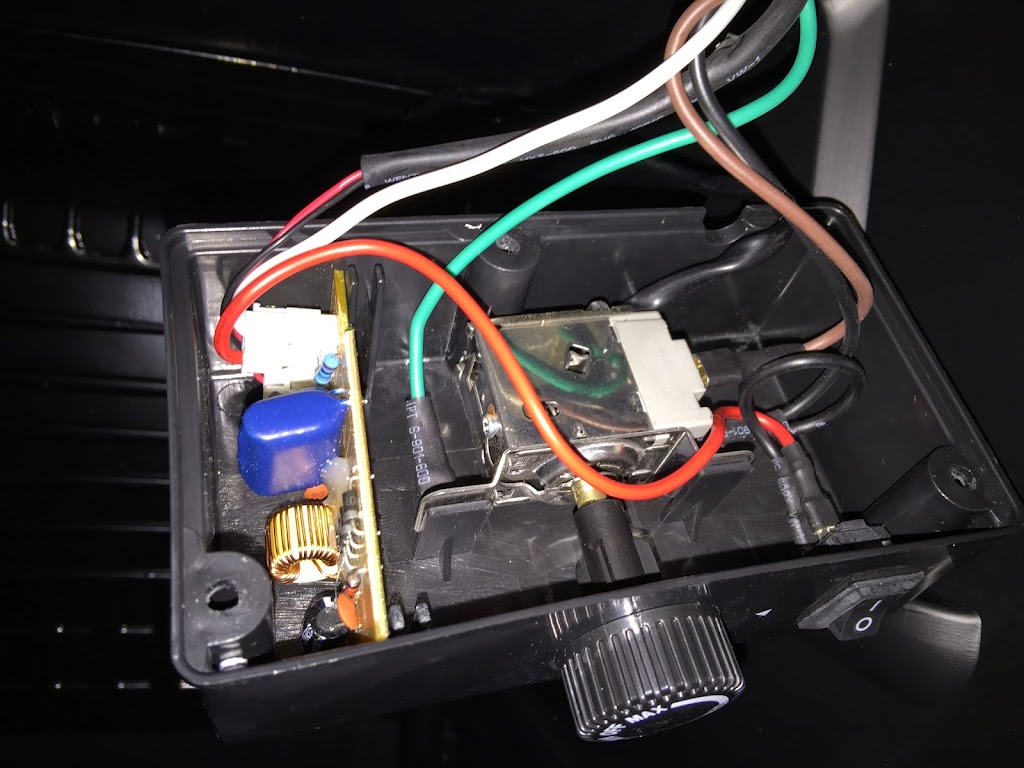
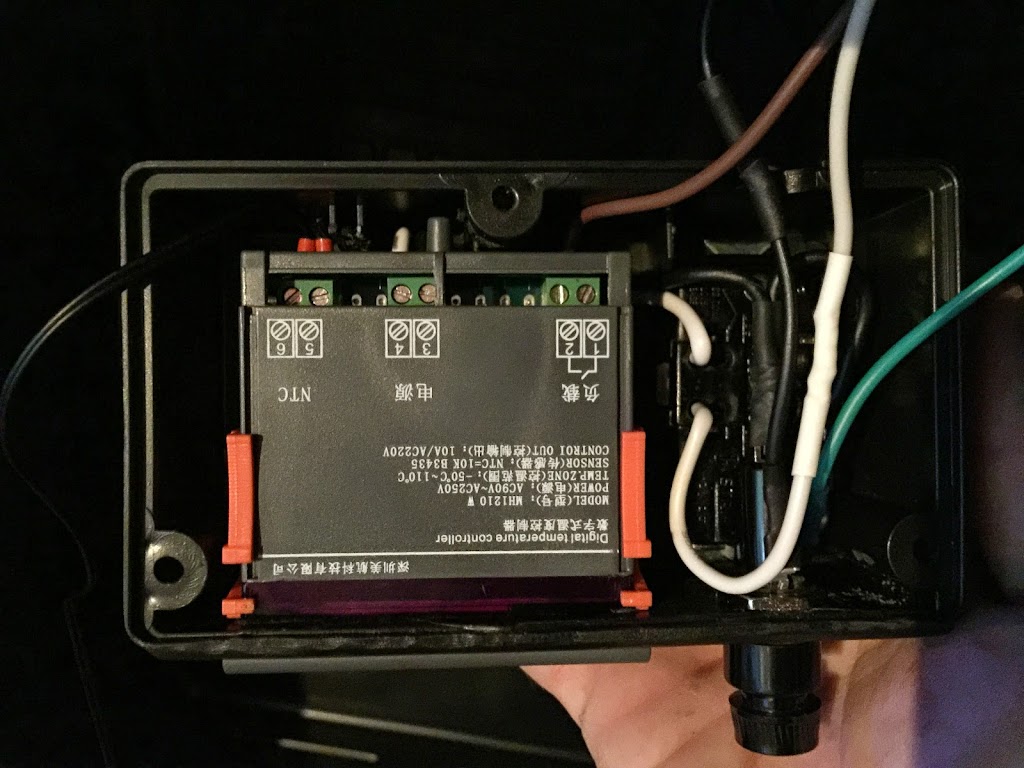
The best thing though is that the ebay temp controller this thread is dedicated to, and a power outlet, fit in the stock thermostat housing (with minor modification).
Housing with original thermostat (the switch and circuit board are for the interior blue LED light that I didn't use):
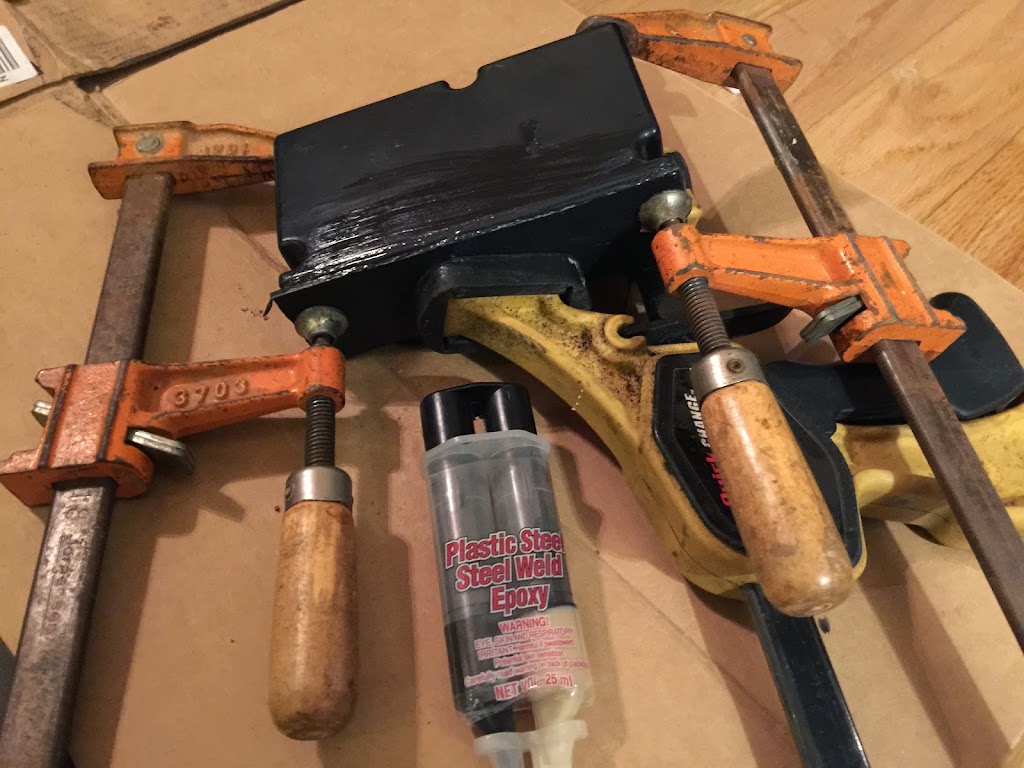
The ebay temp controller only fits if you add a faceplate to the box, which is just as well since you need to cover the holes for the switch and thermostat. I used a bit of kydex and some plastic steel epoxy mainly because that is what I had in my junkpile:
With a little dremel cleaning and hole cutting, I was able to fit the temp controller, an outlet to power the fishtank pumps and lights, and a fuse for extra safety. The outlet is from an old UPS and was designed for panel mounting, but a standard outlet with the mounting tabs cut off would work fine. A GFI plug may fit, but it would be even tighter. The fridge is plugged into a GFI plug in her classroom, so for our purposes, it is fine with a standard plug.
ETA: wiring is pretty simple. Green is ground and goes to the ground stud on the plug outlet. Black is the hot side AC input, it goes to the fuse then splits to the plug, controller input, and controller switched input. Brown is the return to the compressor as goes to the output side of the controller switch. White is AC return that is hooked up to the other side of the plug and controller AC input. It wouldn't be hard to make one or more of the plug outlets trigger on the heater switch of a two channel controller so that you could have control of both heat and cooling. For this project we only needed cooling so a single channel controller was fine.
The end result looks like it came that way from the factory. With the temp probe dropped into the back of the tank with the pump, it can keep the water within 0.1°C of the setpoint. With the plugs inside, no holes need to be cut in the fridge: all alterations to the fridge were limited to the control box. The end result looks nice:
The babies seem at home:


![Craft A Brew - Safale S-04 Dry Yeast - Fermentis - English Ale Dry Yeast - For English and American Ales and Hard Apple Ciders - Ingredients for Home Brewing - Beer Making Supplies - [1 Pack]](https://m.media-amazon.com/images/I/41fVGNh6JfL._SL500_.jpg)


