• Please visit and share your knowledge at our sister communities:
  • If you have not, please join our official Homebrewing Facebook Group!

    Homebrewing Facebook Group

Spike Solo Owner's Thread

Homebrew Talk

Help Support Homebrew Talk:

This site may earn a commission from merchant affiliate links, including eBay, Amazon, and others.
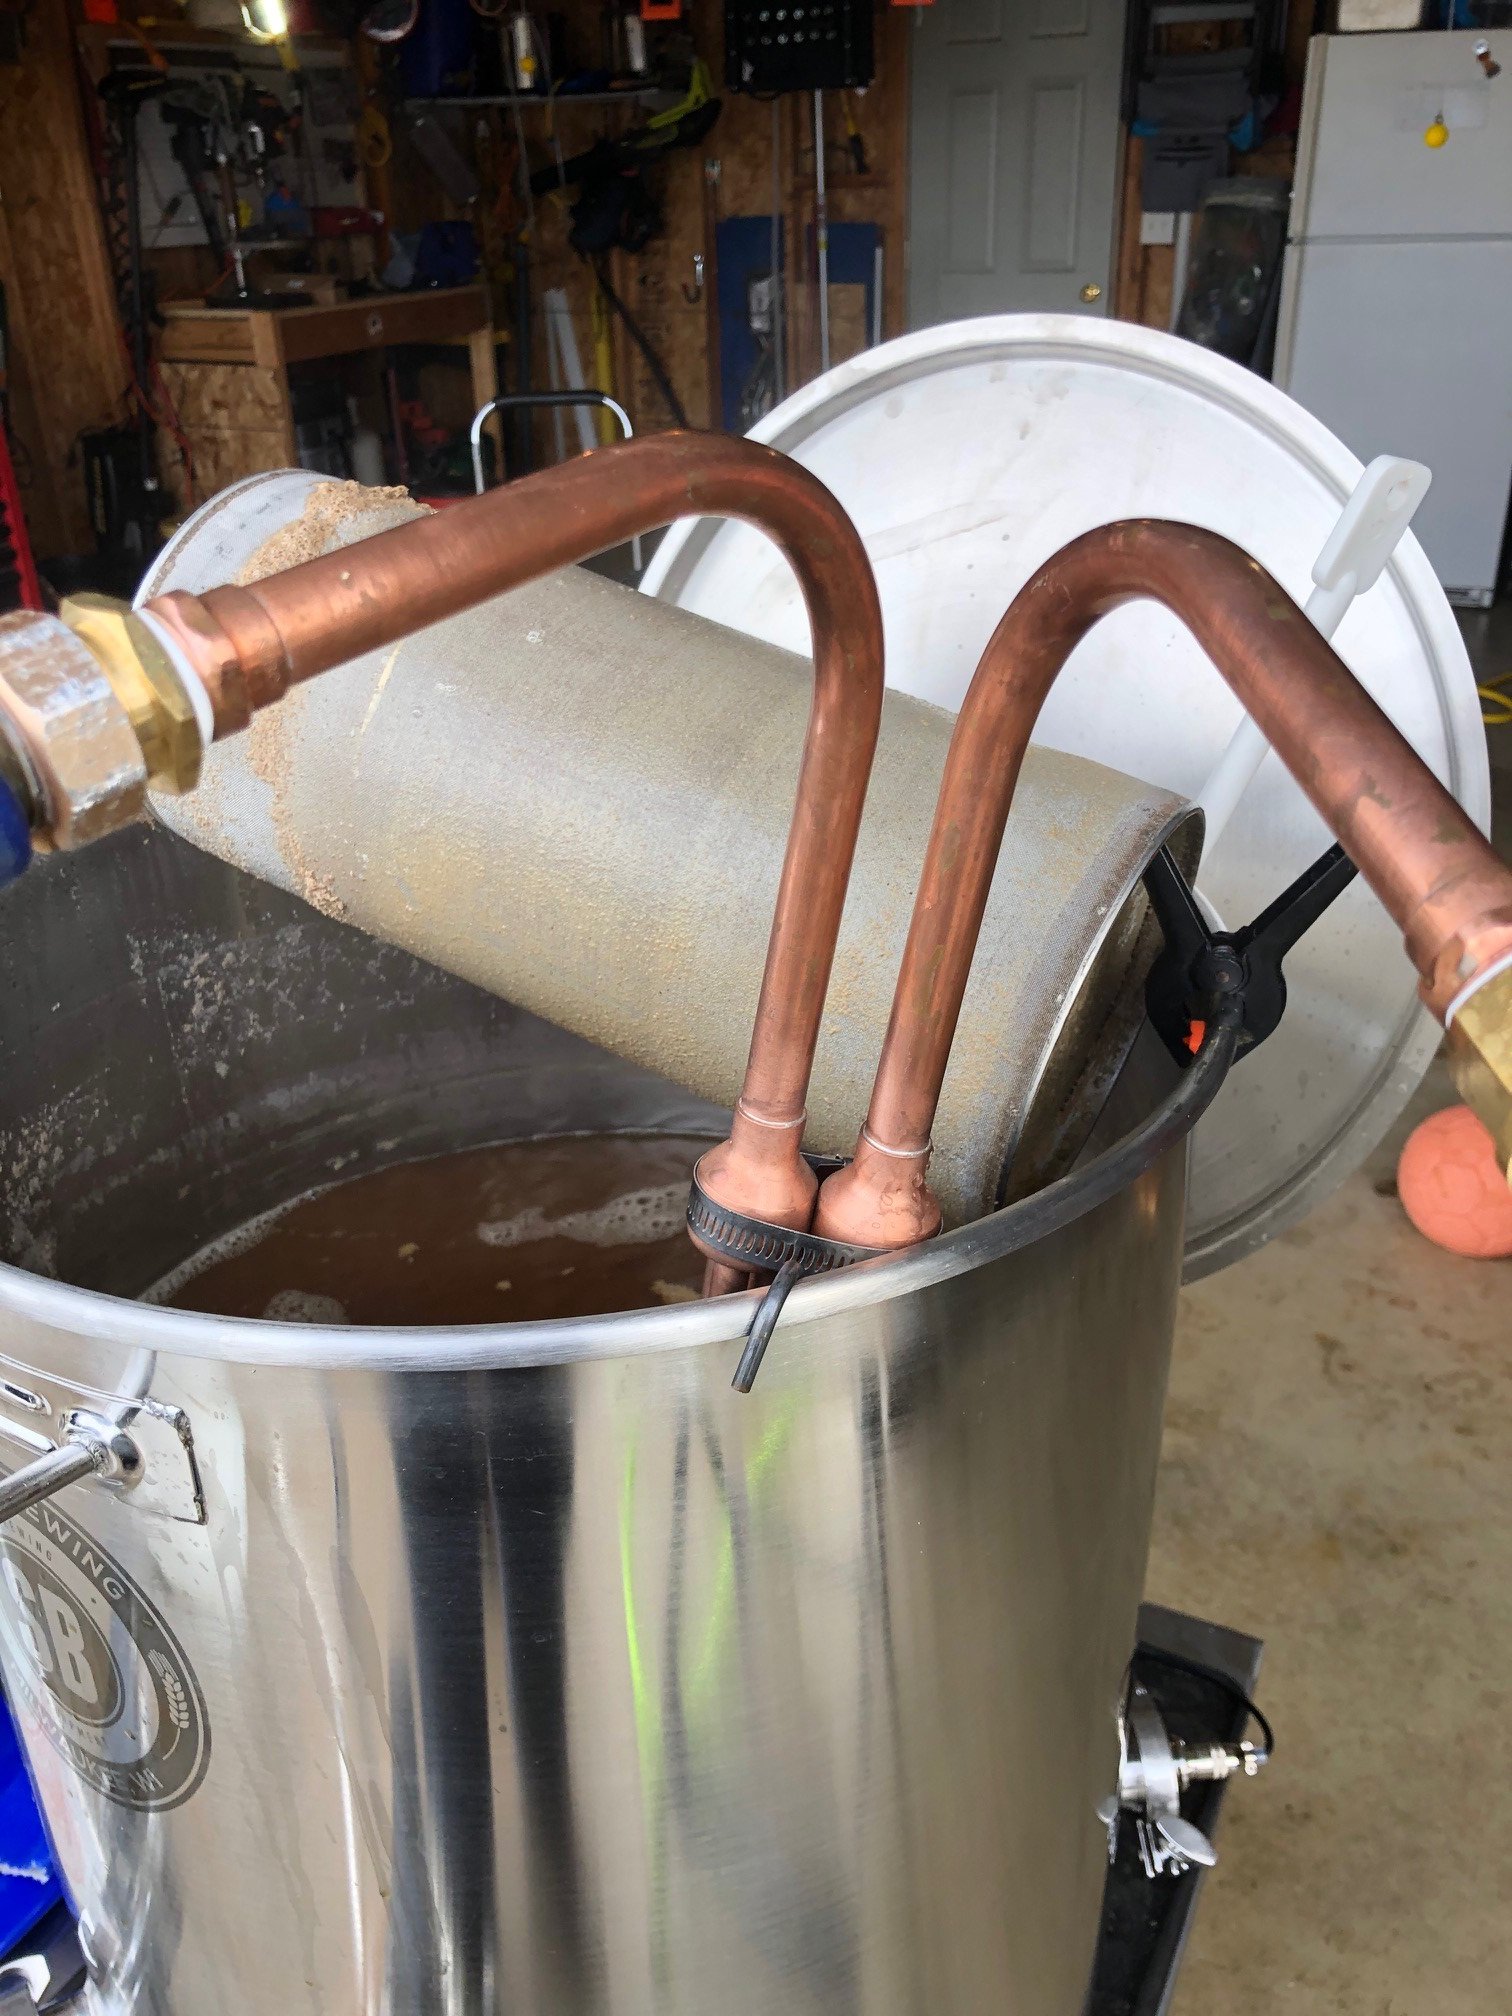
So after a lot of online research and re-reading the above posts, I believe I'm not the only one who's experienced slow draining from the grain basket and perhaps I shouldn't expect it to drain as fast as my previous system (brewzilla 35L). I believe it's called a "stuck mash" when I'm draining about 1/2 gallon of wort in 20-30 minutes.

I've submitted a question to Spike Brewing to see what they recommend but I'm following all the instructions on their website. I'm milling at 0.035", my recirculation is far less than 25%...it's barely a trickle. Spike says not to use rice hulls but I'm wondering if I should anyway. I'm also thinking about jumping up to 0.040" for my next batch. Also, has anyone else thought about using a bag inside the grain basket? If I used a bag, it would prevent any grains from falling into the kettle. Also, it would provide insurance if another stuck mash occurs. :)

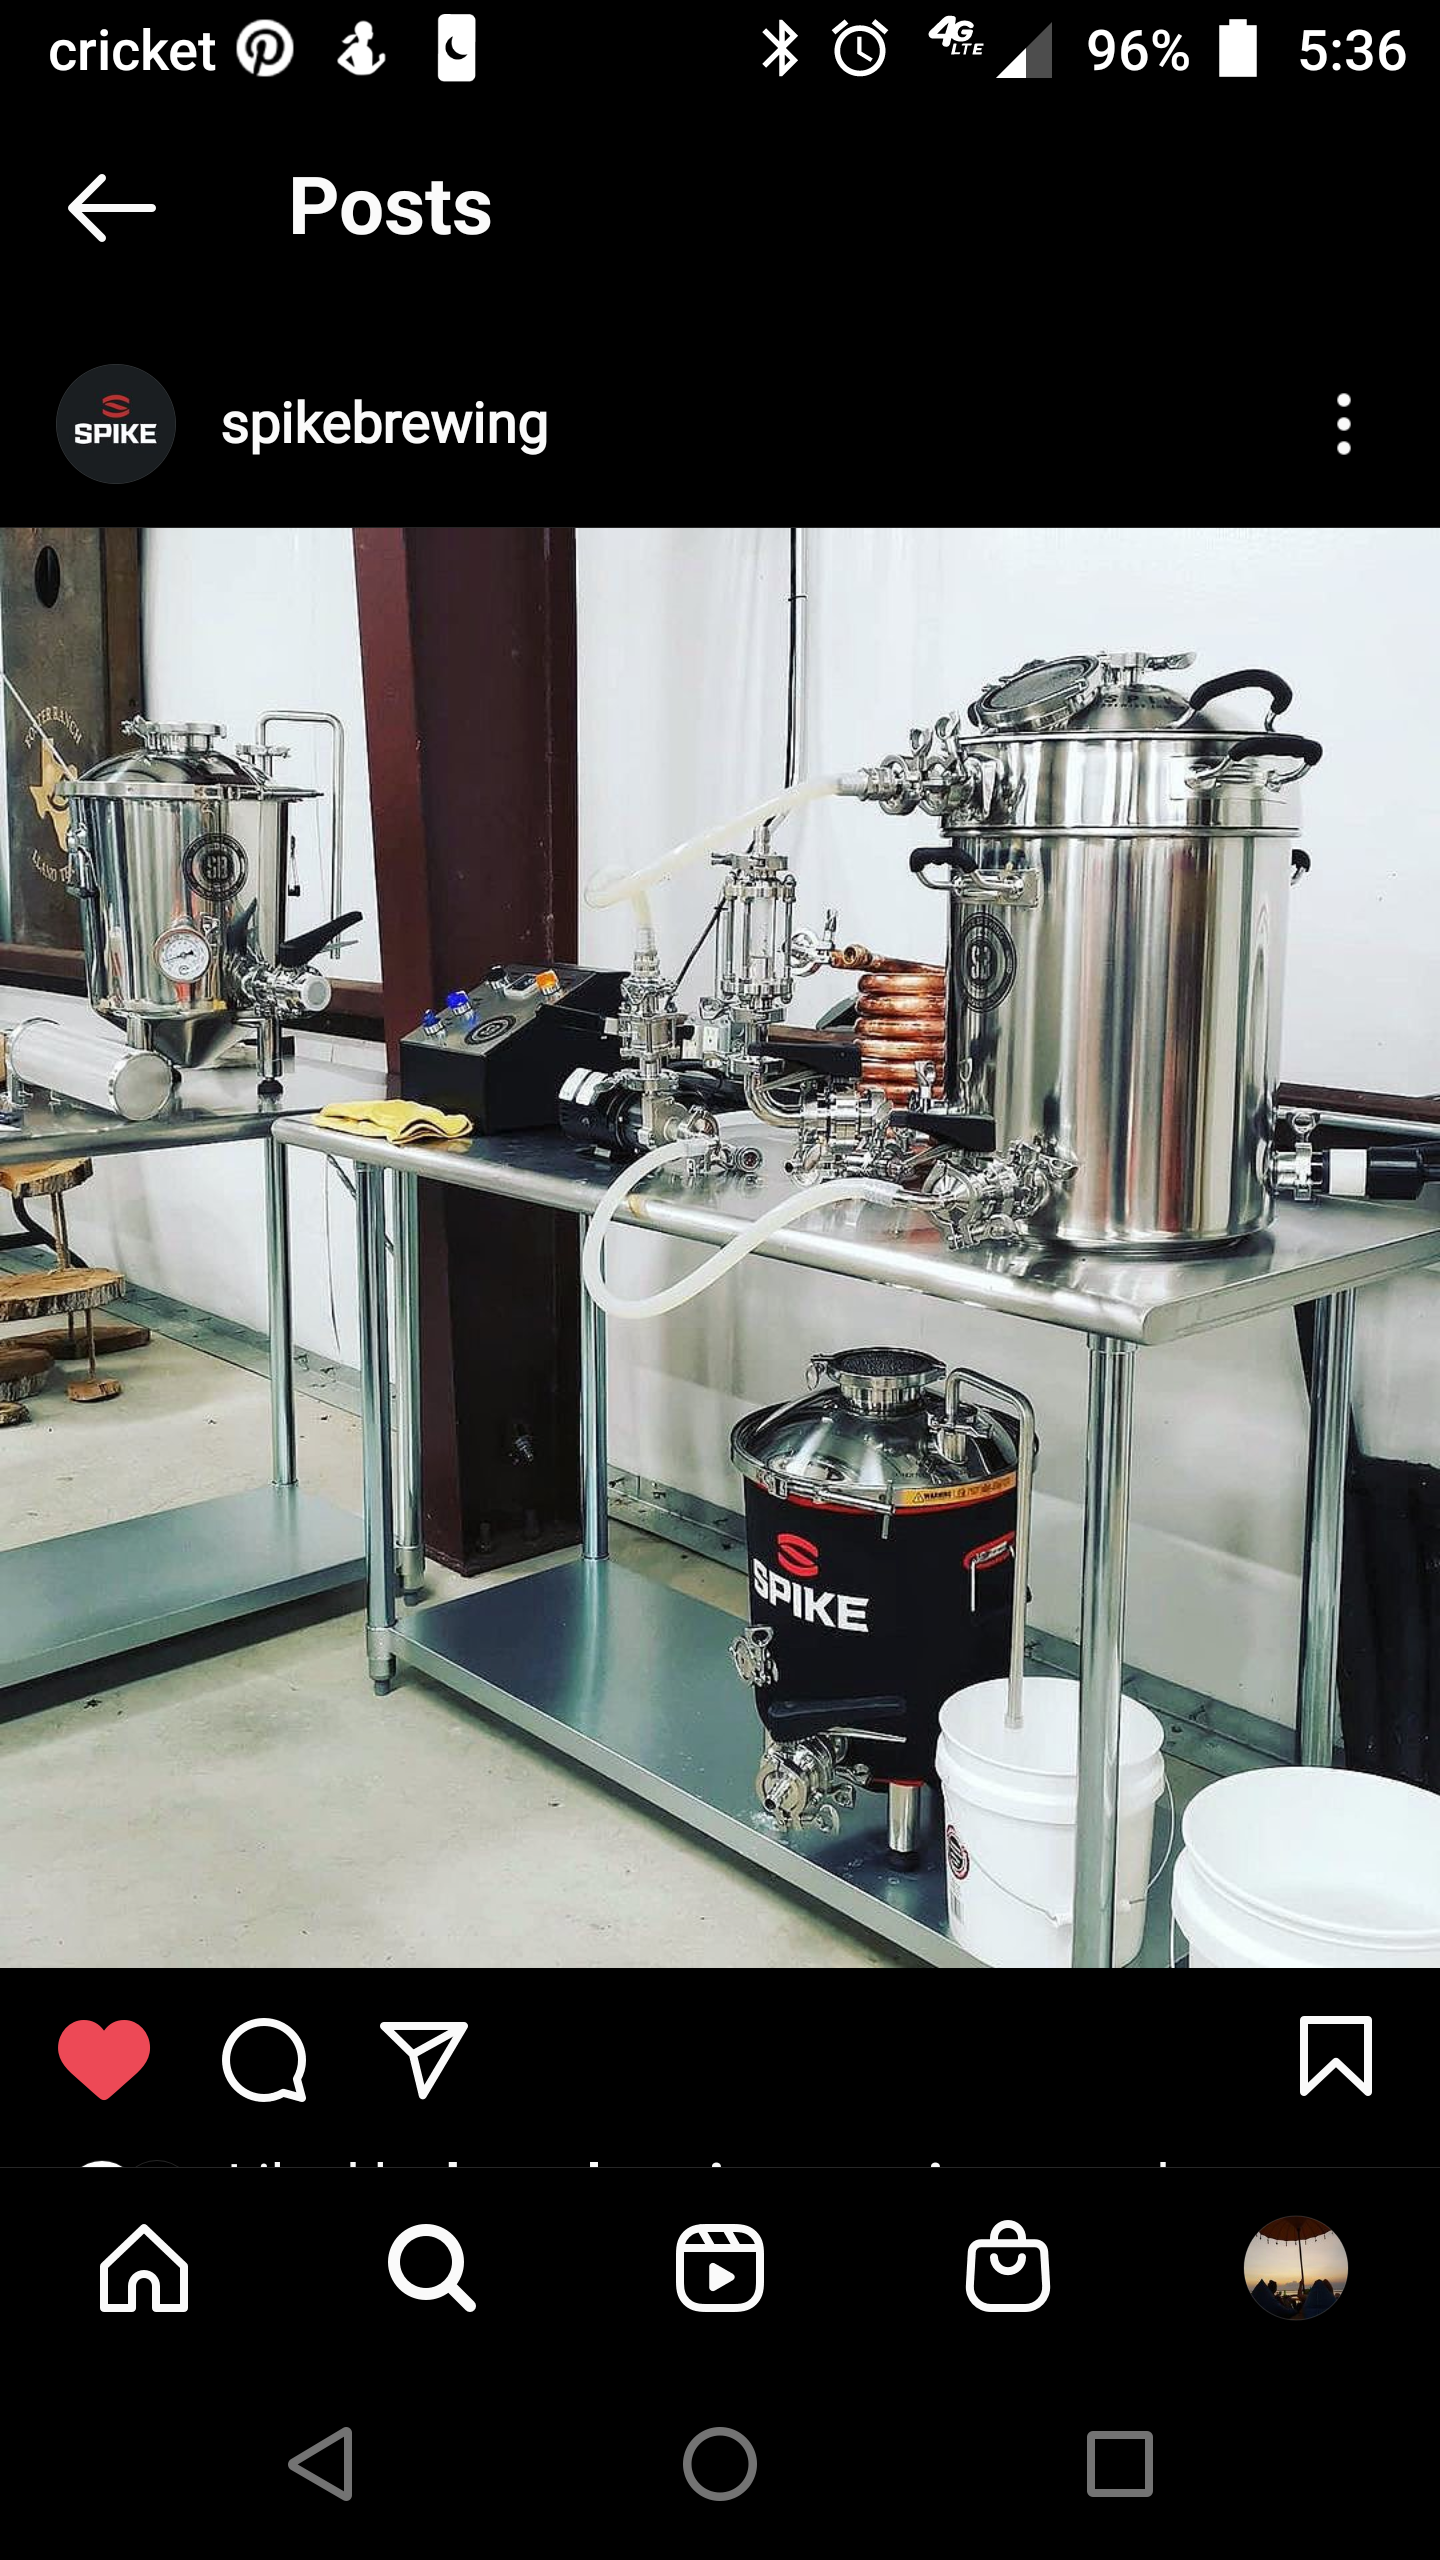
If anyone has any ideas I'd like to hear them. If you've had success with the Spike solo system (in terms of wort draining after lifting the basket) then I"d like to hear what your grain size was as well as the types of grain you used.
 
Last edited:
I ran my third batch yesterday with the Solo basket insert in a previous kettle, and I’ve had trouble with grains in the boil on every batch. Yesterday I milled at 0.037, and did recirc into the basket for about 15 minutes after raising it. I‘m actually thinking about using my grain bag on the outside of the basket for my next batch to catch stragglers. (I’m using a RIMS rocket for maintaining mash temp and not my kettle coil).
 
I had a similar thought about the bag so I ordered one of these. Amazon.com: LD Carlson 4718 Brew-in-A-Bag Straining Bag with Handles (24x26): Industrial & Scientific
Update: This did NOT fit the Spike Solo 20g. Too thin and a bit to short.


On my next batch, I'm going to try 0.040" grain crush and have the bag on standby in case of another stuck mash. If it doesn't drain well, I can always stir again while the basket is raised after put this bag under the grain basket to catch the grains from going into the kettle.
 
Last edited:
The bottom of the grain basket is 14.6" as an outside dimension so I'm guessing 14" ID. Even the large size would be a bit too small. Also, that's an extremely fine mesh screen so it might make stuck mashes even worse?

Overall not a bad idea if we could find a screen that's 14" in diameter with a mesh size of 50 or small.

I'm still waiting to hear back from Spike and I'll post any helpful information they provide here for others to read as well. On my next brew, I'm going to use the bag I posted above INSIDE the grain basket.
 
I think we’ve been having different issues. My grain bed compaction/drainage has been ok - only issues with grain pass-through. I’ve been recirculating at 1 gpm with a full volume mash with 9.5 gal of mash water / 11 lb of grain. Target preboil of around 7 gallons.
 
Don’t own any spike gear, but wanted to read about you guys experiences. I struggled with stuck mashes on my brew boss system regularly.

I’ve recently upgraded to a Ssbrewtech system. I always had a fairly fine mill gap setting but was scared of a stuck mash on this system.

I’ve been carrying 80% efficiency, which I know I could increase, but am happy with. I do use a full lb of rice hulls and mill at .045. Recirculating speed is greater than 50% on my riptide pump.

I stir the grains at mash in and let them set for 5 minutes undisturbed. I turn in the pump and very slowly increase speed over the next 10 minutes until I get to where I want it. It’s been working great.
 
Thanks jtvann. By 50% do you mean you are turning over your mash volume every two minutes, or is this just a variable speed setting for your pump?
 
Last edited:
I’d say it’s more of a visual estimation. I know what full bore speed looks like and I’m guessing that I’m about half that. I could take a flow volume measurement.

It’s for sure a much faster flow rate than I’ve ever used before. I really attribute that to the large mill gap. I was pretty nervous of horrible efficiency going at .045. With that much recirculation though it must make up for it.

To be clear, mine is a different system. I’m doing 3v fly sparge. I don’t know how that will translate to you guys system. Recirculating is recirculating though.
 
7 Batches into brewing with the Spike Solo 20 and I feel like I'm getting this down. Yesterday's brew day was 5 hours long start to finish and I have 11 gallons fermenting away. This is about 2-3 hours shorter than my previous 3 vessel system. I thought I would share a few of my problems and solutions to date.

  1. Stuck Mash - Crush of the grain is everything. Solution: I've stuck the mash and burned up a heater (and the beer) and it was due to a fine crush. My mill gap was about 0.028" which basically made flour. I've got the mill set to 0.035" and it is working great. My efficiency is between 69% and 73% on the last three batches I run my pump about 50% open. I also push on the grain bed (squeeze) when it is nearly done draining and I get a few points higher efficiency.
  2. Low Efficiency - Crush of the grain is everything. Solution: Get the crush right, I did a batch at 0.042" and it came out at 63%, well below my expectation of 68-70% finer crush obviously improves the efficiency but this must be balanced with your recirculation volume for the mash.
  3. The Electric element is in the way of my immersion chiller - Solution: I figured out how to hang the chiller and prevent it from sitting on the heater element. Previously I brewed with gas and just rested the chiller on the bottom of the kettle. This doesn't work now that I have the electric element in the way, so I purchased a Blichmann plate chiller. This worked but it created a lot of extra cleaning and made it more difficult to whirlpool my hops. I solved this by placing a heavy zip tie on the Immersion Chiller and now hang the chiller from the edge of the kettle with a hook that hangs from the zip tie and the kettle rim. I chill 10 gallons from boil to 70 F in about 15 minutes with only a few minutes of cleaning with my C.U.S.S. immersion chiller. The chiller plate worked well, it took about 10 minutes to chill from boil to 70 but it also took about 30 minutes to clean the plate chiller. I feel better with the immersion chiller being clean and now have a Blichmann plate chiller gathering dust on the shelf.
  4. Draining my hop screen was a PIA with new kettle. Solution: I used to rest my hop screen on the top of the immersion chiller when it was sitting in the kettle but this was with a gas fired system. Now that I have an e-kettle with the element in the way, the chiller can no longer support the weight of the chiller and the weight of the hop screen. Enter the cheap clamp, it holds the hop screen perfect to drain wort from the hops. See photo of the clamp on the edge of the kettle with the filter resting on the clamp handle.
  5. The Mash basket is heavy to lift out of the kettle! Solution: I know they say you can empty this yourself but like many here on the forum I wanted no part of slowly lifting 20 lbs of grain and 8 gallons of wort slowly to hang the basket on the kettle rim. I went to Sportsman's Warehouse and purchased a deer gambrel and now use this to hang the basket from the pulley system.
  6. Moving and storing the system is a problem, this thing is massive compared to the 10 gallon kettles I was used to dealing with. Solution: I bought a 24" x 30" SS table with casters from Amazon. See the picture below, I paid $110 for the table and $60 for the heavy duty casters and now it's easy to brew and deal with the system. I'm a garage brewer, my wife is never going to let me take this inside the house.
  7. Recirculation tube falls into mash bed and results in channeling. Solution: I went with a Loc-Line and it works great, I have pictures in an earlier post is this thread if you want to see it. It works well and it stops the channeling I was getting with the hose Spike says to use. The hose works at low flow rates but then my grain bed runs at different temperatures throughout the bed. Around the hose is warmer than in the opposite side of the grain bed where it is 2-3 degrees cooler.
Overall, I am really happy with the Spike Solo system. First, I really like the speed of heating wort with the electric element vs. using gas. BIAB or multi-vessel brewing, doesn't matter what the method is, Electric is the way to go. I'm pretty much resigned to the fact that I will not be getting 80% efficiency with the Solo system but that is about $3 worth of grain. The amount of time saved from my cleaning time and taking advantage of the power of the electric vs. gas heating more than offsets my lower efficiency.
 

Attachments

  • brew table.jpg
    brew table.jpg
    714.2 KB
  • Chiller hanger.jpg
    Chiller hanger.jpg
    465.2 KB
  • Hop filter.jpg
    Hop filter.jpg
    445.1 KB
Well I believe I've identified the problem that was causing stuck mashes.

This is the Maltzilla "grinding" my grain at 0.041". Notice it's pure dust!
IMG_3505.jpeg


So then I get out my trusty old Cereal Crusher set to 0.038" and notice the grain on top of the dust.
IMG_3506.jpeg


So I got back to my Maltzilla and lower the voltage to 12v (from 24v) so it grinds slower: (notice the center of the picture...mostly dust again)
IMG_3508.jpeg


I used a pound of rice hulls in this last batch and that was barely enough to prevent a stuck mash. Problem found! It's the Maltzilla. Or course, I'm not sure where to go from here. I can't find anyone that has experience with the Maltzilla to see if there is somehow something I"m doing wrong but I'm thinking I might try and return it and buy a better system...or just keep using the trusted Cereal Grinder.
 
Conditioning your grain before milling and grinding slowly will help with drainage by keeping the hulls intact. It also keeps the dust down when milling.
 
Thanks for the tip about Conditioning 9Kegs. I looked that up and it looks like adding 2% water weight per weight of grain so I'll give that a shot. My problem was actually caused by the Maltzilla as the dials on the sides of the unit determine grain crush while most every other grinder on the market uses actual gap sizing. So while my Maltzilla had a gap that was ACTUALLY 0.041", the dials were telling me it was .5mm and .75mm and that's probably what caused all the powder...an extremely fine crush. So I'm going to try again with the dials set at 1.0mm which equals 0.040" even though the ACTUAL gap size is now 0.058"

I won't know for sure until my next brew but I'm glad I find that youtube video that did the review of the Maltzilla else I never would have known to look for the little dials.
 
Last edited:
checking into this thread!
I have a 10 gallon clawhammer 120V system, but decided it was time to upgrade to 240V.

I recently got a spike solo kettle, with a few extra custom ports. Went to do my first brew day yesterday, stepped upstairs for about 5-10 minutes after mash in and returned to a scorched element and the gfci had tripped. 28 pounds of grain in the trash in only 10 minutes! Must be a record. On the plus side its nice to know the GFCI works as intended.

Looking forward to my first successful brewday!
 
Did you destroy the heating element as well? I have to imagine that most people experience a burnt element with the spike system as you can’t tell where the wort line is with the lid on and you’ll have issues if you blindly follow their brewing advice. I used a quick disconnect and length of hose to watch the wort level from outside the kettle and I was able to stop the flow as soon as I got in the “danger zone” so to speak. I was dealing with a slow mash due to 10 pounds of the grain being milled into dust on the last batch and even a pound of rice hulls wasn’t enough to allow more than a 10-20% flow rate. The slow flow rate also cases a large delta in temperate in the mash tun so it wasn’t a very enjoyable brew day.
 
I broke down and added a bag to my Solo basket. Now, I crush the ever-loving-jesus out of my grain, mash, lift the basket to drain, then squeeze the bag into the kettle and manage to break the 75% efficiency barrier I had encountered just using the basket.

The real driver for the bag was solid matter in the boil causing scorching on the element, even after a conservative crush on conditioned grain.

The basket is still useful for not disturbing the grain when starting to drain. I get fairly clear wort in the kettle (not like my 3v system, but what you gonna do) this way, and scorching isn't as much of a problem as it was. Still seem to pick up more material on the element through the brew than I used to with my 3v system and home-build AuberIns controller though.
 
Did you destroy the heating element as well? I have to imagine that most people experience a burnt element with the spike system as you can’t tell where the wort line is with the lid on and you’ll have issues if you blindly follow their brewing advice. I used a quick disconnect and length of hose to watch the wort level from outside the kettle and I was able to stop the flow as soon as I got in the “danger zone” so to speak. I was dealing with a slow mash due to 10 pounds of the grain being milled into dust on the last batch and even a pound of rice hulls wasn’t enough to allow more than a 10-20% flow rate. The slow flow rate also cases a large delta in temperate in the mash tun so it wasn’t a very enjoyable brew day.

That was something I experienced too. Got set up to use the Blichmann AutoSparge from my 3v system in the basket... no more over-run mash for me.

123766966_3587465117977395_10697805563250655_o.jpg


That's 40lbs of grain to run a partigyle for 5g of Rye Wine and 10g of Rye Mild. I've use loc-line off of the autosparge for smaller grain bills, but this was a good picture of how it sits in the basket.
 
Did you destroy the heating element as well? I have to imagine that most people experience a burnt element with the spike system as you can’t tell where the wort line is with the lid on and you’ll have issues if you blindly follow their brewing advice. I used a quick disconnect and length of hose to watch the wort level from outside the kettle and I was able to stop the flow as soon as I got in the “danger zone” so to speak. I was dealing with a slow mash due to 10 pounds of the grain being milled into dust on the last batch and even a pound of rice hulls wasn’t enough to allow more than a 10-20% flow rate. The slow flow rate also cases a large delta in temperate in the mash tun so it wasn’t a very enjoyable brew day.
It appears that the fuse tripped in time to save the element, it did get a fairly nice scorch on it I have yet to clean with barkeepers friend.

I also plan to purchase a brew bag for this to hopefully help with this issue. I used to use a brew-bag on my clawhammer system just to aid in cleanup.
 
I broke down and added a bag to my Solo basket. Now, I crush the ever-loving-jesus out of my grain, mash, lift the basket to drain, then squeeze the bag into the kettle and manage to break the 75% efficiency barrier I had encountered just using the basket.

Do you think you can share which bag you are using? As far as the mesh size and the size of the bag itself?
 
checking into this thread!
I have a 10 gallon clawhammer 120V system, but decided it was time to upgrade to 240V.

I recently got a spike solo kettle, with a few extra custom ports. Went to do my first brew day yesterday, stepped upstairs for about 5-10 minutes after mash in and returned to a scorched element and the gfci had tripped. 28 pounds of grain in the trash in only 10 minutes! Must be a record. On the plus side its nice to know the GFCI works as intended.

Looking forward to my first successful brewday!

Sorry about the trouble! We highly recommend turning the element off when mashing in and then letting the mash rest for about 5-10mins. This allows the grain to absorb the liquid and prevents stuck mashes. I've brewed about 10 times over the last couple months and have not had a stuck mash. A few of these were with a double crush since our local store's mill isn't great.
 
Sorry about the trouble! We highly recommend turning the element off when mashing in and then letting the mash rest for about 5-10mins. This allows the grain to absorb the liquid and prevents stuck mashes. I've brewed about 10 times over the last couple months and have not had a stuck mash. A few of these were with a double crush since our local store's mill isn't great.
Wow didn't expect a reply from Spike themselves! Have to say working with you guys for my custom kettle was amazing. Already eyeing a CF5 or CF10 in the near future.

I am sure it was user error on my part, I will try turning off the heating element on my next brew. The 5-10 minute rest is a great idea as well. Planning a second attempt either tomorrow or Saturday and will report back.

Overall I am super impressed by the system itself, just a few hiccups on the learning curve!

Thanks for your response and kind words!

Best of luck on your next brew day!!
 
I wanna say I remember Short Circuited brewer just attaching a spare hose to the whirlpool and hanging it over the kettle handle as a sort of sight glass.

I took a brief look through his videos though and couldn't find it.
 
Not sure if people realize this, but tapering the grain bucket like Spike did on the Solo is terrible for causing mashes to stick. At any point in the bucket there is more area above trying to drain into less area below, meaning there is more and more flow resistance the deeper you go into the bed.

At the perforated bottom you've got a 40% decrease in flow area compared to the top. (12^2 / 15.7^2) Decreased flow area means increased flow velocity equals increased pressure on the bed the deeper you go in the bed. Increased pressure = increased compaction = increased chance of stuck mash.
 
I wanna say I remember Short Circuited brewer just attaching a spare hose to the whirlpool and hanging it over the kettle handle as a sort of sight glass.

Sight glasses on mash tuns are an excellent way to gauge the hydrostatic head on the mash bed. They should be standard on every mash setup.
 
I brewed my first batch with the 20 gal and I have setup a tube that I hooked up to the whirlpool port and tied to the handle to monitor liquid level when recirculating so that is helpful. I am concerned about the even liquid distribution over the grain bed though and have heard of some people having uneven temperatures across it. I did seem to be having trouble with the grain bed compacting. When I would stir it and mix it up a lot of liquid would rush to the bottom and the temp would drop a couple degrees. I am thinking of attaching something like a fly sparge rig to help keep the liquid distribution consistent when recirculating. Good idea?
 
I wanna say I remember Short Circuited brewer just attaching a spare hose to the whirlpool and hanging it over the kettle handle as a sort of sight glass.

I took a brief look through his videos though and couldn't find it.
That’s where I got the idea. I think it was his video of the spike solo while still a prototype. He had the tube come out and bend up and tied to the handle which I did, but I noticed the bend rate really changed the water level so I was looking for a 90 degree 5/8” ss fitting I could use for a temporary sight glass during the mash. That or a more solid tube that I could just attach and then remove at mash out.
 
Has anyone tried making a sight glass for the Spike solo?

I was thinking of using this and attaching some silicone tube secured to the handles on the grain basket.
https://www.brewershardware.com/1-1...-with-90-Bend-TC15B58-90.html?category_id=276

I think a simple sight "glass" implemented with two 1/2" TC flanges, two 1/2" TC x hose barb 90* elbows, and a length of silicon tubing would be the most reliable, easiest to maintain method. Have the flanges welded into the extremes of the kettle (near the interior lip on the bottom and the exterior lip on the top), and it would make use easier during the mash as well as during the boil if using a steam condenser.

I've been exploring the cost of having such a setup incorporated into my system so I don't have to lift the lid during the boil just to check volume when using a condenser.
 
That’s where I got the idea. I think it was his video of the spike solo while still a prototype. He had the tube come out and bend up and tied to the handle which I did, but I noticed the bend rate really changed the water level so I was looking for a 90 degree 5/8” ss fitting I could use for a temporary sight glass during the mash. That or a more solid tube that I could just attach and then remove at mash out.

Spike brewing posted a pic to their instagram page showing the use of a sight glass. The thought of doing something similar has been bouncing around in my head.
 

Attachments

  • Screenshot_20210127-053653.png
    Screenshot_20210127-053653.png
    2.3 MB
Back
Top