You are using an out of date browser. It may not display this or other websites correctly.
You should upgrade or use an alternative browser.
You should upgrade or use an alternative browser.
Show us your sculpture or brew rig
- Thread starter Onescalerguy
- Start date

Help Support Homebrew Talk:
This site may earn a commission from merchant affiliate
links, including eBay, Amazon, and others.
dmcman73
Well-Known Member
- Joined
- Apr 28, 2013
- Messages
- 936
- Reaction score
- 184
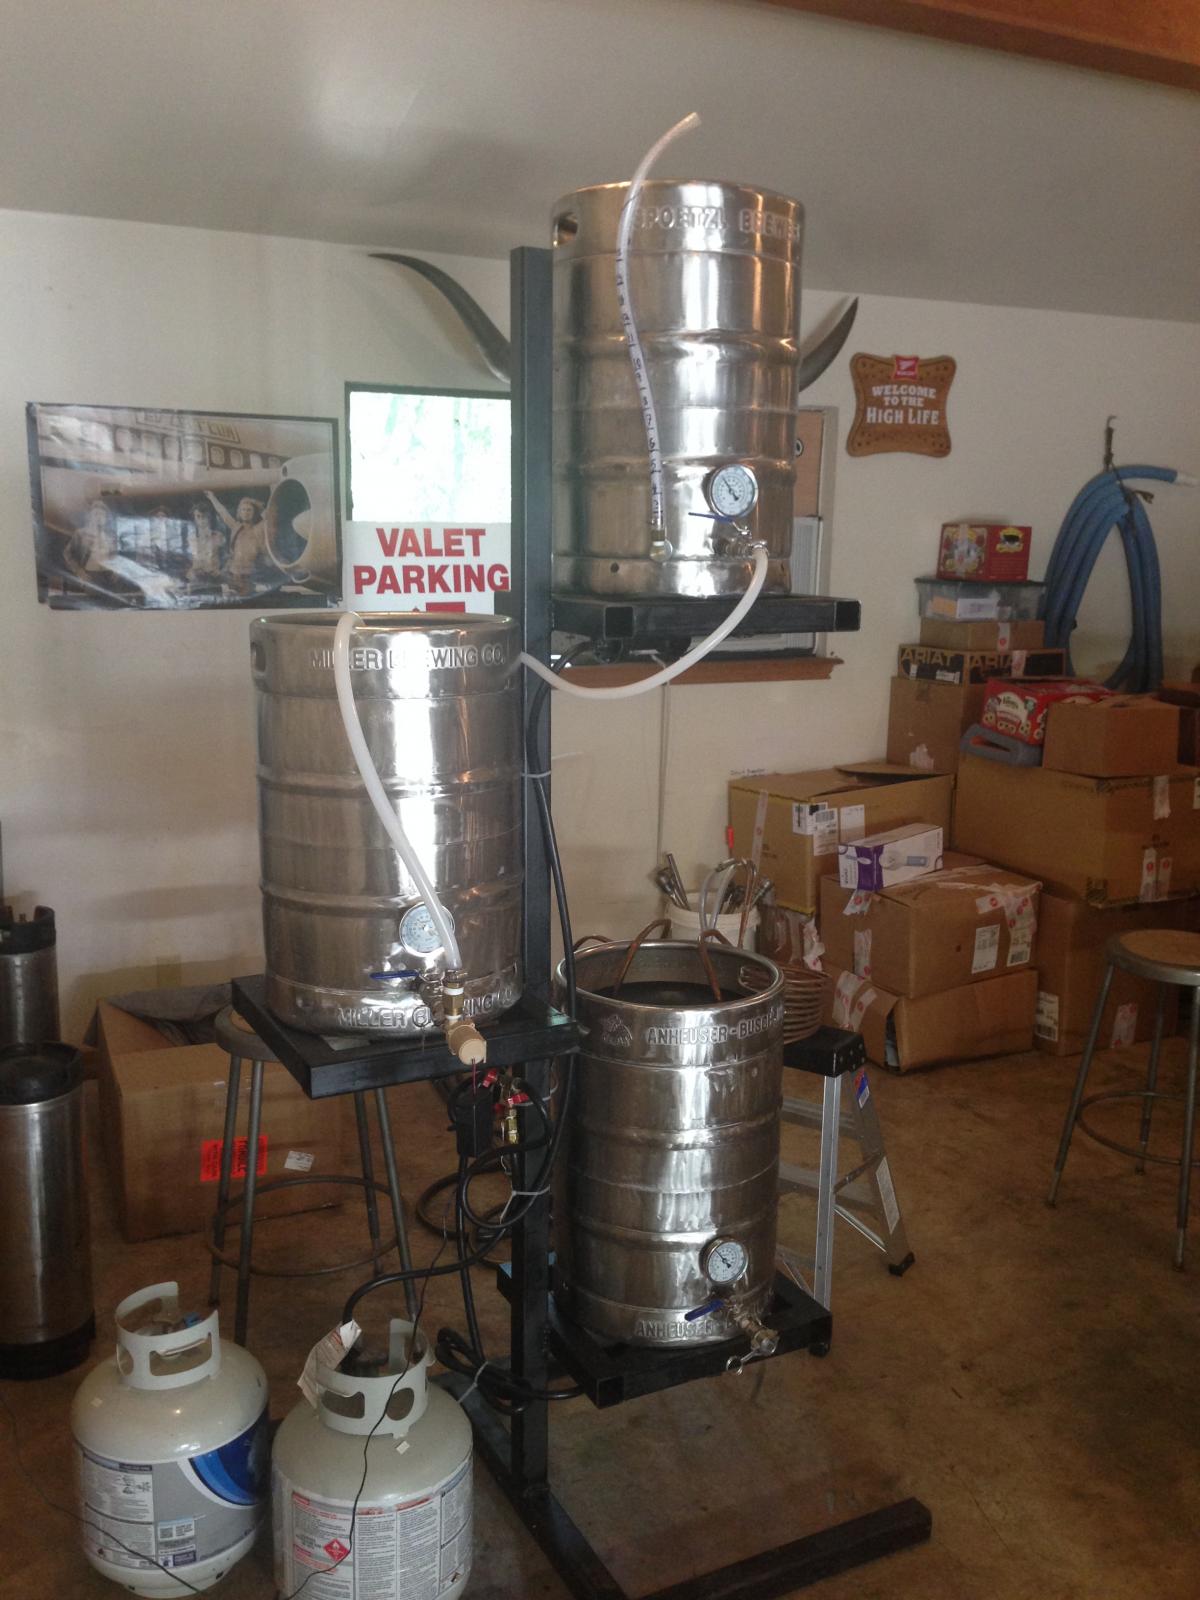
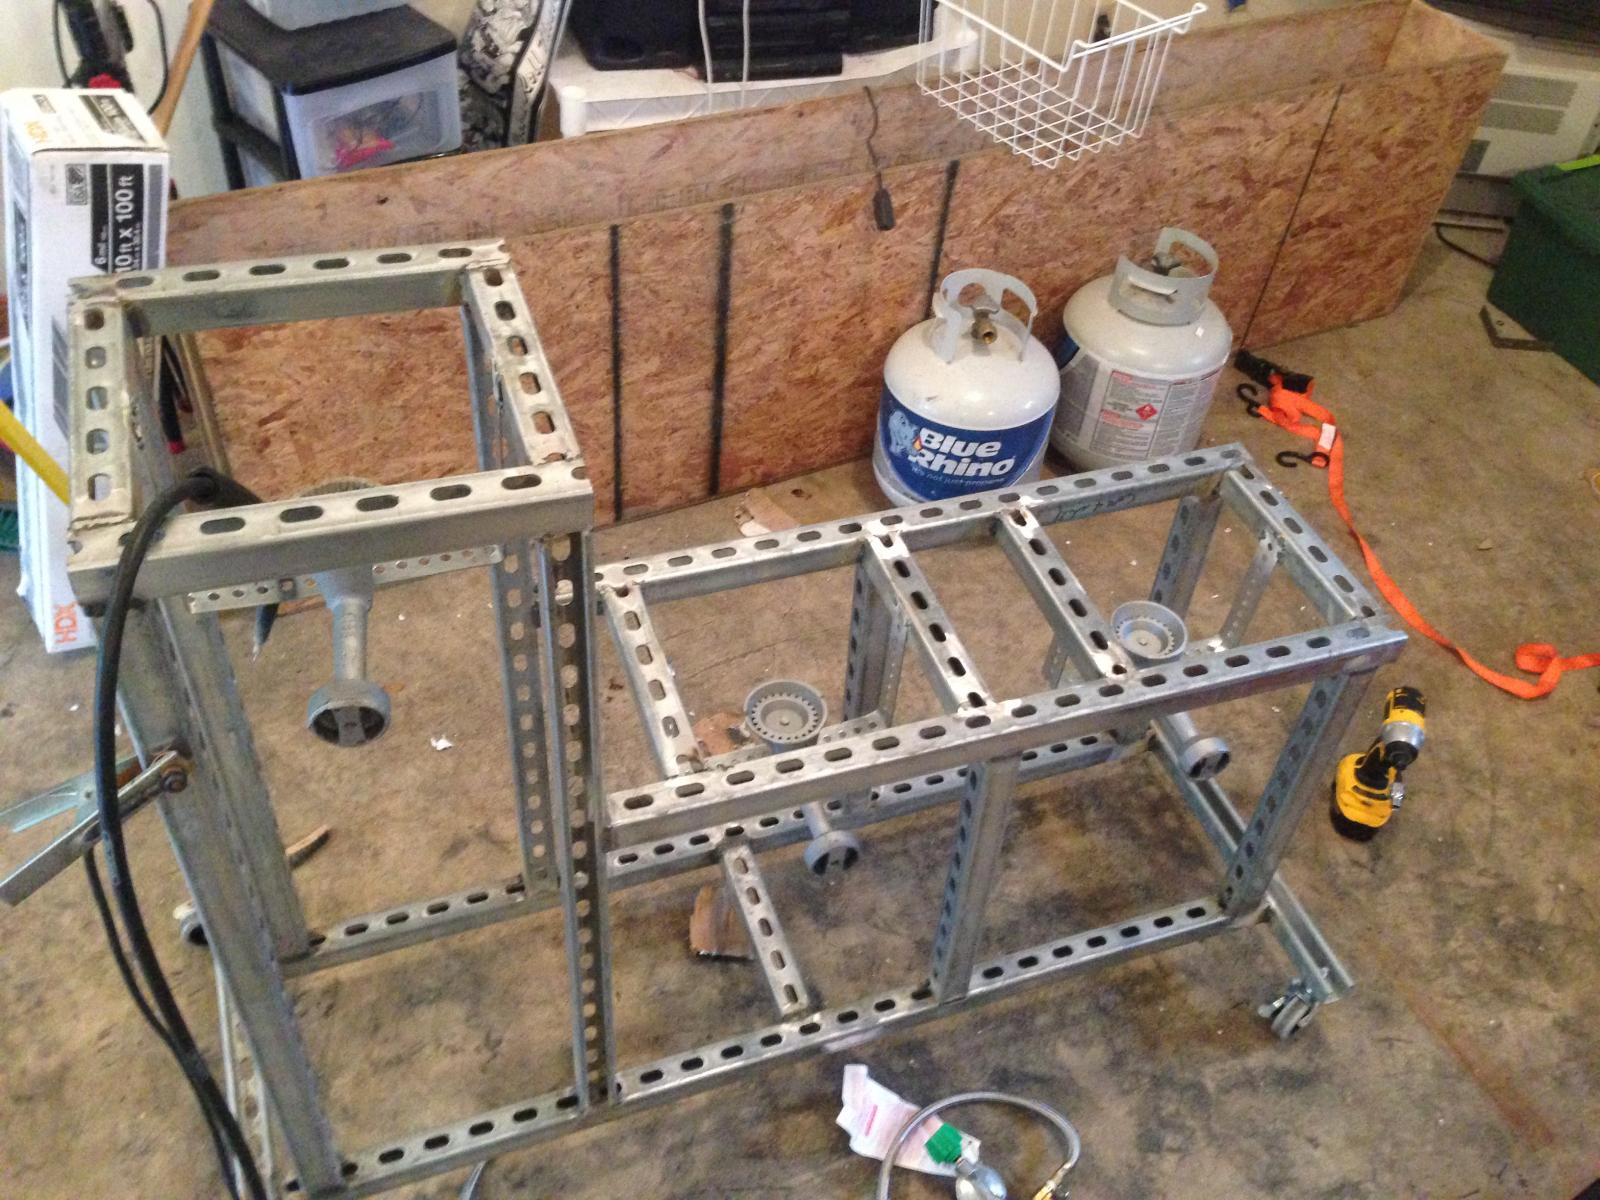
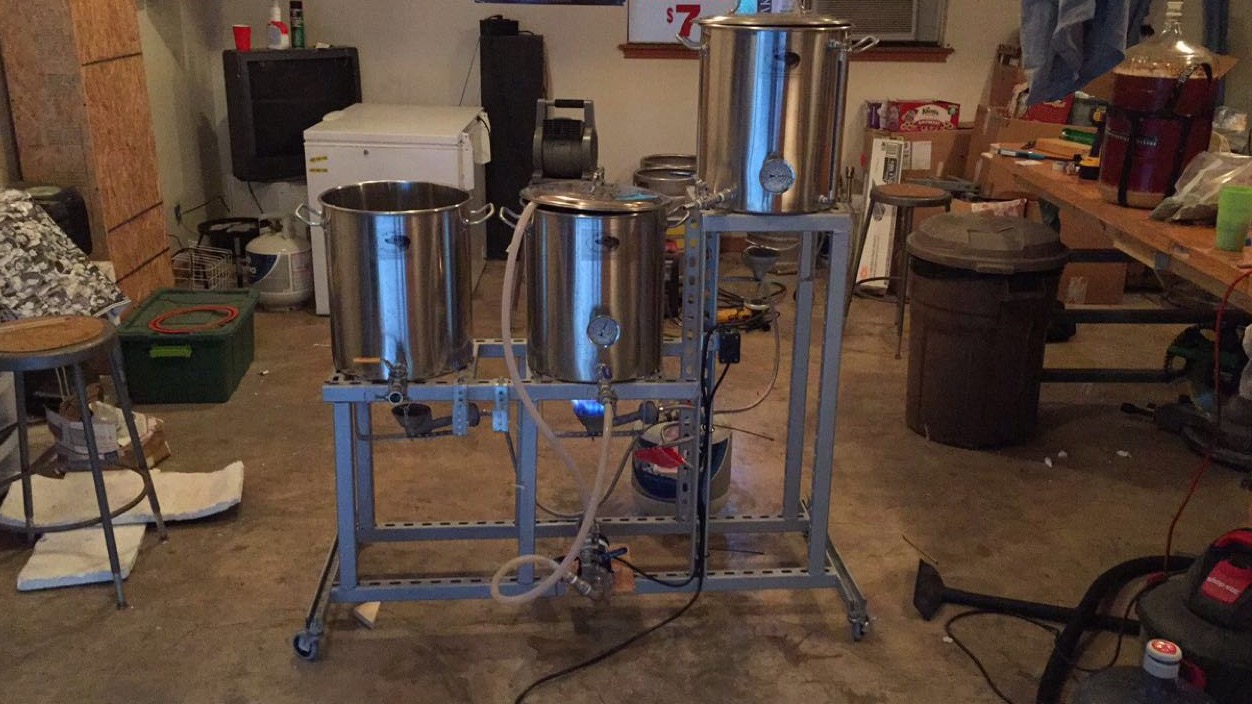
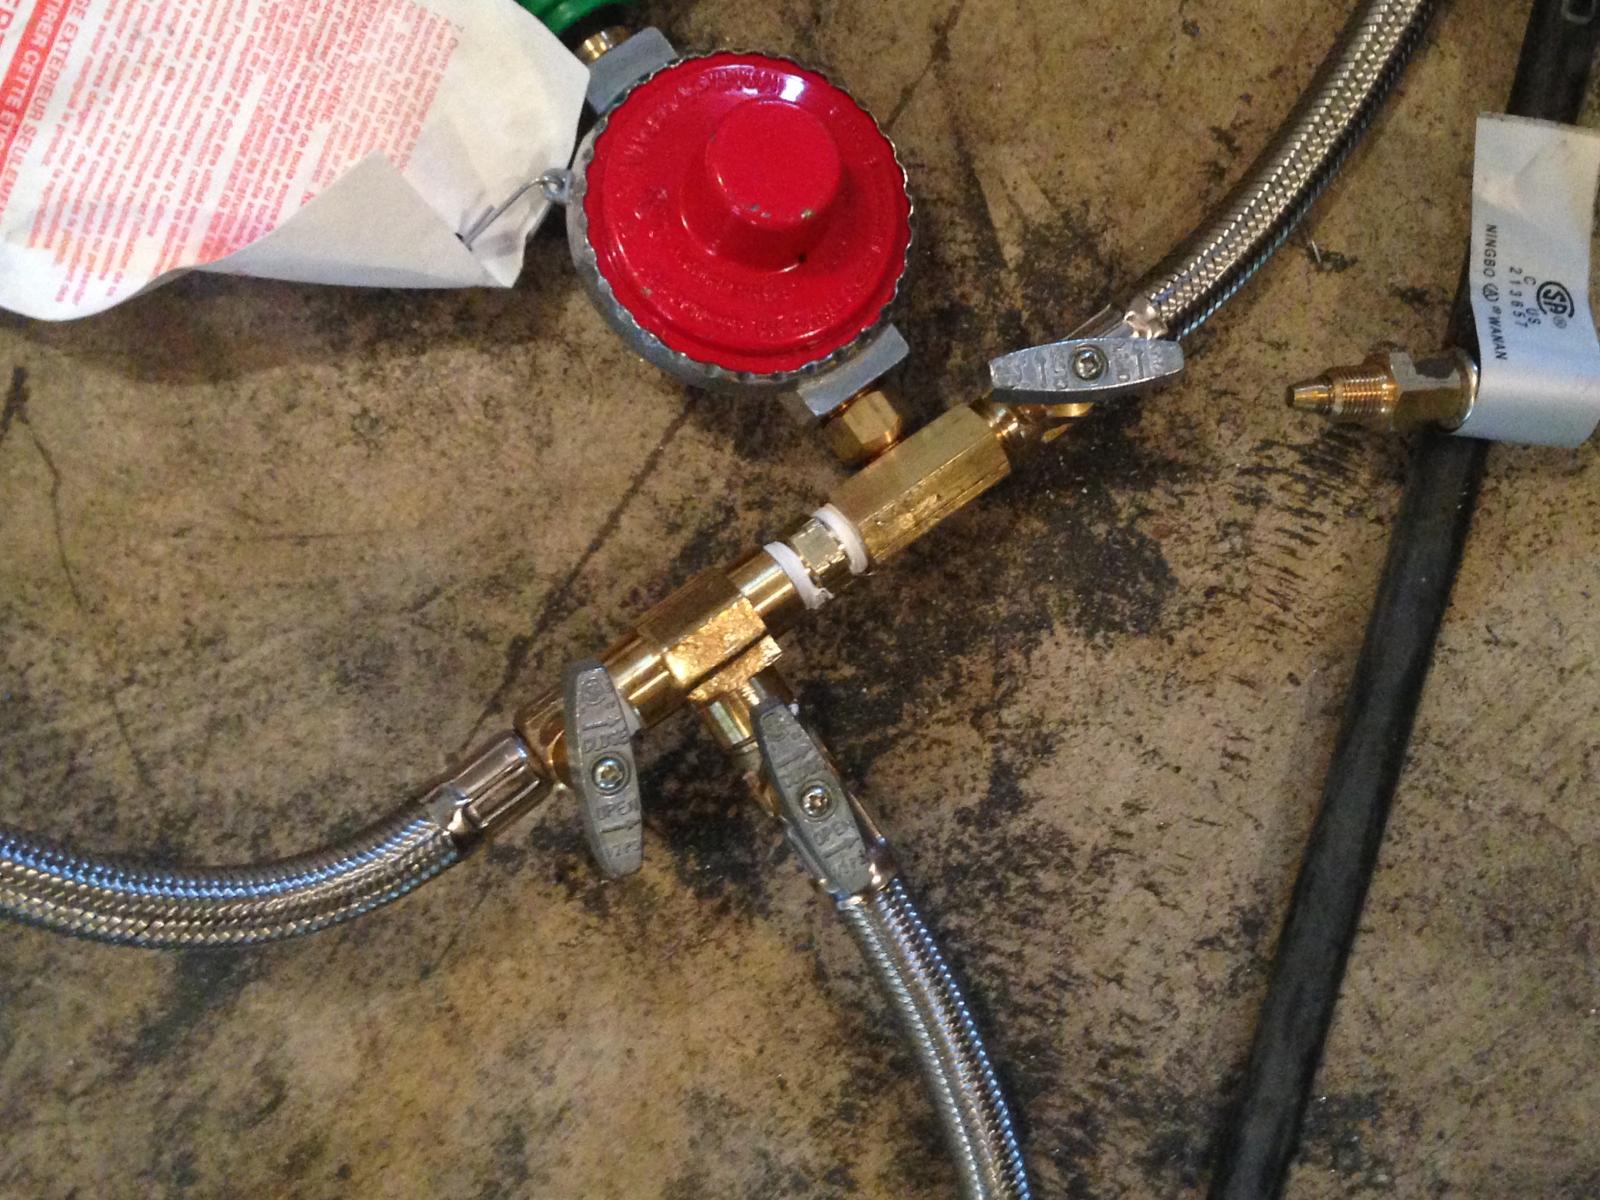
View attachment 290608
Latest rebuild, from gravity to single tier.
Even though it's OK to use copper piping for propane, it shouldn't be exposed like that right in front where you'll be wirking. All it takes is one drop of something onto the pipe to bend the soft copper or even cause a pin hole leak at one of the solder joints. I've seen it happen with water lines and spring a leak. If the copper was covered and protected in some way, it may be OK but the way it's exposed right in front, I would opt for black pipe. This is just my opinion.
liquidlunch
Well-Known Member
- Joined
- Jul 29, 2014
- Messages
- 134
- Reaction score
- 27
A few more little upgrades. I think it's done. View attachment ImageUploadedByHome Brew1437323796.760249.jpg
Timzabel12
Well-Known Member
- Joined
- Jun 8, 2014
- Messages
- 223
- Reaction score
- 7
Still got a few things to tighten up and accessorize but on my way!
View attachment 1437327291466.jpg
View attachment 1437327291466.jpg
SkoobaSteve
Member
- Joined
- Jul 12, 2015
- Messages
- 15
- Reaction score
- 11
This is my first rig that i have built so far. I wanted to do it right the first time and so i went with a 2 tier option so i only need 1 pump, the Mash tun is gravity fed down to the boil kettle. I also went ahead and made the top tier detachable if i ever decide to turn it into a single tier, 3 burner, 2 pump HERMS set up. (the frame underneath the decking is already prepped for a third burner. all i would have to do is add the flashing for heat protection) My next step (after staining and sealing it) is going to be installing all my HERMS components, then rigging up a mash tun agitator. Let me know what you think.


hafmpty
Well-Known Member
...made the top tier detachable
Love the modular component. I'm going to try to remember that.

$53.24
1pc Hose Barb/MFL 1.5" Tri Clamp to Ball Lock Post Liquid Gas Homebrew Kegging Fermentation Parts Brewer Hardware SUS304(Liquid Hose Barb)
Guangshui Weilu You Trading Co., Ltd

$10.99 ($31.16 / Ounce)
Hornindal Kveik Yeast for Homebrewing - Mead, Cider, Wine, Beer - 10g Packet - Saccharomyces Cerevisiae - Sold by Shadowhive.com
Shadowhive

$176.97
1pc Commercial Keg Manifold 2" Tri Clamp,Ball Lock Tapping Head,Pressure Gauge/Adjustable PRV for Kegging,Fermentation Control
hanhanbaihuoxiaoshoudian

$7.79 ($7.79 / Count)
Craft A Brew - LalBrew Voss™ - Kveik Ale Yeast - For Craft Lagers - Ingredients for Home Brewing - Beer Making Supplies - (1 Pack)
Craft a Brew

$20.94
$29.99
The Brew Your Own Big Book of Clone Recipes: Featuring 300 Homebrew Recipes from Your Favorite Breweries
Amazon.com

$53.24
1pc Hose Barb/MFL 1.5" Tri Clamp to Ball Lock Post Liquid Gas Homebrew Kegging Fermentation Parts Brewer Hardware SUS304(Liquid MFL)
yunchengshiyanhuqucuichendianzishangwuyouxiangongsi

$33.99 ($17.00 / Count)
$41.99 ($21.00 / Count)
2 Pack 1 Gallon Large Fermentation Jars with 3 Airlocks and 2 SCREW Lids(100% Airtight Heavy Duty Lid w Silicone) - Wide Mouth Glass Jars w Scale Mark - Pickle Jars for Sauerkraut, Sourdough Starter
Qianfenie Direct

$58.16
HUIZHUGS Brewing Equipment Keg Ball Lock Faucet 30cm Reinforced Silicone Hose Secondary Fermentation Homebrew Kegging Brewing Equipment
xiangshuizhenzhanglingfengshop

$22.00 ($623.23 / Ounce)
AMZLMPKNTW Ball Lock Sample Faucet 30cm Reinforced Silicone Hose Secondary Fermentation Homebrew Kegging joyful
无为中南商贸有限公司

$28.98
Five Star - 6022b_ - Star San - 32 Ounce - High Foaming Sanitizer
Great Fermentations of Indiana
lpdjshaw
Well-Known Member
Nice. Your pump's upside down though. I'd keep a close eye on charring underneath the metal too.
I like it, however, I have some concerns. First, as was mentioned, charring. You do have some shielding, but you may find that it's not enough. Keep an eye on it, and keep either a fire extinguisher or charged water hose near by. I have a wood stand, and had to add shielding to prevent charring. Second, it appears that your burners are only supported by four bolts. What size batches are you planning on? Maybe they'll be ok for a five gallon, but I'd be very afraid to be near that with 10 gallons on it. The bolts could soften when they get hot, and having 100+ pounds pushing on them could cause them to fail. That won't be pretty if you have 10+ gallons of boiling wort splashing all over you.
SkoobaSteve
Member
- Joined
- Jul 12, 2015
- Messages
- 15
- Reaction score
- 11
Appreciate the feedback guys.
First of all, I know the pump is upside down, I was going to flip my head before testing it out.
In regards to the charring concern, I might go back and install flashing that covers the entire height of of the 2x6 and install some fireplace insulation between the wood and flashing. You think that would suffice?
And about the bolts holding my burners in place, they are 4 3/4 carriage bolts. I only do 5 gallon batches right now so I think I should alright. I stood on them after I got them installed and they held fine. I'm 6'4 215lbs so I think they should be able to hold up just fine for 5 gallon runs. When I do decide to start brewing 10 gallon batches, I will probably go back and add some more support just to make sure I don't take a nice surprise boiling wort bath.
Thanks for the feedback guys! I really appreciate it!

wilserbrewer
BIAB Expert Tailor
Maybe I'm risk averse, but for two of the four carriage bolts to fail I would think they would need to get extremely hot, if this were to happen, the burner frame would also be at risk of failing, which is typically not a concern. Also guessing that flashing alone would provide adequate heat protection.
wilserbrewer, my concern with the bolts is that there would be a lot of lateral force, and when they get hot, they'll soften. Maybe they won't get hot enough, and maybe the lateral force won't be enough to break them. Skooby is apparently a big guy, and it held his weight when cold, so I'm sure they would hold five gallons of wort in a kettle when they're hot. I just wanted to make sure that he thought of that before something catastrophic happens.
Scooby, just keep an eye on the wood around the burners when you're brewing. The flashing you have might be enough, but keep an eye on it anyway. It took mine a while to start charing, and then I added the heat shielding. You've already got it, so it may take longer.
Scooby, just keep an eye on the wood around the burners when you're brewing. The flashing you have might be enough, but keep an eye on it anyway. It took mine a while to start charing, and then I added the heat shielding. You've already got it, so it may take longer.
tater2000
Member
Well here we go..
I made a three tier setup with weldless keggles. I loved it. Because, well.. I made it... What can I say.
When I was living with my brother it was an awesome setup. Once he moved out however... It became was too much for one person to manage.
  The regulator was low pressure and well it took forever to boil a 10 gal batch. So
I sold the old set up for a nice profit.
  Turned around and purchased 3 Spike Brewing 10 gal. kettles, and Chugger pump, and because I work in construction I managed to get the steel strut for free. So all I had to buy out of my own pocket were some casters to make the stand mobile, a high-pressure regulator and burners. And WA-BAM!!!
  Instantly took 2hrs off brew day. Love it. For real this time. Not just proud that I could build something.


I made a three tier setup with weldless keggles. I loved it. Because, well.. I made it... What can I say.
When I was living with my brother it was an awesome setup.
 Once he moved out however... It became was too much for one person to manage.
  The regulator was low pressure and well it took forever to boil a 10 gal batch. So
I sold the old set up for a nice profit.
  Turned around and purchased 3 Spike Brewing 10 gal. kettles, and Chugger pump, and because I work in construction I managed to get the steel strut for free. So all I had to buy out of my own pocket were some casters to make the stand mobile, a high-pressure regulator and burners. And WA-BAM!!!
  Instantly took 2hrs off brew day. Love it. For real this time. Not just proud that I could build something.


tater2000
Member
Yeah I was not about to buy a glass tube.... It worked well though. Very accurate. :cross:
dmcman73
Well-Known Member
- Joined
- Apr 28, 2013
- Messages
- 936
- Reaction score
- 184
It's been a while since I last posted here about my "compact" 5 gallon brew rig and now I'm back to post my new 10 Gallon "compact" brew rig. My beer was going fast from friends and family wanting some and my 5 gallon batches disappearing.
Here is my new electric rig. Two 20 gallon custom kettles from Spike brewing and one custom built bottom draining fully insulated mash-tun that I designed and built from a old keg (I have a thread on here on the build process).
The panel is attached to a TV wall mount allowing me to swing it out when the rig is in use and swings closed when not in use to save room in my basement kitchen.
View attachment 1438167720586.jpg
View attachment 1438167735308.jpg
View attachment 1438167753658.jpg
View attachment 1438167769451.jpg
View attachment 1438167807948.jpg
Have a build thread on this somewhere, but this was my first all grain batch on the new stand. Everything worked great, but my ground water is a bit warm, only chilled to 80f then into the chamber to chill the rest of the way.
View attachment ImageUploadedByHome Brew1438199446.626043.jpg
View attachment ImageUploadedByHome Brew1438199446.626043.jpg
horseinmay
Well-Known Member
How about some details on the sweet wood-clad mash tun? I'm contemplating making one and looking to see how others do it. Thanks.
dmcman73
Well-Known Member
- Joined
- Apr 28, 2013
- Messages
- 936
- Reaction score
- 184
How about some details on the sweet wood-clad mash tun? I'm contemplating making one and looking to see how others do it. Thanks.
Here's my thread: https://www.homebrewtalk.com/showthread.php?t=528153
Building a keg bottom draining mashtun
Mattye2902
New Member
- Joined
- Aug 10, 2015
- Messages
- 1
- Reaction score
- 1
View attachment ImageUploadedByHome Brew1439239729.246159.jpgsimple RIMS setup. 10 Gal HLT at the top tier gravity feeds into MLT. pumps out to my RIMS tube back into MLT. then pumps out to boil kettle when ready. counter flow chiller cools 6 gallons of boiling water down to 70 degrees in about 8 minutes!
ericrichards420
Well-Known Member
First one is how I cereal mash, and then the primary mash. Brewed a blond ale yesterday.
View attachment 1440337093769.jpg
View attachment 1440337120830.jpg
View attachment 1440337093769.jpg
View attachment 1440337120830.jpg
ericrichards420
Well-Known Member
Added a 3/8 needle valve right behind the orifice of each of my bg-14 burners. I was just using the ball valve at the manifold. Now I'll have fine tune control over my flame.
View attachment 1440878139215.jpg
View attachment 1440878139215.jpg
copper2hopper
Well-Known Member
View attachment ImageUploadedByHome Brew1441909251.892399.jpgView attachment ImageUploadedByHome Brew1441909272.652046.jpgView attachment ImageUploadedByHome Brew1441909294.361750.jpgView attachment ImageUploadedByHome Brew1441909310.271010.jpgView attachment ImageUploadedByHome Brew1441909322.026698.jpgView attachment ImageUploadedByHome Brew1441909383.405945.jpg
Looks like a beaut!
btw, that pump head is up-side-down. Input side should be pointing down...
Cheers!
btw, that pump head is up-side-down. Input side should be pointing down...
Cheers!
copper2hopper
Well-Known Member
I feel like you're working against natural laws of gravity there for purposes of initially priming the pump head. Any particular reason it should be pointed down instead?
The primary reason why the manufacturer of that pump - as well as it's primary competitor - recommend the input side be below the output side - is to avoid trapping air inside the pump head.
If you go back and look at every single brew structure using either brand of mag-pump you'll note they all have the input side either at 6 o'clock or 9 (as viewed from the pump head), per the respective manufacturer recommendations...
Cheers!
If you go back and look at every single brew structure using either brand of mag-pump you'll note they all have the input side either at 6 o'clock or 9 (as viewed from the pump head), per the respective manufacturer recommendations...
Cheers!
I feel like you're working against natural laws of gravity there for purposes of initially priming the pump head. Any particular reason it should be pointed down instead?
I know it might be a bit counterintuitive, but you actually want gravity to work against you to keep the pump head primed. Good thing is that the pump head can be clocked by simply turning it once the 4 screws on the head are removed, so you don't need to change your mounting orientation to correct the pump head orientation.
That is a fine looking sculpture. Are the kettles mounted so there will be a gap between the burner shield and the bottom of the kettle? I can't tell from the photo. If there is not enough of a gap or a relief cut out of the shields, the burners will starve for air and blow themselves out.
copper2hopper
Well-Known Member
I will do that for sure with the pump then I guess. Thanks fellas. Yeah there's a gap. Plenty of air feeding the bad boys. View attachment ImageUploadedByHome Brew1442019719.886337.jpg
Had some time to finalize my third and final keggle today too. Just beautiful.
Had some time to finalize my third and final keggle today too. Just beautiful.
How did you make your MLT wrap?
Todd
It's called sheet Armaflex (1" thick). It's an insulation used in the HVAC industry. Had extra from a job and it came in good use.
Last edited:
Similar threads
- Replies
- 11
- Views
- 1K
- Replies
- 132
- Views
- 10K
- Replies
- 45
- Views
- 5K


![Craft A Brew - Safale BE-256 Yeast - Fermentis - Belgian Ale Dry Yeast - For Belgian & Strong Ales - Ingredients for Home Brewing - Beer Making Supplies - [3 Pack]](https://m.media-amazon.com/images/I/51bcKEwQmWL._SL500_.jpg)


