alexipas
Well-Known Member
I currently make double batches by mashing in a cooler, and then batch sparging.
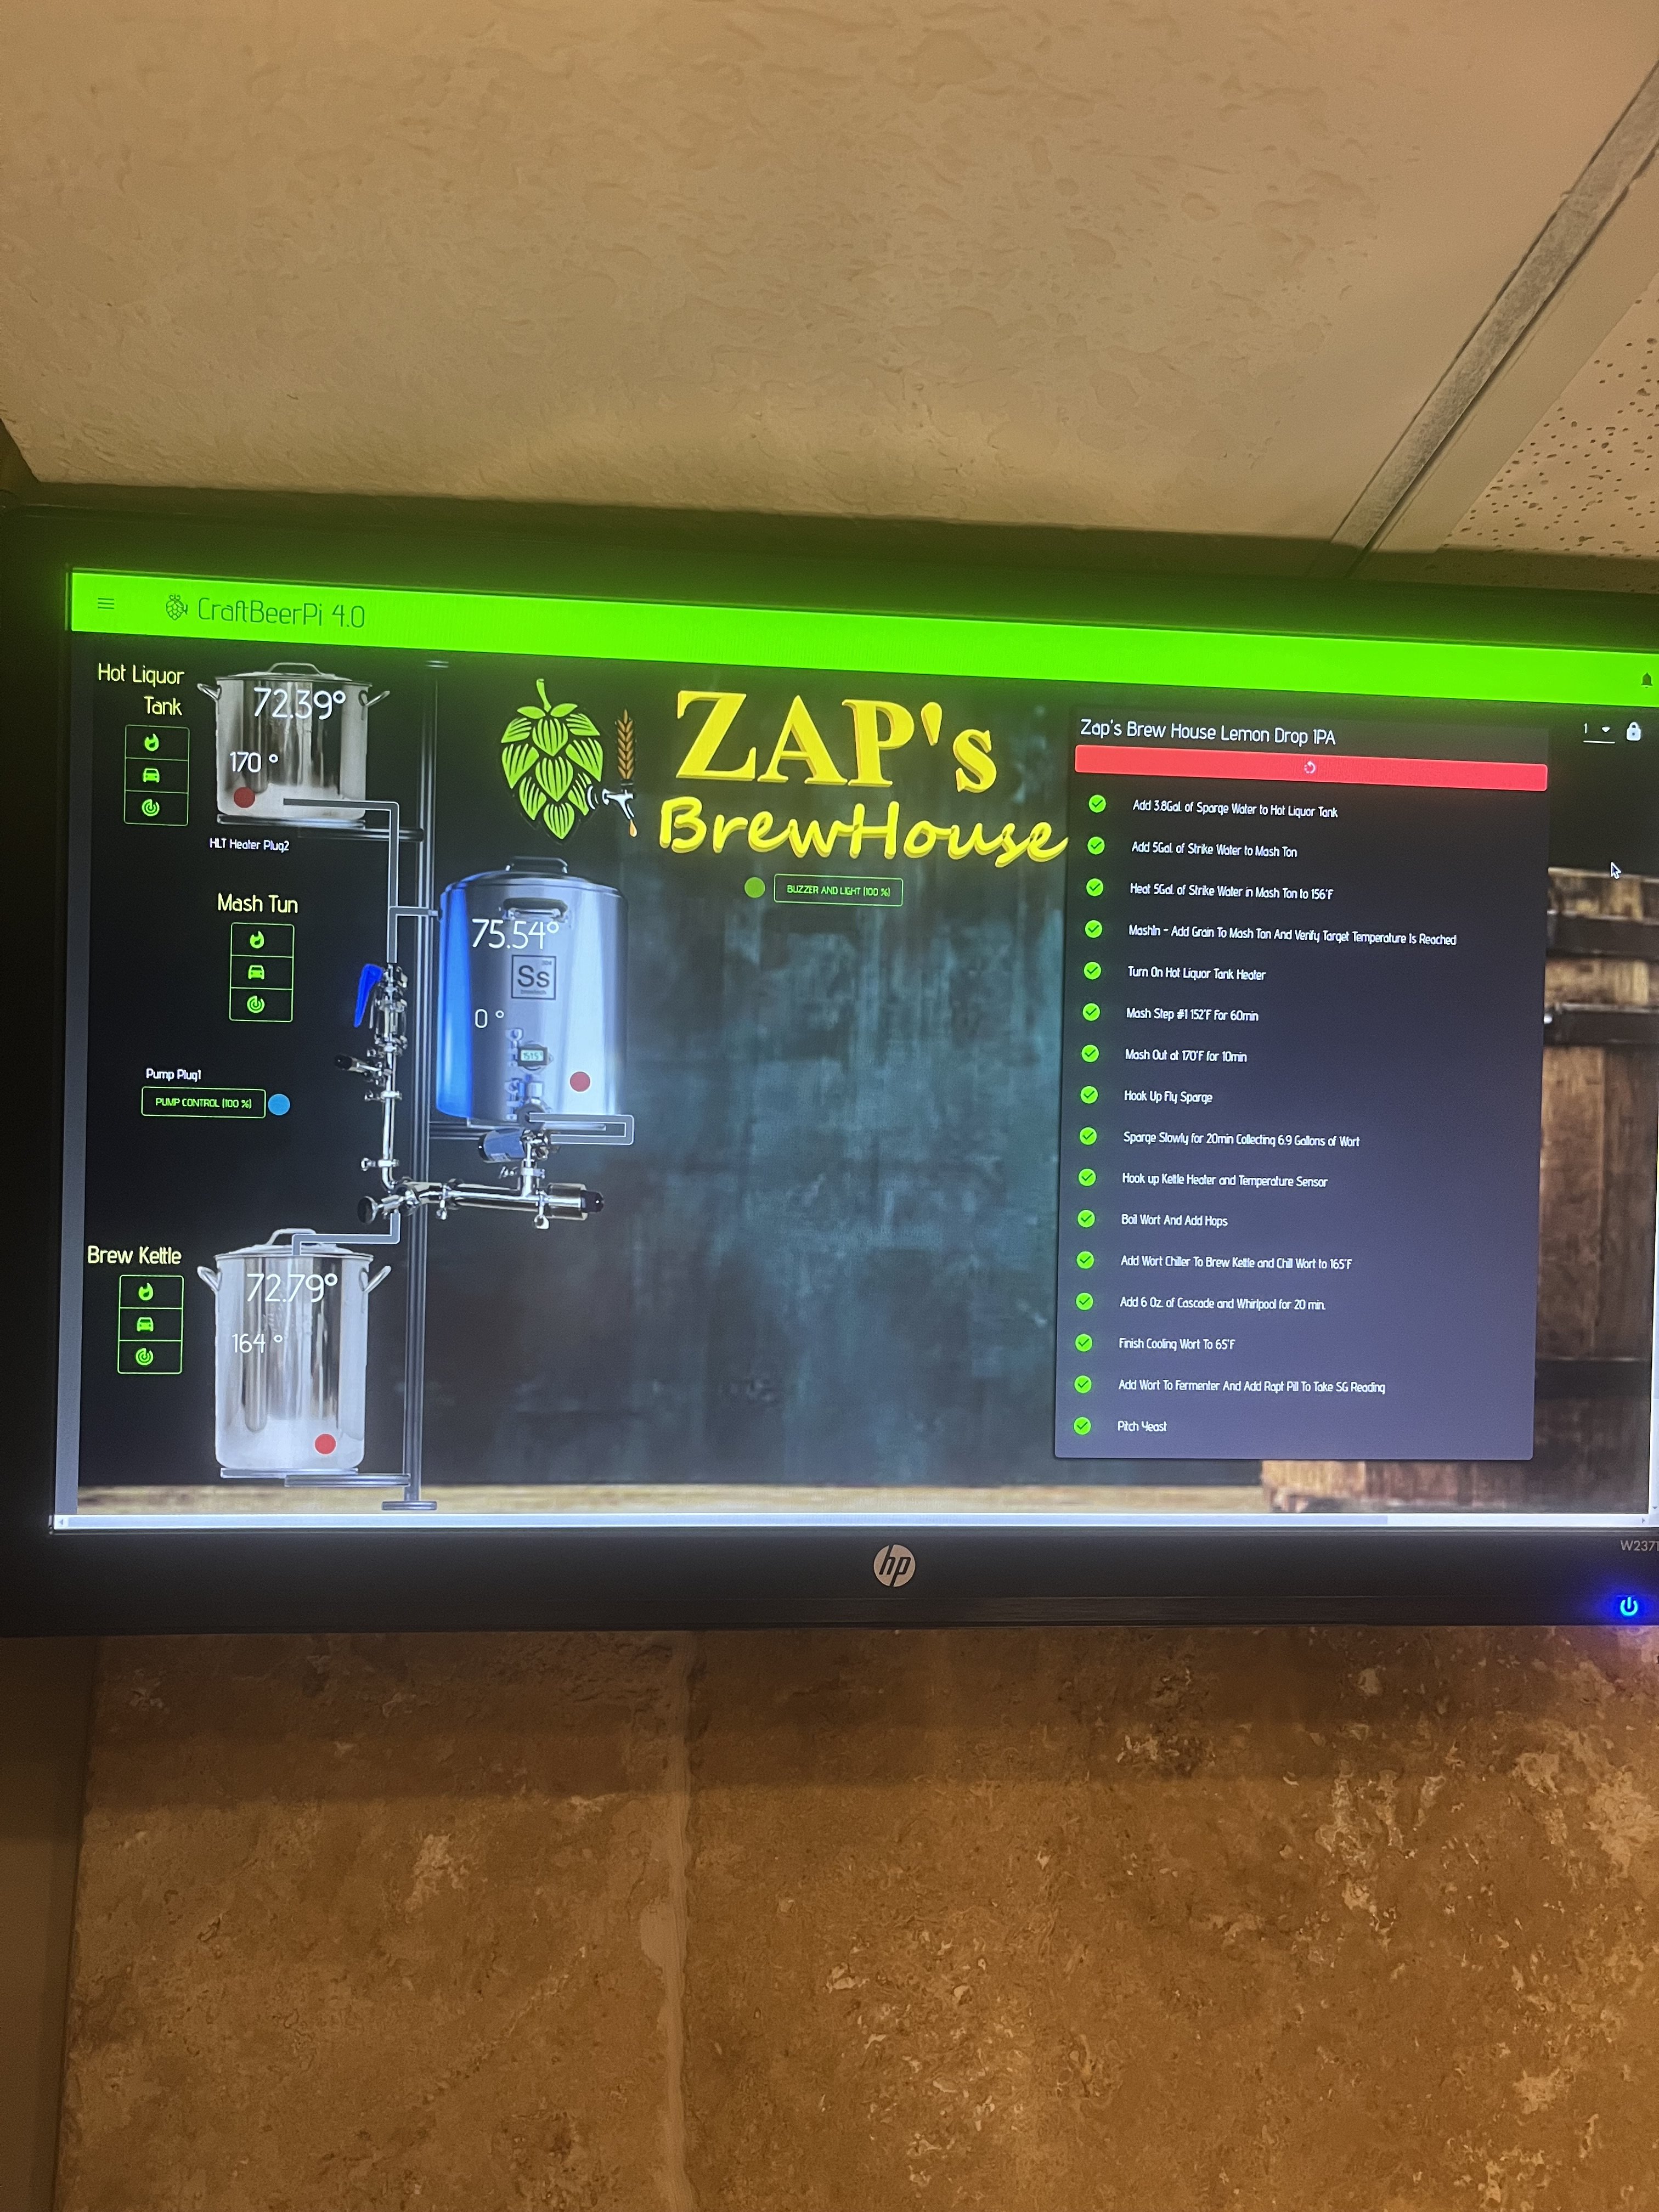
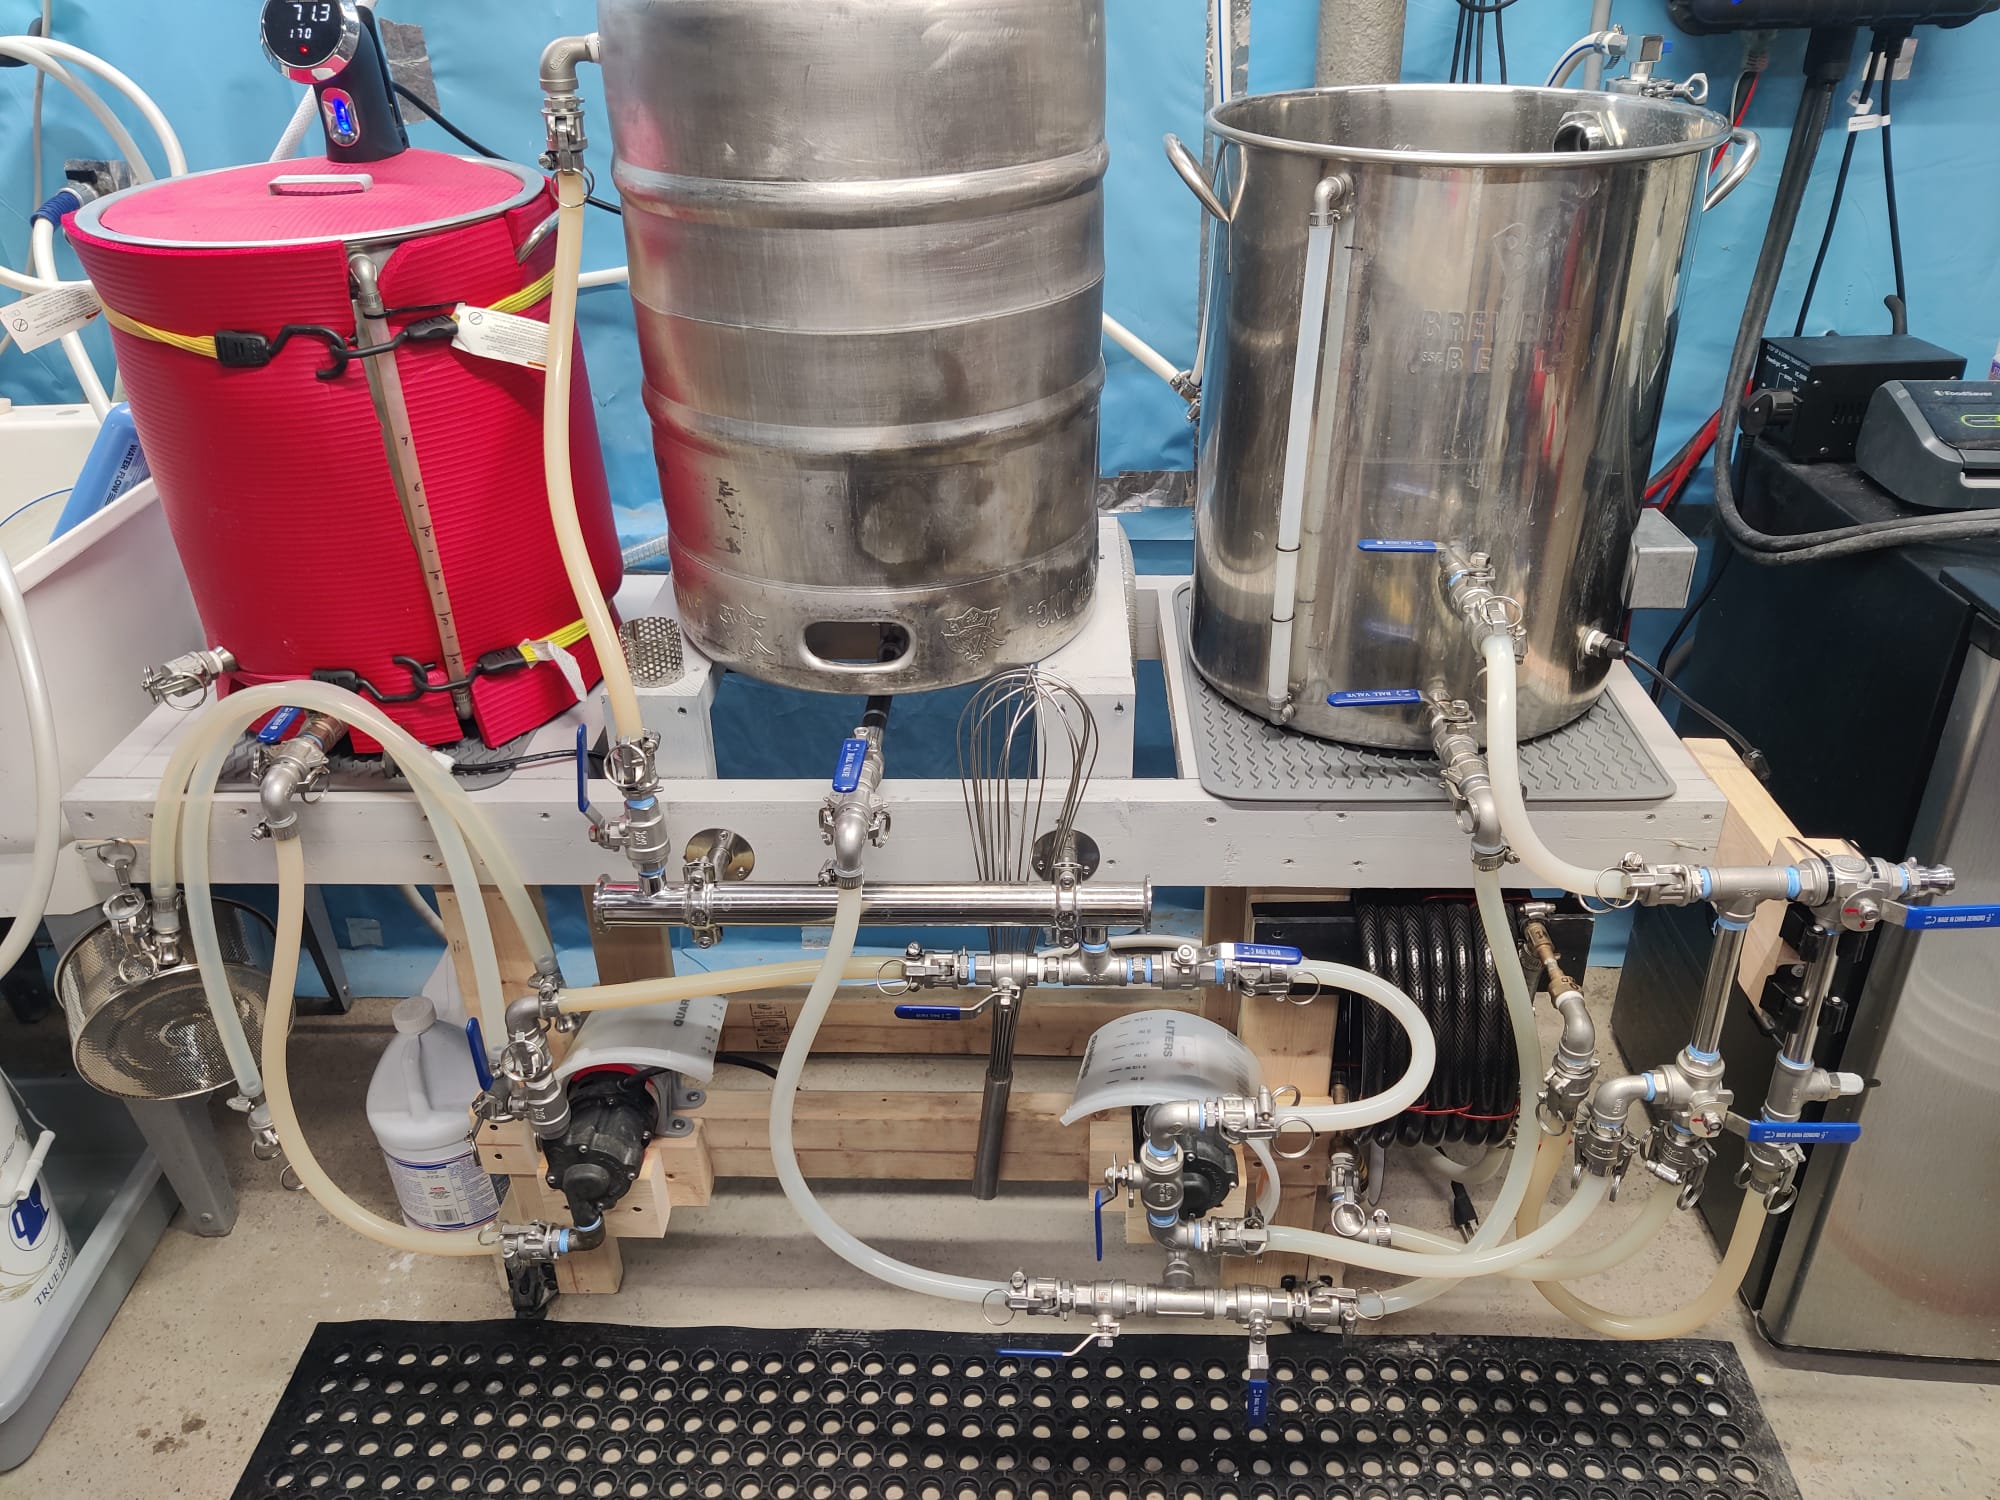
I have a 15gallon electric spike kettle with false bottom and pump
I want to have a recirculating mash. Give me ideas!
I can biab (and I might) but that's a lot of heavy messy grain. I could recirculate through my cooler? Through an additional spare kettle? I have multiple extra elements and plugs and space in my PID so I feel like I could make a rims set up of sorts... I'm worried about dry firing
Float switch?
orrrr looking for motivation
Thanks!


![Craft A Brew - Safale S-04 Dry Yeast - Fermentis - English Ale Dry Yeast - For English and American Ales and Hard Apple Ciders - Ingredients for Home Brewing - Beer Making Supplies - [1 Pack]](https://m.media-amazon.com/images/I/41fVGNh6JfL._SL500_.jpg)