Plumbers, what am I doing wrong? copper chiller build

Homebrew Talk - Beer, Wine, Mead, & Cider Brewing Discussion Forum

Help Support Homebrew Talk - Beer, Wine, Mead, & Cider Brewing Discussion Forum:

This site may earn a commission from merchant affiliate links, including eBay, Amazon, and others.

Elfmaze

Well-Known Member
Joined
Oct 22, 2008
Messages
635
Reaction score
27
Location
Pittsburgh
SO I've never had trouble sweating pipes before. but this one is not flowing... I used a pipe tool to clean up the edges and applied this flux to the joints.


1595875470678.png


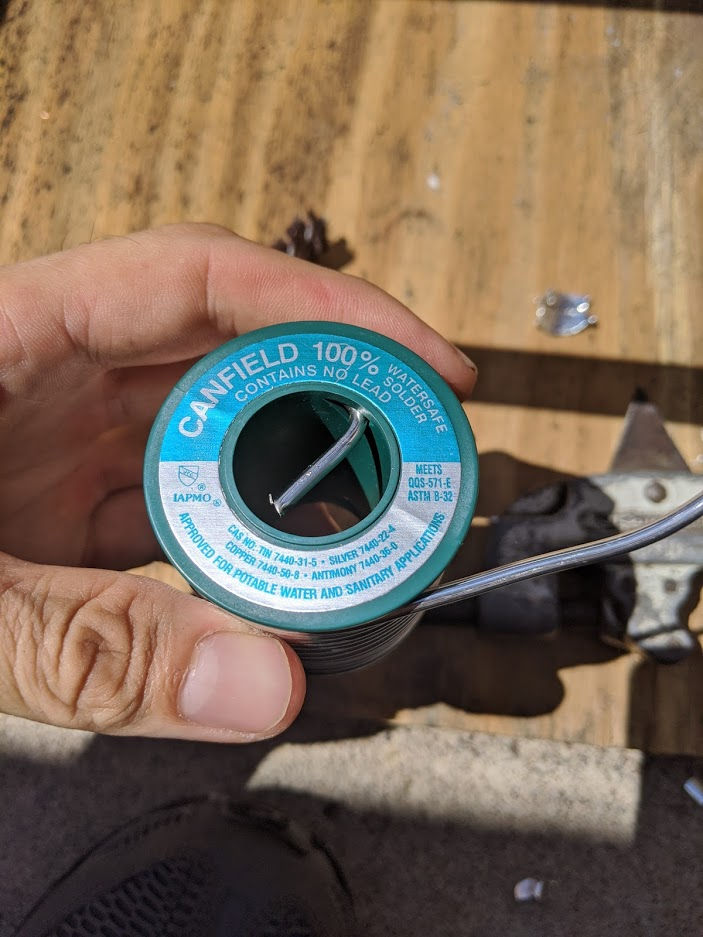
Using this solder,
1595875581479.png


But its not flowing into the joint... just around.
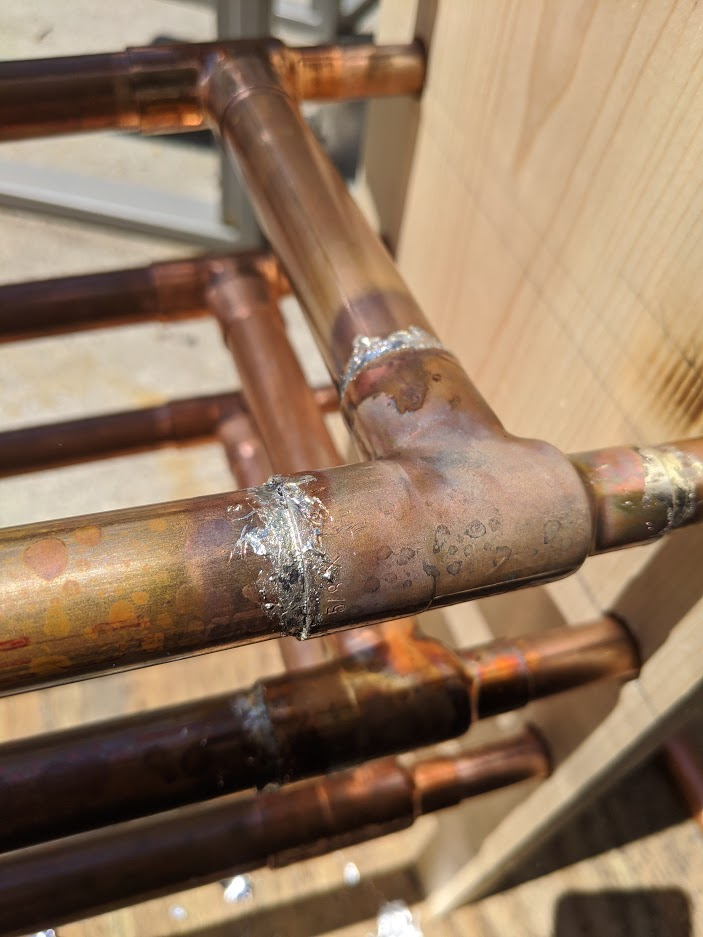
1595875627753.png


It probably took about an hour to put it all together before soldering, could that have been too long?
 
It looks like your pipes may not have been hot enough. A lot of guys, even 'pros', do the touch and test assuming just because the solder melts, it's time. Start heating your pipe not right at the joint, but more on the fitting. Don't touch the solder to the pipe until the flame on the opposite side of the pipe turns green. Green means go - remove the flame and apply solder quickly. Easy on the flux too. A little goes a long way.

Speaking of flame, you didn't say what gas or nozzle you were using. Assuming it's propane and a pencil tip you should be fine.
 
Ah it looks like part of my problem was flux... need more flux. didnt realize the whole area needs cleaned with flux
 
I'm not sure what you were doing before, but yes. The pipe (fitting and pipe) needs to be cleaned with emery cloth and flux applied sparingly. The flux alone will not clean everything. It is only there to prevent oxides and break the surface tension of the liquid solder to promote flow. Only use a solder brush. Never your finger.
 
First leak test done. should have left a bit more space for screwing on the hose as my fitting apparently doesn't spin :( But no significant leaks detected in a dynamic test... i wasn't able to try a static high pressure test... but a few drips on the brew stand dont really worry me
1595882508880.png
 
I'm not sure what you were doing before, but yes. The pipe (fitting and pipe) needs to be cleaned with emery cloth and flux applied sparingly. The flux alone will not clean everything. It is only there to prevent oxides and break the surface tension of the liquid solder to promote flow. Only use a solder brush. Never your finger.

Why no fingers in the flux? Is that because it’s bad for your solder joint or because it’s bad for your finger?
 
Elfmaze,
Can you say a little more about the design of your chiller? It looks totally different than other designs I’ve seen (admittedly not many)
 
Why no fingers in the flux? Is that because it’s bad for your solder joint or because it’s bad for your finger?
Bad for both, but mostly the joint. After cleaning you shouldn't touch the shiny bits to not get contaminants from your hands (especially body oils) on the joint which could interfere with the bond. Applying flux with your finger completely negates the prep and cleaning you just did. As for skin, flux is an acid. It is bad in cuts, on skin, in eyes, and soft tissue. Flux on the skin is not my biggest concern because unless you are the nastiest creature to ever grace this planet you will be washing your hands after doing any plumbing work. Especially if those mits are gonna go anywhere near your face.
 
The copper should be extremely clean via wire brush or emory cloth and then degreased with spirits. Flux should be on the inside of the fittings and the tubing before insertion. Heat mostly the fitting. Remove the flame before touching the solder to the joint to see if it flows. Never put the flame on the solder.
 
SO I've never had trouble sweating pipes before. but this one is not flowing... I used a pipe tool to clean up the edges and applied this flux to the joints.


View attachment 691319

Using this solder,
View attachment 691320

But its not flowing into the joint... just around.
View attachment 691322


It probably took about an hour to put it all together before soldering, could that have been too long?
Get yourself Silverbrite
SO I've never had trouble sweating pipes before. but this one is not flowing... I used a pipe tool to clean up the edges and applied this flux to the joints.


View attachment 691319

Using this solder,
View attachment 691320

But its not flowing into the joint... just around.
..... get yourself a roll of Silverbrite solder it flows nice, I've tried them all. Clean, flux fitting and pipe, heat, quick wipe flux drips, solder, wipe. If you have no leaks, good job.
 
Elfmaze,
Can you say a little more about the design of your chiller? It looks totally different than other designs I’ve seen (admittedly not many)

Yeah, So. I have never liked traditional plate chillers(besides the SABCO monster) because they have fairly small channels and are impossible to clean out. they are soldered together after all. Twisted Counter flow chillers have better flow, But again, impossible to verify clean without a endoscope camera. So this is based on Jaded brewings Cyclone chiller(The JaDeD Cyclone™ Cleanable Counterflow Chiller).

The reason I didn't just buy the Jaded was two fold. one, it didn't fit really well on the rig. and two, I wanted the thing to drain naturally. The whole path of the chilling water drops about an inch every two feet. this allows for a near complete draining of cooling water. My garage gets cold in the winter... I make sure it doesn't freeze in there, but if I ever had the garage door open or a furnace failure it COULD freeze real quick. I don't want to risk having some water pooled in a line and burst pipe city.

The line ends are 1/2 inch tubing that can be pulled off for inspection. and I am using it to recirculate back into the Boil kettle to drop the whole batch before transferring.

1596472919917.png
1596473218407.png
 
Had the first test of the system. Worked as planned. Not the fastest chiller, but does its job. knocked it from 212* to 112* in about 20mins. went to 100* before kicking it over to the conical and glycol took it the rest of the way. I recaptured about 20 gallons of hot water that I then used to flush the brewery.
 
possibly, would help to have fins on the outer at that point... but I doubt it would change the efficiency that much. Now plumbing a ground water prechiller to take it the last 30* using the glycol to precool the incoming water could work...
 
I built one like this but without the fancy stand. That looks like it makes it much easier to handle. I use a pump to move the wort through mine and it gets the wort down to low 80s in one pass.
 
the stand was an after thought. couldn't figure out how to hold it all steady for soldering with the angles, so built a "jig" then realizing how vulnerable it would be to crushing, I left it in the Jig... and finally just accepted it and painted the thing... but yes. Much better protected with the wooden ends accidental design win.

I don't have a temp in/out gauge... but would be easy enough to stick the thermapen under the BK return to see what its knocking out in one pass, I wasn't sure if I wanted to whirlpool or just return. So the return hose is about 3' long and just goes up and over back into the BK. I did use CO2 to blow the wort back down and out back into the BK before transferring to the conical. I calculated I have around a pint+ of liquid in the cooler that I want to drink :)
 
Back
Top