rac3850
Member
Looks like the pictures didn't attach to my post?
Last edited:


the drill i'm using is an old steel encased jobber that puts holes in pressure treated 6x6's like butter and will take your hand off if the bit catches.
best $15 i spent on craigs list.
I've got one of those too -- weighs about 25 lbs, runs about 200 or so RPM, has a curved saddle you can sit on it, plus two handles to hold on for dear life. Unstoppable torque. It was my grandfather's. I don't think I need it for the corona mill though.

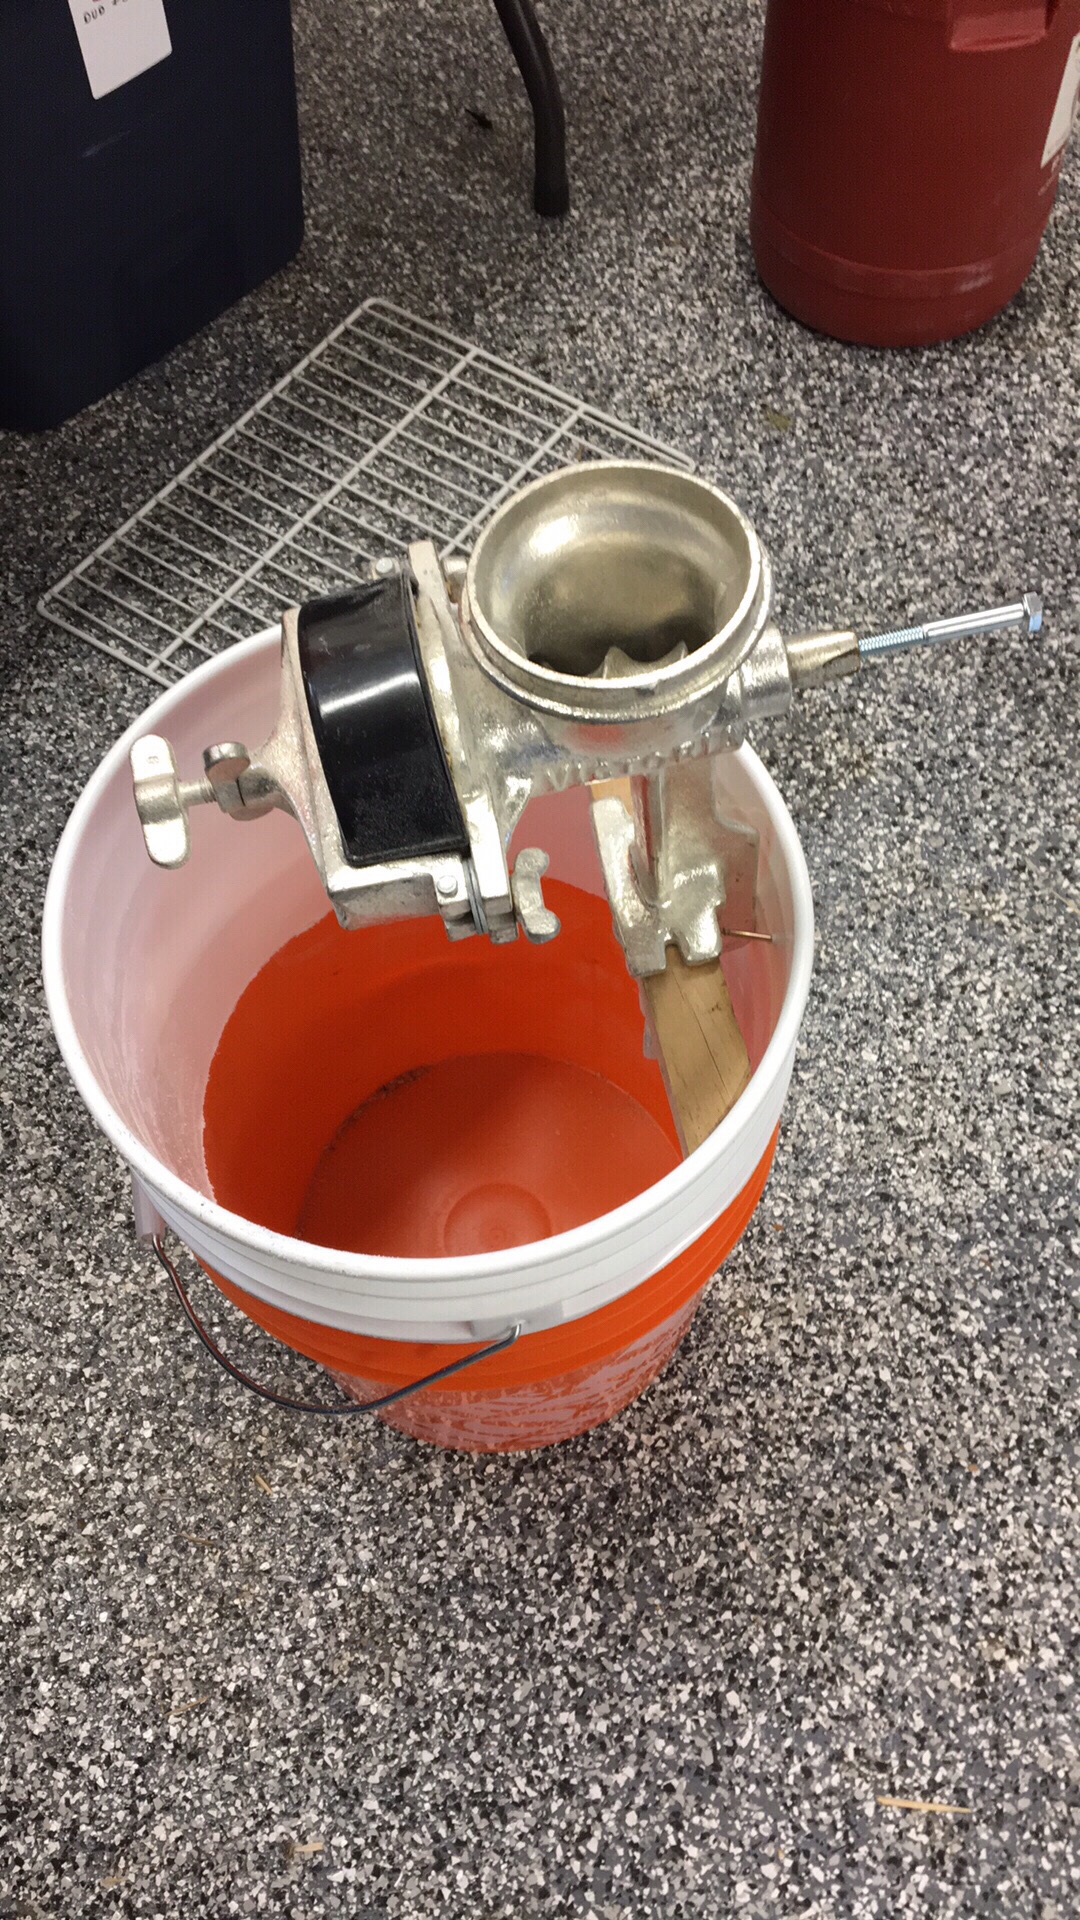
I used the two bucket plan, with a drill driver board inserted between the buckets. The upper bucket has a 1 x 6 inside to mount the mill, using six screws through the bucket to hold it in place. On the outside of the bucket I made a couple of "ears" to hold it in place when inserted into the drill driver board (screwed to the bucket from the inside).
Ok, so, looking at this, in theory I could just cut holes in the side of the bucket to slide a longer 1x6 through, pulling double duty as the mill mount and ears, yes? Of course, the holes would need to be slightly longer than the board is wide, to account for curvature . . .QTikiBrew,
Hope these pictures of the mill mounting bucket help, one from the top, one from the bottom and one from the side. if not just reply with any other views you need.
Ok, so, looking at this, in theory I could just cut holes in the side of the bucket to slide a longer 1x6 through, pulling double duty as the mill mount and ears, yes? Of course, the holes would need to be slightly longer than the board is wide, to account for curvature . . .
Right, although a spare c-clamp could help with that.Yep, I think that would work too. Definitely more elegant from a design perspective, fewer parts. I think the board would need to be wide enough so that if the mill shifted towards one side or the other of the bucket, the opposite board end would not dis-engage (i.e., slip through and fall inside the bucket).
I'm uploading some pictures trying to show how cutting up one bucket to hold the Corona Grinder and using the bottom half to create Cover Shield...I'm able to interchange the bottom collection buckets, (these are unmolested buckets, and just change out) as these are ordinary 5 gallon stackable buckets.a bucket will hold roughly 20 lbs. of milled grains (depending on how fine they are ground) It's easy to just swap out the collection buckets when filled
View attachment 548812 View attachment 548813 View attachment 548814 View attachment 548815


@Stake, I really liked your bucket design. Copied it pretty much straight up.
View attachment 688855
Pin adjusted for rotor plate articulation. Washer stack added at bracket attachment for stability.
View attachment 688856
Milled a small batch of grain for BIAB. Rather consistent grind, plenty of flour. I'm happy with it. About $40 all told.
View attachment 688857


Time to necro this thread since it hopefully just saved me a ton of money. Nothing innovative here and I’ll probably tweak it more later but here’s my Ugly Junk:
View attachment 722455View attachment 722456View attachment 722457
Doing BIAB with this. Thoughts?

I can't tell if you've added these washers. They'll allow you to tighten down the clamp so those screws don't loosen up on you.
View attachment 722460
did that level of crush look good


![Craft A Brew - Safale BE-256 Yeast - Fermentis - Belgian Ale Dry Yeast - For Belgian & Strong Ales - Ingredients for Home Brewing - Beer Making Supplies - [3 Pack]](https://m.media-amazon.com/images/I/51bcKEwQmWL._SL500_.jpg)


