You have my vote. 


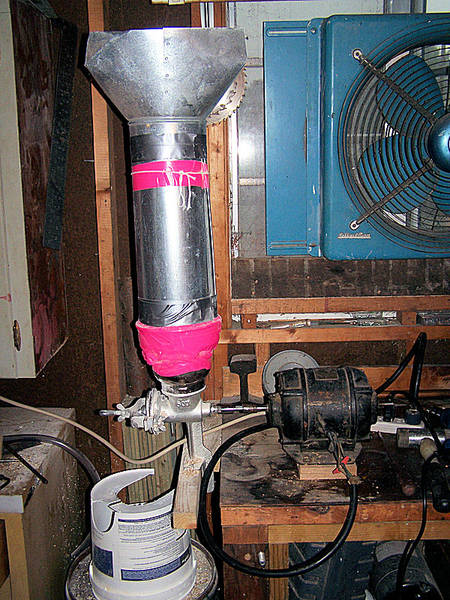
Holy hell, that's an quite an abomination Gnome. I love the pink tape and exposed wiring. It's like modern art.


Gnomy, you won long ago purely by merit of the hot pink duct tape...but this takes ugly junk to the highest level possible....Methinks, you have dethroned king biermuncher himself for who deserves to wear the "My junk is ugly" crown.....
Anything I can do to make it uglier?
I'm thinking a third ribbon of pink duct tape at the top of the hopper, two or three good wraps folded back over could extend the hopper another inch or two for increased capacity. It would finish it off sort of like the cherry on a sundae. What the hell, that pink tape was gararge sale priced anyways right.
I need to see a picture to understand what you're saying. I can't see how you would need that many washer to make it work.
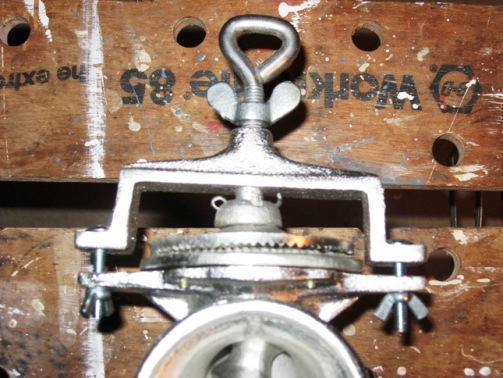
Here is a picture of my mill (hope it posts OK). You can see how the bracket doesn't meet with the body of the mill. The end of the auger shaft does not sit in the bracket all the way. The main problem is the ball bearing in the bracket where the adjusting screw is prevents it from going in all the way.
Do you have a ball bearing in the chamber where the tip of the auger shaft fits into the bracket? That is what's preventing the ends from meeting in mine. When I look at some of the other photos, it looks like the auger shaft slides into that chamber all the way up to the cotter pin that holds it in pace. However with mine it doesn't go in all the way. In any event, I put a couple of large nuts to fill the gaps on each side of the bracket and I can adjust the grinding plates just fine. It looks ugly but then again isn't that the title of this post?That looks exactly like all of our mills...I'm still confused...it they don't meet, then just put your spacer washers on the left and right where the wing nuts are...put enough in there to create a gap between the front grinder and the rear plate....
I'm definitely going to build one of these with a victoria mill from discount tommy using the style of wilserbrewer.
Anyone know where else to get these cheap? DiscountTommy went from 15.95 + $8 shipping yesterday to $39.95 each
secinarot,
Just guessing again here, but I am inclined to think that the ball bearing in your front bracket is binding and is not all the way inserted into the front bracket. I would try and press the bearing fully into the bracket by tapping lightly w/ a punch and hammer, or just by simply tightening the two outer bolts to force the bearing home. I'm guessing that during manufacturing and assembly of your mill, the bearing was not full placed in the front bracket of the mill.
Give it a little wack and reporrt back.


Well.....maybe not quite, but here it is anyway.... I am taking it as an article of faith that all these attachements will post. Anyway, take a look at that crush! Ugly it may be, but crush it does.
.... I want to see the empty husks somewhat in tact and then the insides of the grains sort of chopped up. ..
Thanks, wilserbrewer, I think you may be right about the crush.


![Craft A Brew - Safale BE-256 Yeast - Fermentis - Belgian Ale Dry Yeast - For Belgian & Strong Ales - Ingredients for Home Brewing - Beer Making Supplies - [3 Pack]](https://m.media-amazon.com/images/I/51bcKEwQmWL._SL500_.jpg)


