Frigidaire Model FRC445GB Mini-Fridge Kegerator Conversion

Homebrew Talk - Beer, Wine, Mead, & Cider Brewing Discussion Forum

Help Support Homebrew Talk - Beer, Wine, Mead, & Cider Brewing Discussion Forum:

This site may earn a commission from merchant affiliate links, including eBay, Amazon, and others.
I have a question on the freezer for this model. Has anyone encountered dripping from the freezer after the compartment is removed. I have a decent amount of frozen spikes on mine and it seems whenever the fridge is opened multiple times to grab beer they melt and produce alot of h20 in the bottom which then makes its way onto my floor, any suggestions or advice would be great.
 
just picked mine up this morning. got it all prepped and just waiting on my tower to finish it up.will post pics when im done, thanks for all the info and research
 
ok so i got it all converted just waiting on my keg. i had originally made this with the thoughts of using a 1/6 with a commercial draft as i dont brew my own beer. i even modded the door for more room. ended up just cutting around the edge, peeling the door piece away from the door and filling the low spots with spray foam then sanding flat once it dried. then buying one of those magnetic white boards and cut to size. figured i could use that for notes on date keg was tapped and co2 pressure. anyways i found out not many places in town carry 1/6 barrels in much of anything i drink so i might have to go with a 1/4....not really sure how thats gonna work but i measured the inside and it should fit, probly gonna be pretty snug though. ill post pics when i put it in. might have to figure somethign to do with the light/thermo though.
 
for the record a 1/4 barrel fits pretty good in these things. not sure if i can post pics since my accounts new but ill figure a way to do it.
fighting regulator problems at the moment, set it at 10, it creeps to 25-30 within 10 minutes.
 
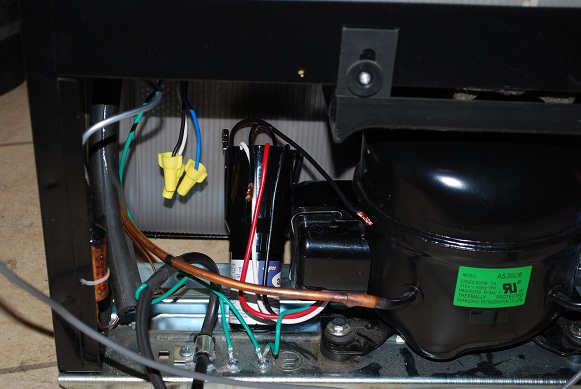
Well, I did this conversion 2 years ago. Everything was running fine until today. I woke up to temps higher than normal and ice all over what was the back of the freezer compartment before I removed it. I had always had a bit of freezing on the top, but not the back.

Turned it off, cleaned up the ice and turned it back on. Compressor came on, ran for 4 hours, no temp change. Thermostat is in factory position on the side wall (I use 3 gallon kegs) and I have a tower that was installed in the front part of the top where there are no coils. Everything seems to be as normal except for the temperature.

Like I said, it was aces for 2 years. Any ideas, or do I just need to bite the pillow and get a new fridge?
 
I would like to mount some faucets on the door of my Frigidaire but cannot find within the thread what size shank should be used. I am looking at kegconnection and there are 3 1/8", 4 1/8" and 5 1/8" options. Can someone let me know which would be preferred? Thanks.
 
I haven't built this kegerator yet (sitting in my office waiting for parts + free time to arrive), but I am going to build a thru-the door model.

That being said, having done lots of research and consulting people in this thread and others who have built it, it seems that you will be fine with 4" or 5" shanks, especially if you mount the faucets as high up on the door as you can. By mounting them close to the top of the door, the shanks will stick through the door above the kegs inside.

Hope this helps, and I will be documenting and eventually posting my build when I get it done.
 
I built this one and I used the 4" shanks and drilled them so they come out exactly in between the ceiling of the fridge and the top of the cornies rubber handle. Still if you turn the cornies just so, it will hit the shank, so I have the cornies turned so the beer line nipple goes over the handle area that has no handle, ie the beer out valve.
 
a build im almost done with. ill post more later

web (1).jpg


web (2).jpg
 
Hi guys, new here.

Anyways im wondering what the INSIDE diameter HEIGHT of this fridgidaire fridge is Model #: LFPH44M4LM 4.4 cu ft?
I live in Ontario and the beer supplier im using has europeon style couplers. So basically i need 31" inside diameter in height. Im hoping the fridge is large enough!

kegheight3.jpg


Thanks in advance!
Chuck
 
Here are the internal dimensions for the newest model of this fridge (depth is to the edge of the interior and assumes you rip out the molding on the door):

Height (at edge): 28.5"
Height (4.5" from edge): 27.75"
Height (hump/shelf from floor): 8.5"

Width (at edge): 18.375"
Width (4.5" from edge): 16.75"

Depth (to hump/shelf): 12"
Depth (above hump/shelf): 17.5"
 
Read the entire post over the past two days. Whew!!.

I bought a conversion off Craigslist and this thing gets cold. Problem is, it always seems to run, whatever setting I put it on (originally 3, now at 1, water in a cup is measuring 36).

Any ideas? Sound like the thermo may be gone and I may need to go external control?

Also, I am seeing frost on the back part of the freezer compartment, not the top like other have seen.
 
Thought I saw it in my powering through the postings yesterday, but how are you guys getting the temp probe into the chamber when using an external (Johnson, ranco) type temp controller?
 
Ok so i've been searching and looking all across the interweb for the past 2 hrs and I haven't found the answer i've been looking for.

I'm trying to find out if i can use the fridge to have a sanke sixtel keg as well as a ball and lock keg in at the same time without much destruction of the fridge. I would love to just use a chest freezer but i live in a small apartment.
 
Hey Pig,

Highly highly doubtful that you could get both of those in there at the same time (and that is with major modification to the interior of the fridge). You are able to fit 2 ball locks inside with about 2-3" to spare without hacking up the interior.

Also, just so you know, this is a BIG mini-fridge. Check out the exterior dimensions versus that of some smaller chest freezers, it may be worth your while to go the freezer route.
 
I just have a 1/4 barrel of bud light right now and when I used the five foot line that came with my tower it was pretty foamy so I bought a 10 footsection and it poured better. Ive read some topics on the mixing stick method to add resistance but havent tried it yet. I decided that this is too small to try and keep a domestic on tap and try to start trying to brew my own so I put mine on craigslist to try to recoup some cash for the keezer project. :D
 
How long of beer line has everyone been using in this setup?

I'm using ~9ft of 3/16 line between 10-12PSI (depending on style) at between 38-40 degrees (with a tower setup). Pretty happy with the pour. Best bet is to get 10 or 11 feet of line and work your way down from there, depending on your preferred temp/PSI.

Side note: Before installing the lines in the tower, I used a sharpie to mark off the 10, 9, 8, 7, 6, and 5 foot length on the line. Then, as I was testing the pour and cutting the line down, it was pretty easy to gauge where I was at. YMMV.
 
So, I built this kegerator a little over 6 months ago and wanted to say thanks to all who have posted on this topic. In particular, I found the following builds particularly useful:


I was working on the newer model of fridge (LFPH44M4LM) and had a few additional modifications for what they're worth.

COPPER TUBING

Nothing earth shattering here. Tried to get the copper tubes as deep into the fridge as possible to conduct the cold up to the tower. On the other end, tried to get the copper as close to the shanks as I could. The shape of my regulator allowed me to thread the tubes between the dials. Thankfully they hover over the shelf in the back, so there is no interference with the kegs.

I used copper clamps on the tubes to sit them on top of my holes in the top of the fridge. I felt like I might be able to get a bit better conductivity by having a little more surface area sitting directly near/on the cooling lines. Ended up being a great fit.

kegerator00001a.jpg

kegerator00002a.JPG

kegerator00003a.jpg

kegerator00004a.jpg

kegerator00005a.jpg
 
TOWER INSULATION

The tower came with a bit of loose rubbery foam insulation and a small Styrofoam disc in the cap. I jammed as much pipe insulation foam around as I could and still clear the copper tubes. With the combination of the copper tubing and the insulation, I haven't had any problems getting a cool pour.


WHITEBOARD DOOR

This idea was taken from someone else who did something similar. I couldn't get both my kegs in and still close the door on the newer model of fridge, so I had to hack off all the plastic innards and remove a lot of foam from the door. I cut a melamine board down to size, filled the inside cavity of the door with Great Stuff and clamped the melamine down. Then, I caulked around the whiteboard. Haven't actually used it yet for writing beer notes, but at least it hides the door innards.


SOUND PROOFING

Not sure if I got a lemon, but the compressor is SUPER LOUD and quite annoying for both me and SWMBO. So, I purchased some soundproofing foam and built a bit of a "box" at the back of the fridge and also stuck some strips underneath the fridge. I fear this will be likely shorten the life of the unit, but it wasn't tolerable otherwise.

kegerator00001b.JPG

kegerator00002b.JPG

kegerator00003b.jpg

kegerator00004b.jpg

kegerator00005b.JPG


Cheers again to everyone who has contributed to this excellent mod!
 
I am getting ready to do this fridge. My question is do you remove all the plastic from the door or do you leave a little around the edges to keep the rubber gasket/seal in place? I would like to do the whiteboard mod as I can't fit 2 kegs and the co2 in the new version of this fridge? Thanks
 
My question is do you remove all the plastic from the door or do you leave a little around the edges to keep the rubber gasket/seal in place?

The latter. It is critical to keep the rubber gasket in place, otherwise you'll leak cool air from the edges of the door. I probably was a bit too aggressive with my door, as, when all was said and done, I wasn't getting a perfect seal (which was quite irritating). I ended up jamming a little extra pipe foam around the edges of the gasket to prop it up a bit and force it to seal against the door.

This worked fine, but, in retrospect, I probably would have given myself a little extra room around the edge of the door so I didn't interfere with the gasket. That said, it's a huge pain to remove all that plastic and the foam underneath it -- so there is a limit to how gentle one can be.
 
I am getting ready to do this fridge. My question is do you remove all the plastic from the door or do you leave a little around the edges to keep the rubber gasket/seal in place? I would like to do the whiteboard mod as I can't fit 2 kegs and the co2 in the new version of this fridge? Thanks

I kinda followed the natural edge of the plastic bevel... cutting into it at the point where it flattened out:

Brians-Belly-Kegerator-14.jpg


Brians-Belly-Kegerator-19.jpg


Dave
 
davebach said:
I kinda followed the natural edge of the plastic bevel... cutting into it at the point where it flattened out:

Dave

Thanks that picture was very helpful, I have been trying to figure out the best place to make the cut but I think I have been overthinking the entire process. What are you guys doing to seal the seam between the original plastic that retains the magnetic seal and the new material? I can see a noticable seam in many of these conversions.

Also, is there any standard for how thick of a piece of new material that can be used to cover the exposed insulation? like is 1/4 wood too thick? is is preferable to go with a thinner material and then use caulk to seal the joint between the two materials?
 
I think davebach made a good choice where he made his cut, as is provides good gasket stability. I was more aggressive in my cutting and had to fight to seal the gasket later on. On the flipside, I probably gained an extra 1/2 inch inside the fridge, which is possibly useful given how tight a space it is in there for two cornys. I'd get your light sorted out and then stick your two cornys in there and measure how much room you have to the edge. From there, you can calculate how much room you'll have with the door molding cut plus your new board on top of it. Should be fine.

To secure the board (I used melamine, davebach used lucite, I'd guess both materials are 1/8"-1/4" thick), I just filled my gaps with Great Stuff and then clamped the melamine onto it, put some heavy items on top and let it dry overnight. I then used some silicone caulk around the edges of the board to seal it up.
 
Thanks elganso... yes, cutting too close would have probably made it more difficult to seam back up. To continue on what you said--for Brizzo's benefit--I didn't use Great Stuff like a lot of other builders. It really is GREAT for a lot of situations, but it expands too much and is too messy. I used regular fiberglass insulation to fill in the holes that the can dispenser and other shelves make since they are molded into the door (as well as protrude). It's hard to see in that pic because the fiberglass is the exact same color as the foam.

Brizzo, I have a rather extensive gallery of pics on my website for the build and there is a description on how I used lucite (and even painted it to match) and then caulked it into place with silicon. I may have used liquid nails to adhere the lucite to some of the high spots in the original foam, but I can't remember. Either way, the lucite is pretty lightweight and very thin.

Dave
 
I just snapped a pic of the seam so you can see it better. Just ran a bead around the seam and smoothed it out with my finger. As you can see, it stayed pretty clear of the original magnetic gasket. Run the silicon BEFORE you put the gasket back in :)

silicon-door-seam.jpg
 
Gotcha, thanks for th break down, I dontwant to get into a situation where I ruin my new little beer fridge. I picked up a piece of thin birch plywood from home depot that I am goin to prime then paint, they had 2x 4 sheets for 8 bucks.
 
+1 on elganso's comments.

I have done a few of these conversions. On the second one I did with a friend, we didn't pay attention and cut too much off of th plastic. Then we put the whiteboard on the door and had fit issues getting the door to seal correctly.

On the third conversion, I really paid attention and cut right at the point where the molding curves upward. Then cut the whiteboard to just fit inside the cut our area. Attach with adhesive and apply weights while it dries. Then use a small bead of caulk to give it a finished look.

The model from Lowes has different molding than the Best Buy model. I may be wrong but I think that the molding on the Lowes model allows for more tolerance in this area.
 
Bumbler said:
Saw this post and thought I'd add my throw in my penny. By coincidence I installed a tower on this very fridge today. The front 4" doesn't have any coils in it. No need to remove the top if you want the tower in the front.

After hole drilled.

Inside of fridge after tower installation.

The unit seems pretty solid. I didn't see the need for a reinforcement plate on the inside. But, I'll monitor it and add if needed.

Finished product.

First pint poured. Not really a pint, more like 12oz.

Sorry! I think my class is warped.

Still room for a drip tray. Easiest install ever. only took 1 hr from start to finish.

Would your tower install work on the new Frigidaier model? I think it is the LFPH44M4LM.

They look very similar.
 
This is exactly what I have been looking at in Lowes. Thanks so much for this. because my wife also wants a wetbar, I'm gonna build a cabinet with a counter on top and mount this kegerator inside the cab. then it doesnt matter where the lines come out. the 2 tap tower will be on top of the countertop. Awsome.
 
Back
Top