bovineblitz
Well-Known Member
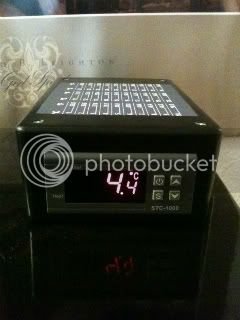
and the most important question. how did you guys make those awesome temperature chart stickers for the top of the unit?
thanks guys in advance
cheers
Super simple. Print it out and use clear tape over the whole thing.


and the most important question. how did you guys make those awesome temperature chart stickers for the top of the unit?
thanks guys in advance
cheers


Well...inspired by this project and taking into account the questions/suggestions/recommendations from posters on this thread, attached are some pictures of my project (5.1 cu ft GE freezer)
The only changes made to Jack's original design:
1) Rather than mount an outlet on the back to control 'hot and cold', I ran a pigtail out the back of the collar with a female cord adapter, allowing the the freezer to be plugged directly into it (eliminating a little additional wiring).
2) Rather than using a space heater AND taking into account all of the different suggestions made on this thread, I elected to use an outdoor outlet box with an added light attachment; a 25W red light bulb in the socket works perfectly for increasing temperatures.
3) To address the 'bending over' issues, I built a small platform that allows me to set all carboys at a height level with the compressor hump. I no longer have to reach down to get carboys in and out. As an added bonus, it also allows me to put two (2) 5-gallon carboys in a 5.1 cu ft freezer (which was my real goal).
4) My OCD kicked in (LOL)...and having some some radiant heat barrier left over from a spring time project, I wrapped the insulating foam lining the 'collar' to give it more of a finished look as well as better insulating properties. I also lined the inside top of the freezer lid to give me additional support in holding the lid in place (since I taped the inside corners with silver tape in addition to using 2-sided tape between the collar and the lid seal).
5) I used an inexpensive aquarium thermostat which ran me about $25 on eBay vice the more expensive ones mentioned in this thread. Although it doesn't have as many 'bells and whistles' as the more expensive controllers, I've found that controlling the temperature to within +/- 1 degree F requires the freezer's compressor to run for about 6-7 minutes, followed by about 6-7 minutes of heat from the 25W bulb (rewarm due to the temperature overshoot). Once the temperature reaches the desired setting, it takes about another 90 minutes before the cycle repeats.
6) Still to be completed...adding some casters to roll this bad boy around...but that's a quick add-on.
I wanted to say thanks to Jack for providing pics and guidance on his project...his original posting was an inspiration to get going on this project and create something that looks nice (and can easily sit in my home for all to see). I also wanted to thank everyone else for the constructive comments and additional suggestions...this is a great site with a wealth of information.


If you leave the plastic cover off the back of the controller and form the wires tight, it works well in the 3" deep Radio Shack box.I wish I had looked at some more pics before starting. I just finished mine with the controller on the large panel side of the project box (like android did) and it barely closes. If I could do it again, I'd put it on the edge like milldoggy and others did.


However, I do wish I had gone out and bought a black outlet and cover...
I don't think these controllers are convertible...So I decided to start this project. I ordered a temp controller and it is in transit as I type. The only problem is that in my infinite wisdom I got a 220v controller. I know as much about electricity as I do about brain surgery so I am asking this; Instead sending it back and further delaying my project is there anything I can add to the wiring to convert the unit from 220v to 120v?
You are correct. You may need a heat source if you have the freezer in a cool location, I know I do.I'm looking on cl now for a chest freezer. I found this thread and will build that temp. controller... So, is there no modification required to the wiring of the chest freezer??? The temp controler basically just turns the freezer on and off as required to keep the temp....
This is the seller I got mine from. Received it in about a week. $20 w/free shipping.Also, does anyone have a direct link to the temp controler...
MrMeans said:So I decided to start this project. I ordered a temp controller and it is in transit as I type. The only problem is that in my infinite wisdom I got a 220v controller. I know as much about electricity as I do about brain surgery so I am asking this; Instead sending it back and further delaying my project is there anything I can add to the wiring to convert the unit from 220v to 120v?
how did you guys make those awesome temperature chart stickers for the top of the unit?

MrMeans said:hmmm I guess I will wait and see what I got when I get it. this si what I got from teh description on ebay. i already emailed the seller and it has been shipped. If I have to exchange it I will, I just was pumped because I got a day off, the wife is going to be gone, and I don't have any tests, quizzes or homework due this week at school.
these are the specs from the ebay description
LCD Digital Temperature Controller Aquarium Digital
Features:
Brand new and high quality
easy-to-read Large LCD display
convenient multifunctional device for controlling temperature
Great for aquarium, terrarium, vivarium, chicken incubator, laboratories and so on
With heating and cooling function
Alarm automatically when temperature exceeds the limit value
Temperature calibration
Refrigerating control output delay protection
Specifications:
Measuring range: -50°C - 99 °C
Control range: -50°C - 99 °C (adjustable)
Control temperature difference: 0.3°C - 10 °C (adjustable)
Resolution: 0.1°C
Accuracy: ± 1°C (-50°C - 70 °C)
Sensor: NTC sensor
Relay contact capacity (heating): 10A (max) 220V
Relay contact capacity (cooling):10 A (max) 220V
Compressor delay protection time: 1 - 10 minutes (adjustable)
Working temperature: 0°C - 60 °C
Storage temperature: -30°C - 75 °C
Operating relative humidity: 20% - 85%
Alarm output: Buzzer
Power consumption: less than 3W
Cable length: 2m
Dimensions: approx. 75mm x 85mm x 34.5mm
Package included:
1 X Temperature controller
1 X Sensor cable
1 X User manual
from reading this is where I figured I got a 220. If its a simple part I have to solder thats fine, if it requires 9 parts and rebuilding the flux capacitor, thats a different story. I guess we'll see what the deal is when it gets here. I will be back with more questions.
Who was the seller? That will really help the most in determining which version you'll probably get.
smartlaptopparts
they recently updated their listing to include 59.99 shipping. good thing I swooped in when it was 16.99 shipping included.
...from reading this is where I figured I got a 220. If its a simple part I have to solder thats fine, if it requires 9 parts and rebuilding the flux capacitor, thats a different story. I guess we'll see what the deal is when it gets here. I will be back with more questions.
MrMeans said:So I decided to start this project. I ordered a temp controller and it is in transit as I type. The only problem is that in my infinite wisdom I got a 220v controller. I know as much about electricity as I do about brain surgery so I am asking this; Instead sending it back and further delaying my project is there anything I can add to the wiring to convert the unit from 220v to 120v?
Could someone clarify something for me on the wiring diagram? I looked through about 100 pages of this post but didnt find my answer. The black wire(s) in the diagram provided on page 1 is hot, correct? Also, is the left side of the outlet is the hot side?
Thanks!

milldoggy said:You could wrap each carboy with a reptile heater for better heat transfer
Edit: I'm a cheap idiot who got the wrong part. Saved $2 and ended up with a 220V unit. Left below just because. Please ignore and forgive my stupidity.
OK I need some help. Got one of these. Set it up, and it doesn't work. Double checked the wiring, still no. The unit turns on, it reads out the temperature, and the "Cool" indicator light blinks for 10 minutes then goes solid (I'm guessing the compressor savor does this). However no power goes to the outlets. I've tried using lamps and fans and clocks to see if it turns on and nothing. I've tried both outlets and still no.
Can someone provide some help.
I followed the schematic and feel like the wiring is correct. I've checked it twice. Here's what I did.
White wire - from power cord to 1, 5 and 7 (single nut).
Green Wire - from power cord to ground on outlet
Black Wire - power cord to "cold/non-broken"
"cold/non-broken" to 2
6 to "hot/broken"-top
8 to "hot/broken"-bottom
Senor to 3 and 4
Thanks


![Craft A Brew - Safale BE-256 Yeast - Fermentis - Belgian Ale Dry Yeast - For Belgian & Strong Ales - Ingredients for Home Brewing - Beer Making Supplies - [3 Pack]](https://m.media-amazon.com/images/I/51bcKEwQmWL._SL500_.jpg)


