
This is a system that I have been working on for a few months. For those that prefer it, here is a link to the video:
https://www.homebrewtalk.com/f36/sids-one-vessel-all-grain-brewing-system-360364/
This system is a modified BIAB system that allows me to brew all grain 10 gallon batches solo in one vessel. No special equipment is necessary. No heavy lifting. I am a computer programmer and I am always looking to do things faster, better, and easier. This is the culmination of the application of that idea to the brewing process.
This how-to utilizes an outdoor propane setup. You can just as easily brew using electric with this method. I prototyped this system indoors with two 15 amp electric heatsticks. My next big project is a 20 amp pid controlled unit with a single heat element and a march pump set up for easy indoor brewing.
Enough chitchat, on to the technique.

This technique is a modification of a basic BIAB. Start by cleaning and preparing your brewing area.

Heat the full volume of strike water to 155-160 degrees or so. I do ten gallon batches so I heat 12.5 gallons of water to 160. Since I made this video I have learned to use a RV potable water hose instead of a garden hose.

Get your strike water heating, secure your area, and move on to something else while it heats.

I am going to prepare my grain bill and other ingredients while the water heats.

This is a modified BIAB. To make life a bit easier, I line an ale pale with a plastic bag, then put a nylon grain bag inside the plastic bag. This keeps things clean and organized and cuts down steps.

As you can see, you keep your brew bags inside the plastic bags until you are ready to use them.

This is where the magic happens. We are doing 10 gallon batches with multiple normal sized bags. This makes ten gallon batches easily possible in one vessel with no special equipment. I can even do twenty gallons solo with two keggles and two propane burners. You can use clothespins to hold the bags in place, I use clamps from the hardware store.


By using a steep walled vessel you can apply heat without worrying about scorching if you need to warm your mash. You just need to make sure the bags are off the heat source or the bottom of the brew kettle.

Agitate by dunking up and down.

And also by opening each bag and carefully stirring vigorously inside each bag. Agitate a few time through out the 1+ hour mash.

Drain the bags for 10-15 seconds each.

You can optionally place them in another vessel to drain further.
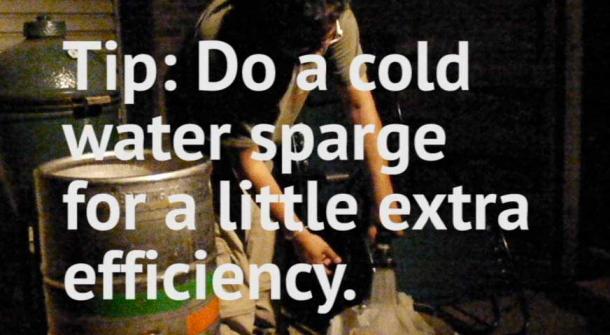
You can go one step further and do a mini sparge in that second vessel. I simply rinse the grain with cold water straight from the hose so I don't need to heat more water for sparging and I can save a bit of time. I am looking for the ratio of efficiency and ease that I want, and a cold water sparge gives it to me.

One and a half months later and the beer looks good. It is not as clear as most lagers I would make at this point, but I am pleased with the product.

This tutorial shows the first half of the brew day which is where the magic happens. For those that are interested, after this we did a one hour rigorous boil. We added 1.5 oz of Apollo as soon as we removed the bags and turned up the gas. @15 minutes we added 1.5 oz of Apollo, added the immersion chiller, and two tabs of whirfloc. At flameout we chilled to 75 degrees andtransferredto a 14.5 gallon conical via gravity (10+ foot run). We pitched a slurry of Bavarian lager yeast and fermented @65 degrees for 3 weeks. We then pushed the beer into kegs with co2 and put in a 45 degree keezer which we dropped to 35 after two weeks.
Prost!

https://www.homebrewtalk.com/f36/sids-one-vessel-all-grain-brewing-system-360364/
This system is a modified BIAB system that allows me to brew all grain 10 gallon batches solo in one vessel. No special equipment is necessary. No heavy lifting. I am a computer programmer and I am always looking to do things faster, better, and easier. This is the culmination of the application of that idea to the brewing process.
This how-to utilizes an outdoor propane setup. You can just as easily brew using electric with this method. I prototyped this system indoors with two 15 amp electric heatsticks. My next big project is a 20 amp pid controlled unit with a single heat element and a march pump set up for easy indoor brewing.
Enough chitchat, on to the technique.
This technique is a modification of a basic BIAB. Start by cleaning and preparing your brewing area.
Heat the full volume of strike water to 155-160 degrees or so. I do ten gallon batches so I heat 12.5 gallons of water to 160. Since I made this video I have learned to use a RV potable water hose instead of a garden hose.
Get your strike water heating, secure your area, and move on to something else while it heats.
I am going to prepare my grain bill and other ingredients while the water heats.
This is a modified BIAB. To make life a bit easier, I line an ale pale with a plastic bag, then put a nylon grain bag inside the plastic bag. This keeps things clean and organized and cuts down steps.
As you can see, you keep your brew bags inside the plastic bags until you are ready to use them.
This is where the magic happens. We are doing 10 gallon batches with multiple normal sized bags. This makes ten gallon batches easily possible in one vessel with no special equipment. I can even do twenty gallons solo with two keggles and two propane burners. You can use clothespins to hold the bags in place, I use clamps from the hardware store.
By using a steep walled vessel you can apply heat without worrying about scorching if you need to warm your mash. You just need to make sure the bags are off the heat source or the bottom of the brew kettle.
Agitate by dunking up and down.
And also by opening each bag and carefully stirring vigorously inside each bag. Agitate a few time through out the 1+ hour mash.
Drain the bags for 10-15 seconds each.
You can optionally place them in another vessel to drain further.
You can go one step further and do a mini sparge in that second vessel. I simply rinse the grain with cold water straight from the hose so I don't need to heat more water for sparging and I can save a bit of time. I am looking for the ratio of efficiency and ease that I want, and a cold water sparge gives it to me.
One and a half months later and the beer looks good. It is not as clear as most lagers I would make at this point, but I am pleased with the product.
This tutorial shows the first half of the brew day which is where the magic happens. For those that are interested, after this we did a one hour rigorous boil. We added 1.5 oz of Apollo as soon as we removed the bags and turned up the gas. @15 minutes we added 1.5 oz of Apollo, added the immersion chiller, and two tabs of whirfloc. At flameout we chilled to 75 degrees andtransferredto a 14.5 gallon conical via gravity (10+ foot run). We pitched a slurry of Bavarian lager yeast and fermented @65 degrees for 3 weeks. We then pushed the beer into kegs with co2 and put in a 45 degree keezer which we dropped to 35 after two weeks.
Prost!


![Craft A Brew - Safale S-04 Dry Yeast - Fermentis - English Ale Dry Yeast - For English and American Ales and Hard Apple Ciders - Ingredients for Home Brewing - Beer Making Supplies - [1 Pack]](https://m.media-amazon.com/images/I/41fVGNh6JfL._SL500_.jpg)


