• Please visit and share your knowledge at our sister communities:
  • If you have not, please join our official Homebrewing Facebook Group!

    Homebrewing Facebook Group

DIY glycol chilled plastic conical fermenters

Homebrew Talk

Help Support Homebrew Talk:

This site may earn a commission from merchant affiliate links, including eBay, Amazon, and others.
I've read through a bit of this post and I saw OP mention he couldn't keep the glycol system too much lower than his target ferm point or else when the pump shut-off there'd still be cold glycol in the lines overcooling it. Has anyone else done more testing in regards to this? If I had a double-conical system would it be possible to cold-crash one while fermenting an ale in the other without chilling too far?

it depends on the ratio of volume of glycol in contact with the beer and the volume of beer. If you've got a large coil for the size of batch, then it can have a noticeable effect.

On my conical with a 25ft stainless 3/8" coil, I notice that I get about .3 degrees of overshoot. My control setup shuts off with .2 degrees of change so it's not a big deal for me. Glycol is 29-33F

For the larger guys, the glycol volume is even less for the amount of beer, so it's negligable

What size conical do you use?
 
What size conical do you use?

The plastic conical referenced is 16 gallons (and typically filled with about 15)

I have worked with the 3 and 7 bbl plastic conicals as well - it's less of an issue there, but still have to be careful how everything is set up.
 
The plastic conical referenced is 16 gallons (and typically filled with about 15)

I have worked with the 3 and 7 bbl plastic conicals as well - it's less of an issue there, but still have to be careful how everything is set up.

Thank you. I'm just trying to get an idea on what size coil I'll need once I buy one.
 
I cold crashed this morning down to 50c, I wonder how low it can go, I'm tempted to try to send it to 40 and see how fast it would loose temp. My fermenter is not insulated and I'm using a glycol machine inside a cold room.
 
I've had three plastic 15 gal conicals running for 2 years now. I've had all three filled numerous times with two of them fermenting ale temps and one cold crashing. The coldest I've ever gotten down to is about 30-32 in the fermenter but the system struggles. Hits 35 with no problem. The limitation is due to the physics of using a home AC unit.

I don't really have any issues with the pumps (good to see you back in the game Packet, learned a ton from you). As long as I make sure it's fed before opening and that I've bled some air, works fine. I'll probably add those ball valve arrangements so I don't have undo the hose and bleed.

Although the plastic worked well for a while, I've been switching over to SS 12.5 gallon conicals. In the past year, I just haven't liked a lot of what we've brewed, off flavors, etc. I think it's because we're not strict enough about our cleaning procedures even though we have a 2" cip spray ball that blows a ton of water. I also never liked the fact that things don't seal all that well and they can't hold pressure. When we clean them, water blasts out the lid and it's a pain. The SS are just much simpler to keep clean. I could rarely ever get rid of the smell of the last brew in the plastics which just never sat well with me.

The chilling system, though, works a charm. It's PID controlled so it really dials in temps. I can also heat with my chilling system. I have a fairly large pump in my glycol cooler. If I run that without the AC going, it will heat up the glycol (found that out the hard way!). If I then set the fermenter for heat control vs cool control in the BCS, I can set a temp and it heats up the fermenter. Last week I had a Saison up to 85 in my 65 basement.

For the money you lay out for a plastic conical with all the bling, it just isn't as cost effective as it used to be given some of the alternatives out there. I was able to use my SS coils in the new fermenters as well as most of the connections on the new ones.

Happy brewing!

Pictures please!

What brand SS conicals are you using and how did you work the coil through lid?

TD
 
I'm using the conicals from American home brewing purchased on eBay. I have 2 of them so far.

I used the Greenlee hole punch I had for the electrical box build of my eBrewery for the coil holes and a step bit for the thermowell.

20151029_081148.jpg


20151029_081229.jpg
 
I have one question about this system: the direct contact of the chiller with the beer doesn´t cause a thermal shock that would be stressful for yeast?
 
I'm sure this should probably go under the "For Sale" section on the forum, but since this is one of the plastic conical threads I thought I'd post here...

I have two brand-new-in-the-box Ace Rotomold A-INFD15-19 15 gal tanks for sale (e.g. http://www.plastic-mart.com/product/5813/15-gallon-cone-inductor-tank-fully-draining-infd15-19). I'm in Fort Collins, CO so I'm looking for a front range CO buyer who could pick them up and pay no shipping. Price is $50 each.

Cheers!
 
PM sent. I can send you packet's original walk through instructions on how to do this. It's easy. I was intimidated by the BCS interface and still am, but Packet's instructions are simple and do what you'll need.

TD


Sent from my iPad using Home Brew

Do you still have his instructions or a PDF of his entire build? I'm mainly looking for the control panel instructions, wiring, and programming. Any help or links would be appreciated since the URL took a crap!

Thanks
 
Been contemplating my system. Been on brewing hiatus since February. Stupidly left some be in the tanks without cleaning. Had nasty nasty stuff by the time I finally cleaned them.

The plastic tanks with the horrid lip where the CIP ball can't touch is a problem. I am considering removing them to pressure wash and invert to let some bleach water dwell in the "lip" section.

I have devised a plan to retrofit my Blichmann 14 gallon to run in one of the conical locations. I just can't tolerate lifting a full conical into and about of the freezer anymore. I'm getting old.

So here is the plan. Bought a spare handle. Mount to third leg. Opened up the handles will let me bolt the conical into the cutout in my stand deck.

Next step. Buy hole punch. Punch two holes in the lid for the cooling coil and ensure that the coil will fit properly into the Blichmann. Pretty sure it will work fine.

Next step. Use blowoff TC port at the top to attach a tee and get a long thermowell, and side hole for blowoff. Alternately, buy a wellness thermowell and punch a hole in the side.

Need to get some ghetto brackets to secure the legs, and check clearance for cleaning bucket, and what not.

And wow, even with the sale on the Blichmann conicals, the brewmaster edition chronical fermentors are an easy off the shelf swap out for the other two plastic tanks if I ever can save the cash.

In the meanwhile, I bought a couple extension tubes for the FTSS setup to see how they are made, and I think I am going to cut and weld those slick fittings onto the Blichmann coil. Ends in place of the compression fitting/shim/locknut setup I have now. I might also ditch the hydraulic quick disconnects and setup a co2 purge port to clear the coils and coolant lines on a per tank basis.

Another plan I have, though not really necessary in FL, is to provide heating. I did install some 25 watt reptile heat cords around the base of each plastic tank. Well, I bought a electronic salon 4 relay board that I am thinking about adding into my control box, which I need to remount anyway, so that I can warm up Belgians, and saisons or if it gets really cold. Then I would need to install some outlets into which to plug the 120vac heating cords that would be controlled by the relays operated by the BCS. I think that I can handle 3 more outputs.

Last thoughts on revamping my system are removing the tops of the plastic conical and installing a large o ring and HPDE disc to act as the lid. I am wondering how to ensure it fits airtight, if the weight of the suspended coil alone would be enough. I know at least one other person did this, but I think that they used some type of bolt/wing nut to tighten the seal. This might "fix" the main issues with this conical design which are: difficult to obtain airtight seal on lid; difficulty ensuring the through-lid coil connections are also airtight on the curved lid; ditto on the through the lid TC port.

I know that @packet ( or is it #packet) is kicking around here again somewhere. I thought he had hinted at some other tweaks he had in store himself.

If I do retain the plastic tanks for a while, I'll consider getting the floor stands as I swap them out with stainless and save for sour projects. I would also consider ditching the three piece ball valves on the dip tubes as well, in favor of a butterfly valve so I don't have to clean them after every use.

TD.
 
I have been thinking hard about how to fix the lid issue, and I think I have struck upon a valid solution.

Cut out the upper ring/lid so the top of the conical inside is flat and deburr. Then, find a suitable lid. I need to make some measurements of course, but, I am thinking I might be able to a set of inexpensive racing stainless steel hub cap covers which a 16" as my new conical lids.
I have a buddy that does welding and he could maybe weld in some TC ferrules to the lids. These I could use for CIP ball, and put a PRV and blow off port in, or just buy TC caps with those off the shelf.
The coils, I suppose I could weld to the lid directly through holes and be done with it, but a removable to clean option is appealing, and I could retain the extension tubes for the FTSS I bought. Welder said that he could cut and weld those onto the end of my coils.
To seal the lid, since my cart is metal, I could do something like the stout tanks use.
http://conical-fermenter.com/7.3-Gallon-Fermenter.html
I'd have to figure a way to do this, but seems like it would be super easy to have welder weld a common upper beam, and some side legs could bolt to my cart-top so I could easily remove the whole thing. Drill and tap holes able the tanks to create a seal with o ring or gasket of some type.

This sees like it would be incredibly less money than buying a bunch of stainless SS brewtech conicals with their aluminum is cheap, the welding would be too, the steel discs and three ferrules, would be less than $150 including the clamps and off the shelf caps hopefully. Will probably need a different CIP ball, but could sell the old one. To recoup some cost. Might even ditch the three piece ball valves on the racking arms for something easier to clean.

TD.


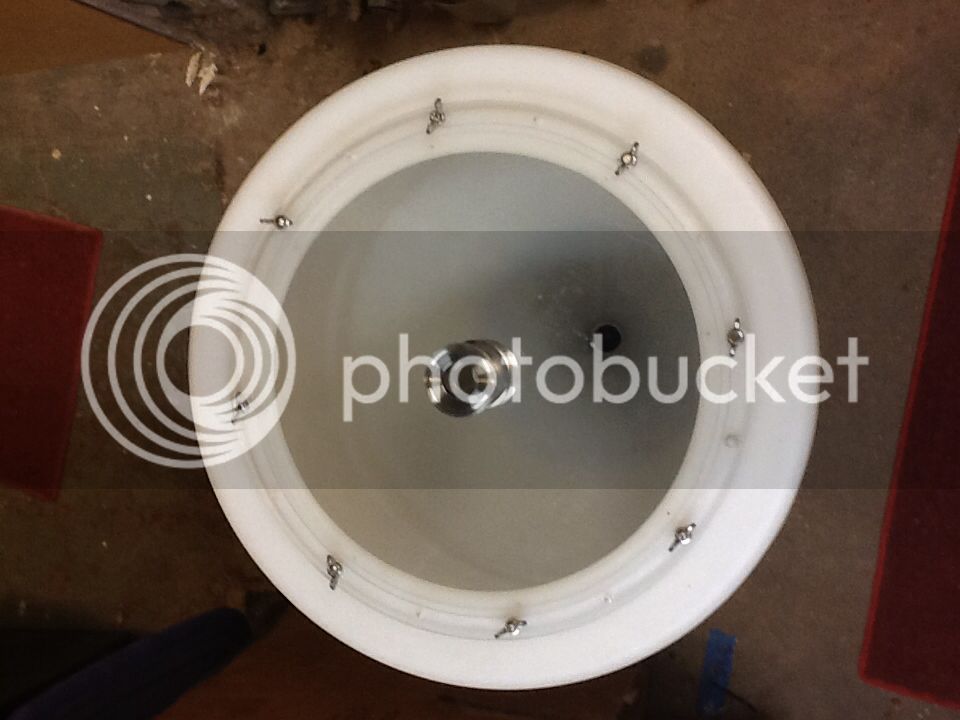
One of the reasons I went to the acrylic lid was so I could get rid of the threaded lid insert and I also cut out the ring that was part of the conical at the top. I have no idea what purpose it serves other than to trap junk. I set up my router with a big base plate and a slot cutter and trimmed the ring right off from the conical. Much easier to clean.

s-l400.jpg


s-l400.jpg


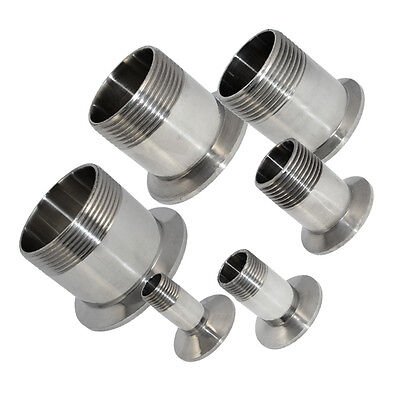
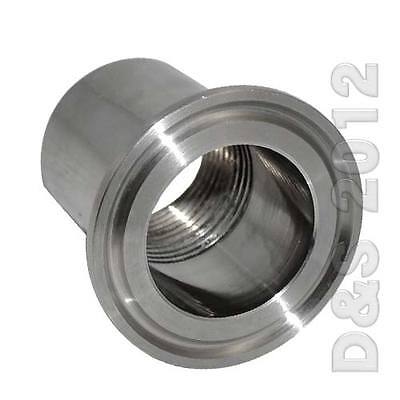
I used a few threaded sanitary adapters in the lid along with a tee and thermowell for temp control and blowoff. THe first pict doesn't show it but I have a 25' 3/8" ss coil mounted to the lid for temp control. I think it was a -455 oring which is 13.5" od 13"id to seal the lid along with the stainless wingnuts and pan head bolts.
 
Do you still have his instructions or a PDF of his entire build? I'm mainly looking for the control panel instructions, wiring, and programming. Any help or links would be appreciated since the URL took a crap!

Thanks

Back when I was researching this I rebuilt a good majority of packets website from web archives and packets images uploaded earlier in the thread. See hosted file. The wiring section was not available in archives, this is a partial of the scanned document.

Note:
  • I ended up going with ss conicals as once triclamp hardware and cooling was added the cost adder for stainless wasn't large.
  • The BCS software has been updated a lot. It is more stable and has more features. The logic behind setting everything up is the same (and very easy) but the step by step has changed. It is very simple (including heating)... I can answer any questions you have.
  • Note the scanned electrical section is not in order and is missing pages. Also I could not find the same relay board and had to find another. Wiring is very simple and I can answer any questions you have.

2015-10-09 20.04.47.jpg


Untitled1.jpg


Untitled2.jpg


Untitled3.png


One of the reasons I went to the acrylic lid was so I could get rid of the threaded lid insert and I also cut out the ring that was part of the conical at the top. I have no idea what purpose it serves other than to trap junk. I set up my router with a big base plate and a slot cutter and trimmed the ring right off from the conical. Much easier to clean.

s-l400.jpg


s-l400.jpg


I used a few threaded sanitary adapters in the lid along with a tee and thermowell for temp control and blowoff. THe first pict doesn't show it but I have a 25' 3/8" ss coil mounted to the lid for temp control. I think it was a -455 oring which is 13.5" od 13"id to seal the lid along with the stainless wingnuts and pan head bolts.

Cool.

I have pretty much all the stuff I need to adapt my lid to create a positive seal and make the coil thru the lid as close to sanitary as I can, with removable coil, and a purge valve for the coolant line. I think that I will retain the the hydraulic fittings as long as they continue working since I already have them. As inexpensive as the individual pieces were, I've spent a considerable amount and already and I still need to pay the welder, but he is a friend. Still need to source some o rings, but I want to see the lids and how they will mate to the tanks. I am also waiting to cut until I get the lids.

Couple questions: Where did you buy the o rings? How did you cut the tank accurately and do you have any suggestions? I am thinking about jig saw and then touch up with spiral saw if needed. I would consider other options if I could think of any. I think I can attach router bits to my spiral saw too, though I've never used one. How did you cut the channel for the o ring? I might end up just buying a sheet of rubber or silicone gasket material or something. I have a feeling it is going to be tedious no matter what I end up doing.

Last final thing to figure out for my revision is how to use the overhead rail to create downforce on the lid sufficient to seal it. I don't expect it'll take much. I need to study the stout tank pictures!!

TD.
 
My o rings are a -456 size and they are Parco brand but I can't remember where I got them from. I think they are epdm or nitrile.


http://www.theoringstore.com/index.php?main_page=product_info&products_id=1372


These are pretty reasonable priced rom what I remember though.

To cut the fermenter and groove I used my router. I used a winged slot cutter to cut the lip out of the top and a big base plate on the router to span the opening.

http://assets.rockler.com/media/cat...3525d08d6e5fb8d27136e95/9/2/92145-04-1000.jpg

For the groove I used a circle cutting base on the router and a 1/4" spiral bit.

You made the cuts all freehand?

I think I've hit a stumbling block with my plan. The "lids" I bought on eBay turn out to be domed, not flat, and on the inner aspect have apparently a crimped in clip (they are intended to be used as hubcaps) that I am not able to remove. This would require grinding the edge I believe to remove, and I suspect then buffing the edges so as not to cut myself, and being careful not to remove much material in order to preserve the flat edge for sealing, which is about 1cm wide. And I still haven't found 16" seals. O ring probably won't work.

Anybody need some 16" hubcaps?:mad:

Live and learn. I'm not sure I want to sink more money or time into trying to get the plastic tanks functional with sealed lids.

I have never used a router or slot cutter, nor do I own either or have friends that do for possible borrowing.

Tempted to go with a stainless solution, and use the existing BCS glycol setup, wrapping drainage hose around the exterior (as per another thread) rather than indwelling coils, then part out stuff on the conicals unless someone locally wanted to pick up whole unit.

Need to think about the next step. My last "plan" Has me more than just a little bummed out right now.
 
Back when I was researching this I rebuilt a good majority of packets website from web archives and packets images uploaded earlier in the thread.

Note:
  • I ended up going with ss conicals as once triclamp hardware and cooling was added the cost adder for stainless wasn't large.
  • The BCS software has been updated a lot. It is more stable and has more features. The logic behind setting everything up is the same (and very easy) but the step by step has changed. It is very simple (including heating)... I can answer any questions you have.
  • Note the scanned electrical section is not in order and is missing pages. Also I could not find the same relay board and had to find another. Wiring is very simple and I can answer any questions you have.

Can you post up some pics on your conicals? What brand? How are you heating and cooling them? I have ability to heat mine but it is not fully implemented (yet). Which relay board did you go with (electronics salon?).
 
Can you post up some pics on your conicals? What brand? .

This project is in one of those "working but still needs refining" stages so things are pulled apart in most of the pictures. If you want pictures of anything specific let me know and I can snap them.

I went with the SSBrew conicals. The only negatives I find with them are the threaded connections. I replaced the valves before using and the cooling coil connections aren't sanitary anyway so I don't see having a no weld thermowell as a big deal.

I bought the first conical a couple months ago and used it to "test" by idea to make sure everything would work right. I built the coil for this one in the same way as mentioned in this thread and installed through the top. In the meantime SSbrew released their "professional" version that included sanitary valves and a cooling coil. While looking much smaller than my homemade coil it works good and ended up being cheaper than making my own and replacing valves. So now I have (1) that I made the coil and (2) with SSbrew coils.

How are you heating and cooling them?

I am cooling them with the method discussed in this thread, glycol reserve and interior cooling coils. I have some Flexwatt reptile heaters wrapped around the outside for heat. They are VERY slow to change a temperature, but hold very well.

Programing the BCS for heater control is simpler than it was made out to be. In each Fermenter Control Process have the start state be Cooling and simply add an exit condition that says if the temperature goes below ## switch state to Heat. In the Heat state turn on the heater with the Direct ON/OFF control. Add a exit condition that says if the temperature gets above ### switch back to Cooling.

Which relay board did you go with (electronics salon?).

To control the valves I used this relay board from Ebrewsupply. To control the A/C and the pump I used (2) relays directly in the panel. To control the heaters I ran the low voltage signal line for each conical to a common auxiliary panel behind the conicals and used (3) relays in this panel. If I had planned better I would have fit the heater relays in the panel itself.

2015-10-04 21.16.57.jpg


2015-10-10 19.43.48.jpg


2015-11-24 20.43.34.jpg


2015-12-03 21.57.30.jpg


2015-12-03 21.57.37.jpg


2016-01-05 18.40.42.jpg


2016-01-20 00.53.05.jpg


cooling.jpg


heat.jpg
 
Thanks. Is that copper tubing you used for the glycol!!

What size or wattage is the flex a watt. Is that the reptile cord stuff?? I wrapped some on my plastic tanks but have never used them. I live in Florida and would only need it for doing saison or Belgian brews. I Think mine are 25 watt, but heat transfer across the plastic is probably so terrible that will not work well. If/when I switch to SS conicals, I think I would forego submerged coils, and either wrap copper tubing around the conicals, or wrap rubber drainage hose with DIY PVC fittings (a much cheaper option) and also a heat source such as the plastic carboy type resistive film or reptile cord or something. I'm not a fan of a peltier unit for heating or cooling because in my experience, they fail and are power hogs. Another option is to run a heating element in the glycol bath, like an aquarium heater, but then all of you tanks would be forced into a heat only mode. Could be OK if you aren't doing any lagering I suppose, and into secondary fermentation stage on the other other tank and could just temporarily turn off. I think the stout kettle website has plans for a <$200 peltier temp controller. Maybe it's worth a revisit.

I'm still trying to figure a way to implement my hubcap lids, but I suspect is going to require a grinder....

Yea I used copper tubing. I find that it is easier to work with the the plastic stuff and will probably last better in the cold temperatures.

Heating element is 20W per foot. I have about 2-3' on each fermenter. The insulation is wrapped around the heaters so most of the energy should transfer to the stainless and the beer. If you wanted to heat faster there is no reason that the heating element couldn't be double or triple wrapped.

Rubber drainage hose is definitely cheaper and arguably better than using an interior coil.

Runnin the heating element in the glycol bath would be a power waste. As soon as you want to heat you are going to put energy in to change the temperature of the whole mass of coolant. As soon as you want to cool you are going to have to use the A/C to transfer all that heat back out. It's colder in NC but it's not uncommon for my system to be running heaters at night and in the morning, then switch to coolant when trying to maintain ~65°F.

You're not going to be able to cold crash with a peltier.
 
Thanks. I ended up grinding one of the four hubcaps then removing the black clips. After grinding the first one, I discovered that I could more easily pry the clips out by applying leverage to dislodge the small angle on the end of the black piece. I was able to remove the clips on the remaining 3 hubcaps turned lids without any grinding. They are the perfect size. A bit flimsy though so I am uncertain if they will tolerate the coils. They are domed however, so that will help. I need to see about the ferrule being welded on next week. Not sure if I should offset them, or put them in the center. I also need to see about some seals.....

Ill post up some pics later.

TD
 
Here are a few pictures of the SS "hubcaps" turned into lids, almost.

Getting finished cutting holes for ferrules today or tomorrow.
Will get them to a friend who does TIG welding, other friend who cut them has only MIG welding, which I understand is more prone to scorch the metal.

Once that is done, I'll need to find some type of gasket or seal material, then cut out the existing lid apparatus and smooth out the plastic.

Finally, have some brackets planned on which to mount a cross-member over the top of the lids, and will then use some type of threaded rod to tighten down the lids forcing an airtight seal.

I'll probably take a nice clean sponge soaked in star-san or rubbing alcohol or something and give the upper lip of the tanks a good rub down before thoroughly cleaning these suckers out. I suspect that this will still be a problem with the domed lid and CIP ball too high to blast that area.

Well if all else fails, will swap out with Stainless Steel tanks and call it quits on the plastic.

TD

1453773922217.jpg


mms_img-860312559.jpg


1454103866500.jpg


20160202_162920.jpg


20160202_162933.jpg
 
Well I have the first lid back with ferrule welded on. misqueue on the hole being cut so had to improvise. Going to try the first one and see how it works before doing the others, which will require more ferrules, as you can see in the photos.
Welder said that the lid was very difficult to weld because the material is so thin and expands so it's sort of warped a bit. For a lid though I'm not terribly concerned.
I'll attach pics from my phone in a second. Not bad welds from a guy who has never done sanitary welding. I figure if I get and krausen on them, I can hit the welds with a torch after cleaning worst case.

TD
 
Why don't you put one ferrule inside and one outside of the lid so you can attach a sprayball inside, or was that the plan and something went wrong?
 
Back
Top