Cant seem to get a blue flame. Lots of soot.

Homebrew Talk - Beer, Wine, Mead, & Cider Brewing Discussion Forum

Help Support Homebrew Talk - Beer, Wine, Mead, & Cider Brewing Discussion Forum:

This site may earn a commission from merchant affiliate links, including eBay, Amazon, and others.

nmistry73

Member
Joined
Apr 22, 2010
Messages
14
Reaction score
0
Location
San Antonio, TX
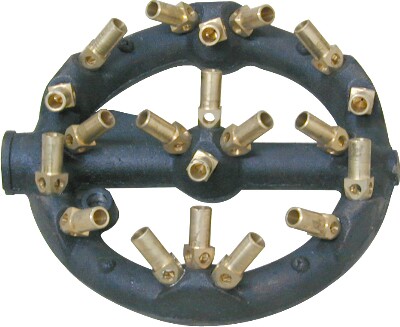
I purchased one of Academy Sports' home brand Outdoor Gourmet turkey fryer burners w/ stand (pictured below) with the intention of keeping all the heat of brewing outside of my house. Unfortunately, no matter what i try to adjust i am getting loads of soot on the bottom of my brew kettles. The best results are had when i adjust the air intake to the full open and the flame will have a hint of blue with plenty of yellow and orange.

Before i try fiddling with it any more (and blow my head off), i thought i would ask here to see if anyone else had some suggestions or similar experiences with that type of burner.

I got the unit on sale for a very reasonable price (probably why its not working properly). Link to the product is below.

0267-02367-2518-p1.jpg


http://www.academy.com/index.php?pa...ng/turkey&start=8&selectedSKU=0267-02367-2518

Thanks in advance.
 
I too bought my burner at Academy, the smaller one with 3 little legs. I cant get anything other than a huge orange flame either, it still boils, but I know it can do better. I paid 19.99 for it, so I guess you get what you pay for. I've tried adusting the little damper to wits end. Thanks for posting, I'm looking forward to hearing others remedies (if there are some!)
 
take a flashlight and look in the hole behind the damper ,spiders love to nest in there.
and it blocks the airflow.
 
take a flashlight and look in the hole behind the damper ,spiders love to nest in there.
and it blocks the airflow.

Mine has done this from day one, out of the box. I hate the thing and have resorted to brewing indoors (which can be nice) but I want it fixed so I can get an all-grain setup going.
 
I looked at the link you provided, searched around on the site, but didn't see any descriptions of that burner.

Look on the valve to see if there's any numbers, specifically pressures. I'm wondering if they put a low pressure valve on a high pressure burner, or visa versa. Also, did you open the tank valve all the way? How 'bout the burner valve?

Also, try closing the air intake all the way.
 
take a flashlight and look in the hole behind the damper ,spiders love to nest in there.
and it blocks the airflow.

or burrs from the manufacturing process that didn't get removed and are clogging the line.

Also, sometimes the regulator 'safety' kicks in and restricts gas flow. make sure the propane tank is almost wide open...I think is how you can prevent that.
 
I had a similar burner and experienced the exact same thing.

Take the cap out of the middle of the burner. mine had a ton of flash from the casting process. Spent a few minutes in there with the Dremel and that helped a lot.
 
Does the hose end connection to the burner have an orifice insert with a tiny hole or is the hose end opening about 3/16". If ti is the large opening you are missing the gas jet for high pressure and you will get way to much propane to burn right. A local BBQ or propane supply place might have a valve with orifice in stock that you could connect to the end of the hose and then to the burner to fix this problem.
 
Thanks everyone for your feedback. Will disassemble the burner tomorrow afternoon to diagnose the problem further. Will take a few photos and post what i find.
 
I had a similar burner and experienced the exact same thing.

Take the cap out of the middle of the burner. mine had a ton of flash from the casting process. Spent a few minutes in there with the Dremel and that helped a lot.

I have what appears to be the same burner and had the same problem. I did the same thing BD did and it worked like a champ*. There was a big chunk of flashing on the center portion bottom preventing it from seating properly.

*I actually bought a new burner for the stand and noticed the flashing when I removed the old one. I should have tried that first before I bought a new burner- doh! but I did try the old one after fixing it, boy I felt dumb.
 
Soot comes from improper air/fuel mixture. Specifically not enough air to properly burn all the fuel.
 
Also, sometimes the regulator 'safety' kicks in and restricts gas flow. make sure the propane tank is almost wide open...I think is how you can prevent that.
that is it , it has happoned to me a few times , and it will do it if you ever open the valve with the regulator on,, the fastest way to fix it is to turn off the reg close the tank valve unhook, tip tank upside down, then turn tank back over and hook back up making sure you open the valve before turning the regulator
 
that is it , it has happoned to me a few times , and it will do it if you ever open the valve with the regulator on,, the fastest way to fix it is to turn off the reg close the tank valve unhook tip tank upside down, then turn tank back over and hook back up making sure you open the valve before turning the regulator

Definitely open the valve prior to the regulator and open it at a moderate speed. For some reason whacking it open as fast as you can seems to make the safety kick in on mine.
 
I've got the same burner, experienced about the same type of flame but I noticed after running it for a good hour the flame has gotten better, not completely blue like I want it but close. Let me know your findings!
 
Here are a few photos of what my burner looks like when disassembled.

I am quite curious about the rust and soot pattern in the first photo. Looks like there is a bit of slag at the top of the hole that is preventing the top part from seating evenly. There is very little rust behind that, and absolutely no soot. This weekend i will grind down the slag so its even with the rest of the rim.

The size of the orifice also seems a bit large. Is it possible to swap out the orifice for something smaller?

There were no spiders nesting inside, and no slag or debris in the air/fuel corridor.

Any thoughts?

Burner3.jpg


Burner2.jpg


Burner1.jpg
 
My experience mirrors that of BenDover and fartingdog. Notice that there is a raised lip around the hole in the base of the burner. You want to use a dremel to flatten that out even with the surrounding metal, and possibly even round over the sharp edge to increase flow. Then, use a nice wire brush to clean off all the rust on the mixing vanes and the inside the cup of the burner. The rust on the mixing vanes is what is really killing the fuel/air mix. Notice that the soot deposits correspond very well to where the vanes are extremely rusty.

It should then work like a champ. :)

...and quit leaving your burner out in the rain. :p
 
fyi for anyone who is looking to buy a burner to take it outside- I got a Bayou Classic and I get nothing but blue flame every time
 
oy, i have a bayou classic and i've never even seen the flame. i just hear it and the wort boils, good enough for me i guess.
 
Every once in a while I blow out all my holes with my air compressor (Well, not ALL my holes) Works wonders, and clears my sinuses.
 
fyi for anyone who is looking to buy a burner to take it outside- I got a Bayou Classic and I get nothing but blue flame every time

Was originally planning to buy a Bayou Classic Banjo but got suckered into the deal for the Academy burner. Lesson learned: You get what you pay for.

Have started researching components for a 3 burner brew rig and I like the BG-14 from agrisupply.com (similar / same burner in the banjo) and the 8" jet burners from topfoodservice.com (shown below). I am probably 6 months out from starting the build so my immediate goal is to doctor the Academy burner so it holds me over until the new rig is operational.

KECAB003~4A.JPG
 
The rust on the mixing vanes is what is really killing the fuel/air mix. Notice that the soot deposits correspond very well to where the vanes are extremely rusty.

It should then work like a champ. :)

...and quit leaving your burner out in the rain. :p

Bingo!!!!!! I've gotten in the habit of turning on my burner while mashing to check out the flame. If I see a lot of orange, I disassemble and out comes the wire wheel. Fixes it every time. My burner accumulates rust even though it is not out in the rain. It is outside though. I suspect a combination of water from combustion and humidity are the problem. One of these days I plan to clean it up and put stove paint on.
 
Great tip. Will definitely season my burner after i clean up all the rust and slag. Instead of the lard shortening i use canola or peanut oil.. seems to work well on my cast iron and cast BBQ parts.
 
Hooray!!! This weekend I ground down the slag and cleaned up the rust. This resulted in a significant improvement to the quality of the flame. Much more blue w/ yellow tips. Will post some photos once i download them from the camera.

I am happy w/ the results but still think the orifice is too large. The vent always needs to be in the full open position. Anything less than that and i get a horrible yellow/orange flame.
 
I have the same burner. I think these things get sold everywhere. On mine when the vent was fully opened against the screws, the passage was still partially blocked due to the slots in the disk not being long enough.
 
I have the same burner. I think these things get sold everywhere. On mine when the vent was fully opened against the screws, the passage was still partially blocked due to the slots in the disk not being long enough.

Yeah, mine too. I just removed the adjustable vent piece entirely. It really serves no other purpose than attempting to keep bugs out, IMHO.
 
Here are some photos of the flame after i evened out the rim and wire brushed off the rust. Drastically better than the first few times i fired it up. Will need to go back and adjust how the cap sits on top. As you can see from the photos the flame is higher on one side than the other. Other than that, i am quite happy w/ the results.

In total was about 10-15 mins to fix, and definitely worth doing. Will also season the burner as instructed above, the next time i open it up.

First shot is w/o flash, propane somewhere around 25 -> 50%, nice blue flame w/ yellow tips. Second shot is the same but with flash.

Third shot is propane at almost full blast. Still lots of blue.

Will upload photos of the inside after I figure out whats causing the flame to be uneven.

Burner_repaired 3.jpg


Burner_repaired 2.jpg


Burner_repaired 1.jpg
 
That's still way too much yellow; you're going to cover the bottom of your pots with messy soot. Completely remove the air mixture control at the base of the burner assembly and see if that solves the problem. That wire mesh they include to keep bugs out restricts the flow quite a bit, and on mine, the shutter doesn't really ever rotate open all the way either.

You may have to use a cut-off disc on your dremel to remove the rust more completely from the mixing vanes on the burner insert as well. Sometimes a wire brush just doesn't clean well enough.

You think this is bad... Wish i had a before photo,. Wife almost killed me when i completely blackened "her" stockpot. Bartenders friend to the rescue.

The burner still needs a bunch more work, plus i also need to season it a few times. At this point glad that things are going in the right direction. If i did not see a significant improvement I would have dumped it in a heartbeat for something better.

All the modifications were done w/ a dremel cut off wheel, grinder, and wire brush wheel. I could have easily done everything by hand using a small file or sandpaper and a small wire brush. Should have been less impatient, let the burner cool and finish the job properly.

Fyi, my shutter opens all the way b/c I removed the two stop screws. Will try removing the screen and see if that helps even more.

Does it make a difference how far forward the nozzle is seated inside the burner. Would it help if i backed it out a few threads?
 
Except for the yellow on the high uneven part of the flame it looks pretty good. I think that the diffuser piece is not seated evenly in the cup and that is causing the imbalance in the flame. I would have expected to see a more impressive flame output at wide open throttle. I have one of those burners and wide open it sounds like a fighter jet and the flame height it way bigger. I think I have a 10 psi high pressure regulator on it.
 
Pay special attention to removing the rust in the bottom of the vanes of removable disk. This is where I've noticed the most problematic rust.
 
Wow, thanks for this thread. I had similar problems to this and kind of figured that it was just a design flaw and I would have to live with it until I could afford a better burner. There was huge amounts of orange in the flame, and lots of soot on my brew kettle, which seemed wrong but i just couldn't seem to adjust anything that helped. Once I opened up the burner though, there was a bunch of metal around the rim of where the air/fuel mix enters the burner. So much, in fact that I hesitated a bit before removing it, almost wondering if it was there intentionally.

Once the extra metal was gone, the difference was unbelievable. I haven't yet done another boil, but based on the apparent improvement in the flame, I think that on top of saving some clean-up, this might just save me a little gas as well.

If you have a burner like this, it is seriously worth your time to pull it apart at least, and have a look. It seems like there is probably a significant quality control problem, but at least it is very easily fixed.
 
Thank you all for your comments! I just got a burner and was getting ready to send it back and be sad, and it was casting flash on the main tube to the burner. Knocked the flash down with a screwdriver and instantly had better flame. Will clean it properly this weekend and hopefully get my Porter started, thanks!
 
Back
Top