BIAB & Steam Condenser

Homebrew Talk - Beer, Wine, Mead, & Cider Brewing Discussion Forum

Help Support Homebrew Talk - Beer, Wine, Mead, & Cider Brewing Discussion Forum:

This site may earn a commission from merchant affiliate links, including eBay, Amazon, and others.

Adrenolin

SportBrewing
Joined
Nov 28, 2018
Messages
16
Reaction score
7
I'm building an indoor basement BIAB electric setup and was considering adding a Steam Condenser instead of doing the whole fresh air intake, overhead hood and exhaust. I know it would be fine for the boil however I was wondering how well it would work during the grain Mash with the bag inside. I'm not worried about some steam.

Anyone using a Steam Condenser with a BIAB setup? Pic of Adam Layton's Steam Condensor.


Adam Laytons Steam Condensor.jpg
 
I’m running a condenser on my 15g kettle BIAB setup in my basement and love it. Steam is very minimal during the mash, an went from boiling at around 85% to 25-30% power (240v). Only issue I had initially was running the condensate to a bucket which really stunk up the house. I ended up running the condensate to a drain which took care of the odor issue.

Edit - also as mentioned below, no need for use during the mash. Even with the lid sitting on the bag, steam is minimal.
 
Last edited:
I’m running a condenser on my 15g kettle BIAB setup in my basement and love it. Steam is very minimal during the mash, an went from boiling at around 85% to 25-30% power (240v). Only issue I had initially was running the condensate to a bucket which really stunk up the house. I ended up running the condensate to a drain which took care of the odor issue.
I am thinking of something like this too as I brew in the basement. However, what has stopped me so far is the amount of water needed to condense. How much water do you use for a 60 min boil (only for the condenser?)
 
I am thinking of something like this too as I brew in the basement. However, what has stopped me so far is the amount of water needed to condense. How much water do you use for a 60 min boil (only for the condenser?)

Now that my water goes to a drain I don’t pay much attention. I am using the 7gal/hr nozzle but have high pressure. When I did the initial tests I believe I was producing around 9-11gal. I’m not sure what nozzle Bobby sells with the steam slayer (I sourced parts from McMaster Carr) but you can calculate pretty close if you no the nozzle gal/hr and your water pressure from your supply line. You can buy a gauge from amazon for around $10.
 
You wouldn't have it on during the mash at all. The only thing that would accomplish is taking heat out of it. So, the 7-12 gallons that you would use during a 60 minute boil would be all, and you could use it for something else such as cleaning equipment, watering plants, and/or flushing toilets.
 
I'm building an indoor basement BIAB electric setup and was considering adding a Steam Condenser instead of doing the whole fresh air intake, overhead hood and exhaust. I know it would be fine for the boil however I was wondering how well it would work during the grain Mash with the bag inside. I'm not worried about some steam.

Anyone using a Steam Condenser with a BIAB setup?

I use a steam slayer in my basement BIAB setup. I don't even have it hooked up during the mash. I recirculate and use the same TC port for the recirc that I use for the steam slayer. During the mash I have the lid on and don't notice any steam in my brew area. You definitely don't need to run the steam slayer during the mash. It would honestly be a waste of water.

I am thinking of something like this too as I brew in the basement. However, what has stopped me so far is the amount of water needed to condense. How much water do you use for a 60 min boil (only for the condenser?)

As previously mentioned, the condensate stinks, so I drain mine outside. I have never actually measured how much water is used, but the nozzles are rated by their gal/hour. That should give you a rough estimate of usage.
 
I've got one on my BIAB setup. It is the one from Bobby at brewhardware.com. I bought both nozzles just in case, but never had to switch from the lower flow (6gph?).

I too was concerned about the water use; however... I am on a well, so I don't 'pay' for it (though I don't like wasting it). I just had to get over it. Brewing generally uses a lot of water... while certainly you can reduce, it just takes water. My counterflow chiller uses substantially more than the condenser for sure... and then I use a bunch more cleaning. I feel most guilty when I 'soak' fermenters or kettles that I have filled for PBW/cleaner. But I am still brewing!

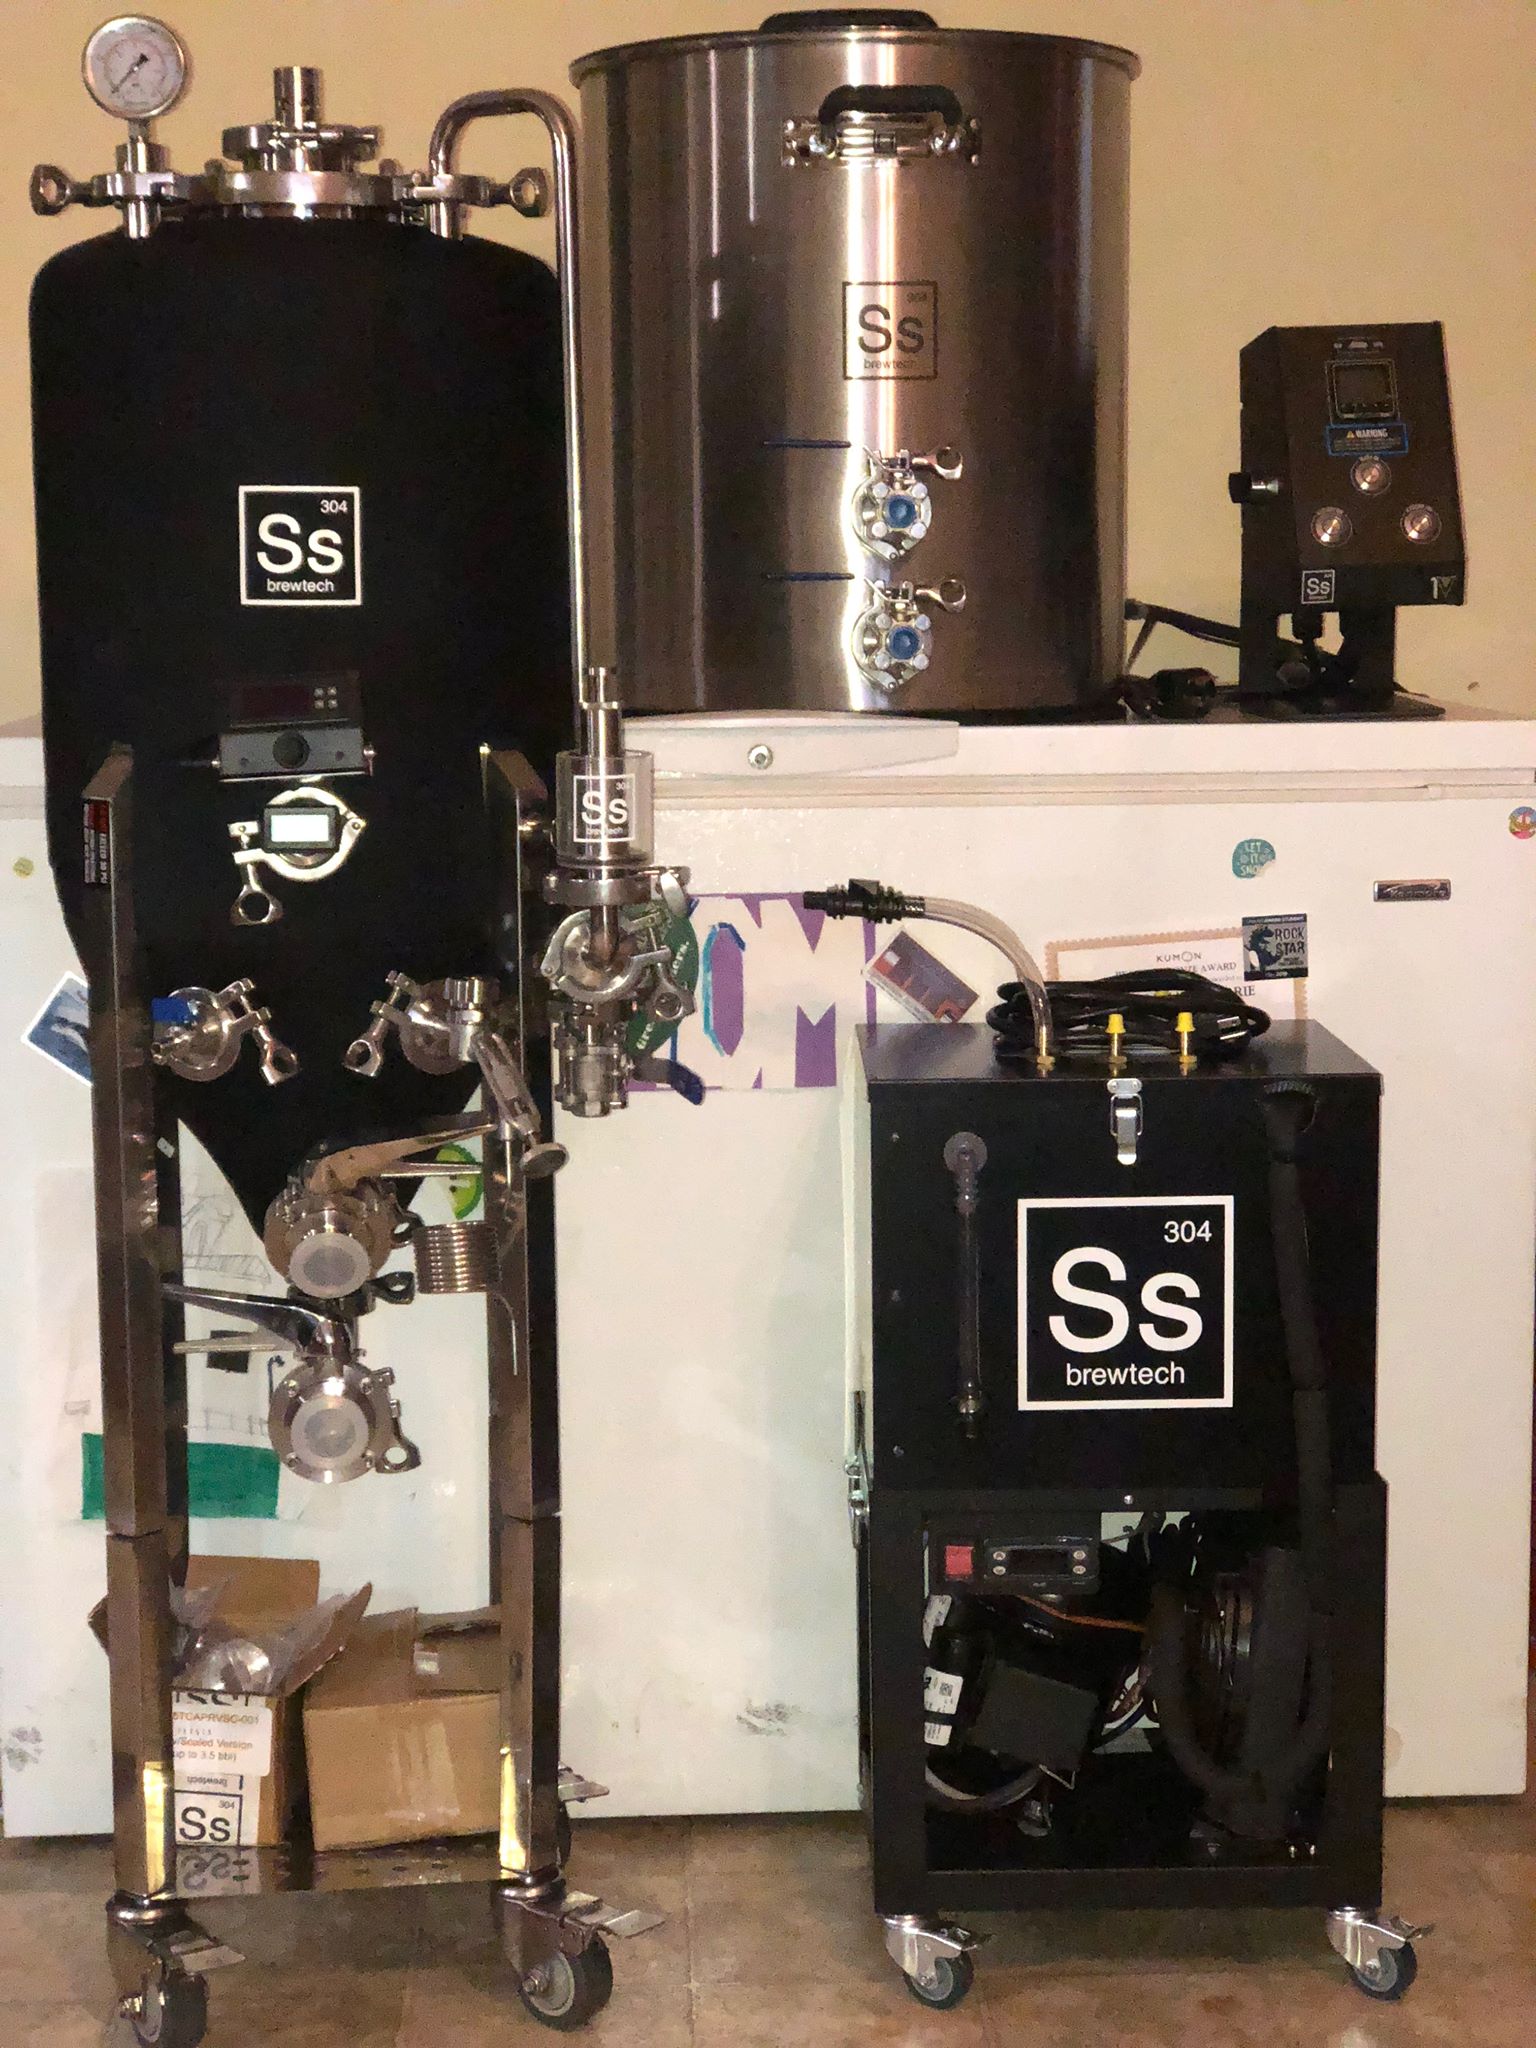
I love the condenser, and second the idea that you'll want to run the discharge tube directly into the drain. You do get a fair amount of odor with the condenser. Your house will smell very much like a brewery if you attempt to collect the water for later use. (Collect your chilling water instead for cleaning, as I do.) You can see how much the steam discharge has 'browned' my silicon tube due to the compounds (DMS, or whatever else) that are boiled off and drawn out.

If you haven't built your system yet... and are mildly handy... I strongly recommend installing a TC ferrule in your lid via silver soldering. I greatly prefer running the condenser out of the top. You don't lose any kettle capacity (for your mash).

I am a bit OCD, and didn't like the tilted condenser on the lid, so I figured out how to "muscle" the ferrule to be straight/upright before I silver soldered it. I didn't get it 100% perfect... but at least 90%. ;-)

2020-01-10 06.40.42.jpg
2020-01-10 06.40.48.jpg
2020-01-10 06.45.34.jpg


Putting the TC ferrule in the lid also allows the opportunity to build a little gadget that can be used for recirculating your mash, and whirlpooling after. All uses the same TC ferrule. (BobbyM modified a "spincycle overboard"... used the tube with a compression fitting welded to a 1.5" TC cap. I can move the tube up or down , and lock it at whatever height via the compression fitting. Have it just below the surface for mash recirc... and drop it lower for whirlpool after boil.)

2019-12-24 05.15.57.jpg
2019-12-24 05.16.11.jpg
 
Last edited:
There is already a mega thread on steam condensing. It would probably be fine to merge this thread with that one. There is no reason to run this thing during the mash. Simply putting the lid on contains the steam. If you decide to side mount the condenser port and kettle capacity is an issue, you can put a cap over the port during the mash and then swap it for the SteamSlayer after the grain bag is removed and you gain back that headspace. Water usage is 5-10 gallons per hour depending on your sprayer nozzle and incoming water pressure.
 
I use the steamslayer in my basement brew room and just put a 2" cap on the TC port I have on the side of the kettle.
You can see it here above the plug for the element.
EdDIlMnkLvvyg0pwK6cHI8YoBJkbAy70p_hnM2K98RZDGOg_UMDG2r2hSpOmRNEY8WJbTd8jVU_Z-mIreqZlebrC5NBEfeE2pC9ats_zTh-9ae2FsXo1frzeokwSSQp3NzmCmhhKWn8O74ffFmyq83huDwvNKE_aaipLpoDqnWoO_iK8ZEnStYkNb1nMPbAeTgeSGoJkjIuOSpao01t6uQEGKAD9yy05r_WoxVkEPALbZHCwJdY1vE-BTCzhaVUv4HkrLsu3h-DYV5QZYWYdxJfD2_IeWxFsifIxVbgZpyZBux59fFmwWcdEmNMDpAp-OflqY30ilOrBgsR8_TjkSoilYgU3p7DqC_nBFJmKnlzoTaKRzL3IxU7fnQ-LoES1yS4JAdqNhdL__I1OhCHB9y4LrTi_-0Q5H4v3_3zcWTmCNoOzAR1R3_lYXWZMQTTXNojJbpwFpLfnhSCEM_nO60a3uqmGQBBDi0MekNTtnLbUqqFpZPUzRE77jVb_0ugGEtVeR5Nm_Sw-gQUBPA6GWgJXEOVWuIKFEE5fYjnIobE7NcXlmF2pS7PBoFpljQ_IYL4VWtg8zTctiwifJ05gNFlwJ_P4YGW-e_Wek4VxIH7VzvOwZqWbns41F9TrJRPr1XloFIW1uu-UcmEzV-evtCb3zv4bef0_o8CNwflhfQGd0ao1WyYb45E=w792-h800-no


When it's time to boil I take the cap off and connect the steam slayer as it heats up to the boil. I drain into 5 gallon buckets and go through about 9 gallons of water during a 60 minute boil.
 
There is already a mega thread on steam condensing. It would probably be fine to merge this thread with that one. There is no reason to run this thing during the mash. Simply putting the lid on contains the steam. If you decide to side mount the condenser port and kettle capacity is an issue, you can put a cap over the port during the mash and then swap it for the SteamSlayer after the grain bag is removed and you gain back that headspace. Water usage is 5-10 gallons per hour depending on your sprayer nozzle and incoming water pressure.

I was really just wondering about the mash was all. Easier to just ask then go through 50 pages to maybe find the answer. I'll be ordering the parts from THIS Post soon from you. I may opt for the LID install initially as I've never modified like this before and the 20G ekettle I haven't even used yet so screwing it up would suck lol. Likely order one of your pull through flaring tools for the 1.5" TC Weld Ferrules.

Question: If I were to install a simple Weldless 1.5" TC Triclamp Bulkhead now, (I believe a buddy has one) could I remove that and use the same hole to install a 1.5 TC LONG Weld Ferrule later? I can see wanting to add a couple silver soldiered ports to the side of this and another pot later.

BTW.. I bought a bunch of stainless QDs from you last week and a t-shirt. Thanks again and sending you another order for this soon.

-Rob
 

Attachments

  • Ss Brewtech Home Brew Setup V3.jpg
    Ss Brewtech Home Brew Setup V3.jpg
    418 KB · Views: 183
Hi
I made a variant of the brewtools condenser for my Guten Electric brew system, this had a stainless steel lid and hole already so I connected the condenser into this. I made another hole which could have a triclamp ferrule soldered on as mentioned above, but instead I get a great seal with the glass top of a kilner clip top preserving jar which has a convenient silicone rubber " gasket ". This extra hole is really helpful easy to lift off and peer in, do hop additions and take samples.
Basically a hack of the spike brewhat.
Fans just aren't up to it.
 
Back
Top