• Please visit and share your knowledge at our sister communities:
  • If you have not, please join our official Homebrewing Facebook Group!

    Homebrewing Facebook Group

Badger Dog Brewing

Homebrew Talk

Help Support Homebrew Talk:

This site may earn a commission from merchant affiliate links, including eBay, Amazon, and others.

Nimbus3000

Well-Known Member
Joined
Feb 14, 2015
Messages
61
Reaction score
21
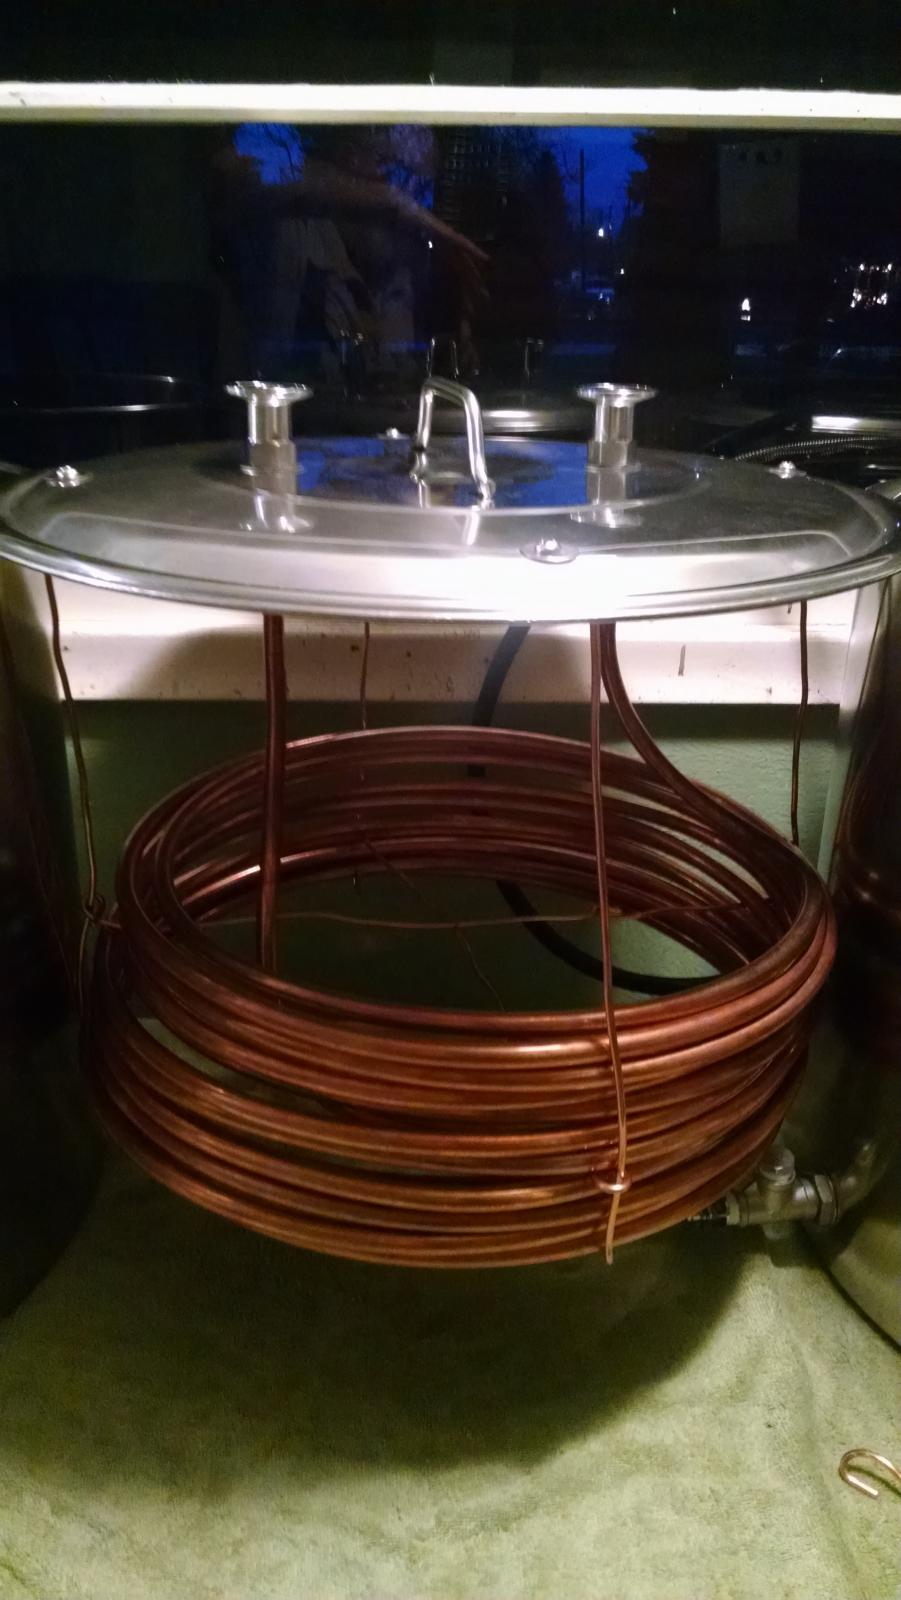
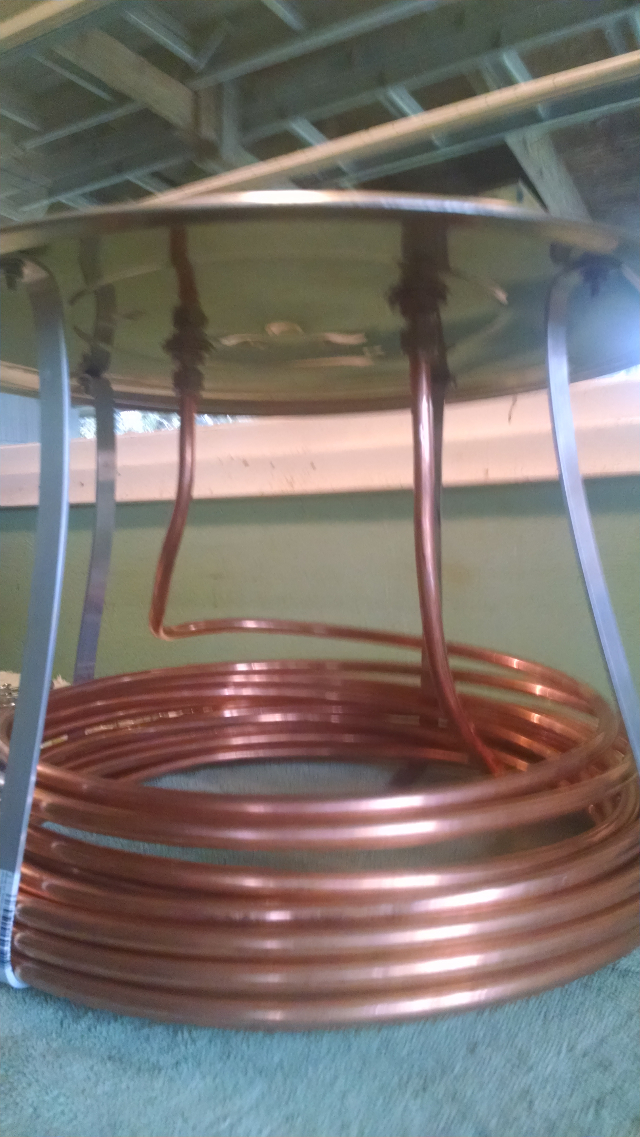
Posted a few pics into another thread so decided to compile them into a single thread. And yes I do have a Dachsund. Attached are a couple of pics of my HERMS coil that I finished today. Used 60 foot of 1/2" O.D. tubing. The support legs are aluminum since I had the material on hand (plan on replacing them with stainless later). Total height of coil is about 4 inches and 19 inches in diameter.
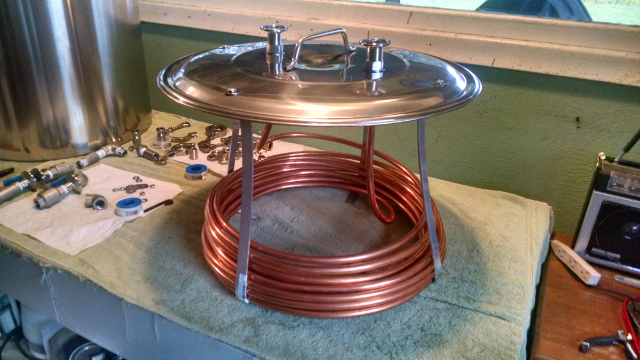
IMG_20160214_131026094_HDR.jpg


IMG_20160214_131040801.jpg
 
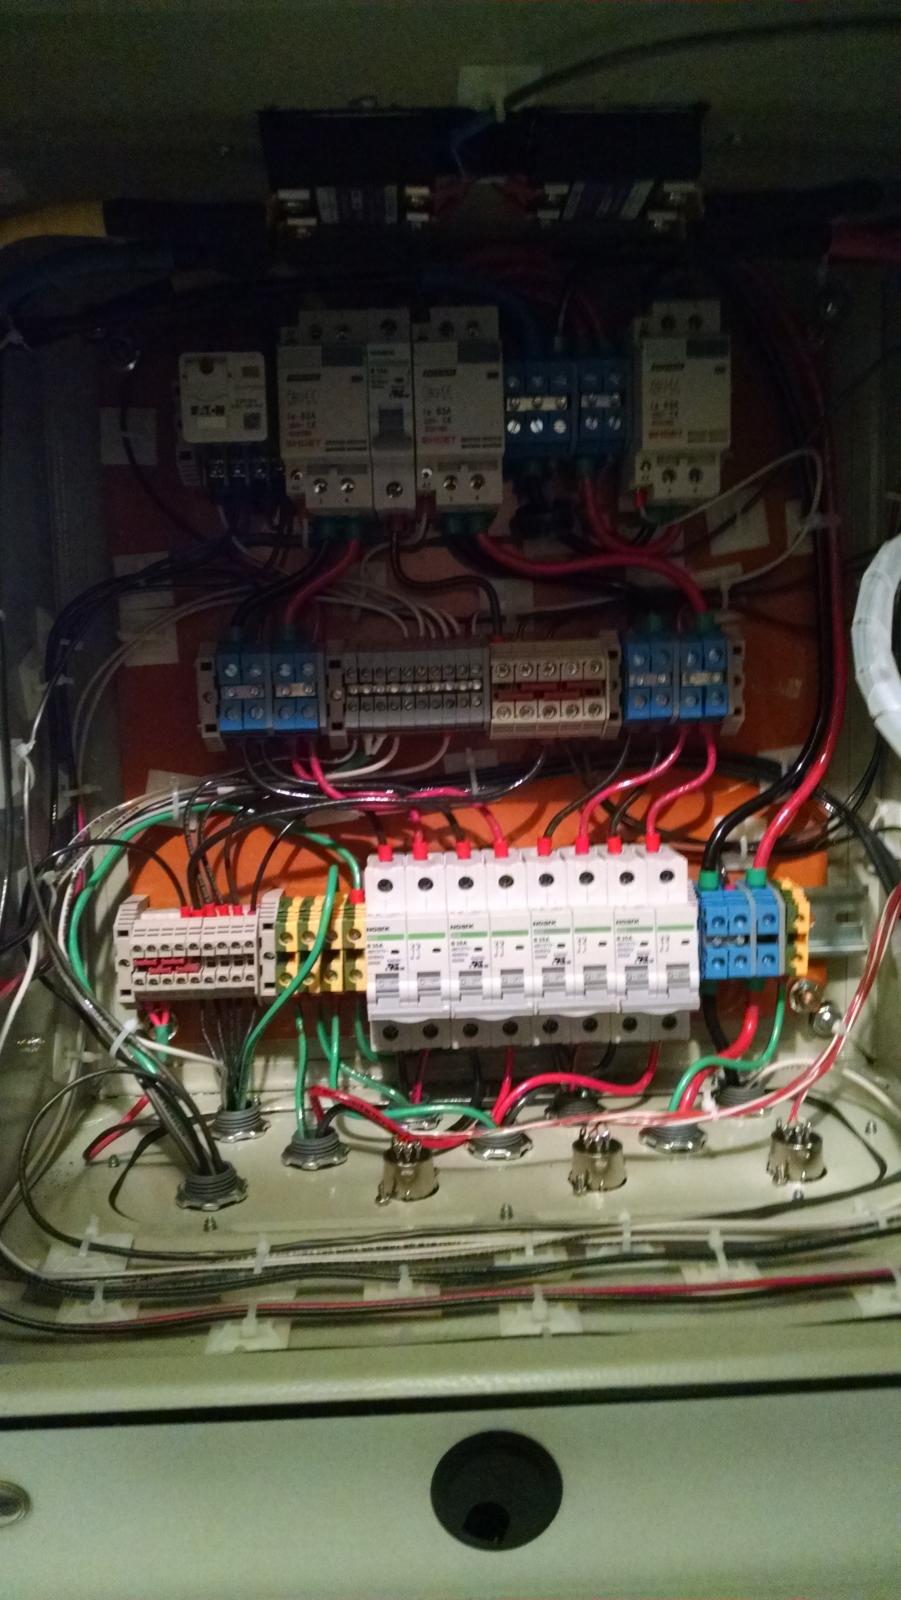
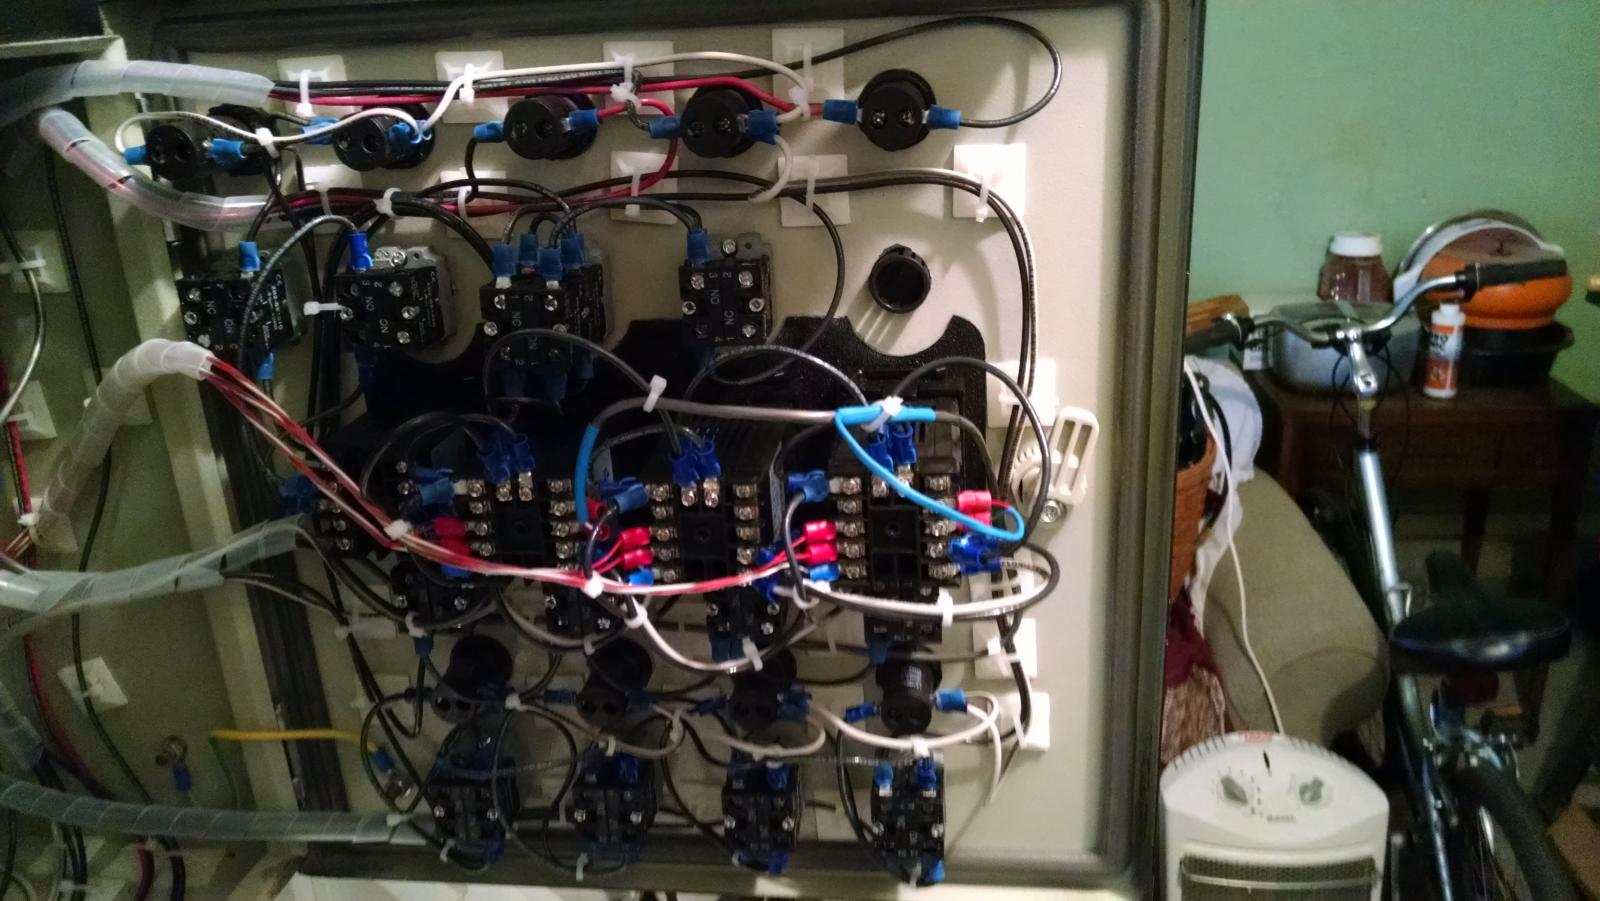
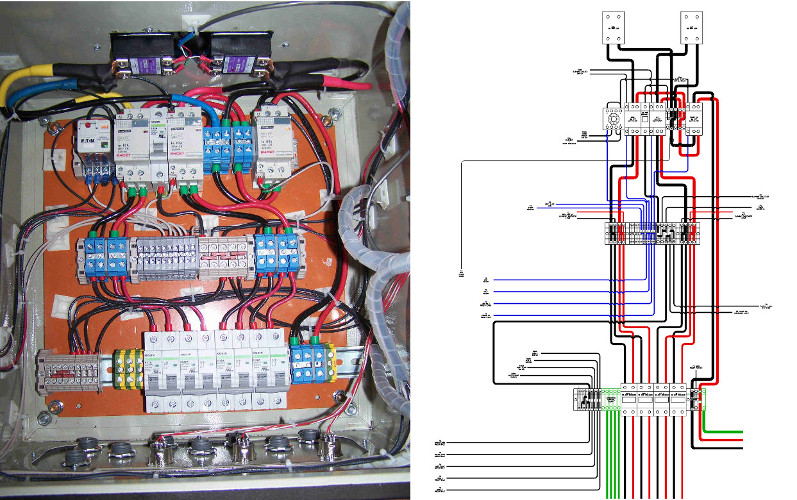
Control panel interior. BackPlane is prior to final wiring run to sockets.

IMG_20151213_135309360.jpg


IMG_20151213_135123934.jpg


BackPlane.JPG
 
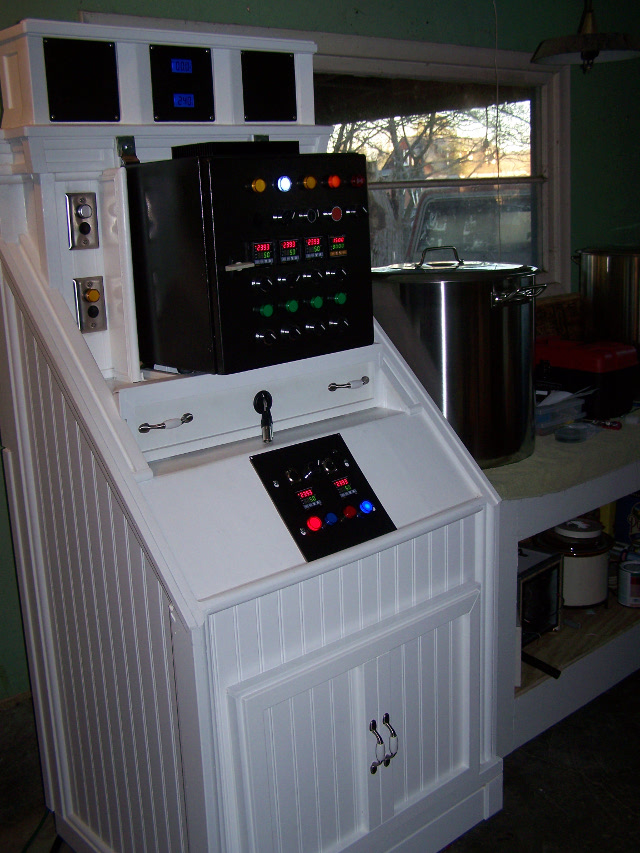
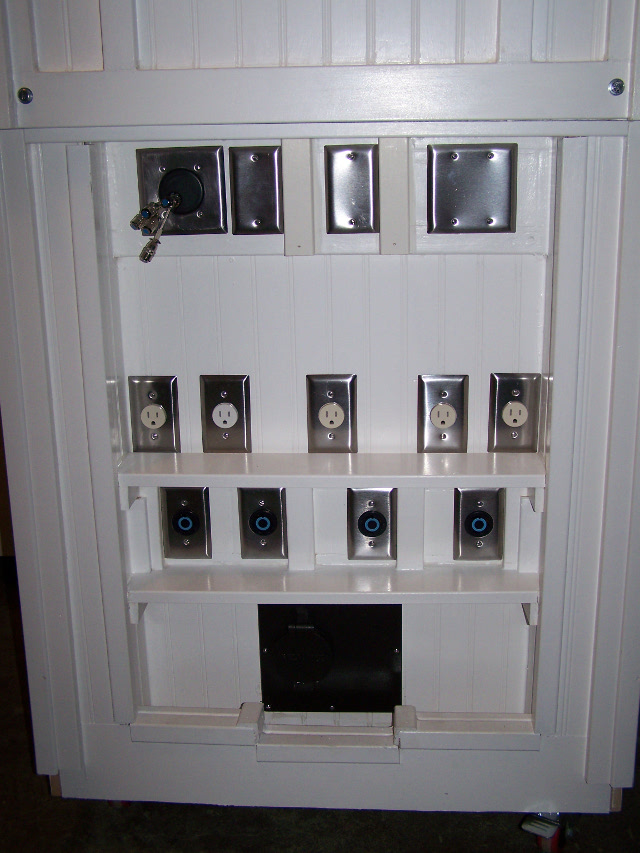
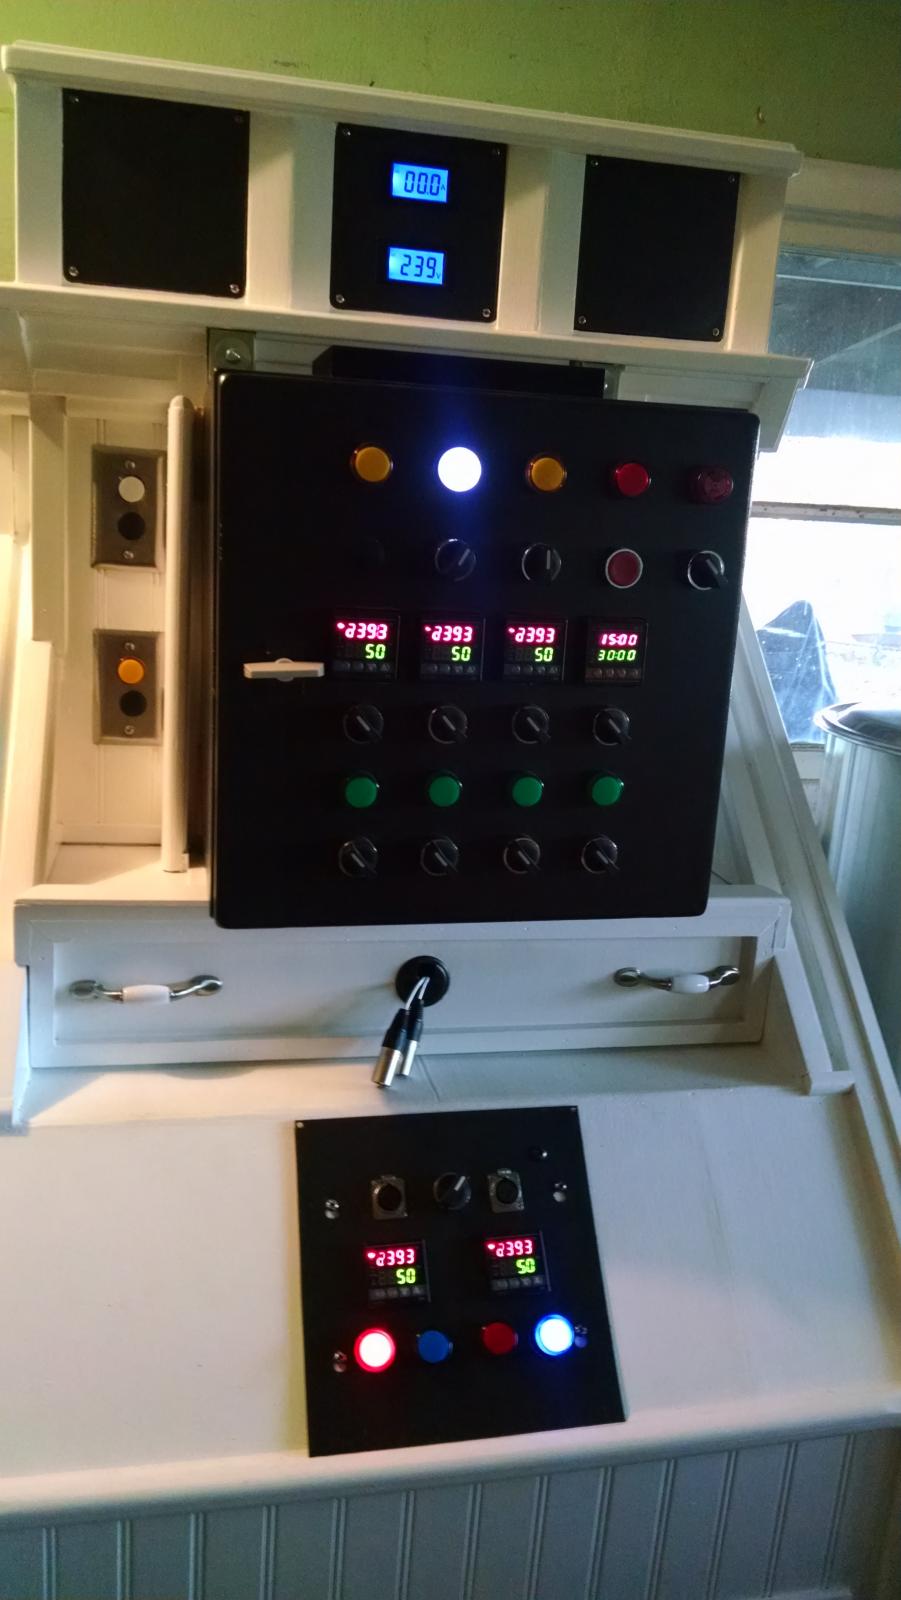
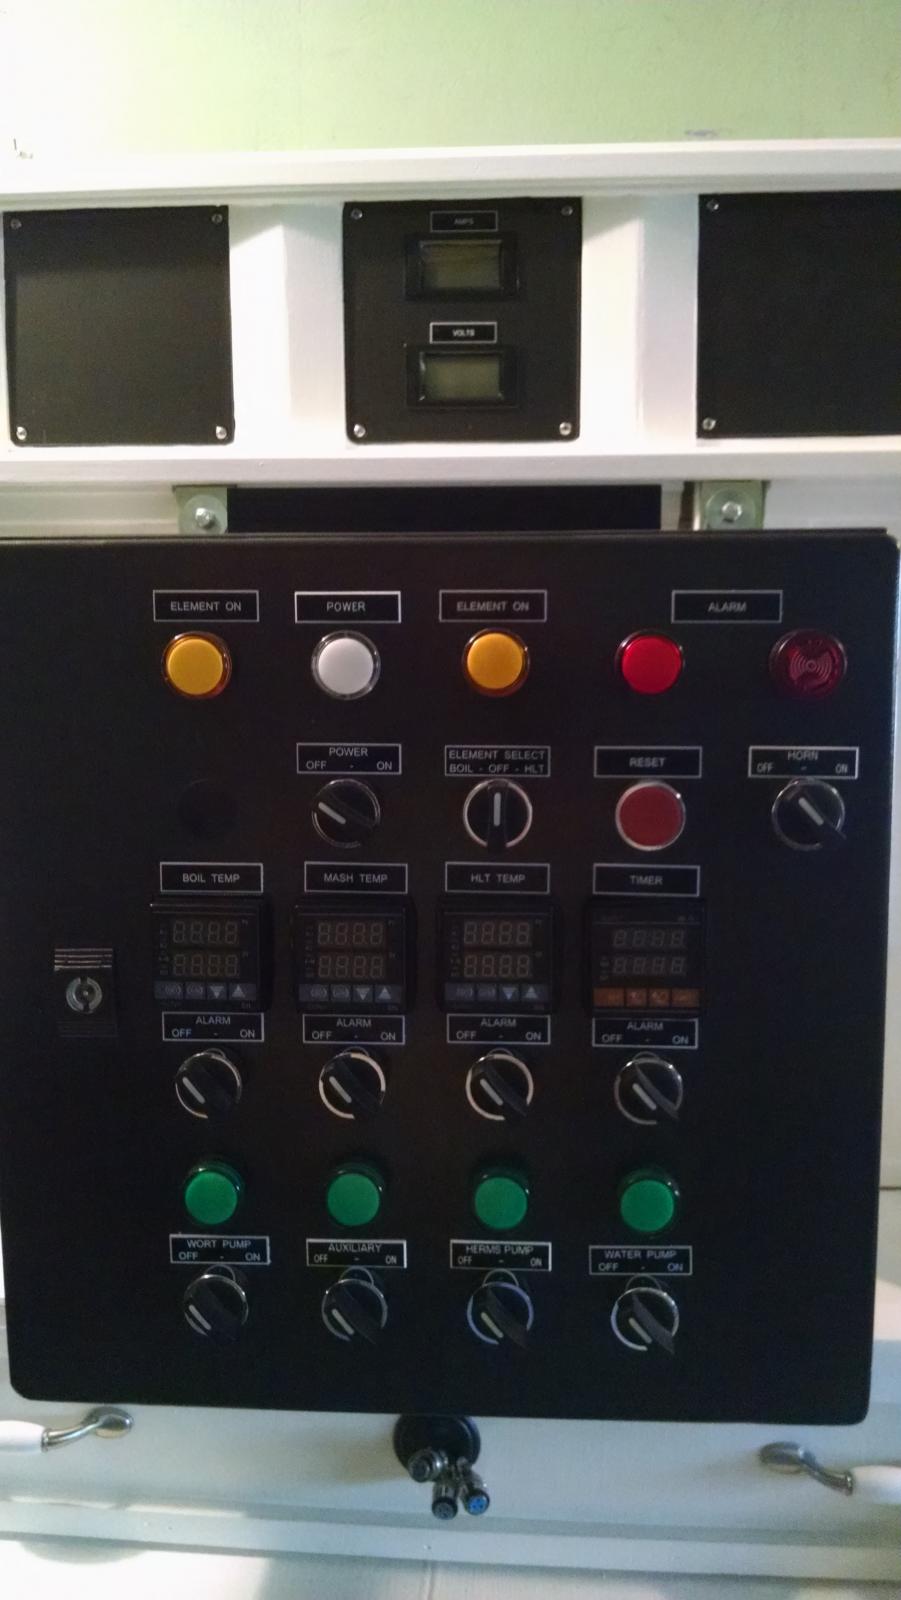
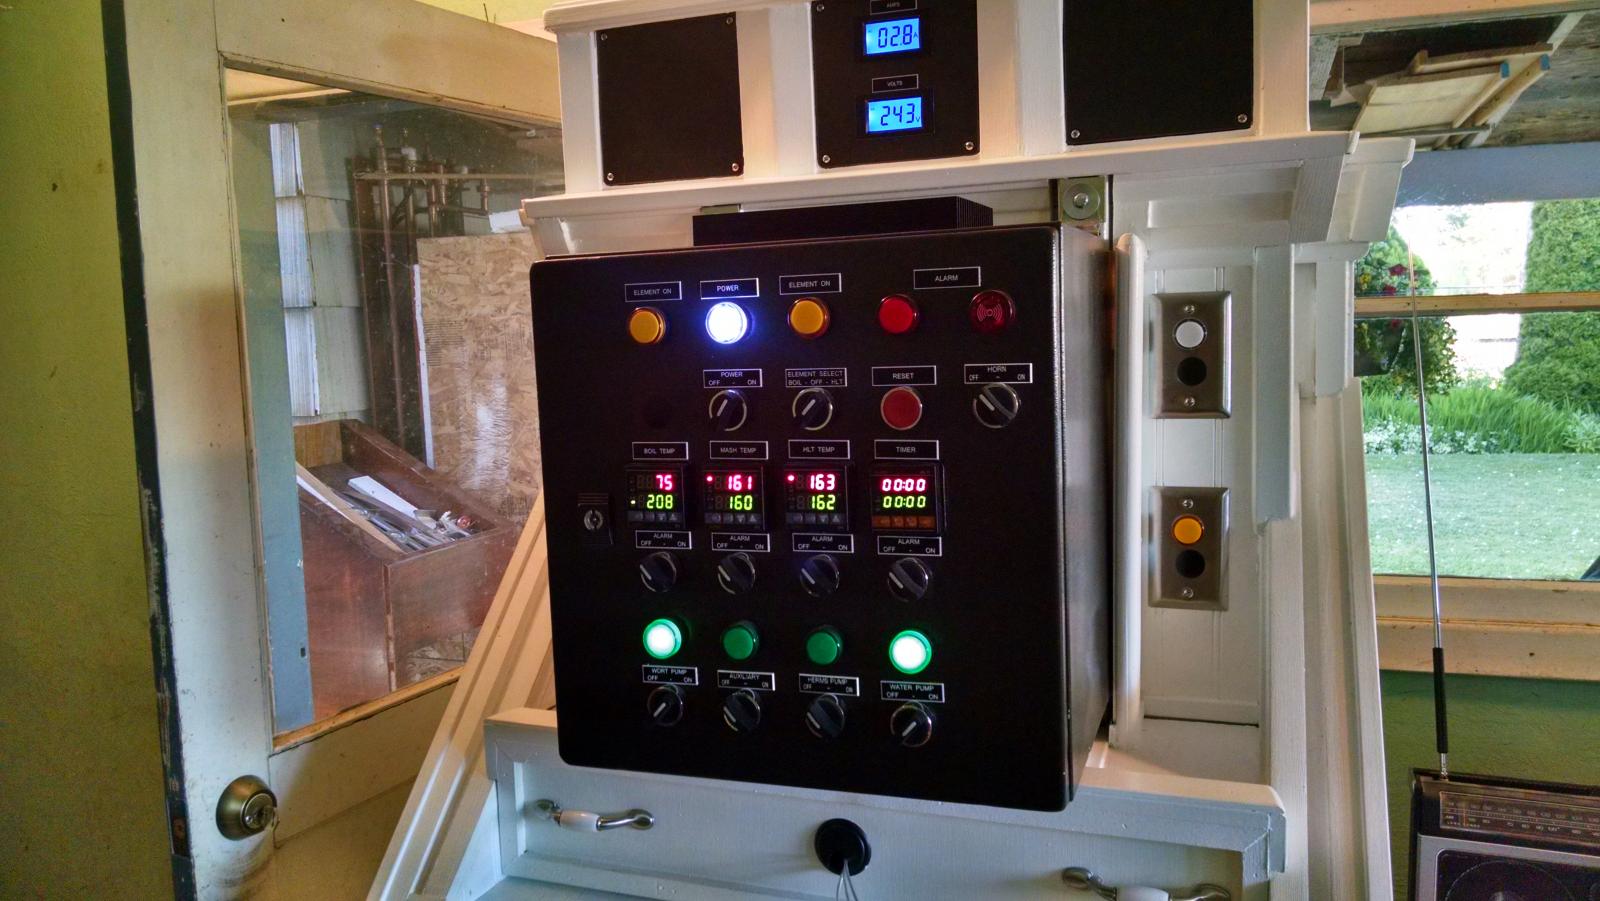
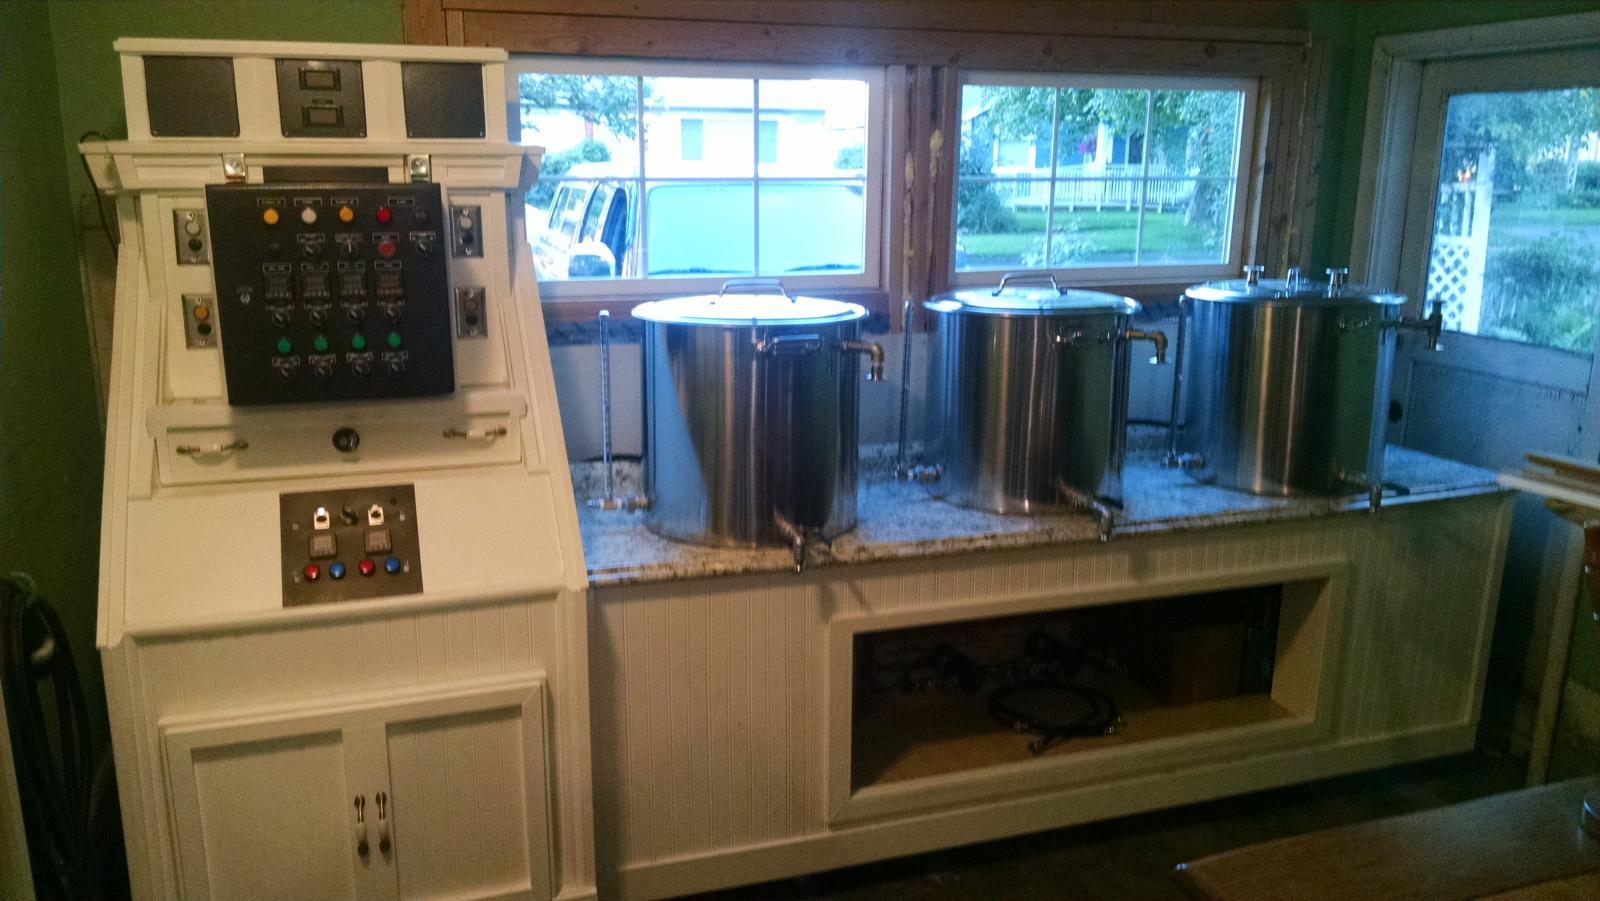
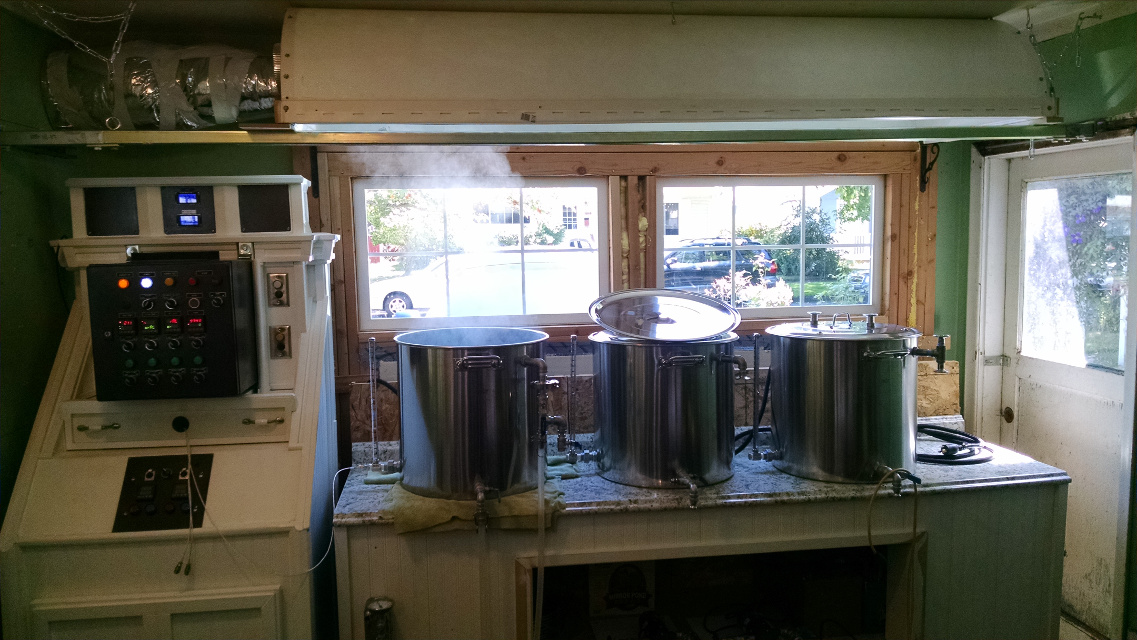
Thanks. Probably should explain why the stand is so large. The panel is designed for 50 amps so there are four 30 amp twist locks to run two 4500 watt elements per kettle. The power in is a Reliance PK50 socket. There is enough room for two more 30 amp power in sockets. The additional two power inlets can feed the power to two more enclosures located inside the base of the cabinet. The two PID's located on the secondary panel can control these two enclosures. This would allow for the use of another 5500 watt element in each of the two kettles. Each of these 5500 watt elements can be run independently from each other and the 4500 watt elements. The two single box covers on the top are for the 30 amp twist lock sockets from the two secondary enclosures. The two blank faced boxes on each side of the amp/volt meters can hold two 1/32 DIN PID, indicator lights and XLR socket. The center 120 volt socket is powered on when the main control panel is powered up. The other four 120 volt sockets are controlled by the switches on the bottom of the main panel. The switches on each side of the main panel (only the left side are visible) are for powering up the secondary panels and the 5500 watt heating elements. The back of the cabinet above the power sockets can be removed to provide access to the wire pull box.
 
That control stand is pretty awesome! I wish I had the room for something like that. I love re-purposed furniture and I like how you split out some of the components. Very nice!:mug:
 
Thanks. Actually I built the cabinet from scrap material left over from other projects. Skilsaw, glue and air nailers. Not fine cabinetry but it is good enough for my use.
 
Question for folks out there. As I work on setting up my brewery a question came to mind. Since I have a spare hot water tank is there any reason that I could not wire the tank with a 30 amp cable and twist lock and run the tank off of the 30 amp power that I use for the control panel? The internal thermostats would control the water temperature. When I need to heat up the water in the tank I would just plug it in.
 
That sounds like a great idea. The only thing about the hot water heater tank, is if it is clean inside. They really advise against using hot water in a hot water tank to brew with as the hard water deposits and other things that accumulate in the tank will effect the water quality. That is why your supposed to heat up the water separately in a vessel and heat source of your choice. I know others don't do this and just use hot water from their hot water tank to save time and that is fine if that is how you want to brew. But in practice they do advise against this when trying to make the best beer you can. If you will just use the spare tank to heat brewing water only and it is new, and you could somehow clean it out or at least empty it after use, that would be better..... I am sure others will chime in.

John
 
No plan to use it for brewing water. That will be RO water. Only plan to use it for wash and clean up. All water heating for brewing will be in the stainless kettles.
 
No plan to use it for brewing water. That will be RO water. Only plan to use it for wash and clean up. All water heating for brewing will be in the stainless kettles.

Well in that case go for it! That would be a nice feature to have hot water for clean up ready to go on demand. Just heat it up in the tank via your awesome control panel. I also use RO water when I brew and adjust it to what I am making.

John
 
Modified my HERMS coil. Removed the aluminum support arms and replaced them with copper wire. Added a couple of cross wires to keep the coil from collapsing on itself.

IMG_20160219_180517712.jpg
 
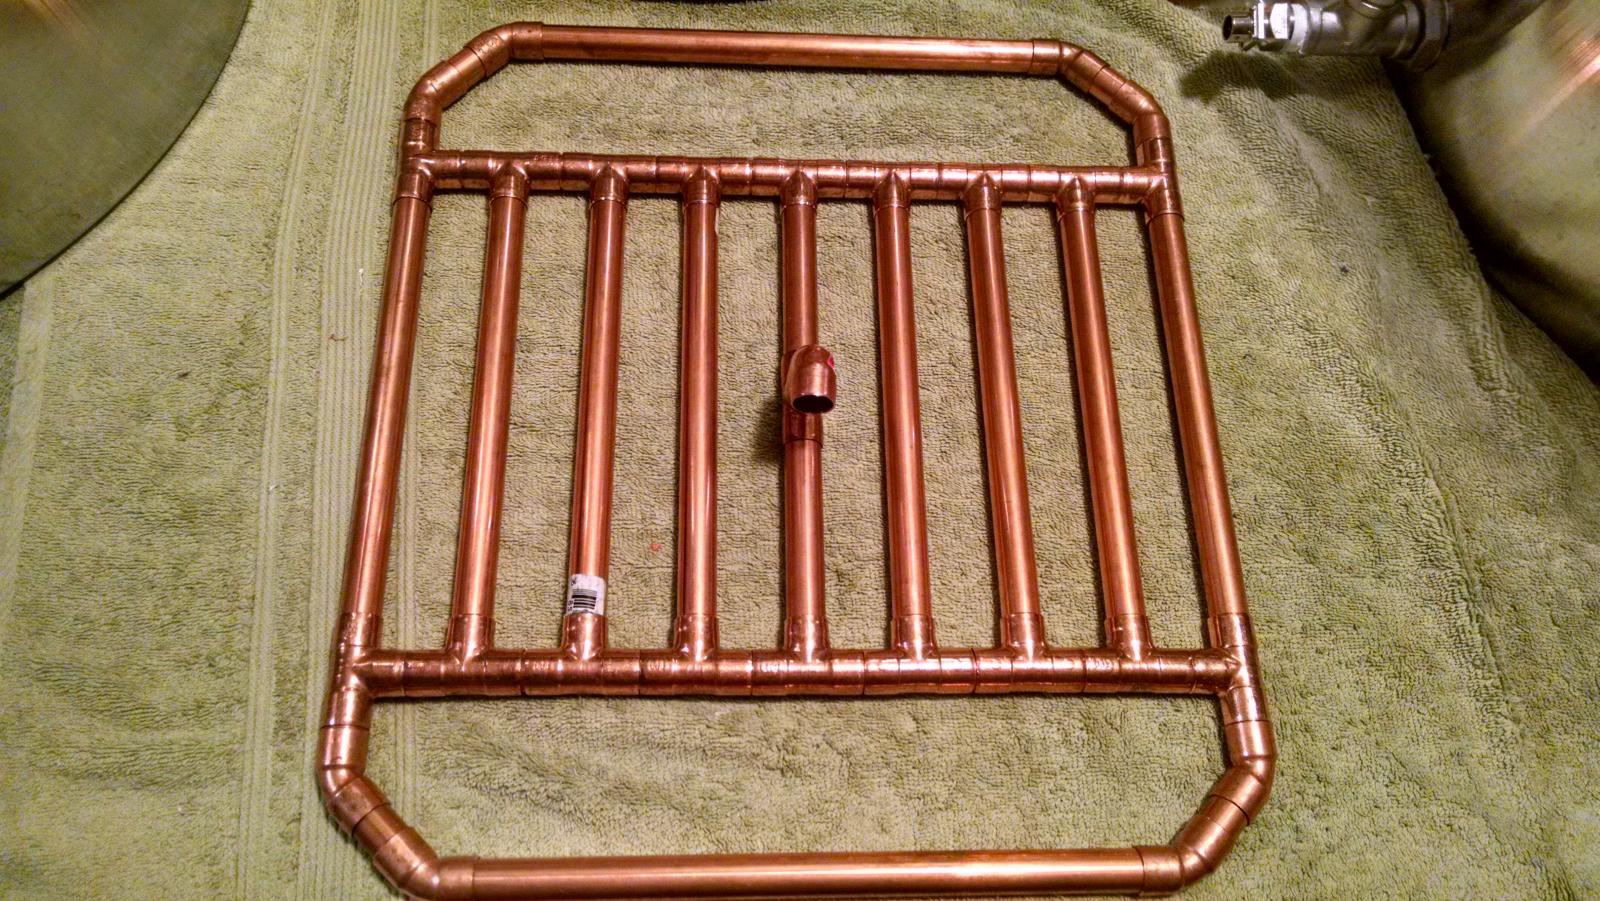
Picture of my tun manifold. Inside of my 20" kettle it leaves 2" maximum on the side. Tubes are at 2" on center

IMG_20160225_204409091_HDR.jpg
 
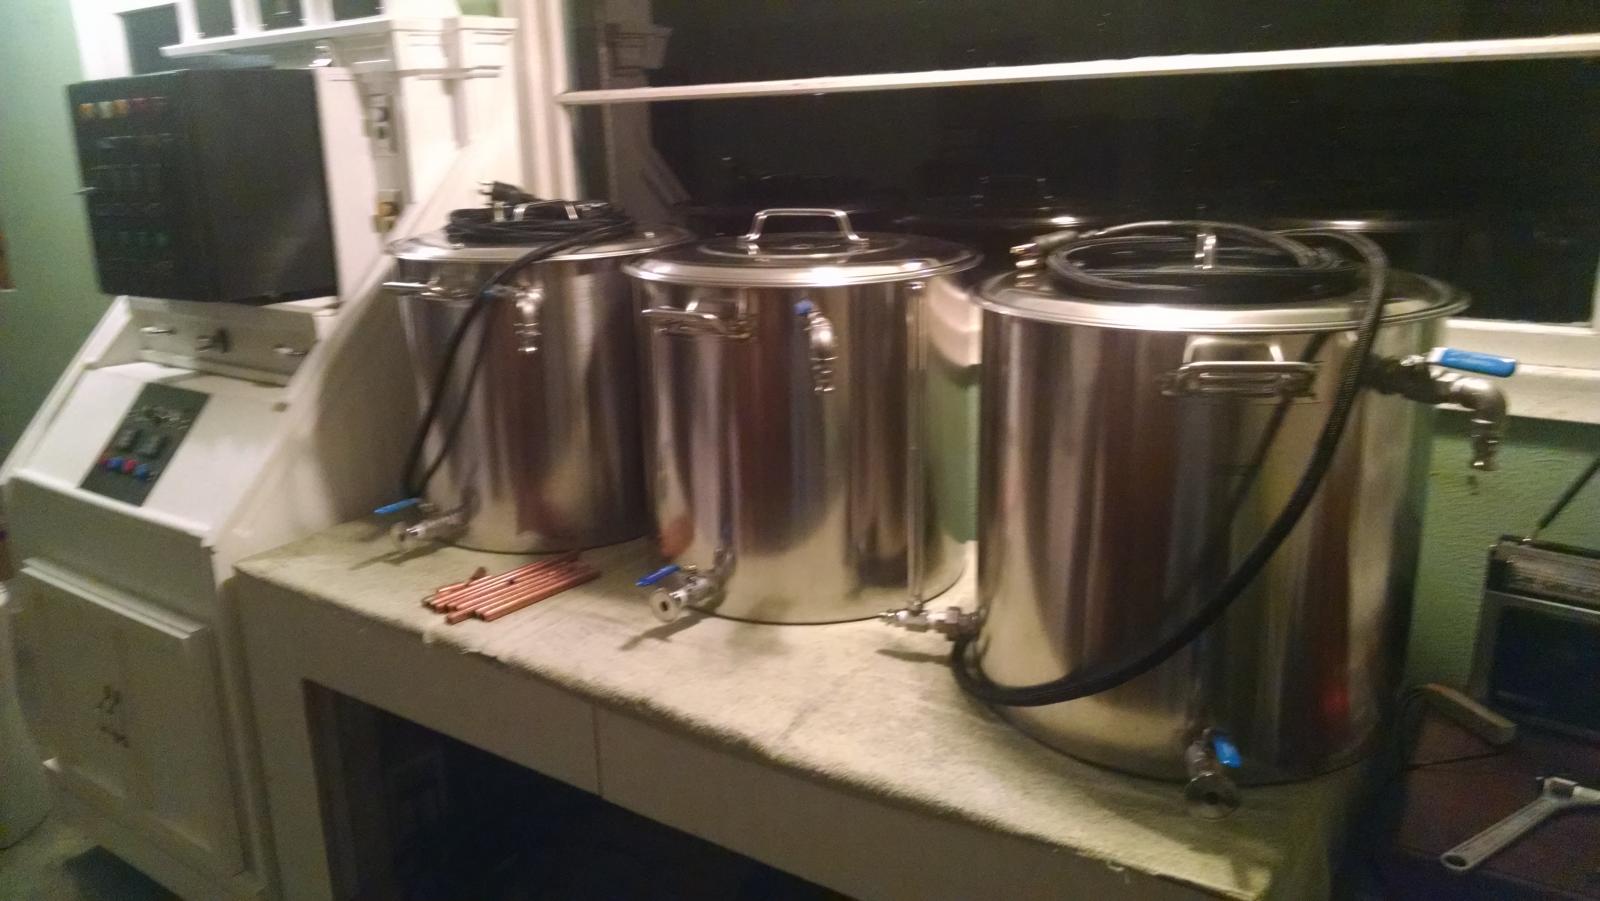
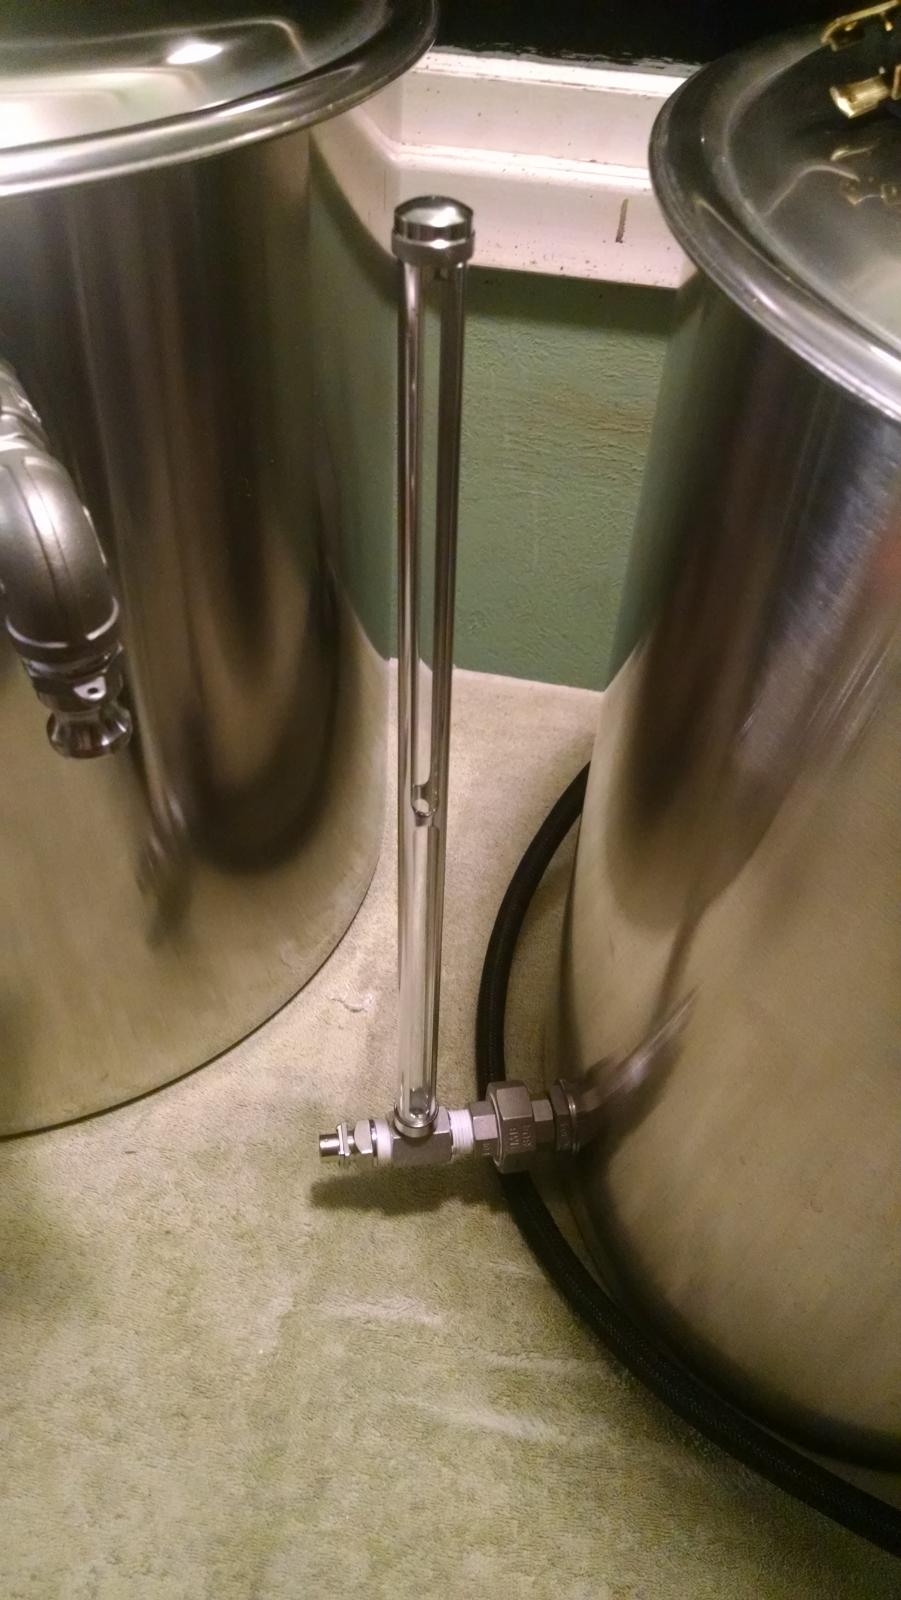
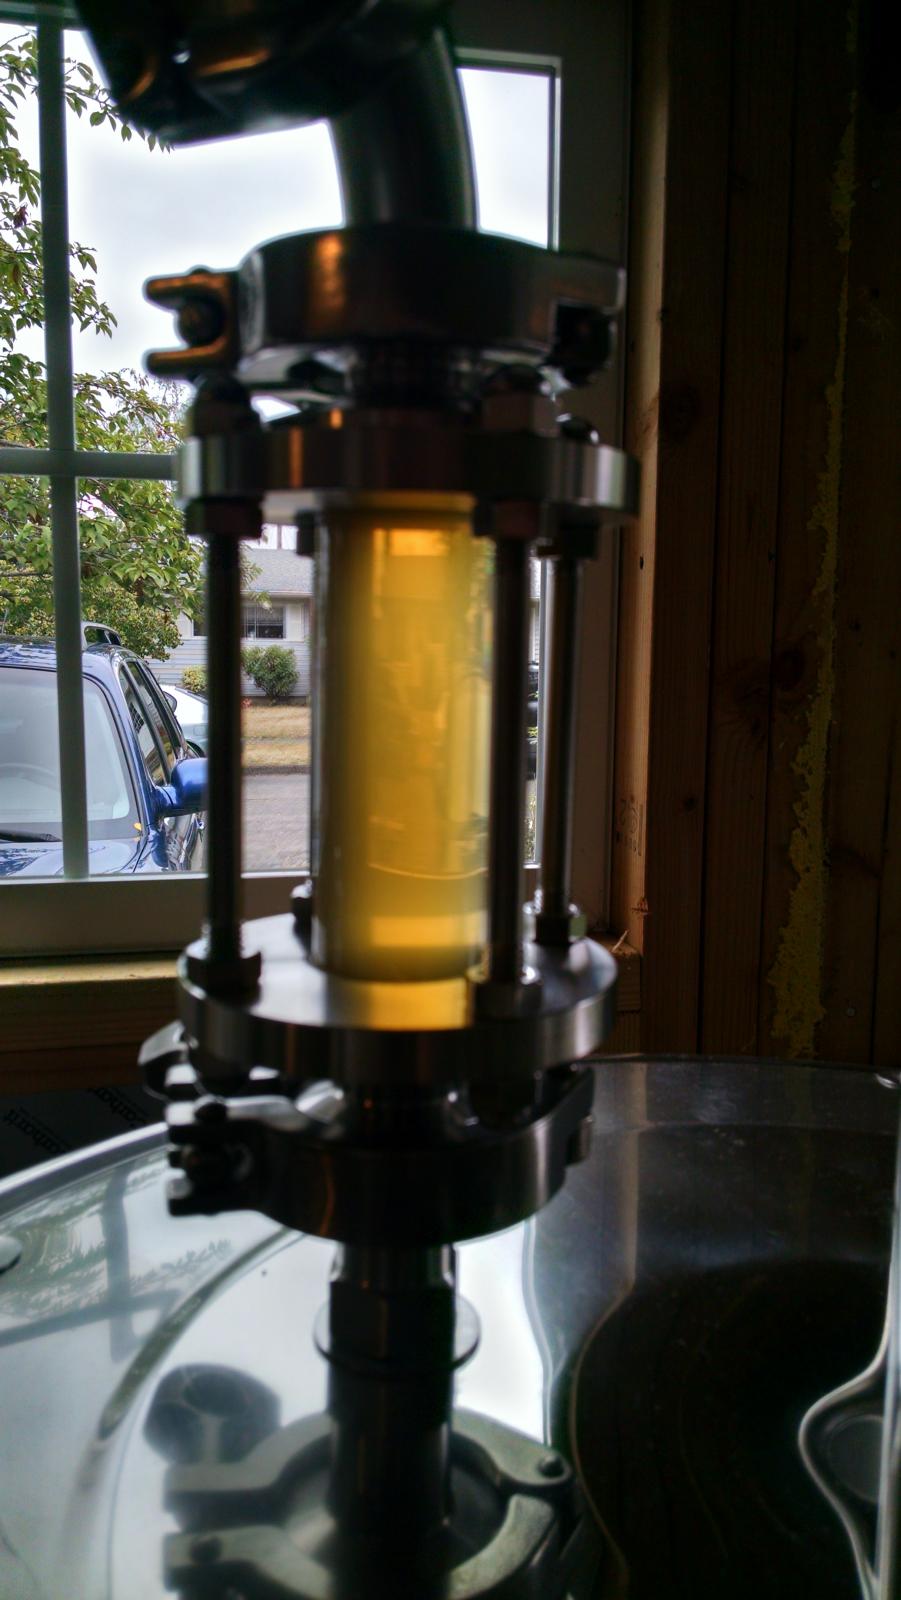
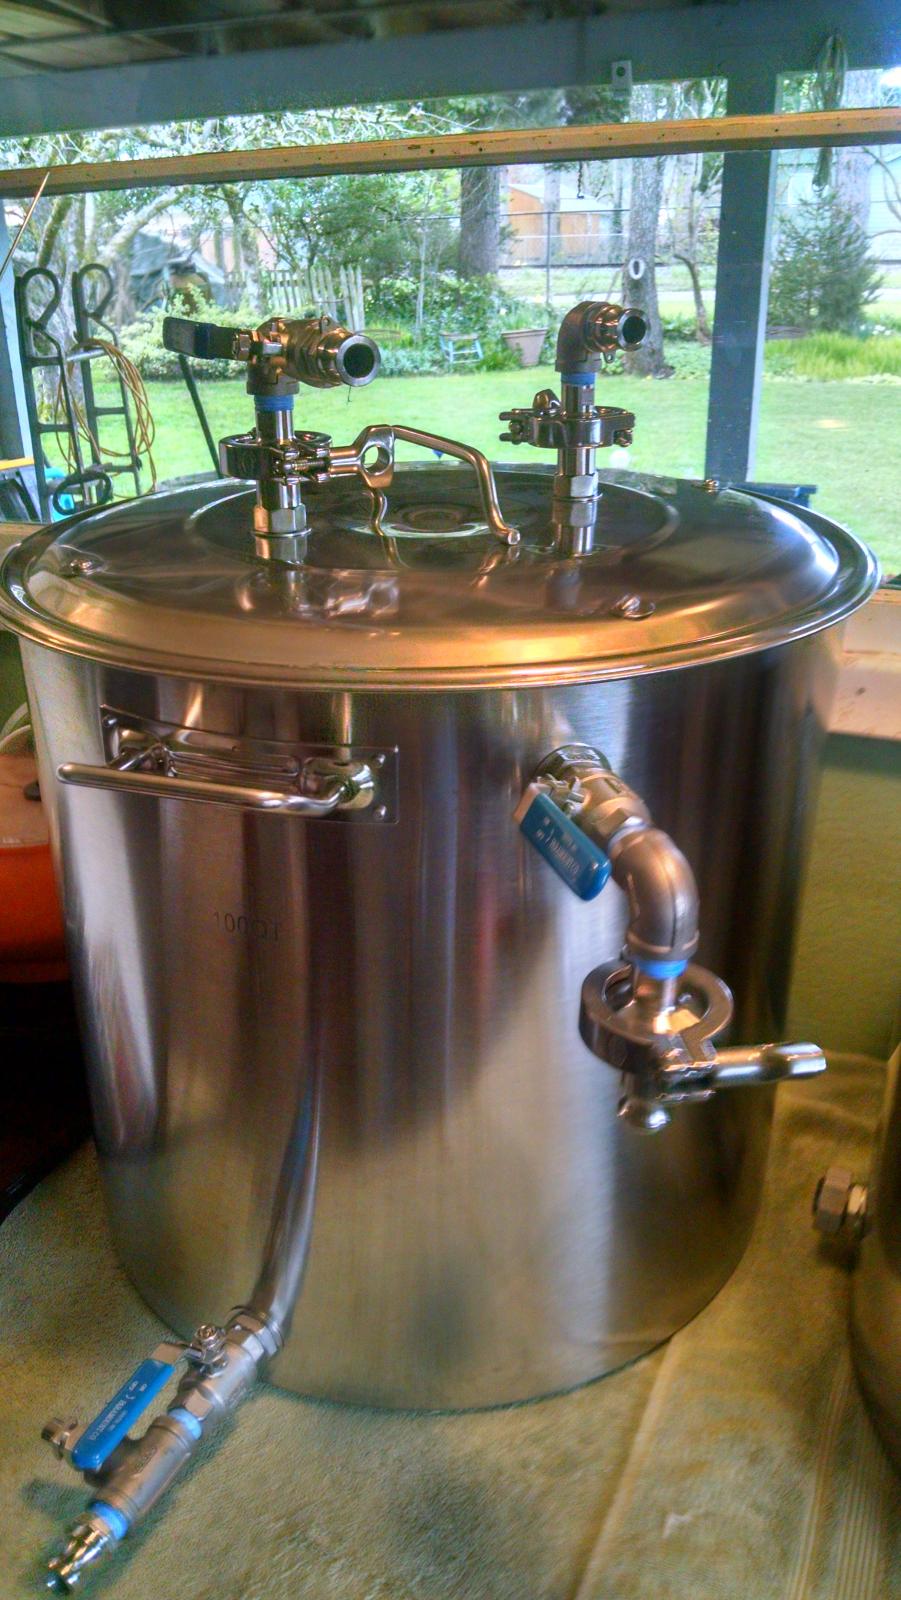
Just a quick post to show my finished kettles. I mounted the sight glass with a pipe union so that I can remove it for cleaning and storage. This also moves it away from the side of the kettle.

IMG_20160303_203203393.jpg


IMG_20160303_203254630.jpg
 
I have an explosion proof 1/4 HP electric motor that has been hanging out on my shop counter. I am planning on using this to drive my grain mill with a 12" or larger sheave on the mill. Anyone have a suggestion on a source for these larger sheaves? So far I have only been able to find sheaves for heavy duty machine use. I really do not want to spend over a hundred bucks on a single sheave. Thanks
 
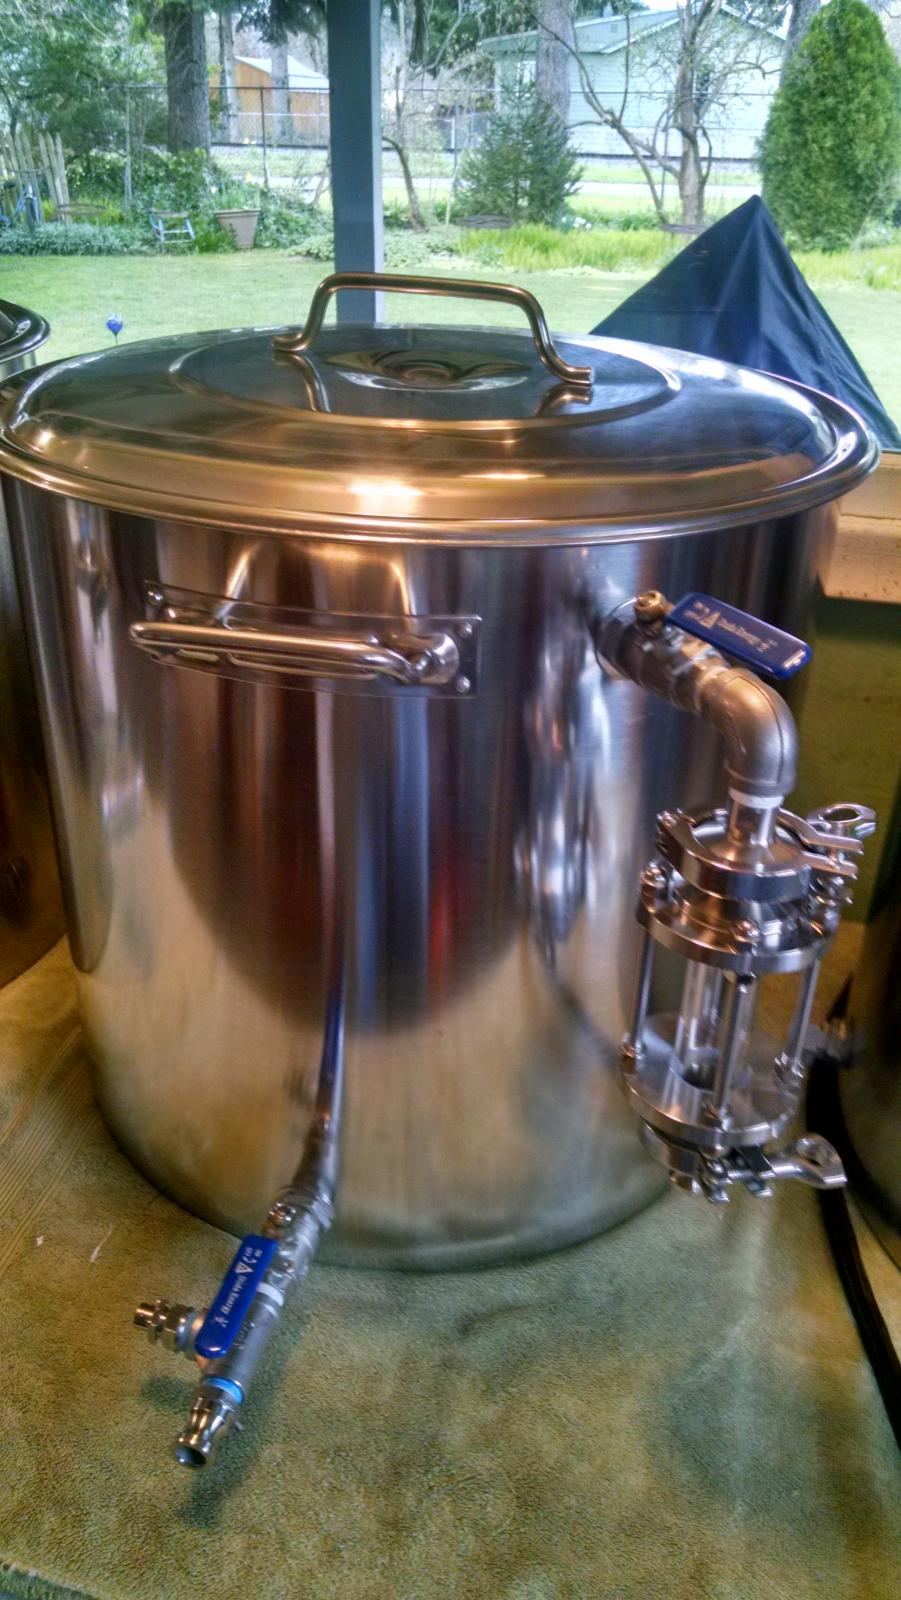
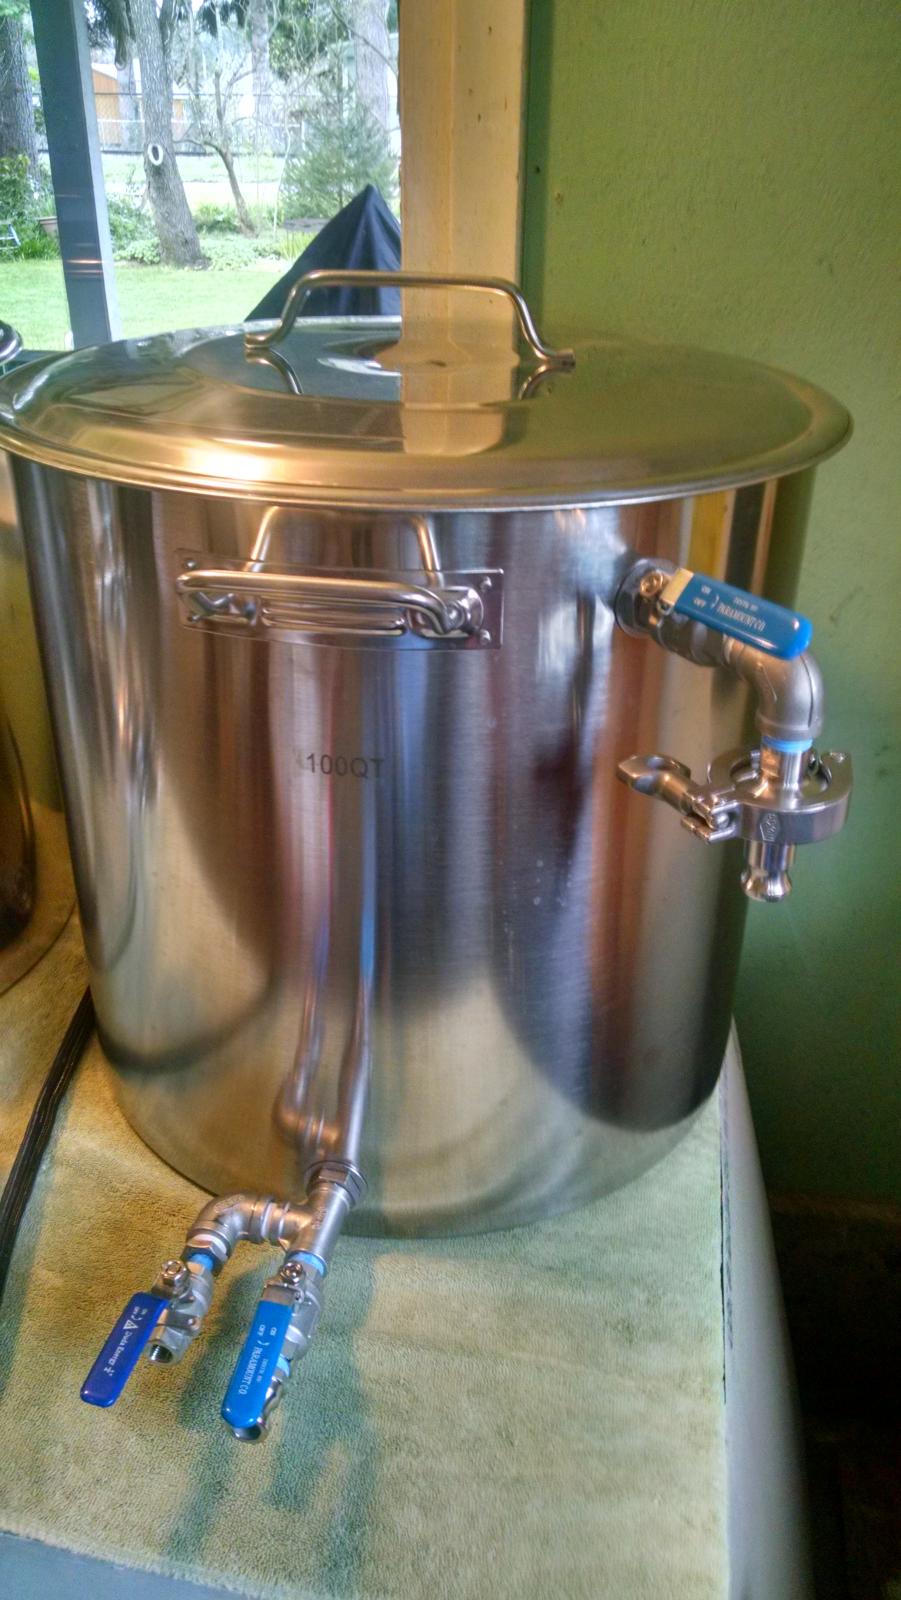
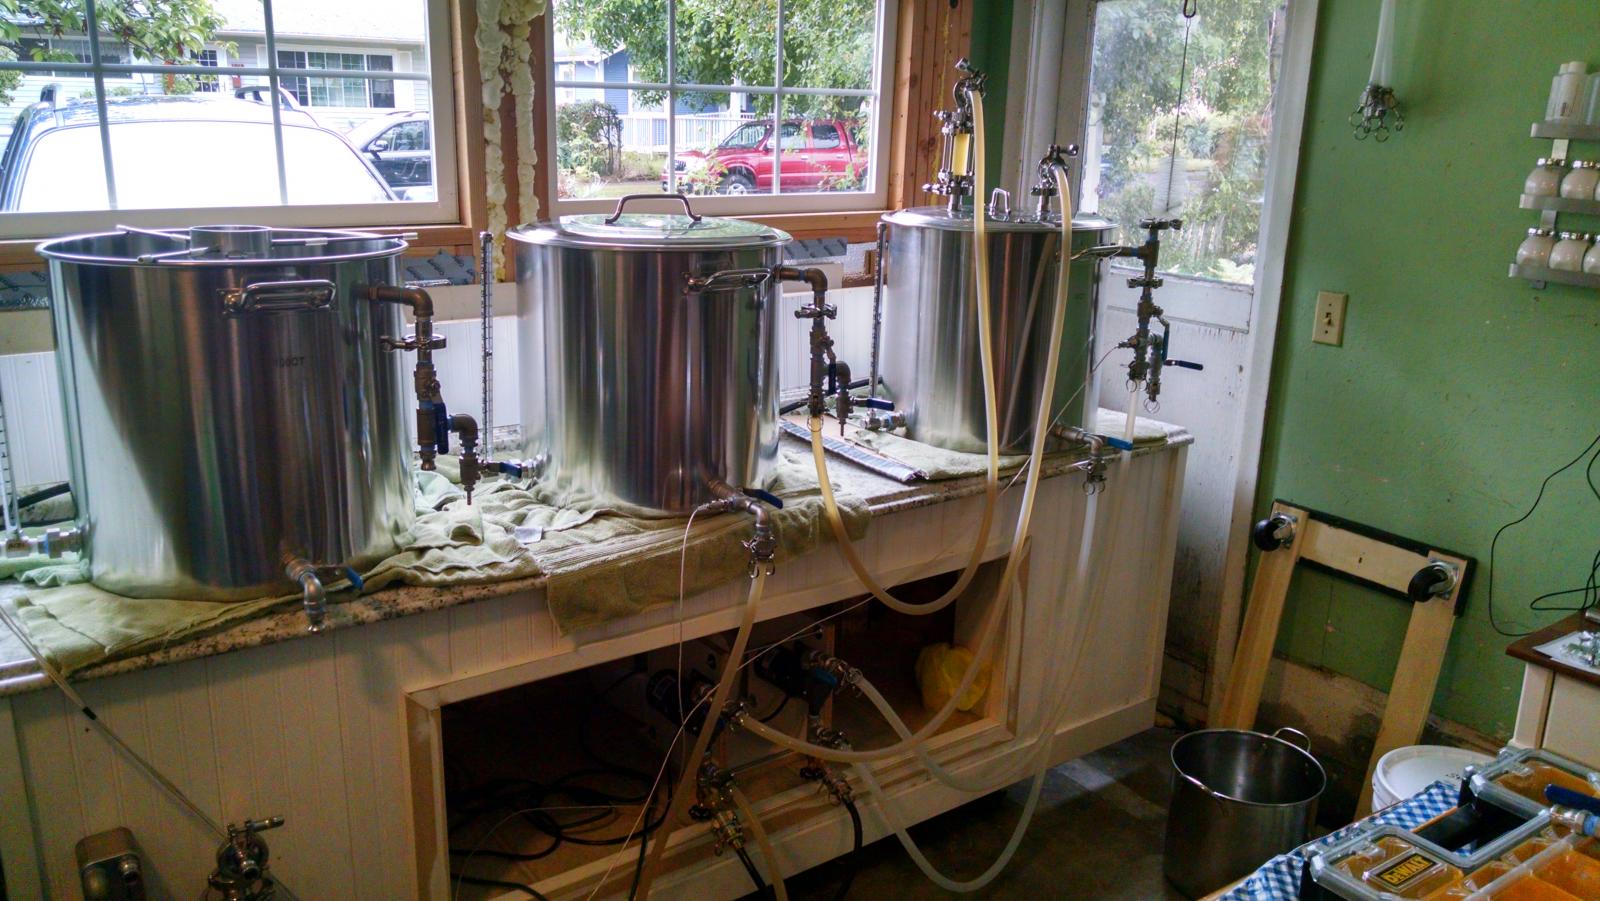
Finished with my kettles. Pictures of the hlt, mash tun and boil kettle. The sight glass is not attached to any of the kettles.

IMG_20160319_172001897_HDR.jpg


IMG_20160319_172034201_HDR.jpg


IMG_20160319_172053701_HDR.jpg
 
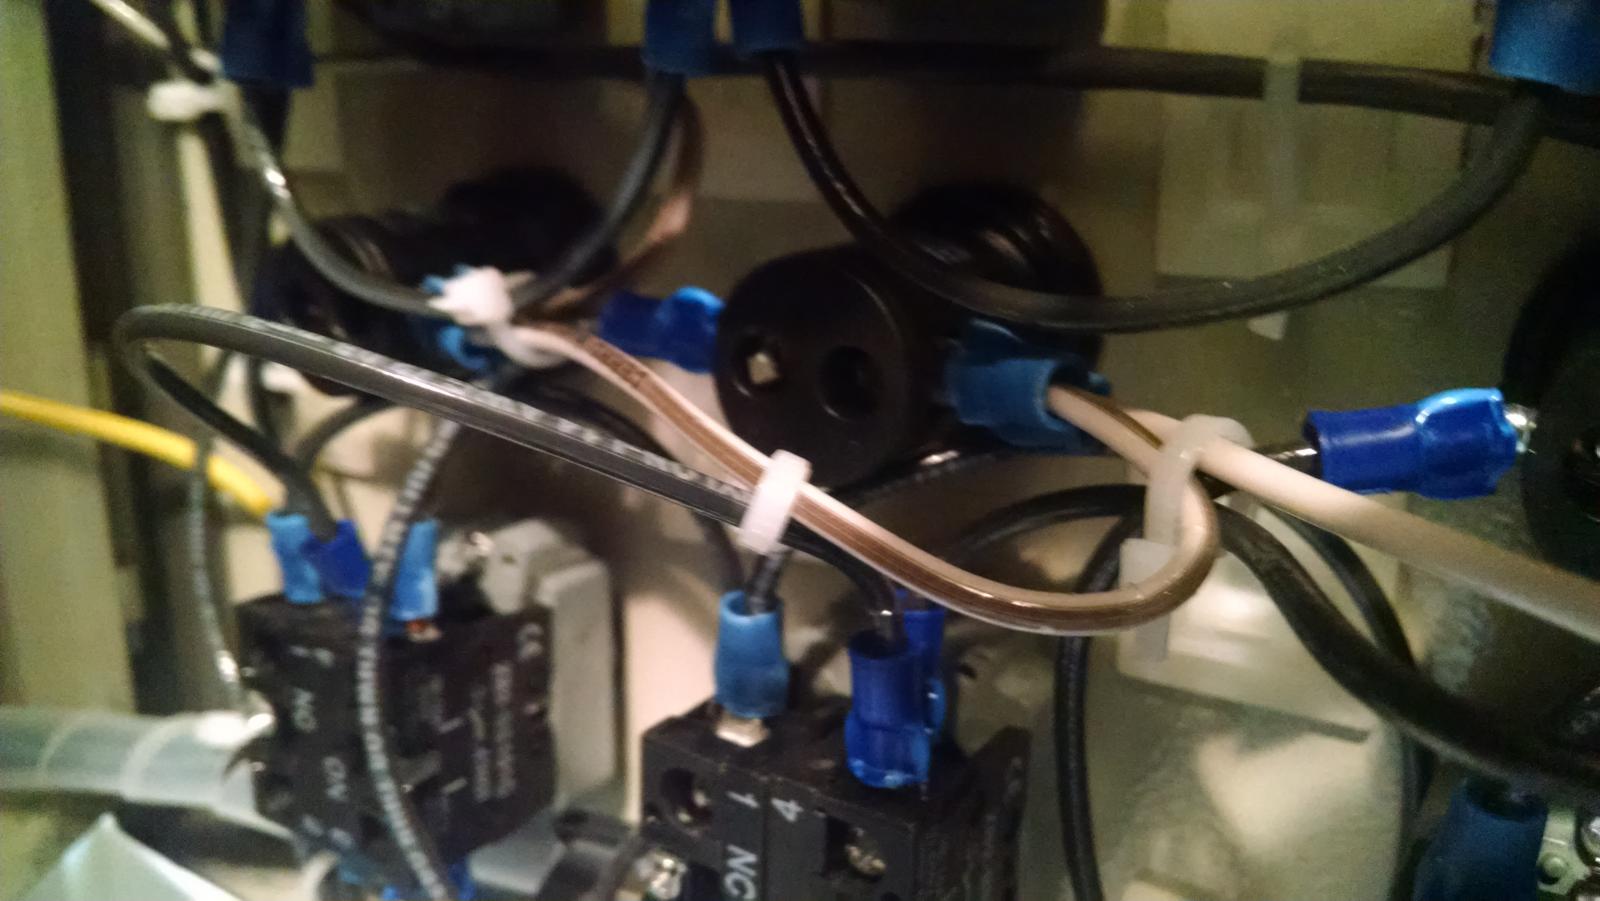
I have run three tests on my panel and have checked the wiring during and after each test. I have not noticed any apparent problems until after the third test. When I checked the wiring after the test was over I noticed a black line on some of the neutral and ground wires (these did not show up during the test as I had the panel open and did not see them). I have not noticed any problems with how the panel functioned during test three and none of the breakers (either inside the control panel enclosure or the house panel) tripped. There was no "smell" or any visual indication of the wiring overheating (no apparent damage to the insulation on the wires). None of the terminals show any sign of overheating or shorting out and the hot side does not appear to show these black lines (at least on the red wires, black is kind of hard to tell). I "was" pretty confident that I had wired the panel correctly but now I am not so sure. I have attached a picture of one of the neutral wires. Any one have an idea what may be causing this? I do not plan on powering up the panel again until this is figured out. This looks like the wiring is overheating somehow, or am I just being paranoid?

One more thing, it seems like these black lines are running along the text that is printed on the wire.

IMG_20160412_170839565.jpg
 
I want to thank Yo Pauly over at The Electric Brewery site. He was more observant than me and noticed from earlier pictures that the dark stripe was visible in the earlier pictures. Suggested that I check left over wire and it showed the dark stripe. Guess I stared at so much wire that I did not notice it. Proves that I should sleep on what I think is a problem before posting. Thanks
 
I cannot tell if that is a granite countertop or some other stone based top but if it is, you will need to put some buffer between those pot bottoms and the counter top. Otherwise (and I know this from experience sadly), it will crack the stone over time.

The only time I have not used something to protect the table surface when having pots holding liquids with this much heat is if its a concrete top, or wood based top.

Other than that, great looking system!
 
It is a laminate top. The plan is that I am going to build three 24 x 24 tile topped trivets with adjustable legs to place under the kettles. This will allow me to adjust the trivets to bring the kettles level. My garage floor has a fairly significant slope to it.
 
Did a boil off test today and have a question on how others calculate the boil off rate. I brought 12 gallons of water to 160 degrees with the lid on. Then pulled lid off and brought to a boil. Took 33 minutes to go from 160 to 212. Allowed the process to run for a total of 115 minutes at which time I had 9 gallons of water remaining. My question is if the boil off calculation should be based on the whole 115 minutes or the 82 minutes that the water was boiling? Just as an FYI, I just installed the vent hood and have not built the front fascia panel yet. The chains are just a safety item, the load (which is not a lot) is carried by the wall and the unistrut. I tend to be a bit paranoid about things falling down on my investment below.

IMG_20160626_121057940.jpg
 
Boil off is typically measured as gallons per hour. Typically you read the volume right as the boil starts, then start your timer and take another reading after 60 minutes. This is your boil off rate as pertinent to brewing.
 
First brew day on Saturday. System worked just like it was supposed to. Recipe called for 1.048 OG and my reading was at 1.048 ( beginners luck ).

IMG_20160806_121317532_HDR.jpg


IMG_20160806_113754195_HDR.jpg
 
Back
Top