Mer-man
Well-Known Member
Well to be fair, as you fill the keg with beer the gas is becoming compressed (PV=nRT or something) so you need to relieve pressure to have the desired differential. Not entirely suprising.

Well to be fair, as you fill the keg with beer the gas is becoming compressed (PV=nRT or something) so you need to relieve pressure to have the desired differential. Not entirely suprising.
I received my Fermentasaurus with the pressure kit only 2 days after ordering from Birdman Brewing. I guess living near the shipping point helps! Has anyone tried bottling thru the bottling port from the bottom? I won't have access to a temp controlled refrigerator for another couple of months, so I won't be fermenting under pressure or cold crashing just yet. I did pick up a 1L soda stream bottle for more trub collection, and I do have a hop spider so hopefully after draining the trub and yeast the beer I'll be bottling from it will be relatively clean.


I'm not sure this is the best approach, using the Fermentasaurus as a secondary. You will probably have less oxygen exposure by simply leaving it longer in primary then going straight to keg or bottle. Plus the Fermentasaurus is a pain for dryhopping anyway.Getting ready to use the Fermentasaurus for the first time this week, but have this idea about using it to get around a few issues and wanted to float the idea to get some feedback.
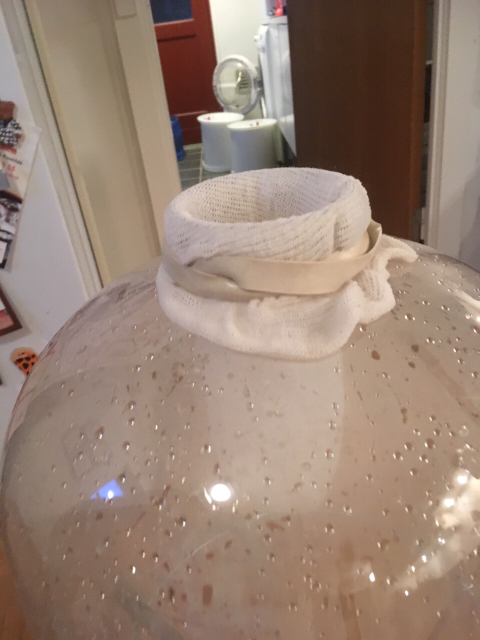
First off, I did get the pressure kit and have a C02 tank and regulator, but no means of temp control (basement is 64F). Also have a 1L soda stream bottle with a stainless carbonation cap with a 3/8" barb on the inside to attach tubing to aid in purging out O2.
Here's my idea- conduct primary ferment in my SS304 stainless Brew Bucket, sanitize then purge the O2 out of the Fermentasaurus before transferring the beer into the Fermentasaurus, then purge the fermenter again a few times to minimize any oxygen exposure. This would, in my thinking, make bottling from it easier since the majority of the yeast and trub would be left behind in the primary. I do plan to dry hop in the Fermentasaurus using the larger 1L bottle to collect the remaining yeast and hops.
Too much hassle, or does this sound practical to keep O2 exposure down while ensuring what I bottle is relatively clear before I can bottle/keg at cold temps?
I've been brewing with the Fermentasaurus for around 3 months using the pressure lid, I'm 6 brews in and I've never had an issue with the silicon tube falling off, it is hard to push on but I lube it up with some starsan and just keep working it on so that it's on all the way to the top, I find it hard to get off once it's all the way on.I've done a couple of batchs with the Fermentasaurus under pressure with a spunding valve. I hooked up the silicon tubing to the outlet and the 'ball'. Each time the tubing has dropped off the outlet on the lid into the wort within a day of hooking it up. Anyone else have this problem? Maybe an extra small stainless clamp would help. Thoughts?

I've been brewing with mine under pressure at around 2-5 psi until I'm a few points off my FG then locking the spunding valve down getting the pressure up to 15psi, 12 days in I cold crash and the pressure drops to around 10psi 2 more days later and I can drink cold carbonated beer, I normally counter pressure transfer to a keg and boost the CO2 to get it right for the style, I had the same problem unscrewing the assembly and now put food grade lubricant on the seals and threads which works great, if you do brew under pressure you will need it really tight to prevent leaks.Used my Fermentasaurus for the first time and just bottled my first batch from it. Some observations from my experience of my first go-round:
- Definitely was great to see exactly what's going on inside, is very light weight and easy to carry
- Assembly was not too difficult, and the YouTube videos are a big help.
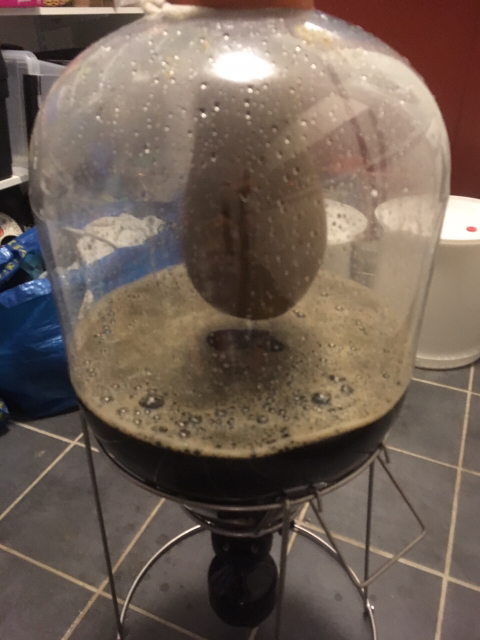
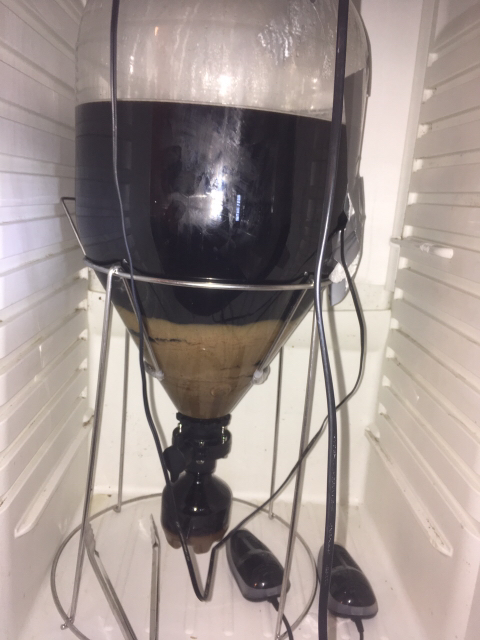
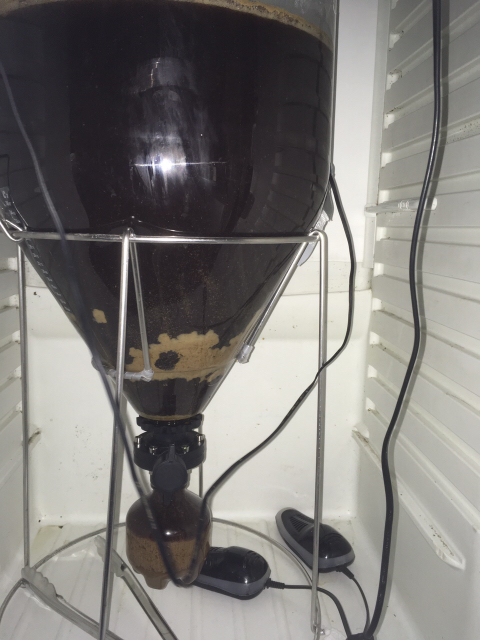
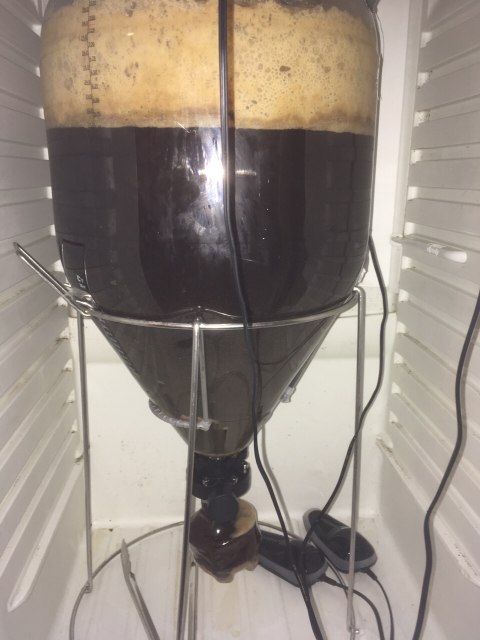
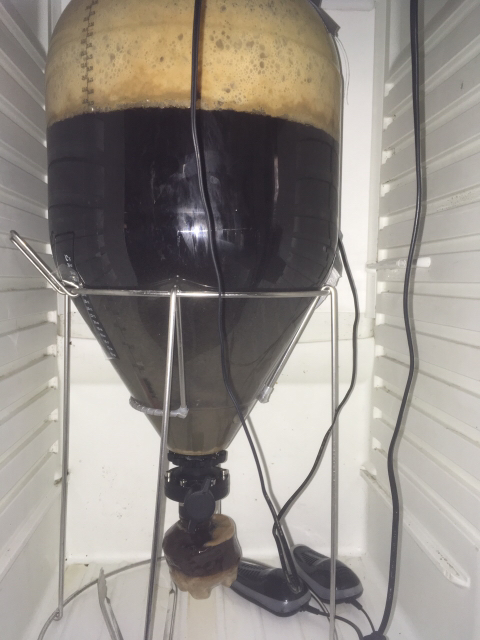
- For my batch of NE IPA, I used a hop spider and immersion chiller, then racked to my SS 304 7 gallon BrewBucket, then let it sit overnight and racked it off the trub into the Fermentasaurus. Had very clean wort as a result.
- I bought and used a 1 liter Soda Stream bottle to begin with instead of the 500ml bottle that comes with the kit.
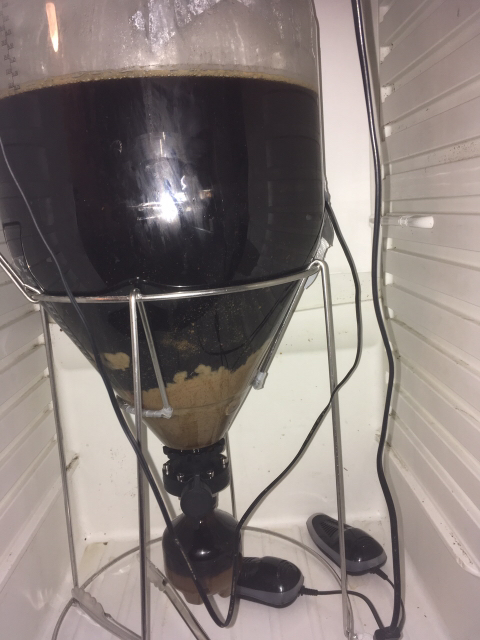
- No trub collected and needed to be dumped, but the bottle filled up 1/2 way with yeast after fermentation.
- I did not ferment under pressure, I don't have a dedicated fridge for it yet.
- I dry hopped with a hop tea, usually I dry hop in a 300 micron canister, which I think I'll do next time
- After 8 days i bottled it using the barb, and had no trouble bottling and had very little yeast on the sides near the bottom of the fermenter.
- Cleaning was easier than I thought, but unscrewing the butterfly valve assembly took every ounce of strength I had (which wasn't much after having a bottle of Permanent Funeral while I bottled).
I am anxious to ferment under pressure, be able to crash-cool, and use the pressure kit to keg the batch off the top. Really liking it after the first use, but will be careful not to overtighten the assembly next batch.
I found using a good food grade lubricant on the bottom assembly makes it manageable otherwise yeah it's hard undo and if not tight it will leak, they need a larger opening/butterfly valve and collection bottle if they want to improve this systemI've used the fermentasaurus for 4 or 5 brews now, and while it's an interesting setup I have the following issues:
- While the yeast/trub catch bottle is a good idea in principle, in practice I think it can lead to oxidisation of your beer: attaching the bottle with air in it and turning the valve causes the air to bubble up through the beer. Maybe there's a better way to go about this (e.g. purge bottle w/CO2 before dumping?).
- Butterfly valve / bottom assembly can be very difficult to remove for washing, and I feel washing it directly is necessary as trub can make its way into crevices in these components, not easily dislodged through PBW+soaking. The bottom assembly eventually became stuck together in a way that was not serviceable and impossible to separate or get back into the sealed position... I feel this part, specifically the threaded stem and ring, could have been manufactured with higher quality components.
Anyone serve from the fermentasaurus?
Anyone know a off a cooling coil that would fit in the fermentasaurus? I believe it would need to be 3 top. Probably would need a ressure relief valve as well.
Anyone know a off a cooling coil that would fit in the fermentasaurus? I believe it would need to be 3 top. Probably would need a ressure relief valve as well.


![Craft A Brew - Safale BE-256 Yeast - Fermentis - Belgian Ale Dry Yeast - For Belgian & Strong Ales - Ingredients for Home Brewing - Beer Making Supplies - [3 Pack]](https://m.media-amazon.com/images/I/51bcKEwQmWL._SL500_.jpg)


