• Please visit and share your knowledge at our sister communities:
  • If you have not, please join our official Homebrewing Facebook Group!

    Homebrewing Facebook Group

Antique Radio Kegerator Build

Homebrew Talk

Help Support Homebrew Talk:

This site may earn a commission from merchant affiliate links, including eBay, Amazon, and others.
Howiedw said:
:off:Mine is an '04 XB9SL with a Jardine RT-1 exhaust, Buell race ECU, and an open airbox conversion with a dual air ram carbon fiber airbox cover. (I replaced the original cover because it was signed by Eric Buell and I did not want to screw it up!) Makes about 110 WHP and 98 FTLBS(?) of torque at the rear wheel. Above all, it sounds like a Harley motor should. I just got sick of being run off the road with the stock setup. Louder is better!:ban:

I had an early prototype HD racing ECU (gotta have people). I knew Eric from way WAY back when he was still at HD. Super nice guy. My dad retired from HD and my sister works there. My aunt and uncle own Uke's HD in Kenosha, WI, which my grandfather started back in 1930. It's a whole family thing.

I never got sick of that exhaust sound. Was quiet enough at low throttle openings that I wasn't embarrassed when I'd get home late, but open her up and they'd know you were there. Did wonders for the power curve, too. Never got to ride an XB9 or 12, but I did take an XB1125 out for an hour. Holy balls that bike was fast! Too small for me at 6' 2", but I sure managed to stay well above the posted speed limit most of the time I was on it. Also rode a Ulysses, X1, S3, Blast, and WAY back when an RS1200. Probably my favorite was the S1 White Lightening. You just couldn't keep that front wheel on the ground!

Sorry to take this so far off topic but its always good to see one of the old machines still around.
 
This afternoons project, stuffing the guts of the mini fridge into the future "Kegeradio". And I was sucessfull!!:ban::ban:

After mounting the rolling base plate to the underside of the radio chassis, I measured and cut the aluminum plate for the heatsink. I had a few plastic spacers left over from a few flatscreen tv mounts so I used the 1/2 inch spacers and some 1-1/4 inch screws to attach the plate to the back. After shoehorning the compressor and screwing it to the base came the fun part of taping all the copper coils to the plate. See picture. I used a metal tape to do this for heat contuctivity. (Actual duct tape, not the plastic stuff from wallyworld)

Them mounting the cold plate to the top of the chamber and hard mounting the foam panels. All of these seams were taped up as well. The thermostat was mounted to the inside in the cold box and then the moment of truth......

I plugged it in, the compressor started humming and the cold plate started getting cold. IT WORKS!!!!!!:rockin:

Here are the picts of todays progress......

And yes, Toe Shoes. I finished a 3.5 mile run pushing the baby in her jogging stroller before I got started!

Cheers!:mug:

Next up - Plumbing for gas and beer!

IMAG0602.jpg


IMAG0603.jpg


IMAG0604.jpg


IMAG0605.jpg


IMAG0606.jpg
 
I got the door insulated and weather stripped today. I am completely out of CO2, so I added a fitting to connect my air compressor to it and pressure tested the system to 30 PSI. No leaks so far. I ran a gallon of BLC through both lines and now I have both kegs full of clean water sitting in it with the refer runing to test the stock temp control. I'll post pictures later tonite of the door. Now all I need to do is find a retro looking radio to put in the hole left by the original one. And wait for the yeasties to finish their work on the two batches in the closet to christen it.
 
Yesterday I filled two empty kegs with tap water and put them inside. Plugged it in, and walked away. Today it's at about 34 deg and holding. I do have one question. There is a cold spot on the top of the outside of the case. It's right where the cold plate is screwed through the insulation into the underside of the top to hold it in place. Any suggestions to remedy this? Should I remove the screws, unplug it, wait for it to completely dry and just metal tape it to the inside with a foam spacer? What are your thoughts?
 
great work man! but aren't the tap handles kinda low? are you planning to raise the whole thing? might be difficult to pour a beer at knee height.
 
great work man! but aren't the tap handles kinda low? are you planning to raise the whole thing? might be difficult to pour a beer at knee height.

I thought about that. Astheticly though, it works. This arrangement, I can retract the taps inside and lock the two doors with a vintage looking lock to keep the kiddos out of it. Another condition from the SWMBO.

1) It dosen't look like a kegorator
2) Must be able to keep kids out.
 
So, it turns out that the CO2 cylinder I had was an "Old style" 5# cylinder. The replacement I got is a new style 2.5#. It's much shorter, so I think that it may stand upright inside. I'll test it this afternoon to find out. If not, It may have to sit outsite the kegarator. But, reguardless, I have gas now. Just waiting on the beer to finish.
 
Howiedw said:
Yesterday I filled two empty kegs with tap water and put them inside. Plugged it in, and walked away. Today it's at about 34 deg and holding. I do have one question. There is a cold spot on the top of the outside of the case. It's right where the cold plate is screwed through the insulation into the underside of the top to hold it in place. Any suggestions to remedy this? Should I remove the screws, unplug it, wait for it to completely dry and just metal tape it to the inside with a foam spacer? What are your thoughts?

The screw is probably acting as a heatsink. Unless its cold enough to be causing condensation I probably wouldn't worry about it.
 
It Fits! :ban:The new smaller 2.5# cylinder fits into the space below the drawer upright! This will be a fully self contained unit! Here are some picts of the cylinder and gas arrangement. I built the manifold myself with parts "Aquired" from work. The only part I had to buy was the shutof valves with the barbs. Still, $20 in valves is better than $40 for a manifold!

As for the other issue, the cold spot is causing condensation, so I think I will remove the 2 screws and try just metal taping it to the top with another small square of insulation to act as a spacer. We'll see if that fixes it.

IMAG0607.jpg


IMAG0608.jpg


IMAG0609.jpg


IMAG0610.jpg
 
Let's see if this makes a difference. Cold plate spaced 1" away from top and taped into place. Here is a before and after of the adjustment.

IMAG0610.jpg


IMAG0611.jpg
 
The modification seems to be working. I plugged it back in last night and earlier today there was no cold spot.
 
Had another slight issue today. I froze the beer lines. Thankfully I caught it before I had kegcicles. They're full of sanitizer. Pulled both kegs out and disconnected them, and relocated the thermocouple probe closer to the cold plate. We'll see if that keeps the beer cold but not frozen. Fridge guts were set to the lowest setting. If this dosen't work, I guess I will have to order a digital temp controller which I may do eventually anyway. Any recomendations? The STC-1000 seems pretty popular around these threads, and fairly inexpensive.
 
Just got home and checked on it. Frozen beer lines again. I unplugged it and ordered a STC-1000 off of amazon. Should be an easy fix once it gets here. Any other suggestions?
 
That STC-1000 should do the trick. Put the probe in a low alcohol spirit and see if that works. Thats how i have mine set up in my Keezer. Love this build btw. very original! Cheers!
 
That STC-1000 should do the trick. Put the probe in a low alcohol spirit and see if that works. Thats how i have mine set up in my Keezer. Love this build btw. very original! Cheers!

I'll propably just do a yeast vial packed with fine sand. Less of a chance of spilling. And it won't waste good vodka. Or perhaps just some Isopropal Alcohol in a test tube. I can get that from work.
 
Holy Schiznit! I ordered the temp controller on the 25th, And it's here already! Brooklyn to Seattle in two days! Now to figure how to wire it. Hopefully I'll have it ready by the time the beer is!
 
After a bit of tinkering, I got it installed and working. Once again, taking cues from others on this forum, I used a modified receptical cover as a mounting bracket. I cut two of them and used them to sandwich the old speaker grill to hold it in place with the retaining clips. Here are a couple pf pics of what it looks like installed. It's running now for a controller test prior to transfering beer to the kegs for the first drafts.

IMAG0612.jpg


IMAG0614.jpg
 
Good job! It's looking pretty sweet.

I used a yeast vial drilled just big enough to push the probe through filled with water. As an alternative to the sand method (which is probably an even better idea since it won't leak or spoil.)

I need to find a unique item to kegerate this summer. Keeping my eyes open for a very small yard sale fridge to sacrifice.
 
can you find a brass cover plate? I'd strip it and let it tarnish a bit. It would look more like it came with the radio than the just plain white plastic cover plate.

It's a cool idea for sure.
 
can you find a brass cover plate? I'd strip it and let it tarnish a bit. It would look more like it came with the radio than the just plain white plastic cover plate.

It's a cool idea for sure.

I used what I had on hand. That is definately a planned upgrade. And yesterday I racked the two beers I had fermenting into kegs and placed them into the kegaradio for cooling and force carbonating Hopefully by this weekend they will be ready to drink! 7-8 PSI @ 2.2 C for a week. That sound about right? Or should I bump it to 10PSI?
 
perfect! Makes it look like it came with it.

can you squeeze a working speaker in that thing and hoop up an ipod and play some old time tunes
 
perfect! Makes it look like it came with it.

can you squeeze a working speaker in that thing and hoop up an ipod and play some old time tunes


The finishing touch will be to find a modern radio with a vintage look to place in the hole that is left. I'm looking for one of the Crosley style radios that I can cannibalize to fit. Searching craigslist and goodwill because I cant justify full retail for something that I am going to tear apart.
 
So I was thinking earlier this afternoon, putting a chalkboard/whiteboard where the radio was and installing a Bluetooth speaker to link to my phone for music. Sound line a plan?
 
I really want to see this thing finished! It's like a hideaway speakeasy type thing. No officer, nothing going on here...
 
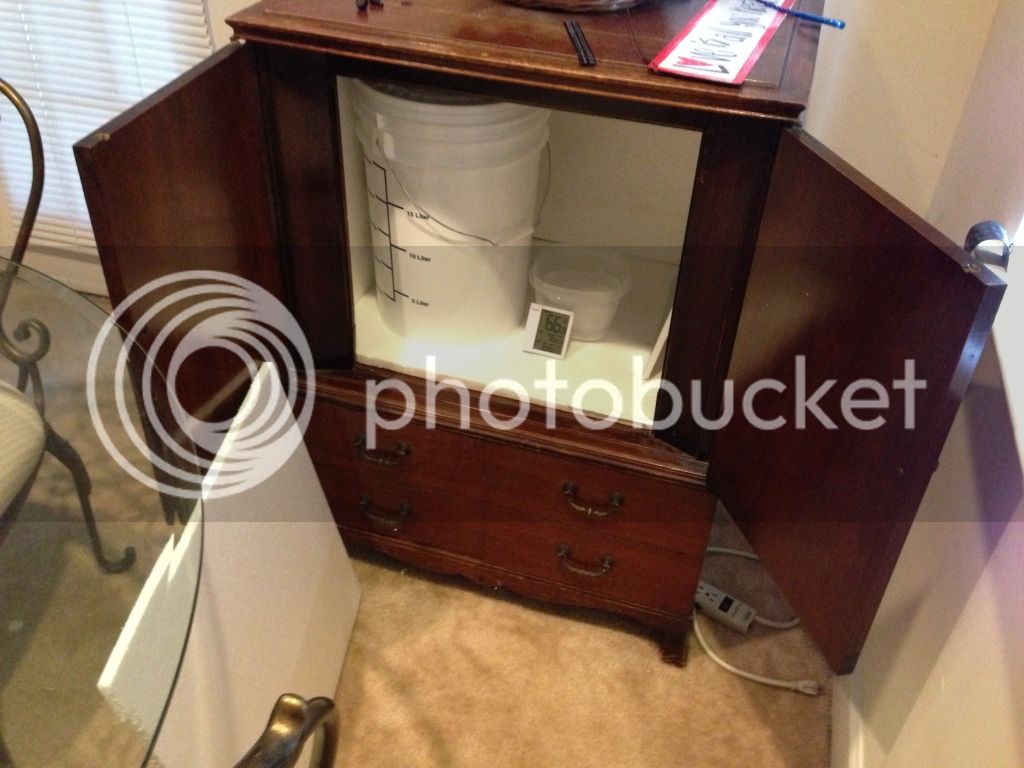
I kind of did the same thing the other day, only for a ferm chamber. We had an antique liquor cabinet that sat in the corner of our dining room and was never used for anything. Lined the inside with foam and now all I have to do is rig up a fan to circ air better. Just 2 bottles of ice and temp dropped 15 degrees in 10 minutes and holds well.

E70ACDF5-DE9E-4D64-8AC2-4608537721FF-33787-00000996E627708C_zps4aaa5520.jpg
 
So, It's working fine, just a few modifications. I finally found a black marker board to put in place of the radio control panel. I ended placing some aluminum straps across the hot coils to help maintain contact with the heat sink plate. I still need to get some various thicknesses of foam tape to seal the door better. The humidity in the air tends to frost up the food plate and freeze my beer lines if it gets too thick. Other than that.........

More picts later this week.
 
Back
Top