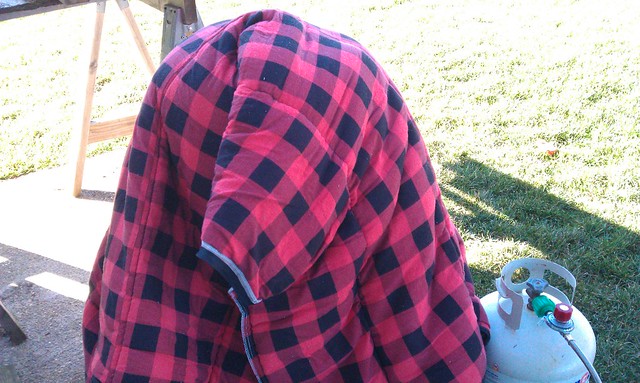
• Please visit and share your knowledge at our sister communities:
  • If you have not, please join our official Homebrewing Facebook Group!

    Homebrewing Facebook Group

1st beer attempt ever....with lots of pics - BIAB

Homebrew Talk

Help Support Homebrew Talk:

This site may earn a commission from merchant affiliate links, including eBay, Amazon, and others.

haeffnkr

Well-Known Member
Joined
Jan 25, 2010
Messages
506
Reaction score
38
Location
St Peters Mo
Hi,

I learned a lot on this forum... have been collecting equipment and knowledge for over a year, probably closer to 2.

Today I just starting running through my first batch to get one under my belt and see what I am missing.

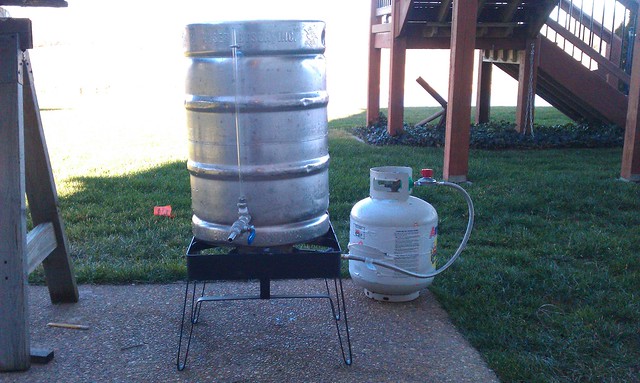
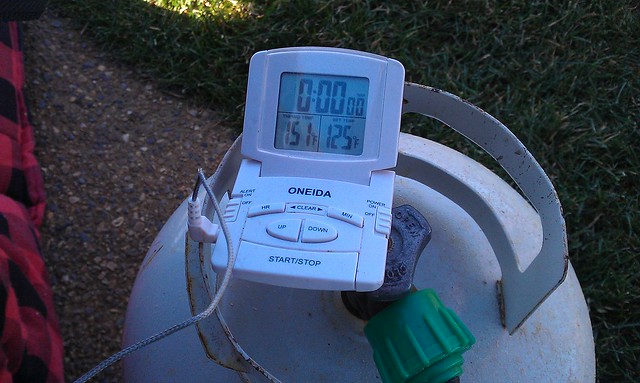
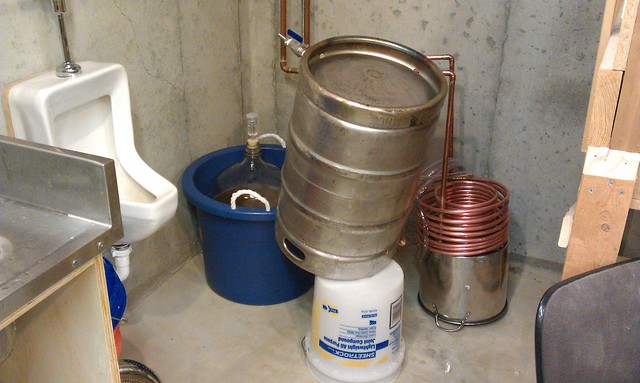
I got my keggle on my bayou classic burner...just moved the burner up higher to the grate to get more effieceint heat to the Keg.

6631941207_b1fcdf9fdd_z.jpg


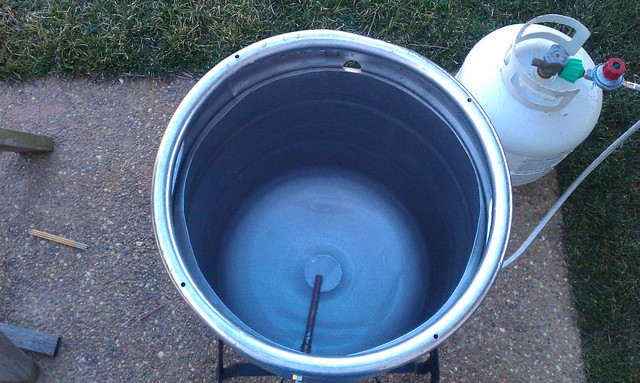
Bottom of keg with custom pick up tube

6631941969_1272f27665_z.jpg


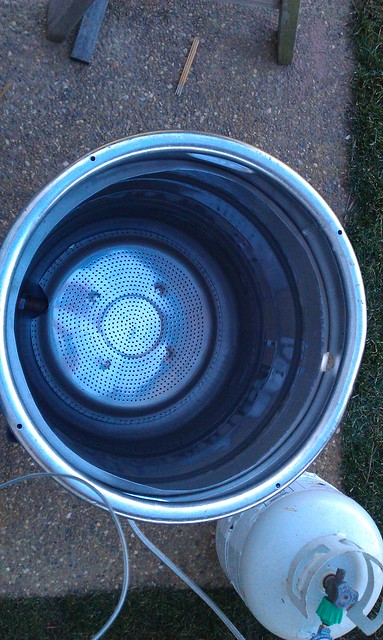
Bottom of keg with stainless colander bottom part to keep bag from melting... Just in case....

6631942489_8ebd30fe8d_z.jpg


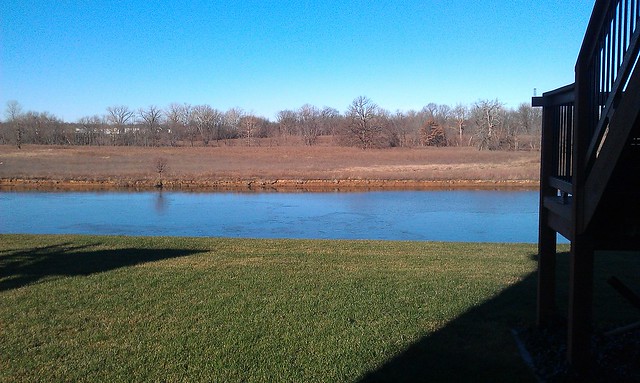
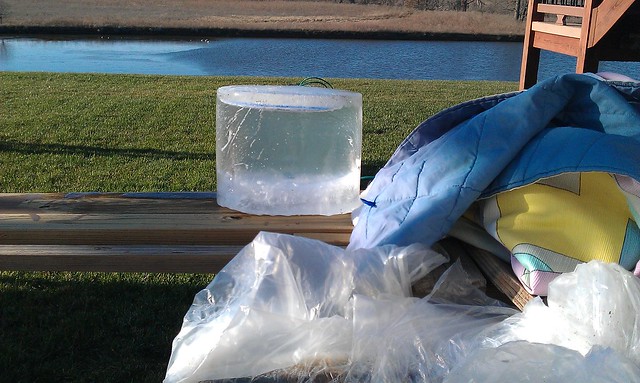
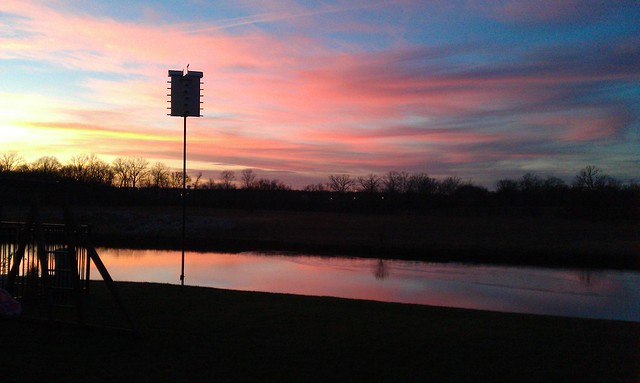
Wind finally quit blowing in St Peters MO... but it was COLD today... ice on the lake at 10:30 am today.

6631943447_0ca57ec265_z.jpg


Time to find all parts I bought 6-8 months ago for my carbon filter setup....

6631944027_70e61a8e21_z.jpg


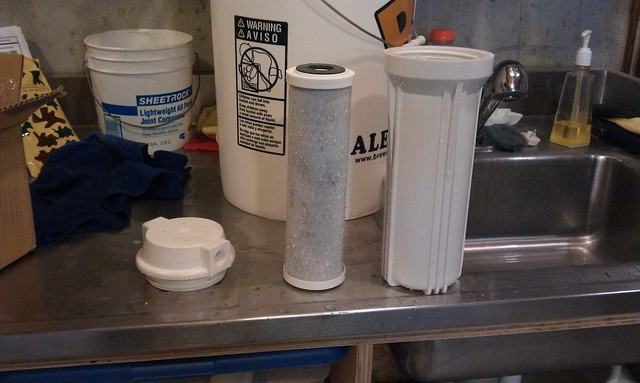
Luckily Home Depot is only 7 minutes away...
Cause I could not find all the parts I bought several months ago to get a water line from a faucet/hose in and out of this filter...... and I need other stuff too...
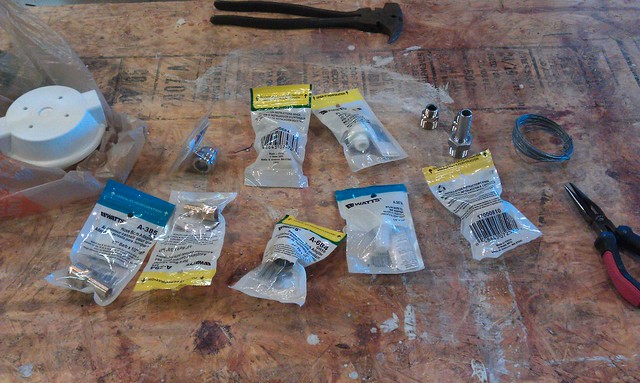
This is what $41 of misc parts looks like... why is this stuff so expensive ??

6631944641_7400169df1_z.jpg


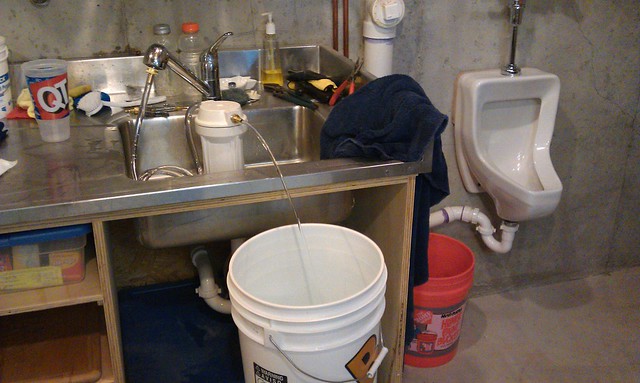
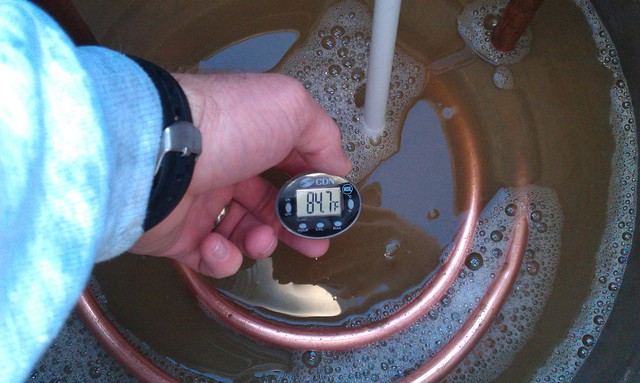
OK - I got filter up a running....2 buckets at 4 gallons each should get the job done... I guess...
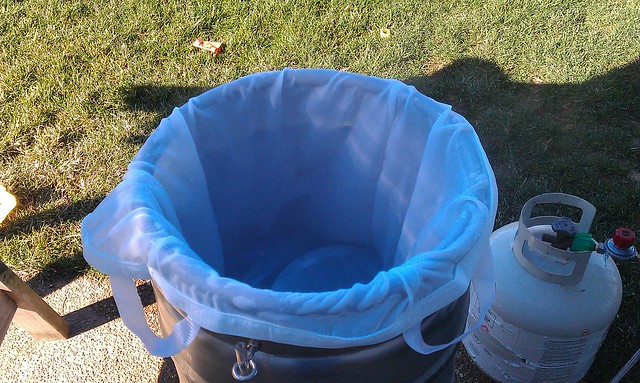
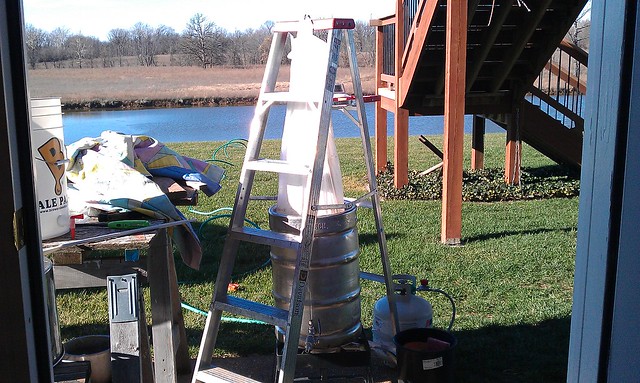
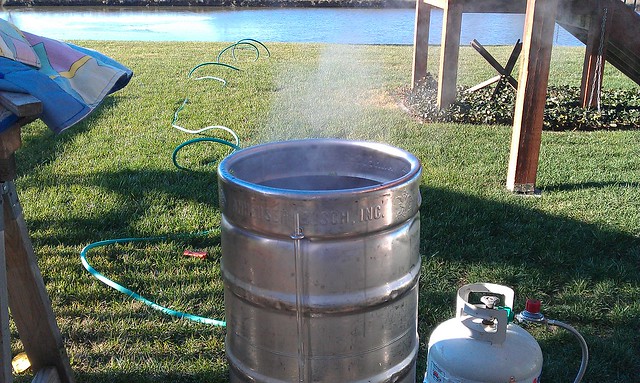
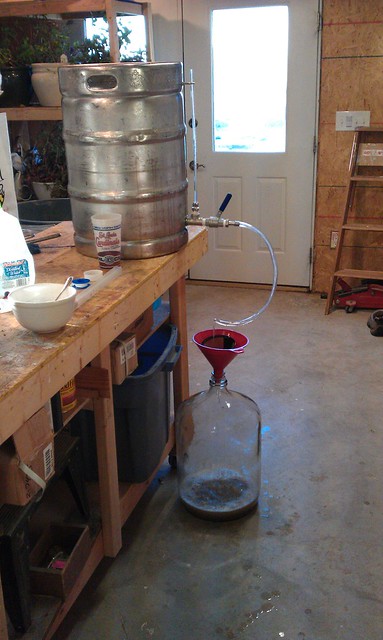
8 gallons total in the keg for my BIAB attempt.
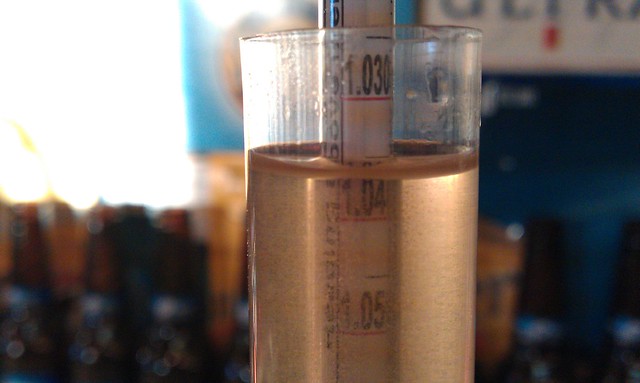
Based on what I figured from other post/calculator with my sludge, hop waste. etc...8 Gallons should get me close to where I want to be... 5.5 gallons after boil.

6631945241_90b10ed23f_z.jpg


More to come on the next post.....
 
Got the 8 gallons on the way up to 150ish mash in temp...

Time to break out the new barley crusher..aint she pretty?
Never used it... factory gap settings used... need to calibrate it some day and check the gap.

6631945563_486d35af86_z.jpg


Need some grain to feed the crusher.
Break out the new scale and weigh out some grain...this scale is cool, was recommended here.
Was like 25 delivered... has a great "tare" setting and goes up to 10 pounds or something.

6631946169_7e3f41f076_z.jpg


OK -
I see why people hook up drills/motors to the grain crushers... man... cranking these things is a painful job.*
1st crush

6631948027_834a1863a6_z.jpg


3rd time thru the crusher
Looks good enough to bread some fish with!

6631952917_fa91ae875e_z.jpg


Bag in the keg - ready for some dough in

6631954253_f7b48c3197_z.jpg


dough in done
150-ish is my target temp.
Wrapped up with an old sleeping bag - will mash for 90 minutes then raise up to 175 for a few minutes more.

6631955247_8e97c5d9d4_z.jpg


remote probe showing I one degree high... went down in a few minutes.
Had to pull off blankets and give it a little heat after 40 minutes...dropped to 145...then it held pretty good for the rest of the time.

6631955785_a20d297e58_z.jpg


Ladder makes a great bag hanger upper - one big S hook and it stays out of the water dripping out/squeezing after mash was raised to 175.

6631958317_87cf322ca7_z.jpg


Boiling .... smells incredible
Hard to see the top of the wort when it is boiling and all that steam was pouring off of there.
Oh well - Had to put my head right down in there and breath in all the steam and hop smell...darn I hate when I have to do that hahah...

6631959621_839b764308_z.jpg
 
Time to prep the new IC I built. (dual coil immersion chiller for those who might see this via search )
2 coils - *one flows bottom up and one flows top down.
Got the ideas from a few other posts/members here - thanks all

6631960227_f4eee60aae_z.jpg


I said it was cold today.... this block never completely melted.

6631960721_f6aedfffd3_z.jpg


It only took about 6-7 minutes to get this down to 70 degrees....with the cold day and the new IC... I was very happy with the new IC.

6631962703_1437a23677_z.jpg


Carried the keg and wort inside....let it drain into the carboy.
If I would have used some kind of hop bag during the boil process... I might have much cleaner wort.... need to order one for the next brew.
I had muck and hops all the bottom of the wort.
I tried to strain the wort and there was so much hop sludge that it it blocked my filter in seconds.

Lesson learned - get some kind of hop bag !!

I made up a gallon of starsan from some distilled water I bought.
Put some in a spray bottle and left the rest in the gallon jug.

I sprayed that white bowl with starsan, then put in clean distilled water in the bowl then dumped my S-05 yeast in there.
Stirred, with sprayed spoon, let it sit for a while, stirred again later... then dumped in the carboy.
Hope that was right?

6631963527_931b4fbc20_z.jpg


I need a nice tube for this hydrometer... thought I had one somewhere... hit my OG per the recipe - sample was at 70 degrees.
Now I need some kind of really long wine thief dealy bob to get more samples out of my carboy... I guess a section of 1/2 hose would work also.

Used this recipe - https://www.homebrewtalk.com/f62/miller-lite-really-triple-hopped-123937/

6631964361_840f494928_z.jpg


Got it all setup ready for some bubbles...hope they show up soon...but not all at once :)

My basement corner is perfect for summer fermenting, but a touch cold right now... about 61 on the floor.

6631965153_0ab8df1a4d_z.jpg


Got my stuff all cleaned up -*
Dont laugh at my urinal... everyone should have one or two ...haha

6631966395_01a0b20b18_z.jpg


By the time I got it all done, sun was going down.
I guess it took me about 6 hours from start to finish, including a trip to home depot.

The radio said it was the shortest day of the year... but I thought that was December 26th...any way... it was a GOOD day.

6631965651_8f2c4412d3_z.jpg


My wort tastes a little bitter hope it mellows out some.
Already clearing up some...*
Now I wait... and work on my kegs/kegerator


I hope someone might learn something from my pics...(either right or wrong :) *)
I appreciate all the great folks on this sight.
This thread would not be possible if not for this great community.

thanks Kevin
 
Wow, you collected knowledge and equipment for a long time before your first batch.. I went from getting the idea to try homebrewing to boiling in about 2 weeks.. haha. I should have gone your route, because I jumped in head first without a clue as to what I was doing. This is how I tend to do things, though. On the fly!! Good luck on your first batch!
 
Impressive! I'm also looking to get going on my first all grain BIAB in the next couple weeks, and this thread is inspiring/helpful. Where did you get your grain bag??
 
Wow, you collected knowledge and equipment for a long time before your first batch.. I went from getting the idea to try homebrewing to boiling in about 2 weeks.. haha. I should have gone your route, because I jumped in head first without a clue as to what I was doing. This is how I tend to do things, though. On the fly!! Good luck on your first batch!

I forgot to mention I have a 1 year old and a 3 year old.
That is why I am so slow getting going.
Then I thought I was going to go whole hog a have a 3 vessel setup and was working to get all that stuff in place.
But then switched plans to go BIAB.

Everybody went back to work/daycare today.... I have 8 hours for me...yah !

thanks Kevin

Lucky you! 8 hours, I'm not sure what I would do with my self with that much free time.

My wife works evening so I have kid duty during that time. Anything brew related gets started about 9:00pm so it makes for a late night. I did a BIAB last Friday and by the time I got everything cleaned up and put away it was well after 2 in the morning. Makes for some late nights. But enjoy it non-the-less.
 
Awesome, man! Wort always tastes more bitter than the finished beer, it'll mellow out nicely. Cheers to a new brewer!!
 
Wow very impressed. Most guys are flyin by the seat of their pant for a year an asking HBT a lot of dumb questions (like me.. haha) before getting that organized. Congrats on a successful brew day! Let us hear/see how she turns out! Ps I've got a 4 month old myself... haven't brewed in a month! Withdrawls!!!!!!
 
haeffnkr said:
I forgot to mention I have a 1 year old and a 3 year old.
That is why I am so slow getting going.
Then I thought I was going to go whole hog a have a 3 vessel setup and was working to get all that stuff in place.
But then switched plans to go BIAB.

Everybody went back to work/daycare today.... I have 8 hours for me...yah !

thanks Kevin[/QUOTE


First of all great job, I also have the same setup.Try putting the burner on cinder blocks ( two on each side ) It will give you enough height to drain into your fermenter. Also I found having a 1 year old and one on the way night brewing is the way to go.The kids are asleep, and by 8:30 on a Saturday my wife could care less what I'm up to in the garage.>>> keep it up <<<<
 
I've got a 2.5 year old and a 17 month old... I brew 2 batches per month... I start about 4:30am... uh huh...
 
overachiever much??? most people's first batch is an extract kit or mr. beer. and your first batch you have a keggle?!?!? seriously, nice job with your first beer and keep it up!!!!
 
Awesome! You sound like you've followed the path similarly to how I did, lots of research and accumulation of equipment first before the first batch was even brewed. Cheers my friend!

Just one thing that catches my attention, watch having the sightglass on the same fitting as your ball valve. That will keep your kettle from draining all the way unless you plug the hole on the top of the sightglass while draining.


Thanks for that tip !
I had tested draining this setup in my other keggle and it seemed to work fine.
But my other keggle had a thermo/site tube and a separate drain hole (any one want to buy it in the area?)
I thought I just needed a length of tube to create the suction and have it drain.
But yesterday -
I got pour suction and it basically failed... makes sense, if you have a secondary vent hole, not much suction will be created - I feel silly now... thanks again.

Everyone else, thanks for the comments -
Night or early day brewing seems to be a common theme around here.
Now that I got one under my belt and know what exactly I need to prepare I will can knock some time off the process for sure.

bwomp313 -
No matter what I do... I do it right the first time..... :) when you make mistakes it cost more but hopefully those will be minimal and you wont have to redo stuff.
Drives the wife crazy... I take too long to do anything, but it is usually right and the way I want it when I am done.

thanks again Kevin
 
You could always plug it with your thumb while draining, or make some sort of cap. Heck a piece of vinyl tubing that is stretched over the top then kinked when you begin to drain would work.
 
Great writeup and congrats on your BIAB success! :mug:

Thanks - beer is bubbling a little this AM so I guess things are moving forward.

My thermometer was reading 61 on the carboy this morning.
I pulled the carboy over to the other part of the basement...should be high 6X there.
Might get things rolling a bit for a day then pull it back.. supposed to warm up in the next few days.

Does it really matter? ferment at high vs low 60s with S-05?

thanks Kevin
 
Hey Kevin (haeffnkr) and CrimsonBrew, I'm in the "area" of STL, would you guys PM me with a LHBS that you guys use...please.
 
Thanks - beer is bubbling a little this AM so I guess things are moving forward.

My thermometer was reading 61 on the carboy this morning.
I pulled the carboy over to the other part of the basement...should be high 6X there.
Might get things rolling a bit for a day then pull it back.. supposed to warm up in the next few days.

Does it really matter? ferment at high vs low 60s with S-05?

thanks Kevin

I pitch at 62F, let it rise to 64F and give it 4-5 days, then I bump it up 2F every day until I hit 76. Once my beer is done I cold crash and rack to kegs.
 
Damn, got the urinal all setup. That's what i'm talking about! If i didn't have to go inside to piss 15 different times during a brewday i could get things done a lot quicker. My old lady wouldn't be so pissed about the sticky footprints getting tracked through the house either. Looks like a great place to brew there and congrats on the first success! Now just build a keezer and invite us all over, in 6 weeks! :ban::mug:
 
I'm still debating my first real brew kettle after 15 years of homebrewing. Nice setup for a first-timer.
 
Great write up and pics dude.... I've been thinging about trying BIAB for a few weeks now. Did you make your Keggle yourself as well? Thinking about doing that too...
 
Great write up and pics dude.... I've been thinging about trying BIAB for a few weeks now. Did you make your Keggle yourself as well? Thinking about doing that too...

Yes -
I read a lot on this sight re how to do it.
First I used a 4" grinder to get a decent hole...then I decided that it needed to be bigger and used a sawzall to get a bigger hole...
I thought a bigger hole was needed to be sure most of my double coil IC would be down in the wort, mostly with 5 gallon batches - the IC was custom made per the hole size, based off some pics/discussion here... (thanks again HBT community)

Use a long blade on the sawzall to get right up against the side and run it around.

For the holes, go to harbor freight and get some cheap step bits and some wd-40 for some lube.
Then get the weldless fittings from Bargain Fittings

Setting up the keggle was easy.
My next keggle (electric setup) will be welded couplers, etc and I am seriously thinking about removing the whole top and welding side handles


------ New Topic ------
It is ALIVE !!

Lots of bubbles -
Nice Krausen layer - Krausen - Wikipedia, the free encyclopedia
Smells very Nice !

6638480007_8ff8f2b232_z.jpg


thanks again to all for the interest, the answers and the comments.

Now on to buy more stuff :)
Kevin
 
Did you get a lot of trub in the kettle? It seems like the crush of your grain was a little fine. I would maybe not put it through the grinder 3 times. You only want a little flour. Just my 2 cents.

Still--great job for your first time. Welcome to the addiction! :mug:
 
Did you get a lot of trub in the kettle? It seems like the crush of your grain was a little fine. I would maybe not put it through the grinder 3 times. You only want a little flour. Just my 2 cents.

Still--great job for your first time. Welcome to the addiction! :mug:

With BIAB you don't have to worry too much about getting a stuck sparge (since you don't sparge) so to account for the anticipated loss in efficiency you typically crush your grain more finely than is traditional. I BIAB and crush almost as finely as the OP with no issues.
 
Back
Top