You are using an out of date browser. It may not display this or other websites correctly.
You should upgrade or use an alternative browser.
You should upgrade or use an alternative browser.
Still alive - just tackling a HUGE DIY
- Thread starter Jester369
- Start date

Help Support Homebrew Talk - Beer, Wine, Mead, & Cider Brewing Discussion Forum:
This site may earn a commission from merchant affiliate
links, including eBay, Amazon, and others.
OP
OP
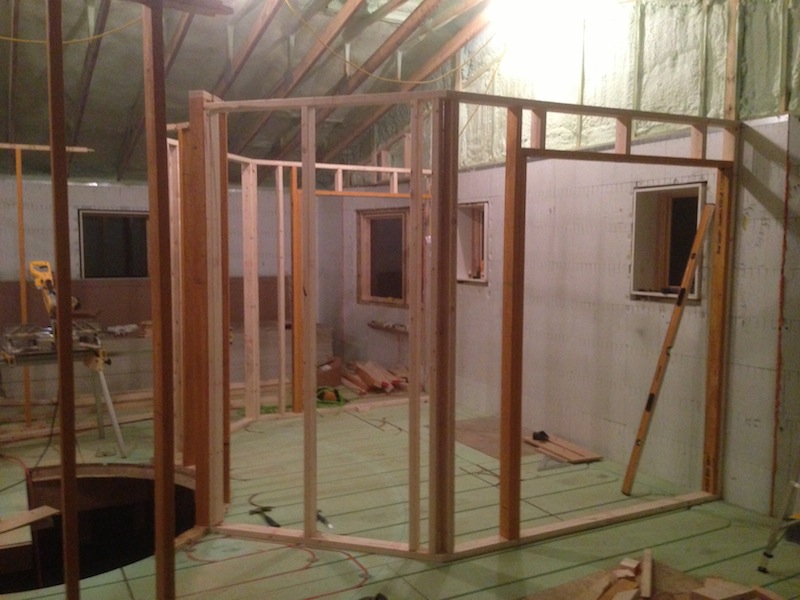
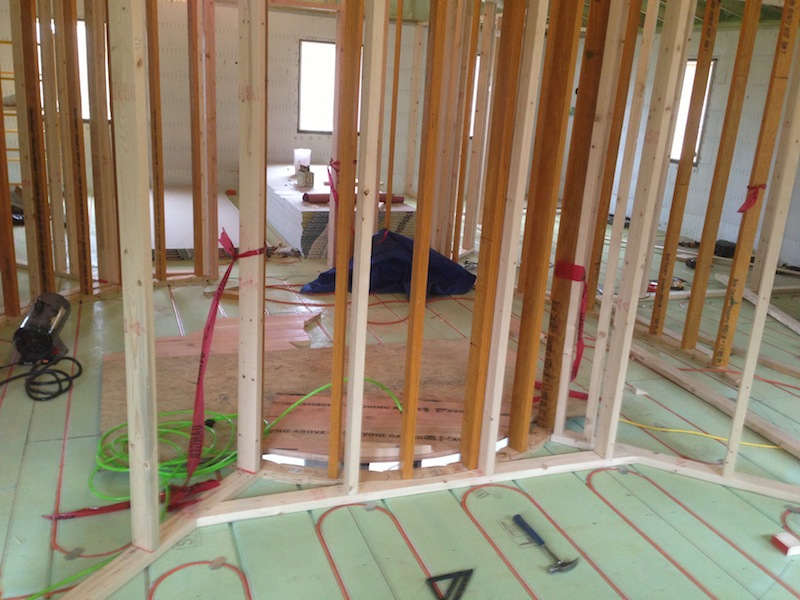
More framing today. More curve competed - 2 parts of the curved hallway wall to be joined by the master bedroom door:

Then, the 5 hour task of framing a seemingly simple 10' section of wall that integrates with the curve...
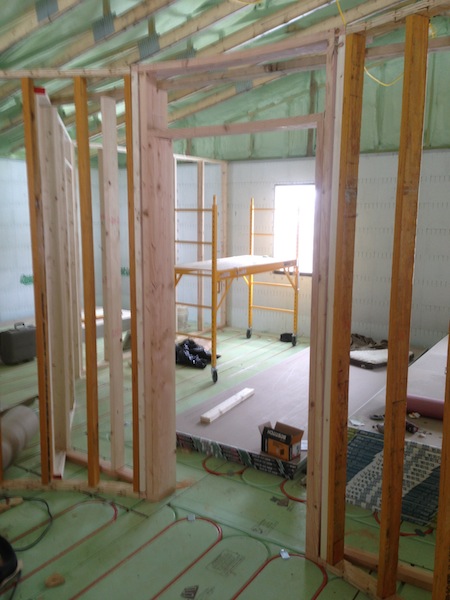
From the master bedroom (flat) side:
Master closet wall with the mounting panel for the second floor radiant manifold:
My little assistant - also a redhead!

Then, the 5 hour task of framing a seemingly simple 10' section of wall that integrates with the curve...
From the master bedroom (flat) side:
Master closet wall with the mounting panel for the second floor radiant manifold:
My little assistant - also a redhead!
WhiteEagle1
Well-Known Member
Very impressive!!
So, how do you actually finish a curved wall like that? Drywall doesn't like bending that much!
Huaco
Well-Known Member
The very thin drywall does.
OP
OP
Yup, I'll be doing 2 layers of 1/4" drywall.
Huaco
Well-Known Member
That's what I thought you would be doing...
I grew up working for Dad as a Wallpaper-Hanger. I've seen some strange walls! lol...
I grew up working for Dad as a Wallpaper-Hanger. I've seen some strange walls! lol...
Cazamodo
Well-Known Member
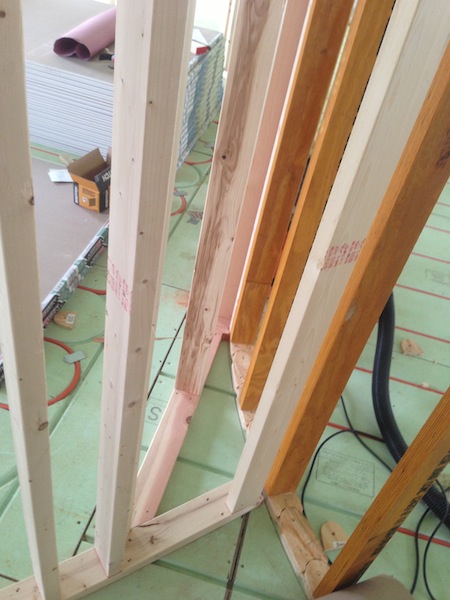
I have to say the curved 2" pieces that dowel together, I have never seen over here. And neither had my dad who's been as chippy all his life. That would of made some of the jobs I've been on so, so much easier for curved walls! Genius!
OP
OP
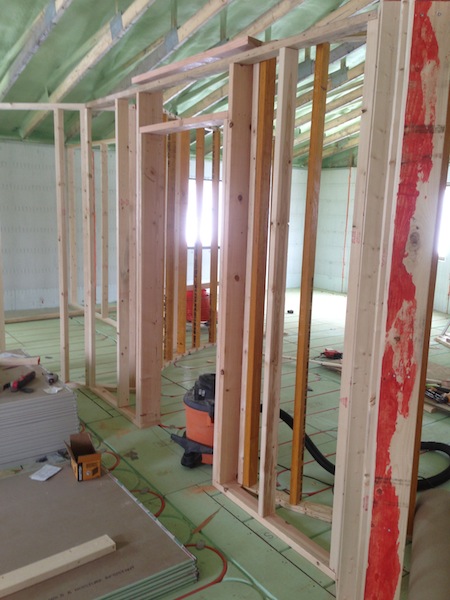
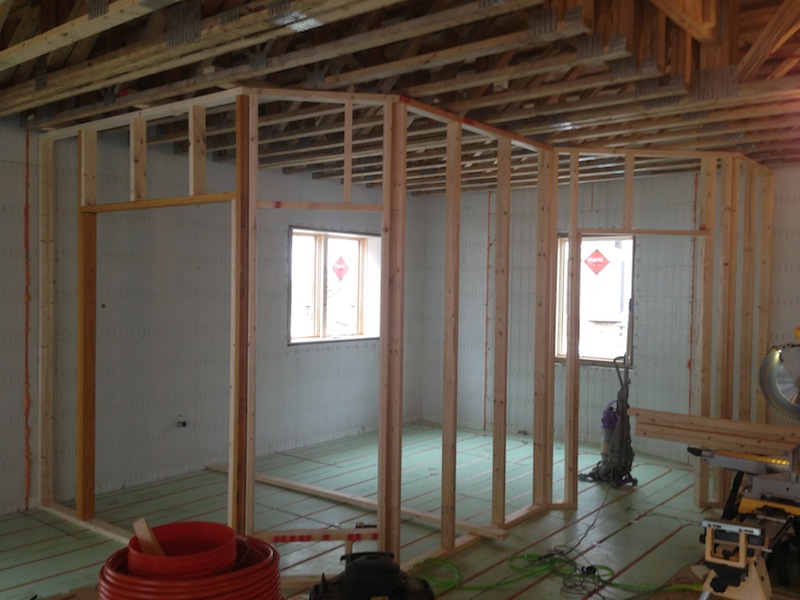
More upstairs framing - the shared bath for the kids bedrooms...
First wall:
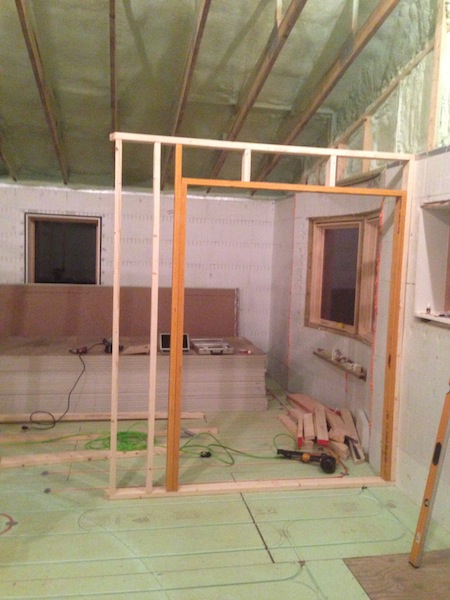
The reason the doorway rough opening is so large is because it's a pocket door - it'll look like a regular door once the door and drywall is installed.
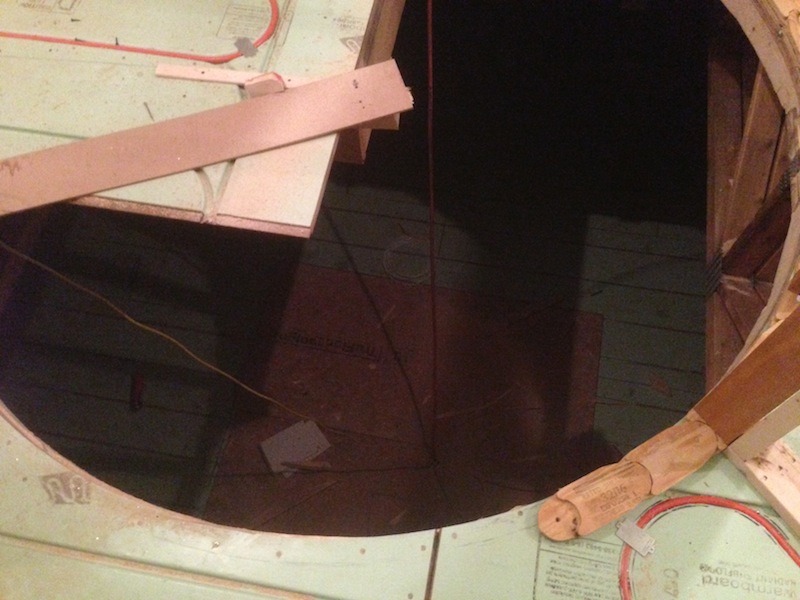
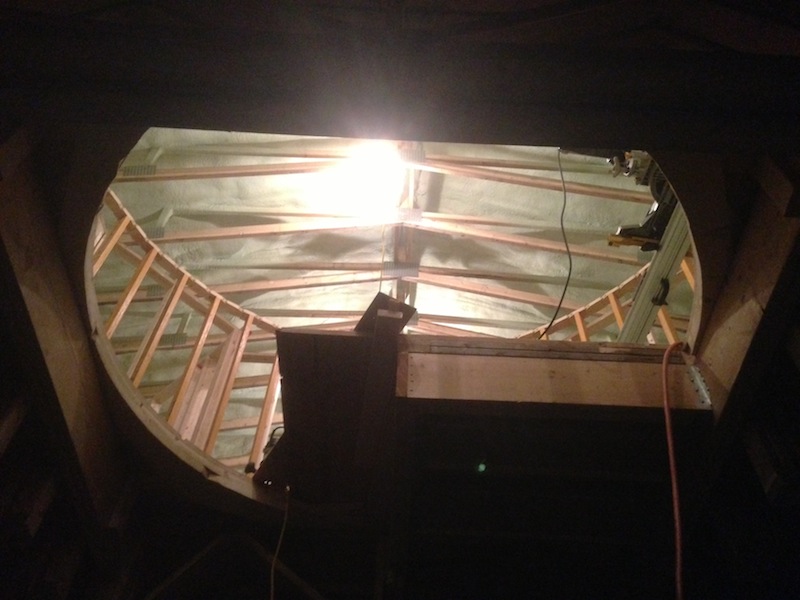
Then, I tackled the job of opening up the floor for the staircase. I scribed a circle with a board drilled for a sharpie marker. I started with a jigsaw to open it up to within about a quarter inch of the ink line, then used a router affixed to a board anchored at the center point to open it to the final rough opening.
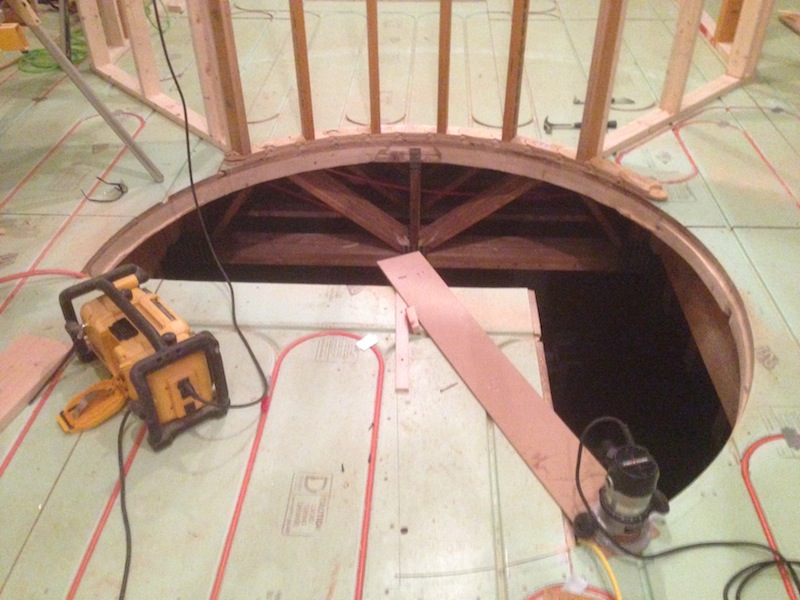
There are still a few rough edges to tidy up - the router bit isn't long enough to get all the way through the framing around the opening.
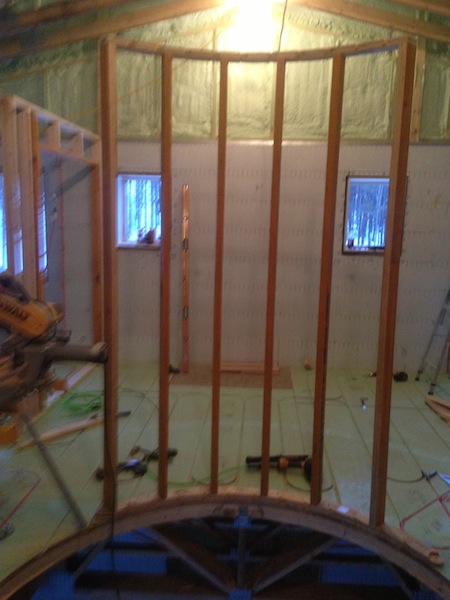
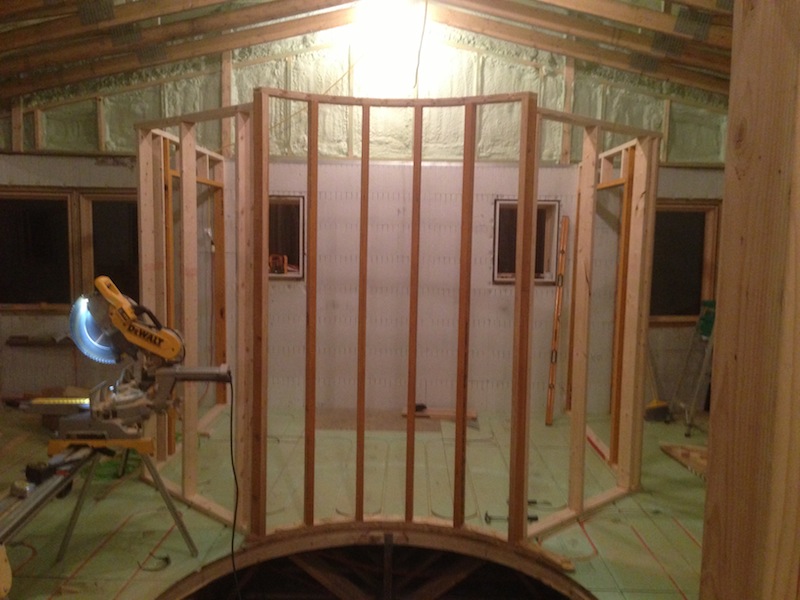
Next, I framed out the small curved wall that separates the hallway from the bathroom:
Next up, the small 45 degree wall between the door wall and the curve wall:
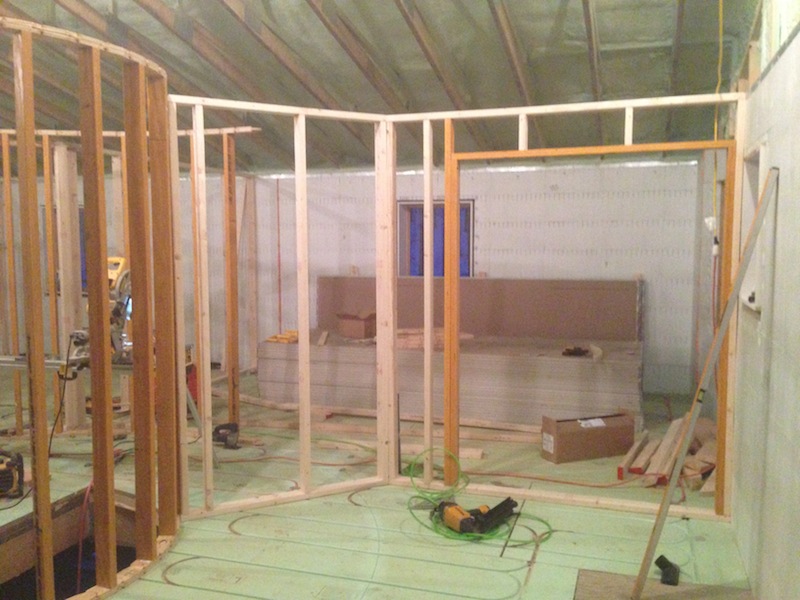
Finally, the door and small walls are repeated on the other side:
First wall:
The reason the doorway rough opening is so large is because it's a pocket door - it'll look like a regular door once the door and drywall is installed.
Then, I tackled the job of opening up the floor for the staircase. I scribed a circle with a board drilled for a sharpie marker. I started with a jigsaw to open it up to within about a quarter inch of the ink line, then used a router affixed to a board anchored at the center point to open it to the final rough opening.
There are still a few rough edges to tidy up - the router bit isn't long enough to get all the way through the framing around the opening.
Next, I framed out the small curved wall that separates the hallway from the bathroom:
Next up, the small 45 degree wall between the door wall and the curve wall:
Finally, the door and small walls are repeated on the other side:
OP
OP
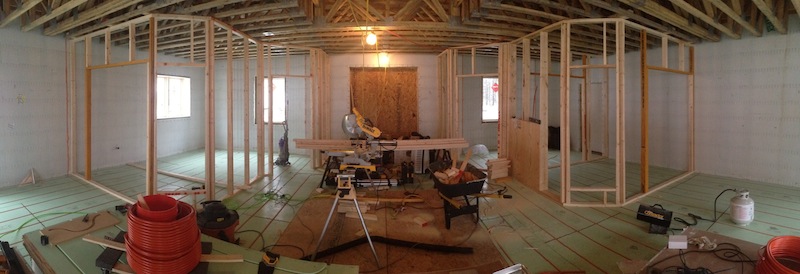
Here's a look at the router setup used to create the opening:
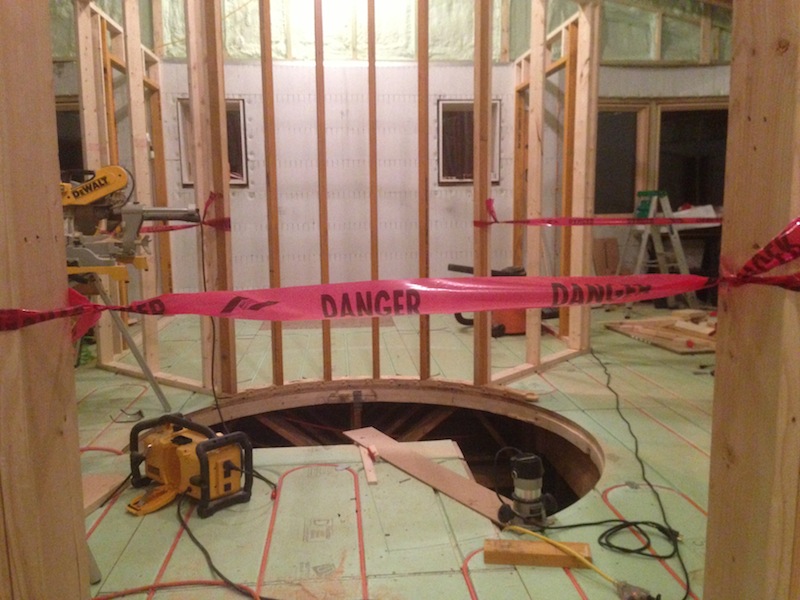
A panoramic shot of the bathroom:
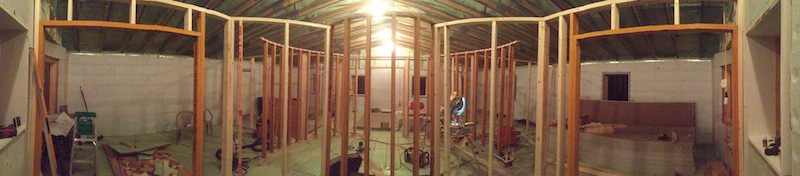
Watch your step!
Danger, indeed!
A panoramic shot of the bathroom:
Watch your step!
Danger, indeed!
Huaco
Well-Known Member
Please don't fall through again...
OP
OP
Yeah, If I fell through this one, it's 11' to the plywood below, which would most likely break, and then another 10' to the concrete! Once the opening is fully finished, it will be closed up until the staircase is ready to go in.
vogtenstein222
Well-Known Member
- Joined
- Dec 24, 2012
- Messages
- 145
- Reaction score
- 14
I love seeing every update to this thread. I'm borderline obsessed haha.
Understand if you don't care to say, but how deep are you financially on this? Or at least, no numbers involved, how are you compared to what you would imagine it would have run to have this built?
Understand if you don't care to say, but how deep are you financially on this? Or at least, no numbers involved, how are you compared to what you would imagine it would have run to have this built?
OP
OP
vogtenstein222 said:I love seeing every update to this thread. I'm borderline obsessed haha.
Understand if you don't care to say, but how deep are you financially on this? Or at least, no numbers involved, how are you compared to what you would imagine it would have run to have this built?
Oh, pretty deep! I'll be paying for this project for a while, to be sure...
Compared to the few bids I got I'm way ahead dollar wise but incredibly behind time wise. In general, labor costs roughly the same as materials, so cutting so much paid labor out saves a lot. Just remember though that your build time will suffer for it. I have great flexibility in my work so that I have essentially been working on it full time since June, and you can see I have a long way to go. It is fun, though. Stressful, but fun.
subscribed..
i haven't read much, just really enjoyed looking at all of the pics.. i'm assuming you are still in vermont building this?
i haven't read much, just really enjoyed looking at all of the pics.. i'm assuming you are still in vermont building this?
OP
OP
i'm assuming you are still in vermont building this?
Yup.
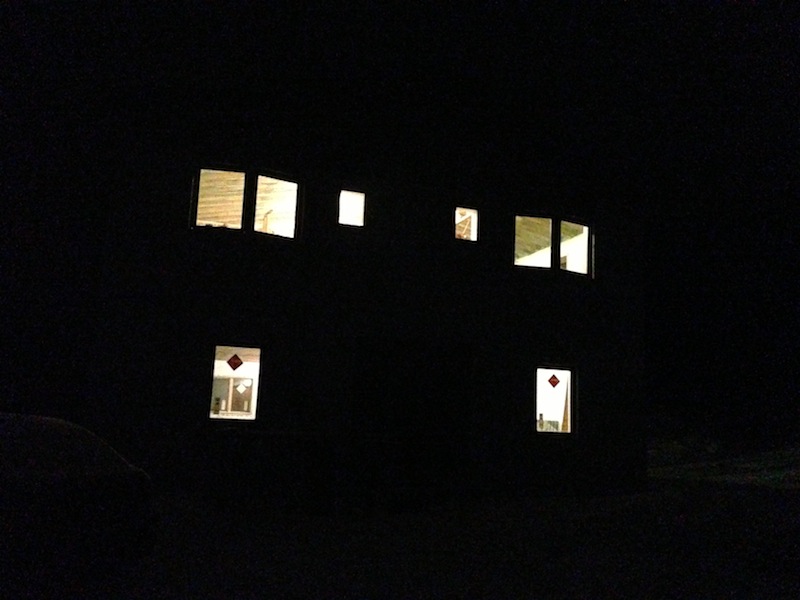
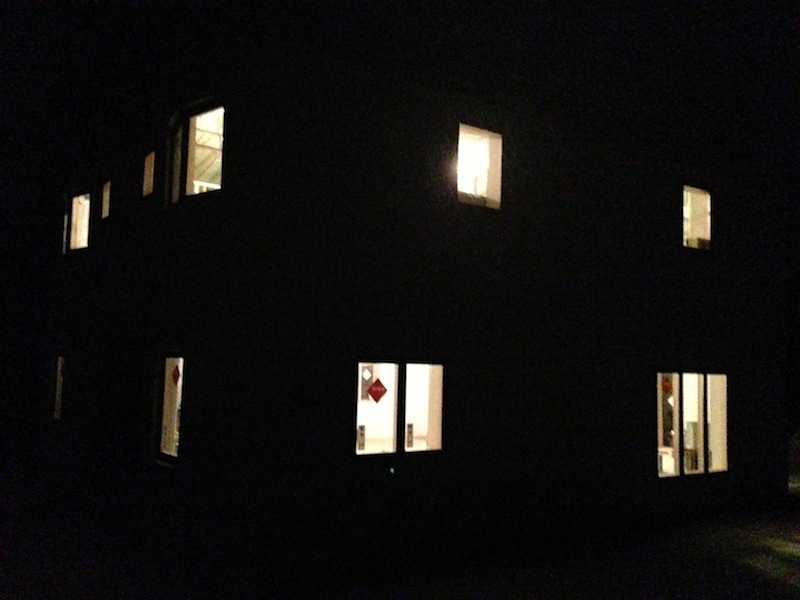
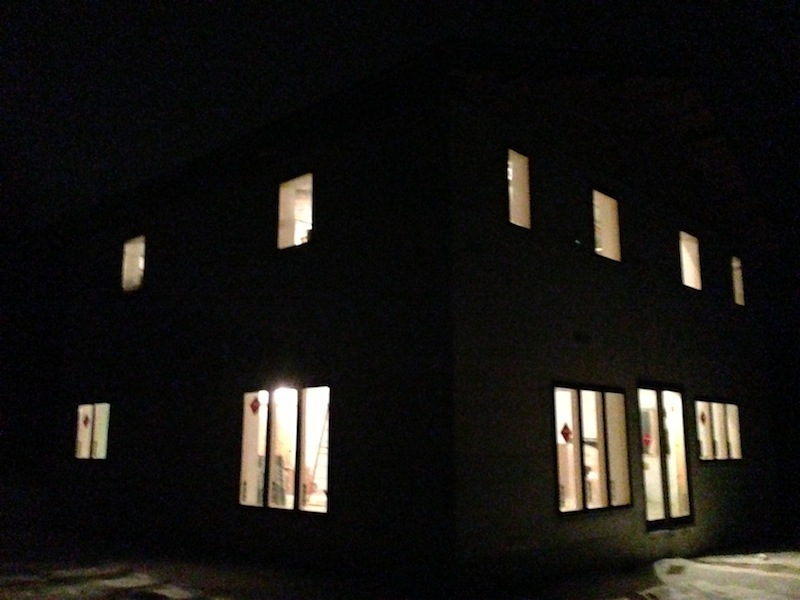
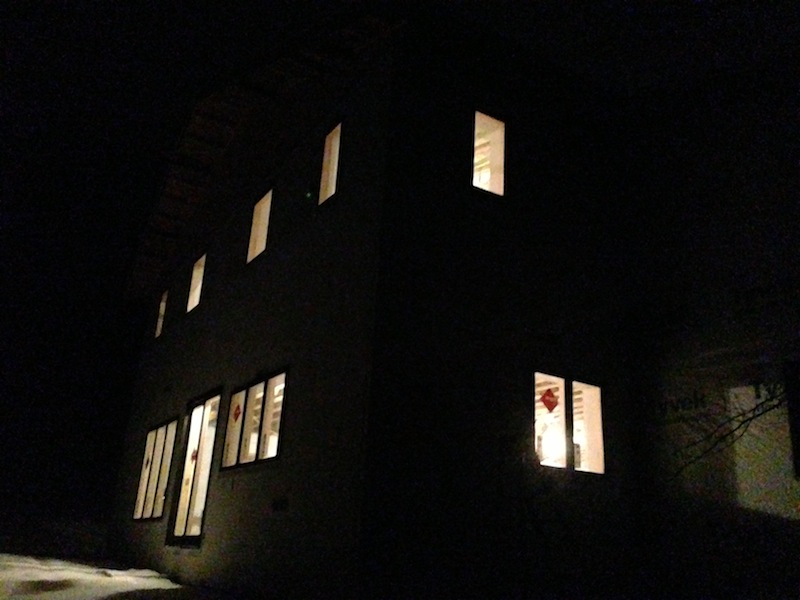
Here's just a few fun night pictures after I put work lights on both floors. Can't wait to drive up the driveway to the warm inviting lights of my house!
DeviantBee
Member
- Joined
- Feb 16, 2013
- Messages
- 10
- Reaction score
- 0
I've been looking at both SIPs and ICF construction techniques.
I was curious what you used to vibrate the concrete during pouring?
For the insides of the ICF walls, are you going to apply the drywall directly, or are you going to have some type of furring strips to space the drywall out for drywall anchors for pictures etc?
Did you have electrical conduit in the exterior walls with junction boxes for outlets/switches?
What type of concrete did you have poured into the forms?
It appears that you had minimal bracing for the blocks, is this because of the type of blocks you used? I've seen forms that were supported front and back with plywood/bracing to keep from having blow outs and keeping the walls straight.
Keep up the good work, it's impressive to see it come together.
OP
OP
I've been looking at both SIPs and ICF construction techniques.
I was curious what you used to vibrate the concrete during pouring?
For the insides of the ICF walls, are you going to apply the drywall directly, or are you going to have some type of furring strips to space the drywall out for drywall anchors for pictures etc?
Did you have electrical conduit in the exterior walls with junction boxes for outlets/switches?
What type of concrete did you have poured into the forms?
It appears that you had minimal bracing for the blocks, is this because of the type of blocks you used? I've seen forms that were supported front and back with plywood/bracing to keep from having blow outs and keeping the walls straight.
Keep up the good work, it's impressive to see it come together.
The concrete can either be consolidated with a pencil vibrator, or simply rodding with some rebar. I chose
latter, and it seemed to work just fine. The slump is so high that voids are minimal to begin with. When attaching the garage foundation walls to the main structure, the foam at the joint was cut away, and you could see that the consolidation was good.
Drywall will get attached directly to the foam - any anchors needed for pictures can go right into the foam. Anything more substantial could be anchored through to the concrete.
I chose to not run conduit through the concrete - too many unanswered questions about switch and outlet locations, plus a lot more cost. For the few switches and outlets on exterior walls, I will be using special ICF electrical boxes that anchor directly to the foam, and using a hot knife to cut channels for the wire.
I don't have the specs handy for the concrete, but each ICF manufacturer will have a set of recommendations. I just called the concrete supplier and asked for the specs on their 'ICF Mix' and it was right in line with the recommendations so that's what I used. Seems to me mine was 3000 psi 5.5 slump 3/8 aggregate?
The bracing was supplied by the foam vendor, and per the manufacturer's manual it was all that was needed. The foam block and plastic cross ties take all the side load, and the bracing is used to keep the wall from tipping over and staying straight. I did use additional bracing for the curved sections as they were inherently weaker. The only place I even came close to having a blowout was one corner where I screwed up and missed placing one of the plastic ties. Even then, it didn't fail, just bowed out a bit. Fortunately that little boo boo is below grade!
OP
OP
Did you save a lot of money doing the foam blocks yourself? How long did it take to place them all for the basement and 1st floor?
Well, I saved an awful lot, but not sure how much. The few bids I got didn't break out foam block work from other parts of the quote - which kind of pissed me off since I specifically requested itemized bids! If you aren't doing curved walls, it goes super fast. I estimate that my curved walls more than doubled the construction time for the foam blocks.
OP
OP
Some new pics...
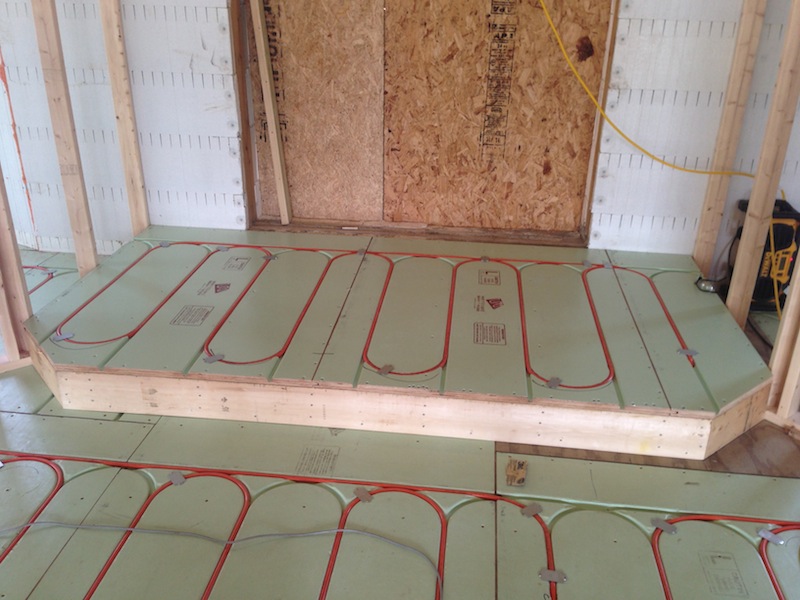
Did some more of the upstairs heat pipe - only one loop to go after this:
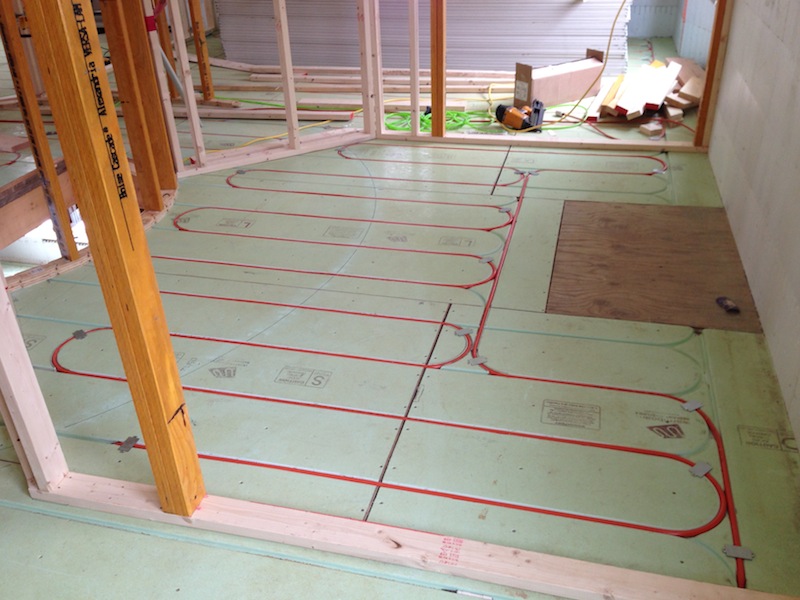
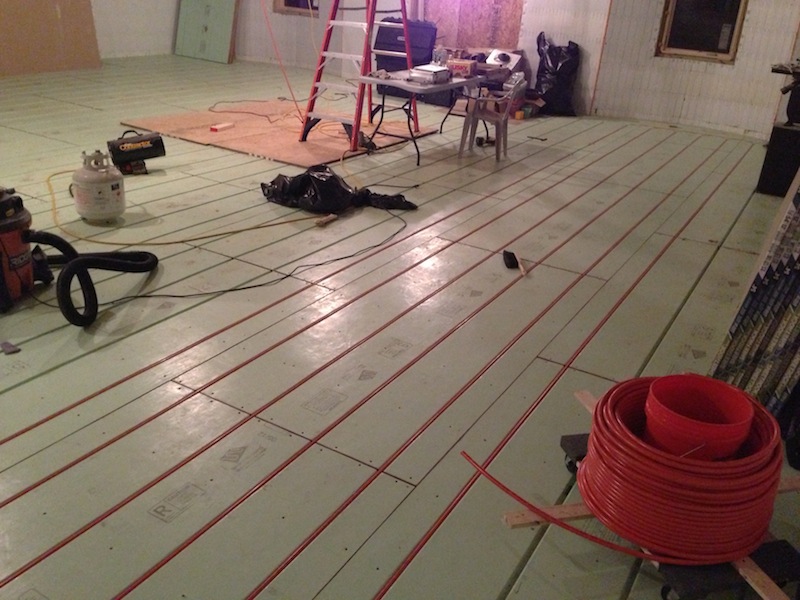
I then decided to see how easy it was going to be to do the heat pipe downstairs - there was none of the overspray from attic insulation, but there was more accumulated dirt and some concrete splatter, but still far easier than upstairs:
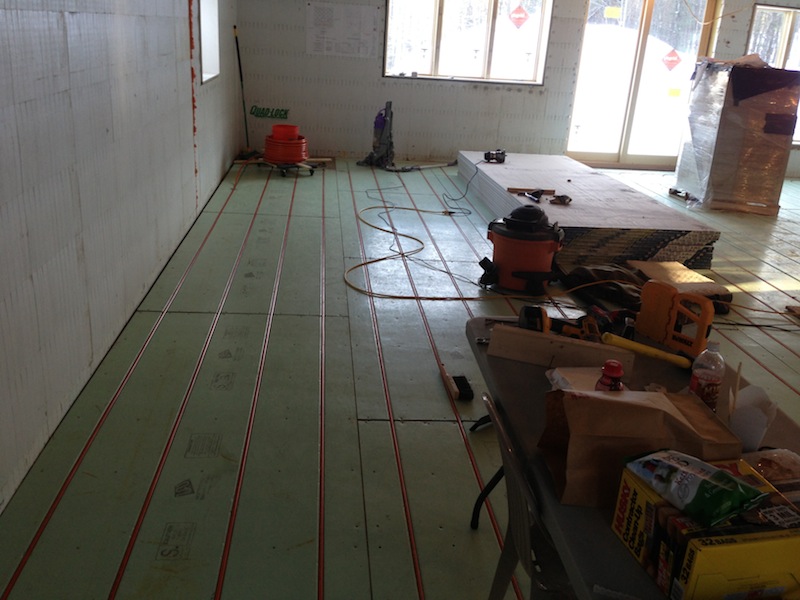
Then it was on to starting the downstairs framing. Here is the mudroom:

Here is the wall behind the range, with blocking for the range hood:

Then on to the pantry - still have more to go on this:
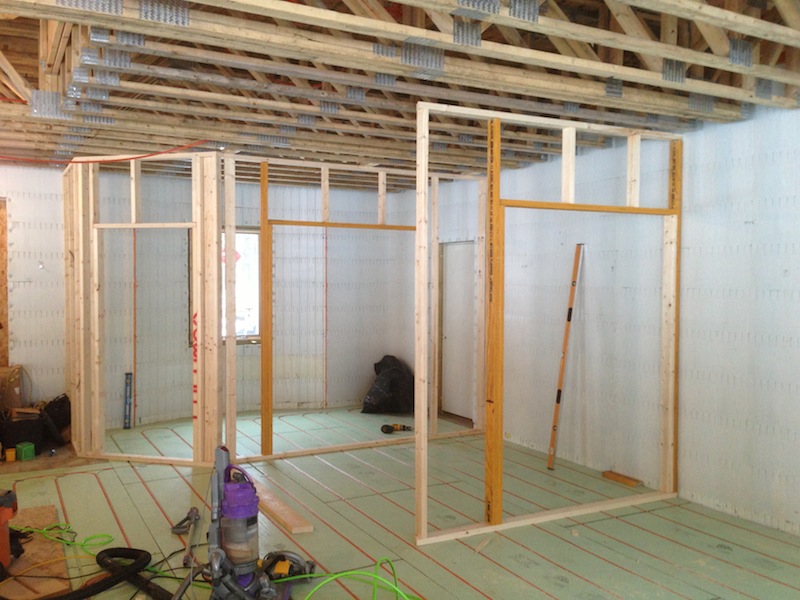

Tomorrow, I will try to finish up the pantry, and get more heat pipe down. I can't start the other downstairs framing until the pipe is in, since it runs under the walls. Pics to follow...
Did some more of the upstairs heat pipe - only one loop to go after this:
I then decided to see how easy it was going to be to do the heat pipe downstairs - there was none of the overspray from attic insulation, but there was more accumulated dirt and some concrete splatter, but still far easier than upstairs:
Then it was on to starting the downstairs framing. Here is the mudroom:
Here is the wall behind the range, with blocking for the range hood:
Then on to the pantry - still have more to go on this:
Tomorrow, I will try to finish up the pantry, and get more heat pipe down. I can't start the other downstairs framing until the pipe is in, since it runs under the walls. Pics to follow...
BeardedIdiot
Well-Known Member
I'm full of jelly up to my eyeballs! I'm sure its been a lot of work, but it must be so rewarding to be doing so much of the work yourself, and being able to make sure everything is exactly how YOU want it to be.
OP
OP
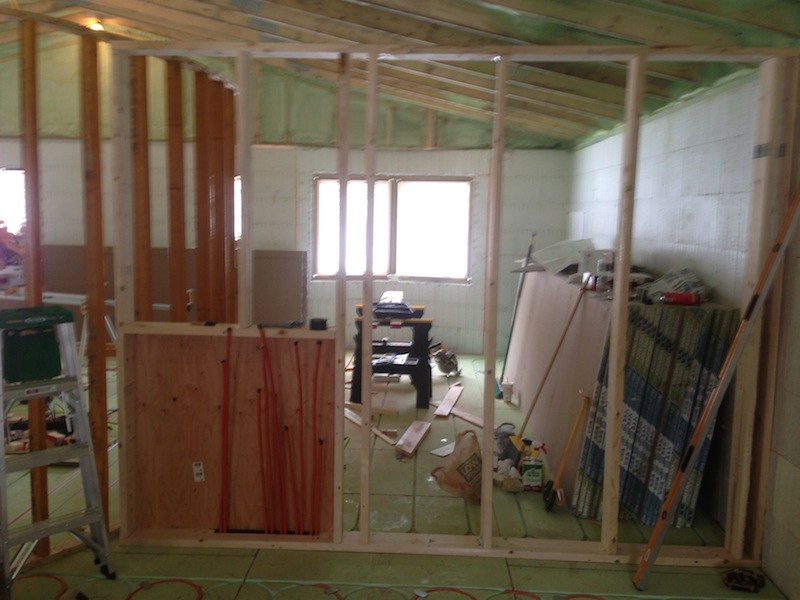
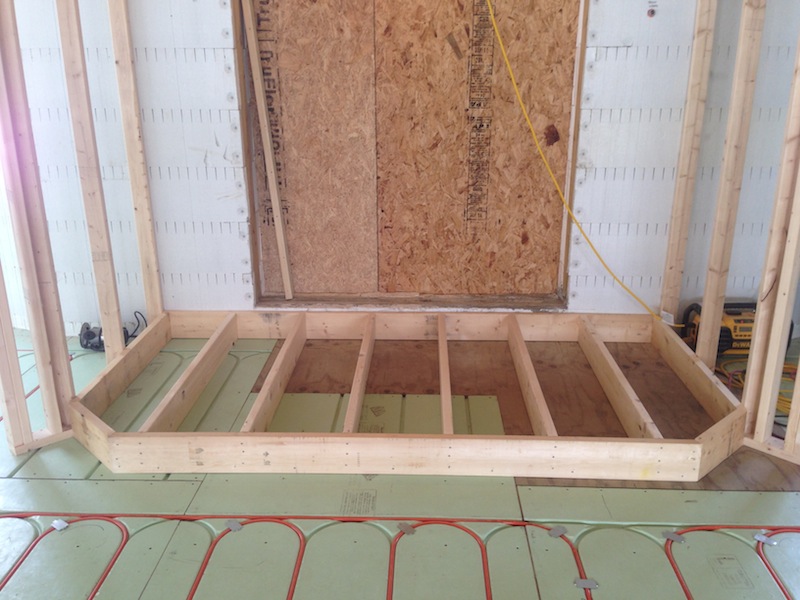
Not much new to report. Still plugging away - here is the finished mud room and pantry.
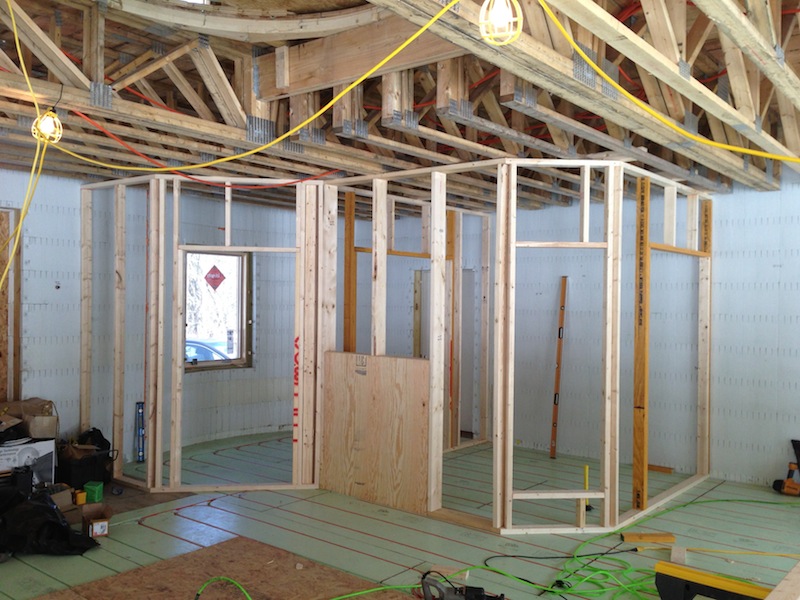
The ply panel is the mounting spot for the 1st floor heating manifold, and the opening framed in the little 45° wall is for a pass through cabinet from the pantry to the dining area. Clean dishes can come out of the dishwasher in the pantry and go right into the cabinet from the back.
I have also finished two more loops of heat pipe totaling about 500 linear feet. Another 250 to go before I can frame out the rest of the first floor.
LowNotes
Well-Known Member
As someone who spent 5 years getting an architecture degree, thousands of hours as a general laborer on construction jobs, and 4 more years after that as a construction manager and at some point wrote my masters thesis on the benefits of panelized construction, you sir, deserve a tip-o-the-hat. I am really glad I clicked through all of this, as it has been right up my alley as far as interests go...and we aren't even at the brewing yet!
It sucks you had to learn the hard way about how quickly safety can go from "not worried about it" to "oh crap oh crap oh crap", but it sounds like all in all you aren't too busted up, and it obviously left an imprint when it came time to work on the opening later on
Keep the updates coming (as if you have a choice now!), consider me subscribed
OP
OP
As someone who spent 5 years getting an architecture degree
Architecture was my second choice when I first went to college - turns out it should have been my first - I totally washed out of comp sys design!
A few more framing shots of the downstairs. One more divider between the office and the bathroom, and the 1st floor framing (with the exception of the fireplace, which will be done later) will be done. Then the plumber can come in and do the drains and vents.
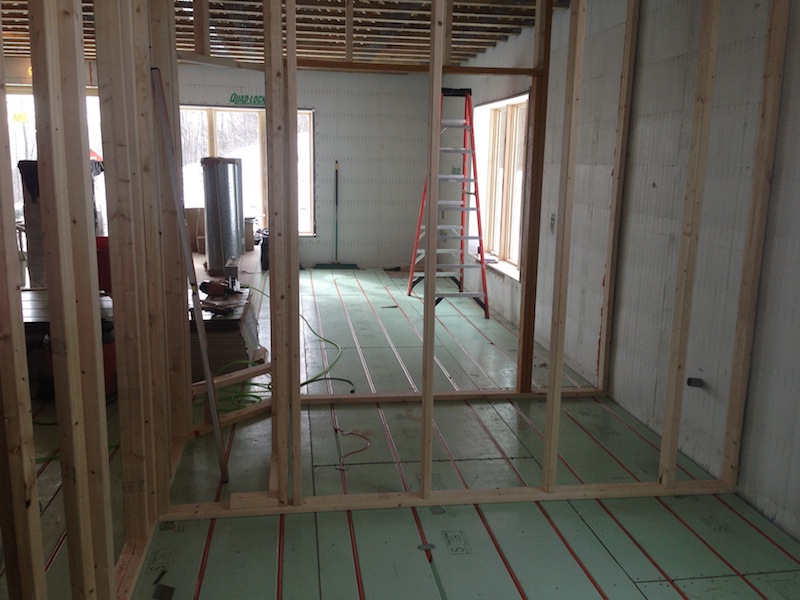
This shot looks through the pocket door into the bathroom. That 2x4 just laying on the floor is there to indicate the approximate location of the wall still to be done:
This shot shows the right half of the downstairs framing. The doorway to the right of the pic is to the office.
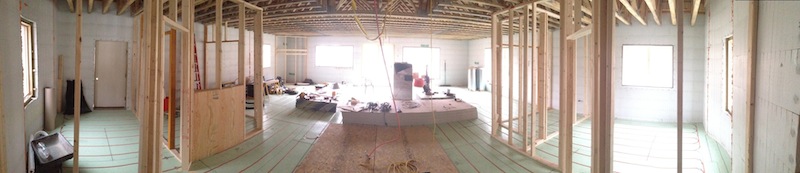
Panorama of the downstairs:
Wow. And to think I am still held up on tearing out a semi-closet which contains the heat/air-conditioner and water heater to turn it into a walk in bar. When I get there I will make my own thread. Well played. I am jealous.
OP
OP
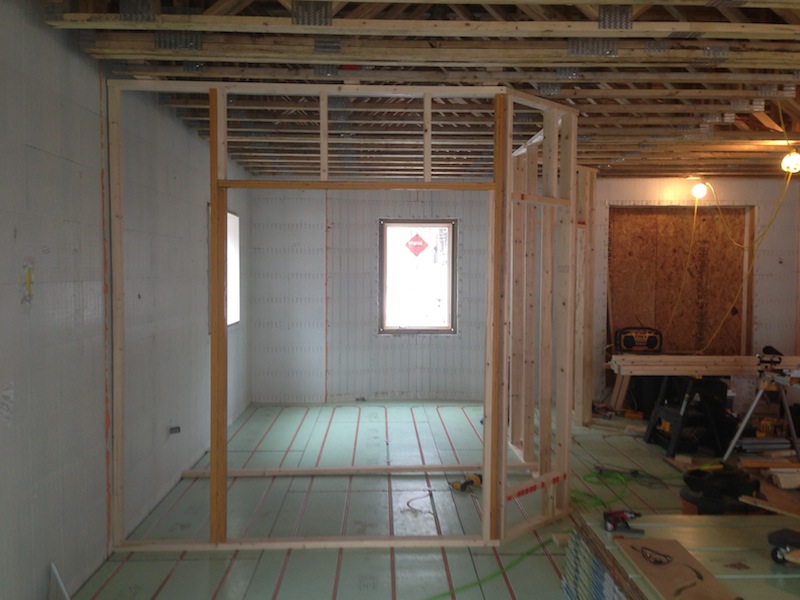
The first floor is now framed out. Finished the bathroom, and the front entry landing.
Here is the wall dividing the office (foreground) and bathroom:
It's hard to see from this angle, but the bathroom actually is rectangular, not going all the way into the angled space to the left in the photo. There is a wall that is almost impossible to see in the photo, and the odd leftover space will serve as a closet for vacuum accessories, etc.
And here is the step up to the front entry:
Just need to chop and drop the subfloor onto the step up, and run the pipe in it.
Next up, back to the the second floor to finish up the curved door openings and frame from 8' up.
wow! this is fantastic! I just read this from start to finish and I'm hooked. Great looking place you have going there.
OP
OP
Ok, the front entry raised area is done and piped:
So the first floor is officially framed:
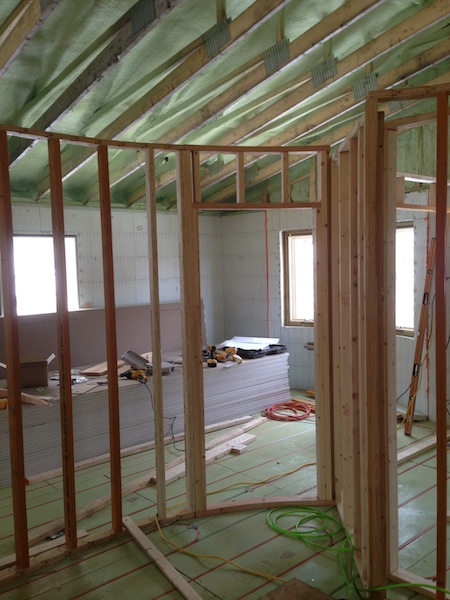
Now, back upstairs to the kids bathroom. In process - Turning a curved wall into a flat one:
So the first floor is officially framed:
Now, back upstairs to the kids bathroom. In process - Turning a curved wall into a flat one:
Now, back upstairs to the kids bathroom.
Did I miss an announcement?
OP
OP
ISLAGI said:Did I miss an announcement?
No. I have two kids from my first marriage.
TomRep
Well-Known Member
Awesome build man! I spent the past several months completely renovating my late father-in-laws bi-level for resale. That was quite a bit of work in its self, but you sir take the cake! I'd love to be able to do this, and know I can, but doubt it will ever happen. I'll live my dream through yours!
OP
OP
Short day yesterday, but got this curved doorway sorted out. One more just like it on the other side to do yet.
vogtenstein222
Well-Known Member
- Joined
- Dec 24, 2012
- Messages
- 145
- Reaction score
- 14
So through all of this admirable work...when was the last time you brewed?
OP
OP
So through all of this admirable work...when was the last time you brewed?
It's been a long time - even longer than the build process. I had to pack up all my brewing gear when I was trying to sell my house - there was just way too much stuff cluttering up the place. It's been a couple years at this point, but I hope to get something fermenting this summer.
LandoLincoln
Well-Known Member
It's been a long time - even longer than the build process. I had to pack up all my brewing gear when I was trying to sell my house - there was just way too much stuff cluttering up the place. It's been a couple years at this point, but I hope to get something fermenting this summer.
I hope that you have some homebrewing friends that at least stop by and give you some of theirs.
OP
OP
I hope that you have some homebrewing friends that at least stop by and give you some of theirs.
Nope, I seem to be the lone brewer in my circle of friends. Fortunately there is great beer all around me!
BeerguyNC61
Well-Known Member
Yea I miss living in VT, Magic Hat, Otter Creek, Long Trail all those breweries so close and fun to visit!
Cool looking house so far Jester!
Cool looking house so far Jester!
Well, if you ever need a homebrew (or a lighting assistant for a photo shoot ), give a shout....
), give a shout....
OP
OP
the_bird said:Well, if you ever need a homebrew (or a lighting assistant for a photo shoot
Well, probably won't need lighting til the house is done, but you're welcome to come up and visit any time, my friend!
Similar threads
- Replies
- 3
- Views
- 329
- Replies
- 4
- Views
- 776
- Replies
- 14
- Views
- 1K
