New Brewer- 1st Brew Today, 1/12/12

Homebrew Talk - Beer, Wine, Mead, & Cider Brewing Discussion Forum

Help Support Homebrew Talk - Beer, Wine, Mead, & Cider Brewing Discussion Forum:

This site may earn a commission from merchant affiliate links, including eBay, Amazon, and others.

JeffoC6

Well-Known Member
Joined
Jan 12, 2012
Messages
1,053
Reaction score
94
Location
Stewartsville
Greetings all,

I just finished up my first homebrew today, roughly an hour ago. I tried my absolute best to be clean and sanitize everything. I followed the instructions (Brooklyn Brew Shop) to a T and I'm hoping that what I've created turns out somewhat drinkable haha.

I've done some reading here and there before I decided to brew, so I could familiarize myself with the process the best I could. But as you know, you sometimes need to just jump in and go for it. That's what happened today. One thing I remember reading is that it's very important to take good notes. I did so today, and am hoping that I could share them with the forum in order to gain some construction feedback for my next experience. I highly doubt that I nailed it the first time out, and seeing how I finished up about an hour ago, I won't really know for awhile. Anyways, here are my notes, I appreciate any comments, feedback, etc. Thanks so much for having me!

Brew Diary #1- Chestnut Brown Ale (Brooklyn Brew Shop)

-Completely wiped down all counters and stove with soapy water and sponge, removed everything from the area.

-Added 1/2 pack of C-Brite sanitizer (as instructed) to the 1 gallon jug (carboy that they provided) and filled with cold tap water to "1 Gallon" mark.

-Filled a large deep foil pan (11x14) with about 3/4 of a gallon of the sanitizing solution. Added all pieces of brewing kit to solution to soak for about 30 min. Left remaining sanitizing solution in the 1 gallon jug. Put the half used packet of C-Brite in a tupperware container for next use.

-After soaking all pieces, I placed them all on 2 large sections of paper towels, which were laid out on the cleaned counters. These were left out to air-dry.

-I left the sanitizing solution in the large foil pan to use throughout my brewing process if I needed to re-sanitize something, or if I needed to dip my hands in it and then rinse off if necessary.

-I filled my large black stock pot with 2 quarts (8 cups) of spring water. I did not sanitize the large black pot, but did wash it out thoroughly with hot soapy water earlier, but I did sanitize the measuring cup.

-I put the large silver stock pot on the other burner, empty. I did not sanitize this pot, but I did wash it out thoroughly earlier with hot soapy water.

-I brought the spring water in the black pot to 160 degrees and added the grains provided to me in the kit (I put the yeast and hops provided to me in the kit, on a paper towel, on the cleaned counter-top) and set the timer for 60 minutes.

-I stirred a few times to incorporate all of the grains into the water and then lowered the heat almost immediately to make sure the grain/water was between 144-152 degrees. I continuously prodded around the pot with the sanitized thermometer, making sure the mixture never went above 152 degrees, although I noticed that certain areas were hotter than others, and at times, certain areas did go above 152, but the majority of the mixture stayed between 144-152. When the temperature would fall, I'd turn the heat back on for another boost to the temperature, trying my best to keep it between 144-152. At exactly every 10 minutes, I would stir the mixture with a black plastic spoon that I had previously sanitized.

-As I approached the 60 minute mark, I filled up 2 other (small) with 1 gallon of spring water. I did not sanitize these pots, but did wash them out thoroughly with soapy water. I brought the gallon of water (divided between both pots) to a boil and then turned the heat off in order to achieve 170 degrees. Next time, I feel that I should have an additional large pot for this job, as using 2 smaller pots was harder to gauge the temperatures of both.

-After 60 minutes, I put my sanitized strainer over the mouth of the large silver pot and carefully (also using a ladle that had been sanitized) put the grain mixture/water through the strainer. I made sure to get all the water out, but the strainer wasn't large enough to hold ALL of the grain, so I ended up just throwing a little of the grain away so it didn't spill over into the wort that was collecting in the pot.

-After making sure that the water in the 2 small pots were at 170 degrees, I used the same ladle (re-sanitized it) to ladle the water over the grains in the strainer until I felt comfortable simply pouring it over. At this point, all of my wort was in the large silver pot, and all of my grain was in the strainer. I removed the strainer and started to bring the wort to a boil over moderately high temp, but not too high.

-After the wort came to a rolling boil (not too aggressively), I set the timer to 60 minutes and added 2/3 of the hops that were provided to me (using sanitized scissors to open the package). I did not use any chestnuts per the recipe, as my store didn't have them and a trip to a speciality store wasn't possible.

-The wort then came to the "hot break" and started to foam (about 1-2 minutes into the beginning of the boil). At that time, I lowered the temp, but kept a steady, easy, boil, stirring occasionally. I would raise and lower the temp during the remaining of the boil to make sure the boil was never too high, or too low.

-When the timer read 20 minutes left, I added the last 1/3 of the hops that were provided to me (per the instructions) and stirred, keeping the same consistent boil. Never too high and never to low.

-I cleaned out the sink and filled it with cold water with 10 minutes left in the boil process. Once the sink was filled, I waited until 2 minutes were left in the boil process and added all of the ice and ice packets that I had in the freezer to the water in the sink, then, as soon as the 60 minute boil was up, I put the large pot in the sink and surrounded it with the ice and waited for it to achieve 70 degrees (using the re-sanitized thermometer). I did not get any water into the wort, as I made sure the faucet was moved away so it didn't drip into the wort.

-After the wort dropped to below 70 degrees (which took approx 10 minutes), I shook up the carboy (1 gallon jug) that had the remaining sanitizing solution in. I poured it out and then rinsed it with spring water, right from the bottle, making sure the bottle didn't touch the lip of the carboy.

-I then took my sanitized funnel and put it over the mouth of the carboy. Above that, I rested a smaller sanitized strainer that I have, and poured the wort through the strainer, down into the funnel, and into the carboy. Towards the end, there was a lot of residue that was collected in the strainer.

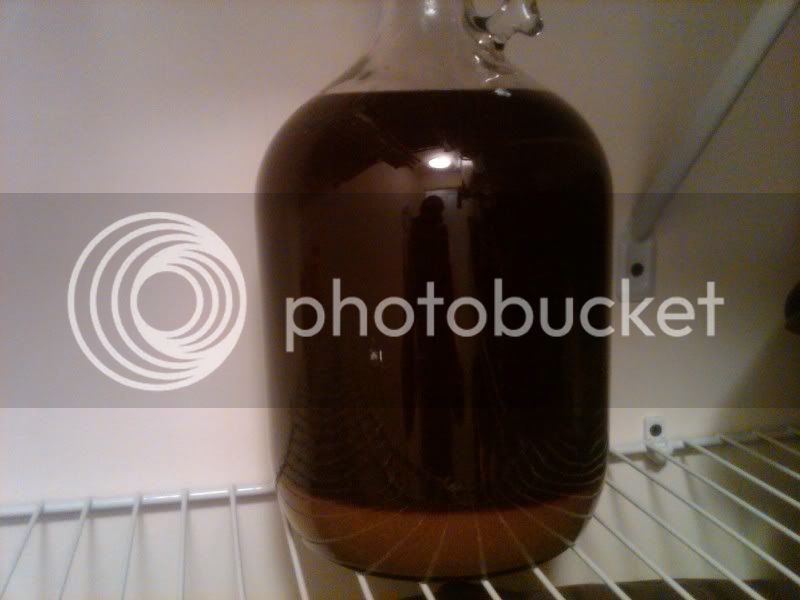
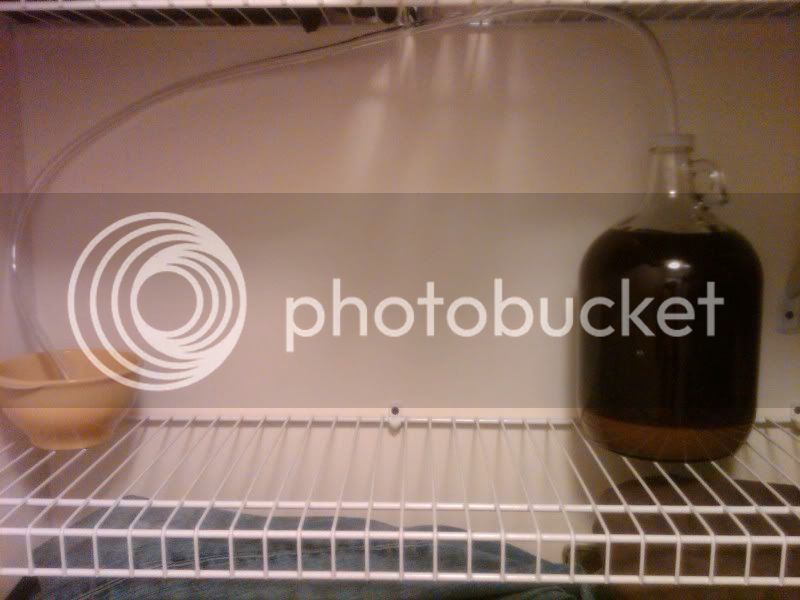
-Per the instructions in my kit, I cut open the packet of yeast with my sanitized scissors and poured it into the carboy. I then sanitized my hands and held my palm up to the mouth of the carboy and shook vigorously to activate the yeast. I capped the carboy with the sanitized cap and attached the sanitized blow off tube, affixing the other end of the blow off tube into a bowl full of sanitizing solution.

-I put the carboy and bowl of solution in my dark walk-in close and will check periodically, but plan to attach the airlock in 3 days, per my instructions.
 
wow...super detailed.

seems like you're being overly cautious about sanitizing (which is better than the other way but...). remember that during the boil, the wort and anything that comes in contact with it will be sanitized by the boil itself. sanitation is super important after the wort is cooled.

also...why the airlock in 3 days...what's on there now?
 
We all hope brew #2 and #3 do not have a post like this LOL

hint - for steeping/mini mashing - turn on oven on lowest setting while heating water for steeping/minimashing. when you put the grains in the pot. Turn OFF oven (170ish degrees) and put covered pot into over with door open. That will keep the mash at a good temp. The oven will cool but the mash will stay a nice even temp.

Also - anything having to do with the boil really doesn't have to be sanitized . . .it's being boiled anyway. You could drop a chicken in it if you wanted too . . . .for chicken beer I suppose.

Also - a boil is a boil. can't have a hot or cool boil.

Cooling - . . . how big of a batch was this??

Put the airlock ASAP. Never heard of a waiting period. Weird!!

and yea - I never want to discourage being sanitary but your not attempting an open heart operation :) I hope you scrubbed down and sandpapered yourself in the shower first!

OH - I see - you have a blow off tube - yea - that's good - I have blow offs in the summer but never winter when I brew with cooler yeast.
 
Good work on the detail. It helps for the first batch. Also helps the experienced members of this forum evaluate your processes. Once you have a few batches under your belt You'll get into the swing and the sanitizing steps will become second nature. I have a spare fermenter that I use to mix 2.5 gallons of starsan and drop in everything that's going to touch the wort post boil.
 
Hahahaha. Sounds like I've got the "detailed" part of the brewing process down pat.
Point taken on the sanitizing BEFORE the boil, thanks Atom.

I'm just following the directions from the Brooklyn Brew Shop kit in regards to the blow-off tube vs. airlock. The instructions told me to install the blow-off tube for 3 days. Then, on day 3, remove it and add the airlock (filled with sanitizing solution).

Here's a picture of my current set-up. Note the odd color on the bottom of the carboy? I'm assuming this is normal?
-2.jpg

-1.jpg


Anyone think NOT adding the roasted chestnuts is going to be a problem? I didn't have access to them so simply brewed with the grains, hops, and yeast they provided to me. Granted, I won't get that chestnut taste, but I'm assuming my beer will still be fine.
 
Reading your highly-detailed account, I'm feeling very nostalgic for my first batches of beer. Good work with all the notes. Good to start super cautious like this. Then you can ease up as you learn more and experience more.

Congrats!
 
Hahahaha. Sounds like I've got the "detailed" part of the brewing process down pat.
Point taken on the sanitizing BEFORE the boil, thanks Atom.

I'm just following the directions from the Brooklyn Brew Shop kit in regards to the blow-off tube vs. airlock. The instructions told me to install the blow-off tube for 3 days. Then, on day 3, remove it and add the airlock (filled with sanitizing solution).

Anyone think NOT adding the roasted chestnuts is going to be a problem? I didn't have access to them so simply brewed with the grains, hops, and yeast they provided to me. Granted, I won't get that chestnut taste, but I'm assuming my beer will still be fine.

I tried posting some pictures but it seems that they need to be approved first, so in the interest of time, I posted sans pictures.
 
I read the whole thing. I have a brew log that is a few years old now. I notice my notes have become considerably shorter after 50+ batches. Now I have a template and I cut and paste. Then I bought Beersmith software and notes are even shorter. My techniques are familiar to me, it's recording the recipe that matters most.

I ran into a sanitation issue after about 20 batches. I had three batches go bad. I traced it to my plastic transfer hosing. It required that I soaked all my equipment in a bleach/water solution. 1 tsp/gal of water. It worked and I've never had trouble since. I now 'bleach bomb' every 2 or three batches or after long storage of equipment.

Good Job and Good Luck!
 
Another question (my first batch has been done for about 3 hours now)...

Now that it's in the carboy and has the blow-off tube attached, am I right in saying that this is "1st fermentation?" With that said, what is the optimum temperature I want to keep it? I have a towel around it in a dark utility closet that's about 68-70 degrees. No warmer, and if colder, would only be down to about 66 degrees or so.

Thank you all for your help!
 
You'll be fine leaving out the nuts- I would think nuts would only kill your head retention, but don't quote me on that. Anyway, my first kit was a BBS as well- FERMENTATION TEMPERATURES. They're not explicit about it. Cool that sucker down. You want to shoot for low 60s F IN THE BEER, not ambient. My BBS kit was undrinkable due to high fermentation temperatures.
 
You'll be fine leaving out the nuts- I would think nuts would only kill your head retention, but don't quote me on that. Anyway, my first kit was a BBS as well- FERMENTATION TEMPERATURES. They're not explicit about it. Cool that sucker down. You want to shoot for low 60s F IN THE BEER, not ambient. My BBS kit was undrinkable due to high fermentation temperatures.

Thanks. I moved it into my other walk-in closet that's cooler. It maintains about 66 degrees or so, maybe less during the day when nobody is home and the heat is lower.
 
Thanks. I moved it into my other walk-in closet that's cooler. It maintains about 66 degrees or so, maybe less during the day when nobody is home and the heat is lower.

Try wrapping it in a wet towel, or putting it in a large water bath, like a bucket. Fermentation temperatures can push your beer up to 10F above ambient, and 76 is NOT where you want to be. Trust me on this one- cooler is better.

I think the number of people homebrewing would be twice what it is if half of new brewers weren't discouraged from buying a second Mr. Beer refill or Cooper's kit just because their 75F fermented beer was undrinkable.
 
Sanitation problems can start around batch 20 to 30 it seems. When you got the system down and get lazy.

My spigot on my bottling bucket got bad bugs and cost me 3 batches.
 
My first four batches were Brooklyn Brew Shop. Liked the "not so technical" process...it was a nice introduction to all grain brewing. They suggest the three day thing before you put on the air lock...I just put it on when the bubbling slowed down. Also, I found that I needed to let the bottles condition longer than the 2 weeks the instructions suggested.

I'm much more interested in the details now, so I've left their kits behind. But they sure have a special place in my heart...no way I would have started brewing 5 gallon batches...1 gallon is perfect for me and my space.
 
Good Detail, oddly enough I just brewed that same kit just over 1month ago. I got to drink it the other day and I was pleasantly surprised it tasted good (only because lots of people say their first brew tasted bad). I also happened to leave out the Chestnuts but I added Pistachios to it since they were on hand.
I have their Summer Blond and will be brewing that this weekend I hope.

BTW, first post here and I love just browsing and reading everyones stories.

IMG_0765.jpg
 
Awesome, Maverick! Now I'm even more excited hahaha.

Just checked on my carboy (6 hours since I pitched the yeast into the cooled wort) and the kraeusen has formed! I noticed that the end of the blow-off tube, which is submerged in my sanitizing solution, is bubbling ever so slightly. I'm assuming I'm on my way?
 
JeffoC6 said:
Awesome, Maverick! Now I'm even more excited hahaha.

Just checked on my carboy (6 hours since I pitched the yeast into the cooled wort) and the kraeusen has formed! I noticed that the end of the blow-off tube, which is submerged in my sanitizing solution, is bubbling ever so slightly. I'm assuming I'm on my way?

Yep, you're good. I loved watching it bubble the first day or so:) Gotta love that first batch feeling!
 
That is how my brew started, it bubbled for about 2 days and yes it was ever so slight. I was expecting some big continous farting from it but it never did. My Carboy also did have that build up on the bottom and from what I have seen that is also normal.
I just happened to also get my 5 gallon buckets today so I can start to eventually go bigger.This is such and addicting hobby but cant seem to stay away.
 
Hey there, I also got a BBS kit, and I noticed that some of their instructions are a little strange when I compare them to other info out there. For instance in my kit they said to leave the mash uncovered, and check on it every 10 mins, well, it seems like you had better luck than me, because my mash temps were all over the place. Since then I've realised that it's much better to put the lid on and cover and insulate the grains while their mashing, and not to check on it so often so you don't let the heat out.

The other thing that the BBS kit said nothing about was the fact that you can let a lot of that sediment fall to the bottom of the pot when you're chilling it, and then don't pour all that junk in to the jug to ferment. These are only one gallon batches - we have to try to get all the beer we can out of our efforts, no point in fermenting 2 cups of sediment!

(I'm very very much a newbie, please correct me, if any of the above is not best practice)
 
GallonJugs said:
.

The other thing that the BBS kit said nothing about was the fact that you can let a lot of that sediment fall to the bottom of the pot when you're chilling it, and then don't pour all that junk in to the jug to ferment. These are only one gallon batches - we have to try to get all the beer we can out of our efforts, no point in fermenting 2 cups of sediment!

I didn't have that problem, as I went ahead and strained the wort as I put it in the fermentor. But I never seemed to get the 10 bottles...8.5 or 9 depending on how much junk was at the bottom of the fermentor at bottling time. Now I'm fermenting 1.5 gallons so I can take some out for gravity readings and hopefully I'll be bottling 12 now. I don't drink a lot...but I'd rather have 12 around then 8.5!
 
In Beer Craft, another book I got, they say they use a sanitized gold coffee filter as they funnel in to the jug, I think I'm going to give that a go next time :)
 
Up this morning bright and early and my fermentation is coming along wonderfully (I think hahaha). I have repeated bubbling in my sanitizing solution. A consistent "bloop....bloop....bloop." It looks like a storm in my carboy!
 
"1st Fermentation". Also called Primary Fermentation refers to the time you pitch the yeast, till the time it consumes the fermentable sugars and the gravity of the beer stops changing. It is usually fully complete in 7 to 14 days. After that you can check with a hydrometer over a couple days to ensure the gravity is where you expect and not changing. Then go straight to bottling.

There is a lot of discussion about "Secondary Fermentation" and whether or not it is necessary. Secondary Fermentation is just transferring your beer from the primary fermenter into your secondary fermenter; usually from a plastic bucket to a glass carboy. The question that comes up is, "Is this necessary"? The simple answer in my opinion is No.

There is really no actual "Fermentation" happening after the primary. So the term 2nd, or Secondary Fermentation is really not accurate because your yeast has finished its work completely in the primary vessel. So when you hear the term, ‘Secondary’, it simply means the beer has been transferred.

For your purposes, I recommend skipping a Secondary. Try 2 weeks in the Primary Fermenter and bottling. You do want to drink this beer sooner than later right? You also want to avoid possible contamination by transferring right? This is the right thing to do for most beers.

That being said, there are some valid reasons that a secondary fermenter would be used.

1. Bulk storage of a high alcohol beer for aging or for Lagering – I made a 9% Belgian Golden Ale. It called for 6 months of bulk aging. Lagering can be several months of low temp storage as well. You don’t want to do that in a plastic bucket because they are porous and can oxidize the contents over time. I transferred to a glass carboy and left it in the dark for 6 mos. It was great.

2. Dry hopping or adding other adjuncts – Some beers call for extra hops after primary for a strong hop aroma. Some recipes call for fruit, spices, oak chips or whatever. Many people will put these adjuncts in the Secondary fermenter and siphon the beer from the primary into the secondary.

3. Clearing the beer. This is a debatable reason. I’ve heard many say that the beer will have less sediment in the bottles if you transfer it to a secondary for a week. It’s up to you but you just have to ask yourself is the time and risk involved in a transfer really necessary when you can just bottle the stuff already.

4. Staring at your beer in a glass carboy is cool. This is not debatable. You just can’t really enjoy the great colors of the beer in a murky plastic bucket. So transfer it and set it right in the middle of the kitchen table and stare at it. – I see you have a carboy for your primary. Active fermentation is cool to watch also.

There are lots of opinions regarding this topic and it sort of confused me when I started brewing. Hope this helps. You’ll find what works best for you over time. Cheers!
 
I would never ever bottle after only 2 weeks in a primary. 3 weeks is the minimum for 90% of yor beers. Unless you like playing Russian roulette.

Your beer will taste better with 3 weeks in the primary or 1 week in a secondary because it is still aging and the yeast need time to clean up after themselves. Yea. Fermentation will be finish but the yeast are still doing important work as them clear up their mess by eating there deposits.
 
Thank you both mugs and grinder. I'm tending to lean more towards 3 weeks in the primary as well. From what I've read, there's no reason to rush anything. I also agree that as I go forth with this hobby, I don't (personally) feel that secondary fermenting is necessary. While I want to learn how to brew, I don't want to do anything that isn't necessary, and may only make more work for me in the long-run.
 
Just an update...

I'm about 31 1/2 hours into primary fermentation. My fermentation started out with a bang after about 6 hours, and has been going non-stop until about 2 hours ago, when things slowed down a bit. My blow-off tube was bloop bloop blooping away all day long, but now, the bloops have slowed, and the "storm" inside the carboy has relaxed some. I'm supposed to switch off the blow-off tube on Sunday at 2:00 PM (day 3) and replace it with the airlock. Just wanted to see if what I'm experiencing is "normal." As always...Thank you.
 
Morning all...

I placed my carboy in my dark walk in closet on Thursday at 2:00 PM (ET) and by 8:00 PM that same night, krausen had formed and primary fermentation had begun. By Friday, things were definitely moving. When I woke up this morning, I noticed that everything has slowed down considerably. My blowoff tube has completely stopped bubbling in the sanitizing solution, and the activity inside the carboy has slowed down to almost a halt. As an FYI, the temperature in the closet has been between 58-60 degrees consistently. The directions (Brooklyn Brew Shop) tell me that on day 3 (which will be Sunday at 2:00 PM (ET) I should remove the blow-off tube and add the airlock.

I'm not concerned that the activity has slowed, but a little re-assurance would be nice :)
 
You're fine. Go ahead and put your airlock on right now. They suggest a blowoff tube to avoid big, messy explosions during the very active first stage of fermentation. Now that that's over, you can safely put the airlock on and forget all about it until next month.
 
It's so hard to stop peaking in to check on. I've been good about not moving it or turning the light on, but I can't help myself from constantly checking the ambient temp around the carboy. I feel like a new mom checking on her baby.
 
I just removed the blow-off tube. I pitched the yeast on Thursday at 2:00 PM and I'm 3 days into primary fermentation. It went like crazy 6 hours after pitching, and then slowed considerably the last day or day and a half, but there are still tiny bubbles just underneath the krauzen. I sanitized the airlock and filled it with vodka before adding it on in place of the blow-off tube. I'm planning to let the primary go for 3 weeks total, so just another 18 days to go *sigh*
 
Nice job, man. BBS's Everyday IPA was my first homebrew experience.

Things I've learned since then:

1) During the mash, take the pot off the heat as soon as your stir in the grains. Then, wrap the pot on all sides with a towel, blanket, sleeping bag, etc. and don't open it up to monitor temps. You can wedge that thermometer in between the pot and lid and just leave it peeking out, if you really want to keep an eye on it. But my guess is, if you wrap it up, you won't lose more than a degree over your 60 minute mash, assuming your pot is stainless steel as opposed to aluminum (aluminum bleeds heat off faster than steel).

2) As mentioned, sanitation is really only necessary post-boil. It's never a bad habit to get into, but things don't necessarily need to be sanitary during the mash/sparge stage.

3) I leave my blowoff tube in until right before I want to bottle, then I put on the airlock. It's the easiest thing for me to do. They serve the same function, and I don't really see the point of switching one out for the other.

4) For your ice bath, try a sinkful or two of straight tap water first. I see it didn't take you long to cool the wort, but the difference between 212° boiling wort and 60° tap water is not significantly different than that between the wort and 32° ice water. If you use tap water first, and get the temps down to 90°-100°, and then use an ice bath, you won't need nearly as much ice. Your call, but I've found it's almost just as fast, and I only need 4 or 5 trays full of ice instead of twice that.

5) If you have the chance, get a bottling wand before you bottle. It is literally a lifesaver. It's so much easier to use than that thumblock that comes in the BBS kits.

6) When siphoning, practice with water first. There's nothing more annoying than struggling with your siphon as the beer is sitting open, just begging to have a dog hair fall in or something. Also, you can fill you wand/tubing/bottling wand with water or a sanitizing mixture to prime your siphon (a spray bottle works great for this). Hydrostatic pressure will keep the liquid from dripping out, and it will lead to a faster siphon, as well as minimize bubbling through the tube.

7) Ignore the schedule on their kit instructions. You'll only do better by leaving stuff in there longer, be it fermentation or bottle conditioning. I'd double everything they say, as a decent rule of thumb.

Hope some of this helps make brewday a little easier. Welcome to the obsession!

Thanks for these tips! I did a quick google search for what a bottling wand was, and it looks exactly like what I need. However, I already ordered an auto-siphon...Can you use a bottling wand and an auto siphon together?

Example: After my primary fermentation, I want to use the auto siphon to extract the beer into my bottles, using the bottling wand to fill them. Will this work? Can you use both at the same time? Thanks again...
 
Yep, that'll work fine, though you might have to practice some first. I imagine you'll have to keep the valve on the wand open while you start the siphon, but that shouldn't be too hard.. If you move to bigger batches, you'll probably opt for a bottling bucket for that process, but an autosiphon will still be very valuable. Just remember that they don't play well with hot liquids.
 
Yep, that'll work fine, though you might have to practice some first. I imagine you'll have to keep the valve on the wand open while you start the siphon, but that shouldn't be too hard.. If you move to bigger batches, you'll probably opt for a bottling bucket for that process, but an autosiphon will still be very valuable. Just remember that they don't play well with hot liquids.

Thanks for all your help
 
Yep, that'll work fine, though you might have to practice some first. I imagine you'll have to keep the valve on the wand open while you start the siphon, but that shouldn't be too hard.. If you move to bigger batches, you'll probably opt for a bottling bucket for that process, but an autosiphon will still be very valuable. Just remember that they don't play well with hot liquids.

Hey man, just a few more questions (if you don't mind)...

So right now, I've got the basic Brooklyn Brew Shop equipment. I'm looking to triple my set-up by buying 2 more carboys and thus, all of the equipment I need to go along with them. You already told me to get these, which I totally plan on doing:

38mm Plastic Screw Cap with Hole

Here are the 1-gallon glass carboys I plan on buying:

1 Gallon glass Jug

Here are the airlocks I'm picking up:

Airlock 3 piece type

Now, with regards to the bottling wand, what one would you suggest...Other than the sizes (which I'm not sure what size I actually need), I don't really know the other differences:

Combination Bottle Filler (3/8 Spring Or Springless)

Fermtech Bottle Filler

Combination Bottle Filler (1/2 Spring Or Springless)

I already ordered (and it's currently shipped) the auto-siphon from BBS as well:

Mini Auto-Siphon | Accessories | Store

Will this auto siphon jive with the above bottling wands?

Dude, thank you for all of your suggestions...I feel like you understand exactly what my set-up is, which is why I'm picking your brain.
 
Good notes! I'm also a BBS brewer. I'm a big fan of the 1 gal brew. Perfect set up for what I want to do. I have 4 1 gal jugs and I can brew up a batch every weekend or so. I highly recommend their book that just came out. I have brewed about 4 of their recipes so far. I have started tyring new recipes from this site and other brews I wanted to clone and scaled them down to 1 gal. I did buy a bottle wand and an auto siphon. I also made a bottling bucket and the best thing ever, a 5 gal MLT from a cooler from lowes. This saved me a ton of work and less mess to deal with. I suggest you do this. I get about 9 to 10 bottles and I'm good with that. But my goal is to keep rotating batches. Hope your beer turns out good!!
 
I'm sure that auto-siphon will work with the tubing you already have. Any of the bottling wands should work, but you may want to verify with the supplier what the ID and ODs are, to ensure compatibility with your tubing. They make them fairly universal, but you never know.

Also consider getting this stuff from a local HBS or wine-making store, if you have one local. You'll save some money on shipping, depending on what their prices are in-store. Also, you can bring in all your other stuff and test fit it, so you know it'll all work together. I got my bottling wand locally for a couple bucks, but I'm nowhere near you, so who knows.

Good luck. I'm happy to help, so let me know if you need anything else. I love the idea of people starting in AG on a manageable scale.
 
I have a BBS kit, but I've added an auto-siphon and bottling wand (and a buch of other stuff). I have the fermtech, and can heartily agree that you have to practice with water first. It took me quite a few tries to get the siphon going smoothly. What I realised is that you have to have the bottling wand depressed, so it's open at the bottom when you start the siphon, and once the water is flowing freely with no air in the tube, you can raise the wand, so the flow stops. If you do this will boiled-cooled water, your siphon is primed and ready to be used for the beer. At first I was doing long smooth pumps with the auto-siphon, but eventually realised that a couple of small pumps was all that was needed to get it going, so long as there was plenty of water and the siphon was fully submerged.

I also got the BBS book, and I think that is far more useful to me now that I've done a couple of batches, I think it was actually a pretty bad book as an introduction to brewing. Now that I know what to expect, it's a pretty fun recipe book.

I would also +1 the advice to find these smaller pieces of equipment in your local homebrew store. My local ones charge the same price as the online places, but I don't pay for shipping, so it's easy to pick a couple of things now and again, as I need them, rather than having to worry about getting it all in one order.
 
Back
Top