Igloo 7.1 CuFt Keezer Build

Homebrew Talk - Beer, Wine, Mead, & Cider Brewing Discussion Forum

Help Support Homebrew Talk - Beer, Wine, Mead, & Cider Brewing Discussion Forum:

This site may earn a commission from merchant affiliate links, including eBay, Amazon, and others.

tomcho74

Active Member
Joined
Jan 27, 2015
Messages
25
Reaction score
13
So after about 3 weeks of off and on work I finished my Keezer build. A huge thank you to many great posters and builds here on HBT. My build is combination of ideas from many different builds. A special thank you to GraintoGlass as most of my ideas were "borrowed" from his build.

I started this project with a post debating on buying a dual tap kegerator versus building my own. That thought quickly changed to I might as well built a 4 tap keezer and skip the intermediate mini-fridge kegerator step.

Onto the pictures!

I found a good deal on new/refurbished freezers locally on ebay. This 7.1 CuFt Igloo was $169 and I picked it up locally

img_1817-67009.jpg


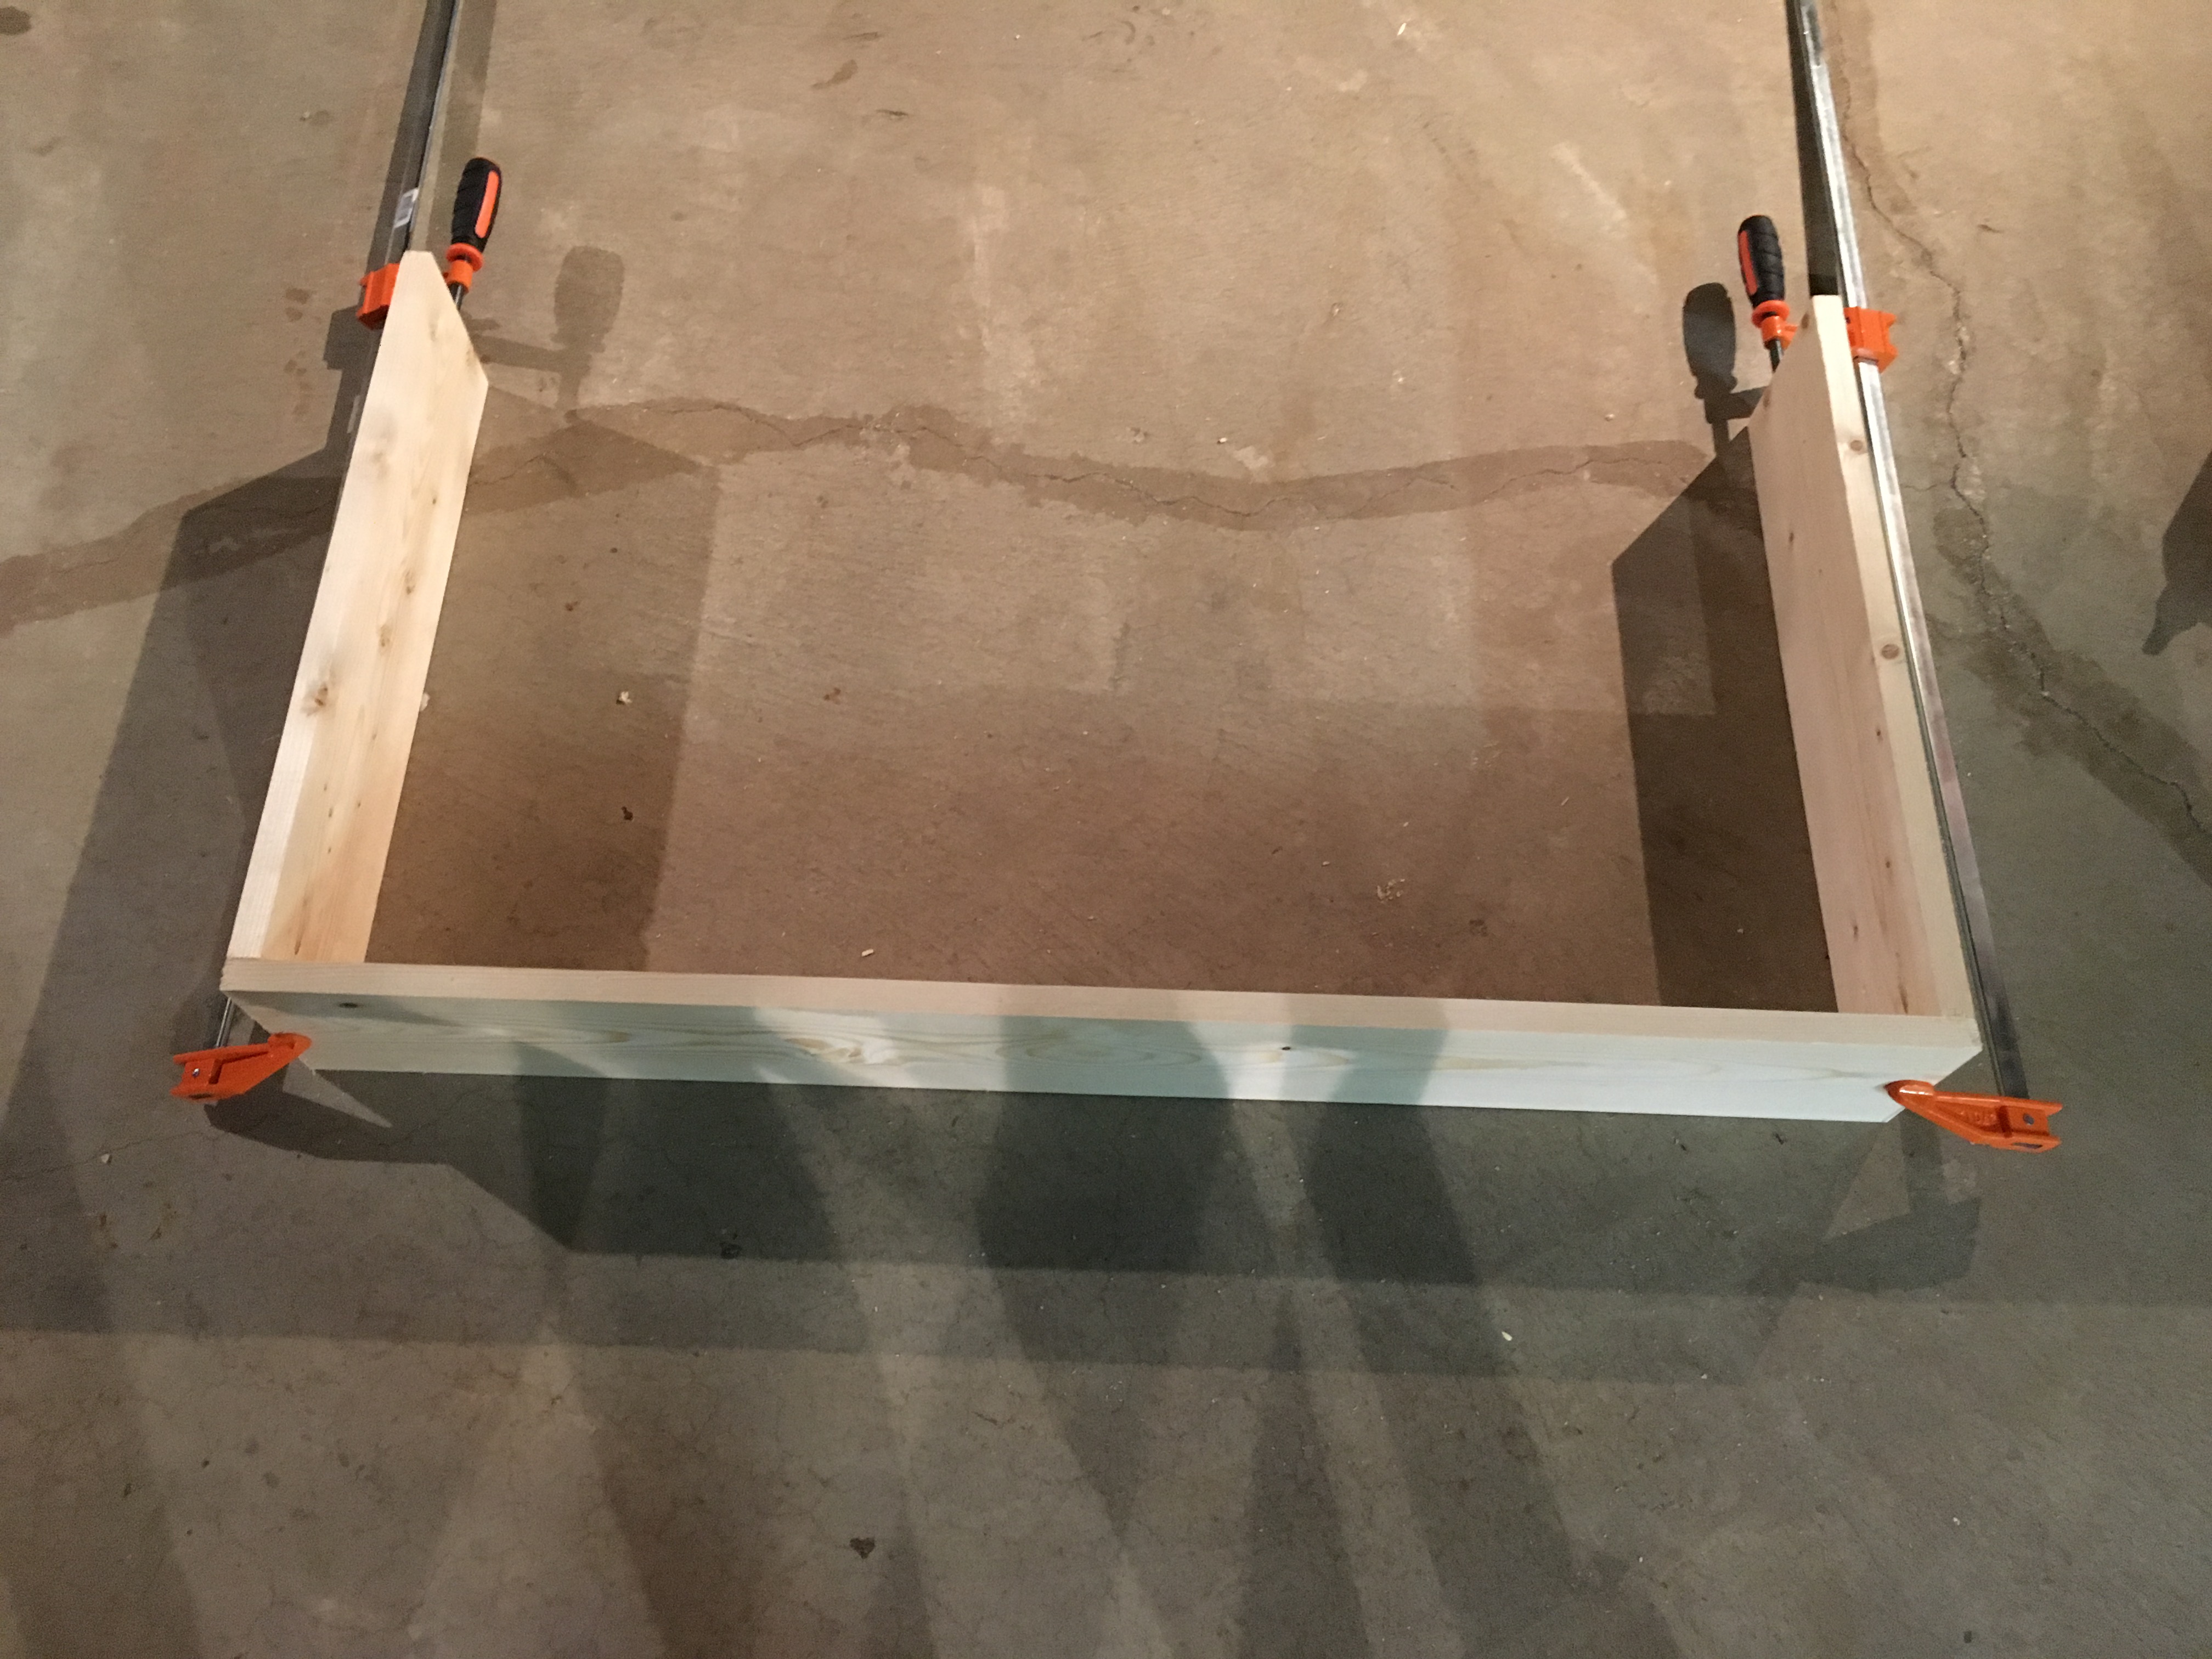
I decided I wanted the ability to easily move this around in my mostly unfinished basement so I built a caster frame for the freezer.

img_1865-67010.jpg


Freezer on base with casters

img_1867-67011.jpg


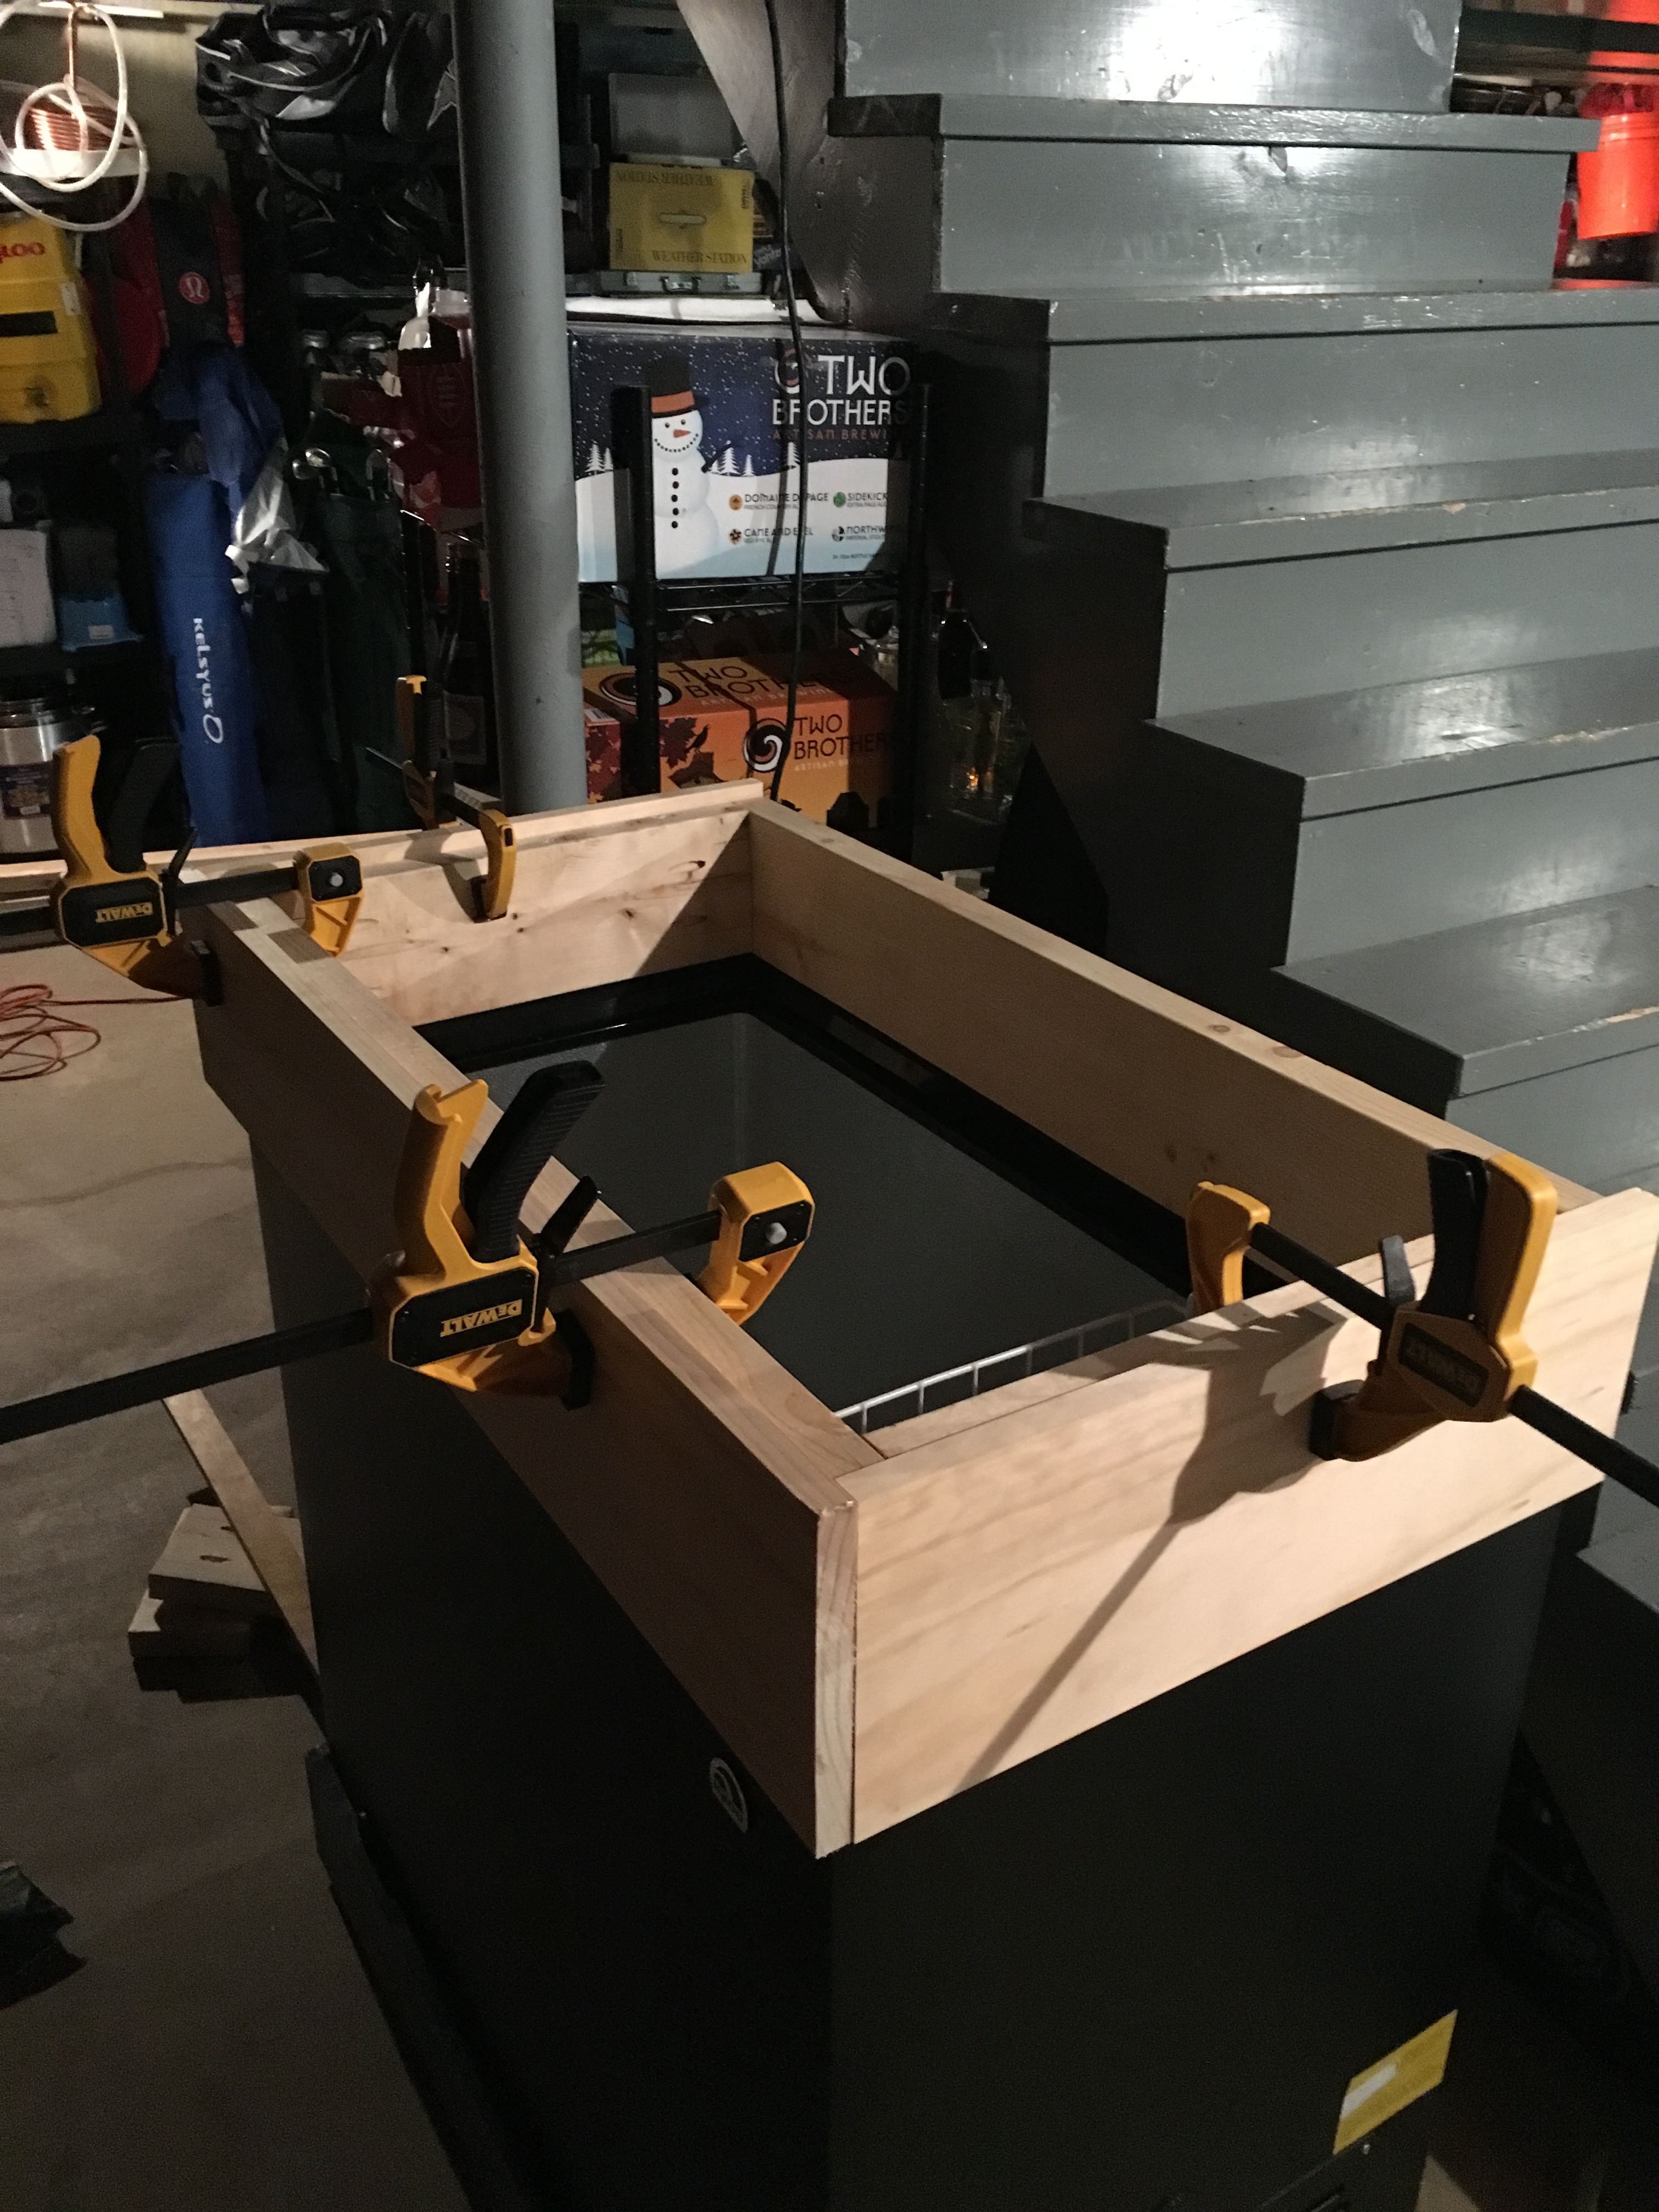
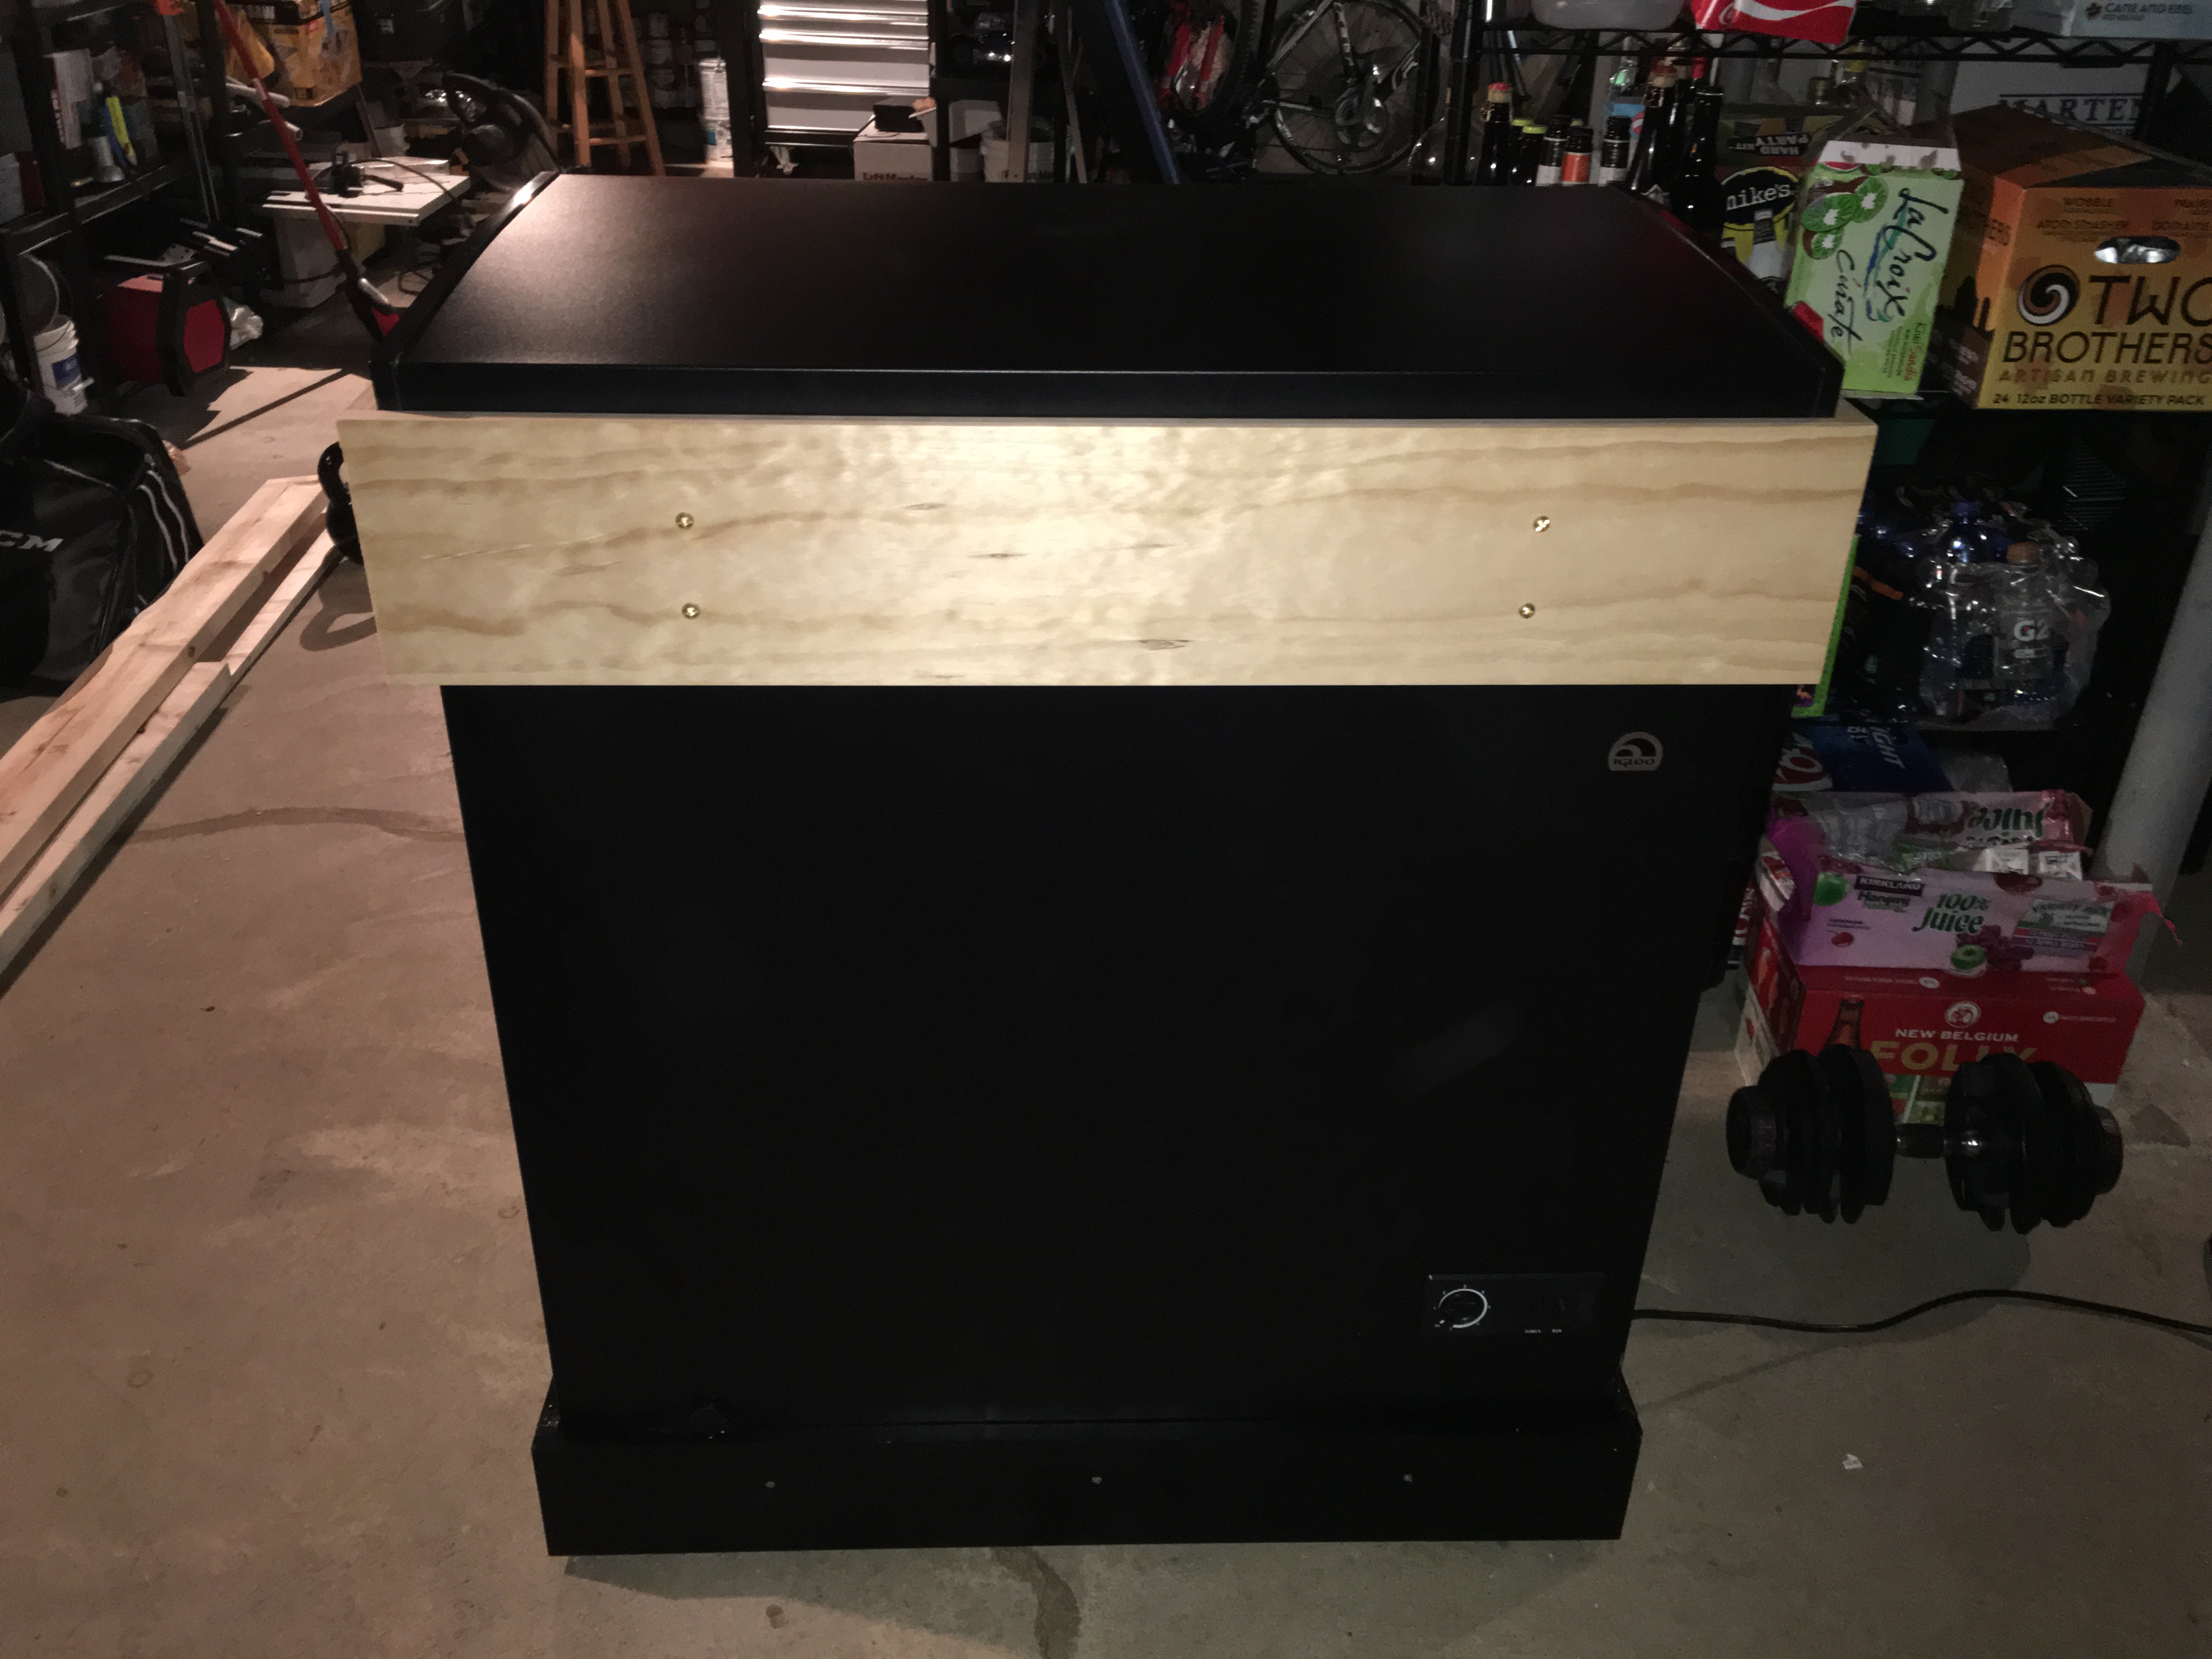
I then built a collar for the base and painted it black to match the freezer.

img_1875-67012.jpg


img_1912-67013.jpg


Next up was to build the collar. I used a two piece design with 2x6 for the inside and 1x8 for the outside. The way it's built the inner collar sits on the freezer and the outer collar secures it to the freezer frame. I did lay a bead a silicone down but it's mostly secured by the weight of the wood/equipment on the collar.

img_1977-67029.jpg


img_1981-67014.jpg


img_1984-67015.jpg


img_1985-67016.jpg


The interior insulation is 1" EPS with a few layers of foil tape.

img_2159-67017.jpg


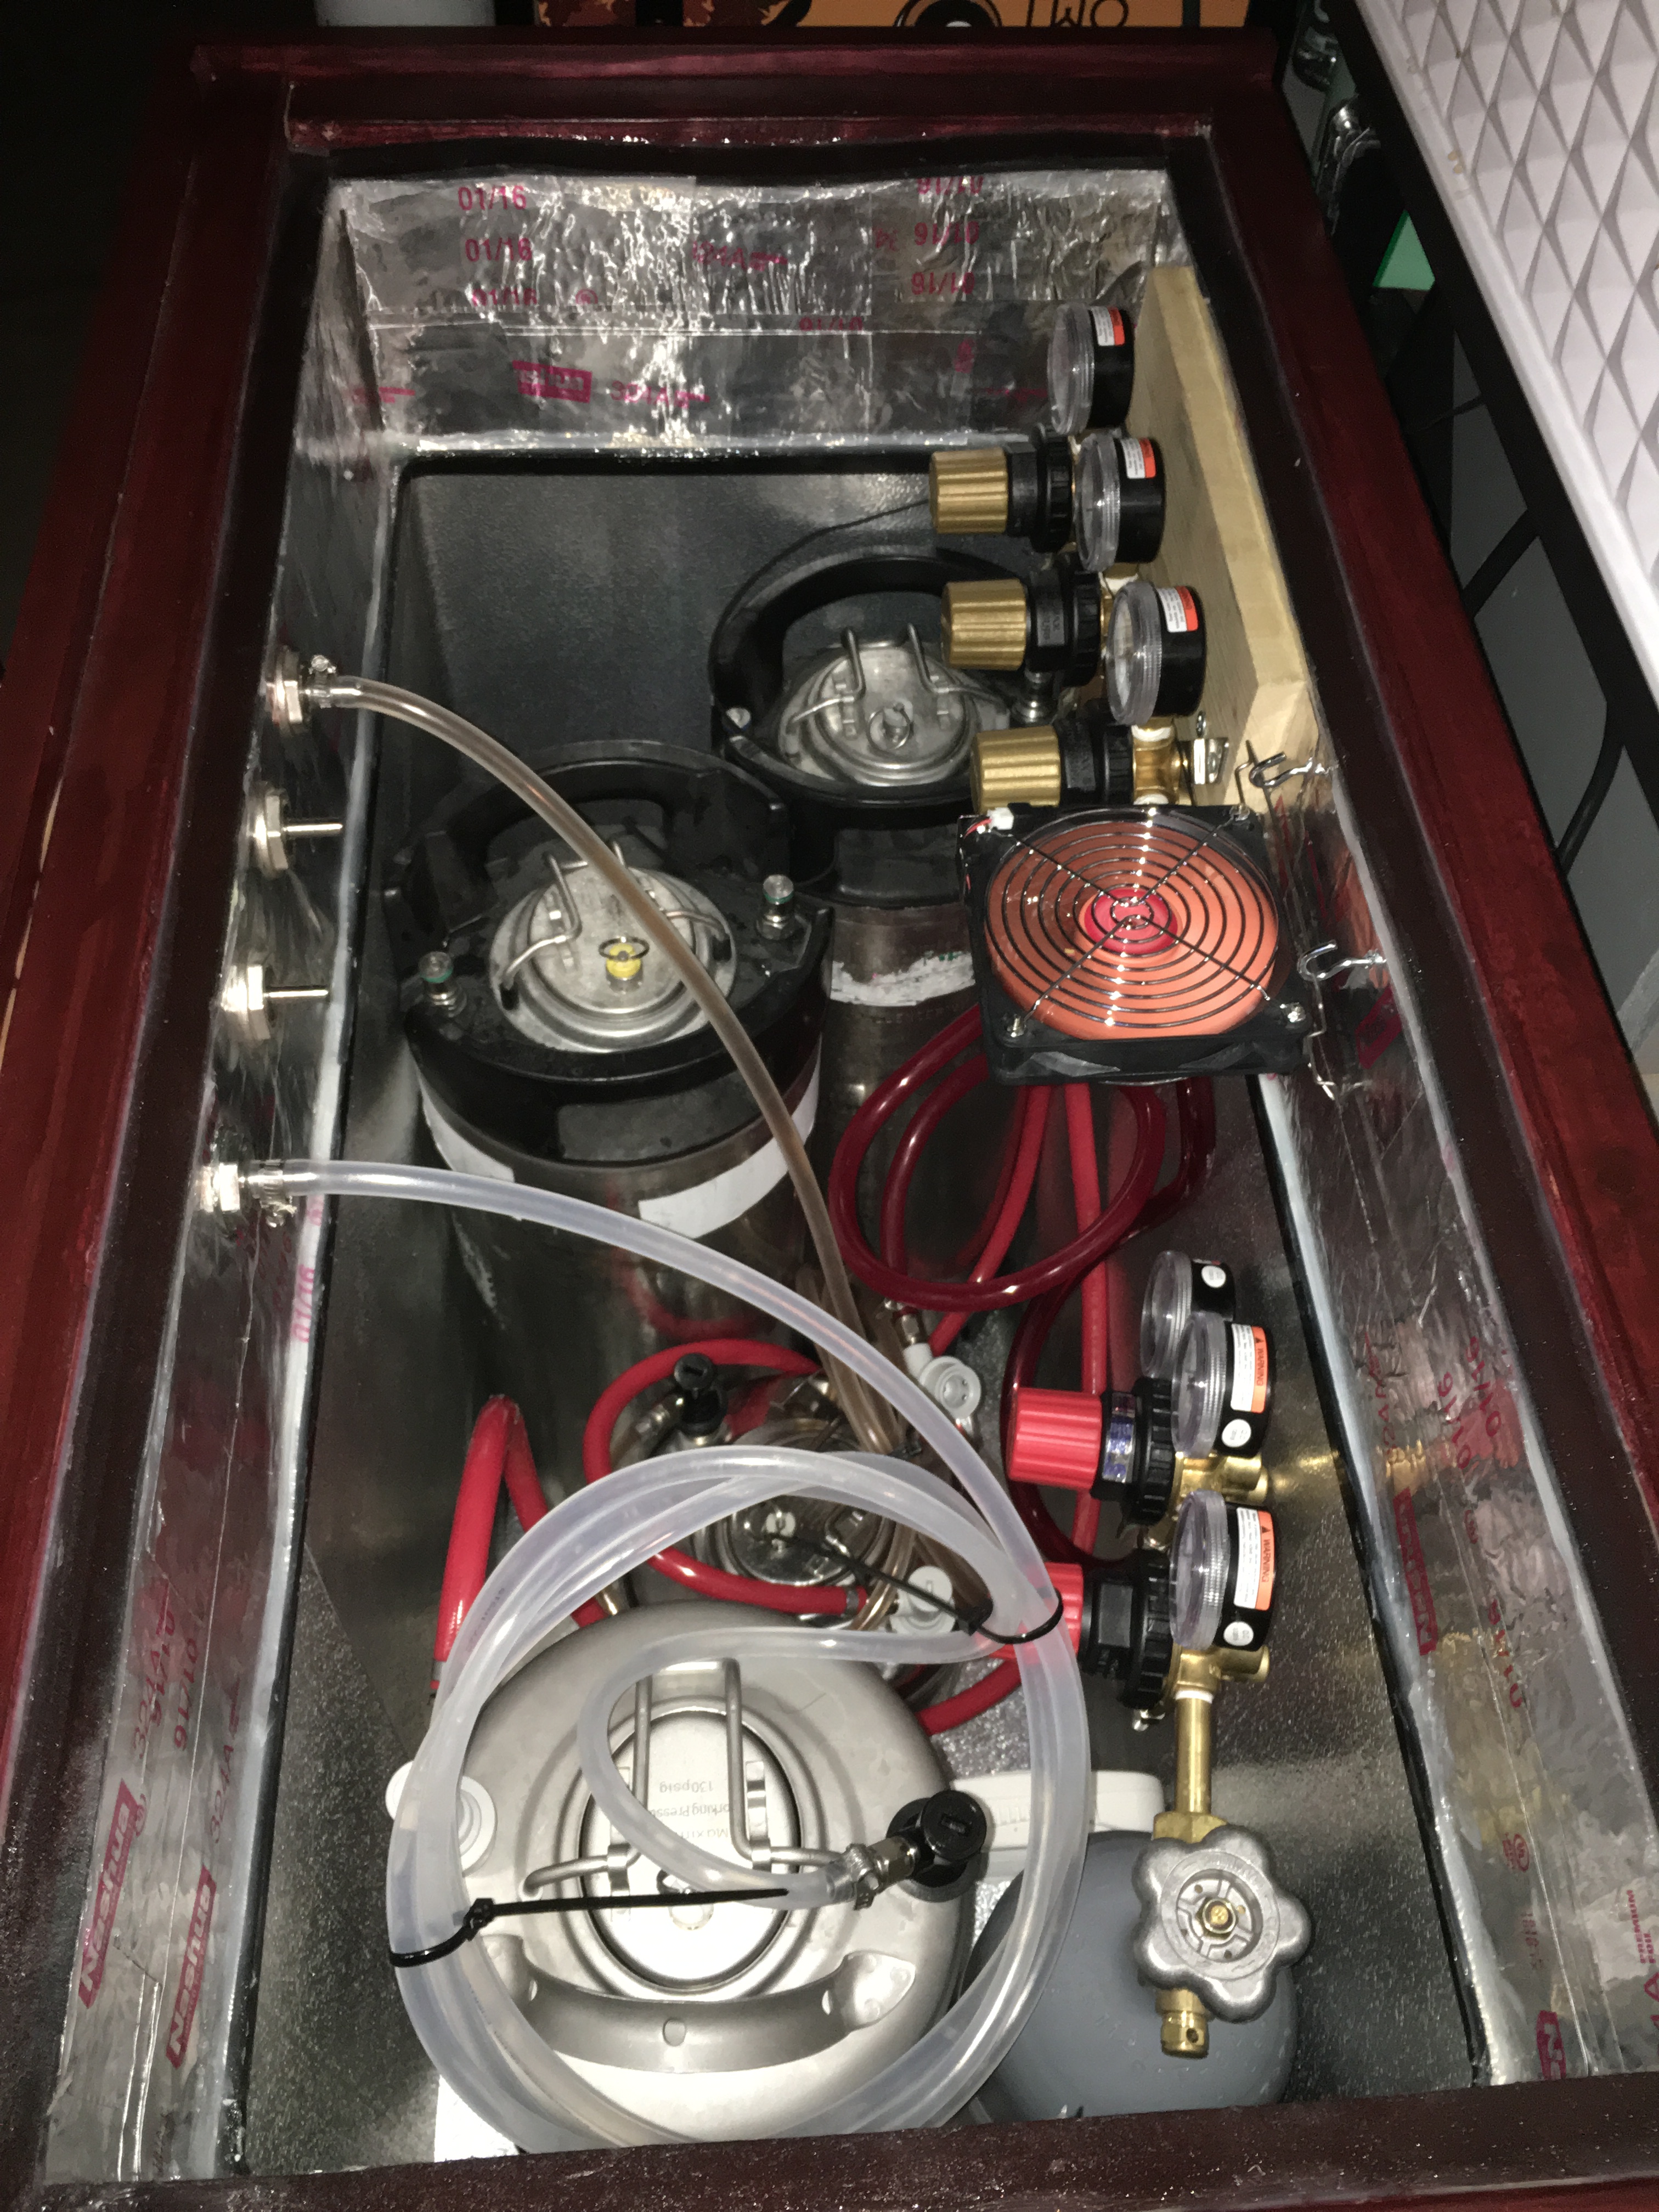
I have a Taprite dual primary and a taprite 3 way secondary.

img_2164-67019.jpg


img_2163-67018.jpg


Currently there are 4 kegs inside, 2 5gl ball lock cornies, 1 2.5gl(caribou slobber) and 1 3gl(flavored sparkling water). Next up is to step up my brewing to fill those 2 5gl kegs.

The faucets are 3 Perlick 630s and 1 650s. I'm really happy how this came out and was a relatively easy project. If any new keezer builders have any questions feel free to ask!

img_2165-67030.jpg


img_2157-67020.jpg
 
Looks nice! I especially like the way you "hid" the caster base.

Fridge came in black? AWESOME! What's the model number on that fridge?

Do you feel like that collar would have stayed put without the silicone bead?

OK you said 650ss, so that triggers a knee-jerk response in me...can you check the bottom of that faucet and tell me what the lot code is on it?
https://www.homebrewtalk.com/showthread.php?t=575364

(For that matter, can you also tell me the lot codes on your 630ss faucets, I'm curious about something)

Thanks!
 
Very nice. A few questions, if you don't mind...

I especially like how you have the drip tray back section going "under" the outer collar. Is that one of those trays that has a high back and holes cut out for the taps? What is the spacing between the taps?

Also, it looks like your secondary regulator is mounted to a piece of wood or plywood? How is it secured to the collar?
 
Looks nice! I especially like the way you "hid" the caster base.

Fridge came in black? AWESOME! What's the model number on that fridge?

Do you feel like that collar would have stayed put without the silicone bead?

OK you said 650ss, so that triggers a knee-jerk response in me...can you check the bottom of that faucet and tell me what the lot code is on it?
https://www.homebrewtalk.com/showthread.php?t=575364

(For that matter, can you also tell me the lot codes on your 630ss faucets, I'm curious about something)

Thanks!

Thank you, the freezer is an Igloo FRF470. This is where I bought it, I paid $169
http://www.ebay.com/itm/Chicagoland-Pickup-Igloo-7-1-Cu-Ft-ENERGY-STAR-Chest-Freezer-Black-FRF470-/252126398778


The collar definitely would have stayed without the silicone, I mostly did it as a sealer to keep the collar as airtight as possible.

I've read your sulfur thread and I don't smell anything but I've only run about 2 gallons of carbonated water through the 650.

650 Lot #A1115G
630 Lot #A1215K - These are all the same
 
Very nice. A few questions, if you don't mind...

I especially like how you have the drip tray back section going "under" the outer collar. Is that one of those trays that has a high back and holes cut out for the taps? What is the spacing between the taps?

Also, it looks like your secondary regulator is mounted to a piece of wood or plywood? How is it secured to the collar?

Correct the drip tray is sandwiched between the 2 collar layers. This is the model I bought
http://www.kegconnection.com/drip-tray-for-4-faucets-16-wide-with-drain/

I completely stole the drip tray idea from GlasstoGrains build. I cut off the drain nipple and just plugged the hole inside the tray with a small rubber stopper.

Drip Tray Faucet Spacing Measurements:
From the outer edge to the center of the first hole = 3”
From center of one hole to the center of the next hole = 3”

The secondary is attached to a piece of 1x5 that I cut down. I just used 3" bolts to attach through both layers of the collar.
 
Nice build, I'm in the middle of mine. I've seen some with fans and some without. Do you run your fan all the time?

Yes the fan is USB powered, I just ran the cable through the same hole as the temperature probe and it's plugged into an iphone adapter. It runs 24/7 and it's barely audible with the lid closed.
 
Correct the drip tray is sandwiched between the 2 collar layers. This is the model I bought
http://www.kegconnection.com/drip-tray-for-4-faucets-16-wide-with-drain/

I completely stole the drip tray idea from GlasstoGrains build. I cut off the drain nipple and just plugged the hole inside the tray with a small rubber stopper.

Drip Tray Faucet Spacing Measurements:
From the outer edge to the center of the first hole = 3”
From center of one hole to the center of the next hole = 3”

The secondary is attached to a piece of 1x5 that I cut down. I just used 3" bolts to attach through both layers of the collar.

So the bolts go through the insulation into the collar? Do you have any issues with the 1x5 being loose, or the collar insulation getting crushed?
 
So the bolts go through the insulation into the collar? Do you have any issues with the 1x5 being loose, or the collar insulation getting crushed?

Through the 1x5, through the 1" EPS insulation, through the 1x6 and through the 2x6". Come to think of it i think I used 4" bolts. There is no issue with looseness or crushing at all. The 1x5" is wide enough to spread the pressure against the insulation to prevent crushing. I'd imagine I'd need to crank down those bolts way tighter than need be to crush any insulation.
 
I really like this!!
My wife just snagged me a cheap freezer and im thinking of going this route.

What kind of 1x8 wood did u use for the outer collar?.
 
I knew this would be in my basement so the outer collar is just select pine. Less expensive than oak, cherry, etc
 

Latest posts

Back
Top