GE 7.0cf Keezer

Homebrew Talk - Beer, Wine, Mead, & Cider Brewing Discussion Forum

Help Support Homebrew Talk - Beer, Wine, Mead, & Cider Brewing Discussion Forum:

This site may earn a commission from merchant affiliate links, including eBay, Amazon, and others.

soccerguy83

Well-Known Member
Joined
Aug 25, 2014
Messages
219
Reaction score
29
Location
Richmond
I haven't done much with brewing lately other than drink what I brewed back in Jan.

The reason for that is that I am storing my first keg of beer in my fermentation chamber because I didn't have anywhere else to keep it cold. As my fermentation chamber is occupied, I can't brew again!

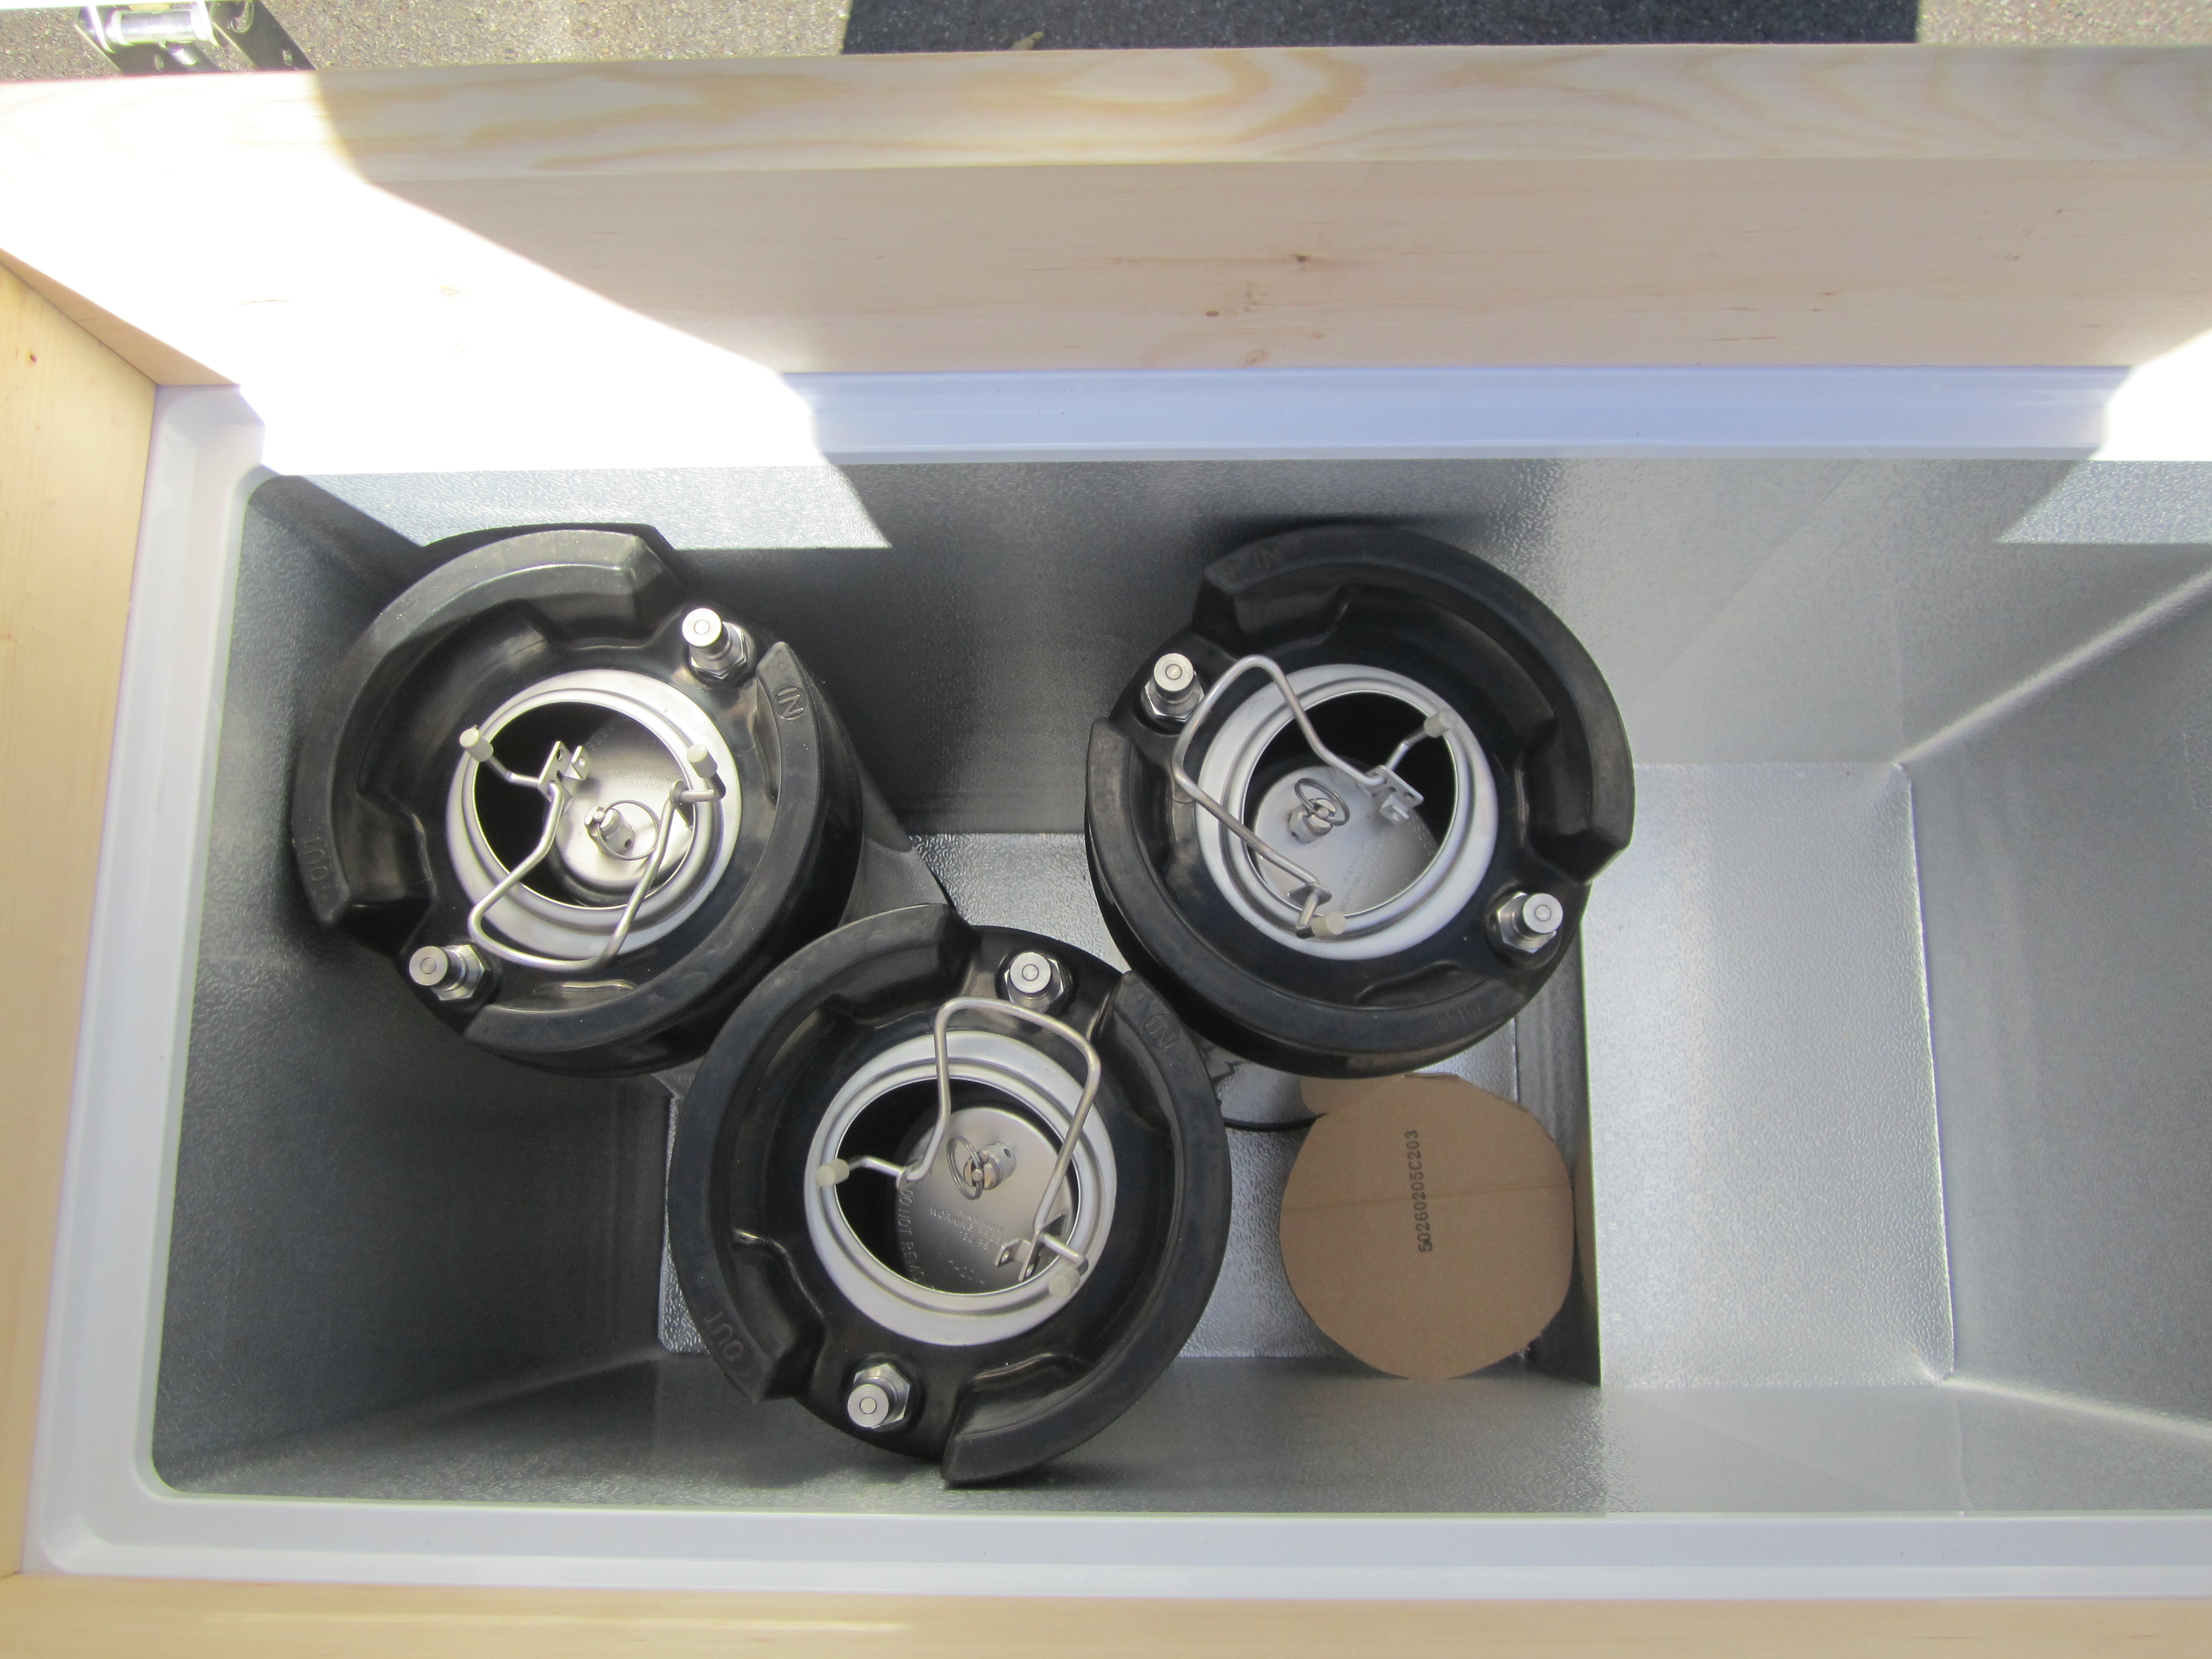
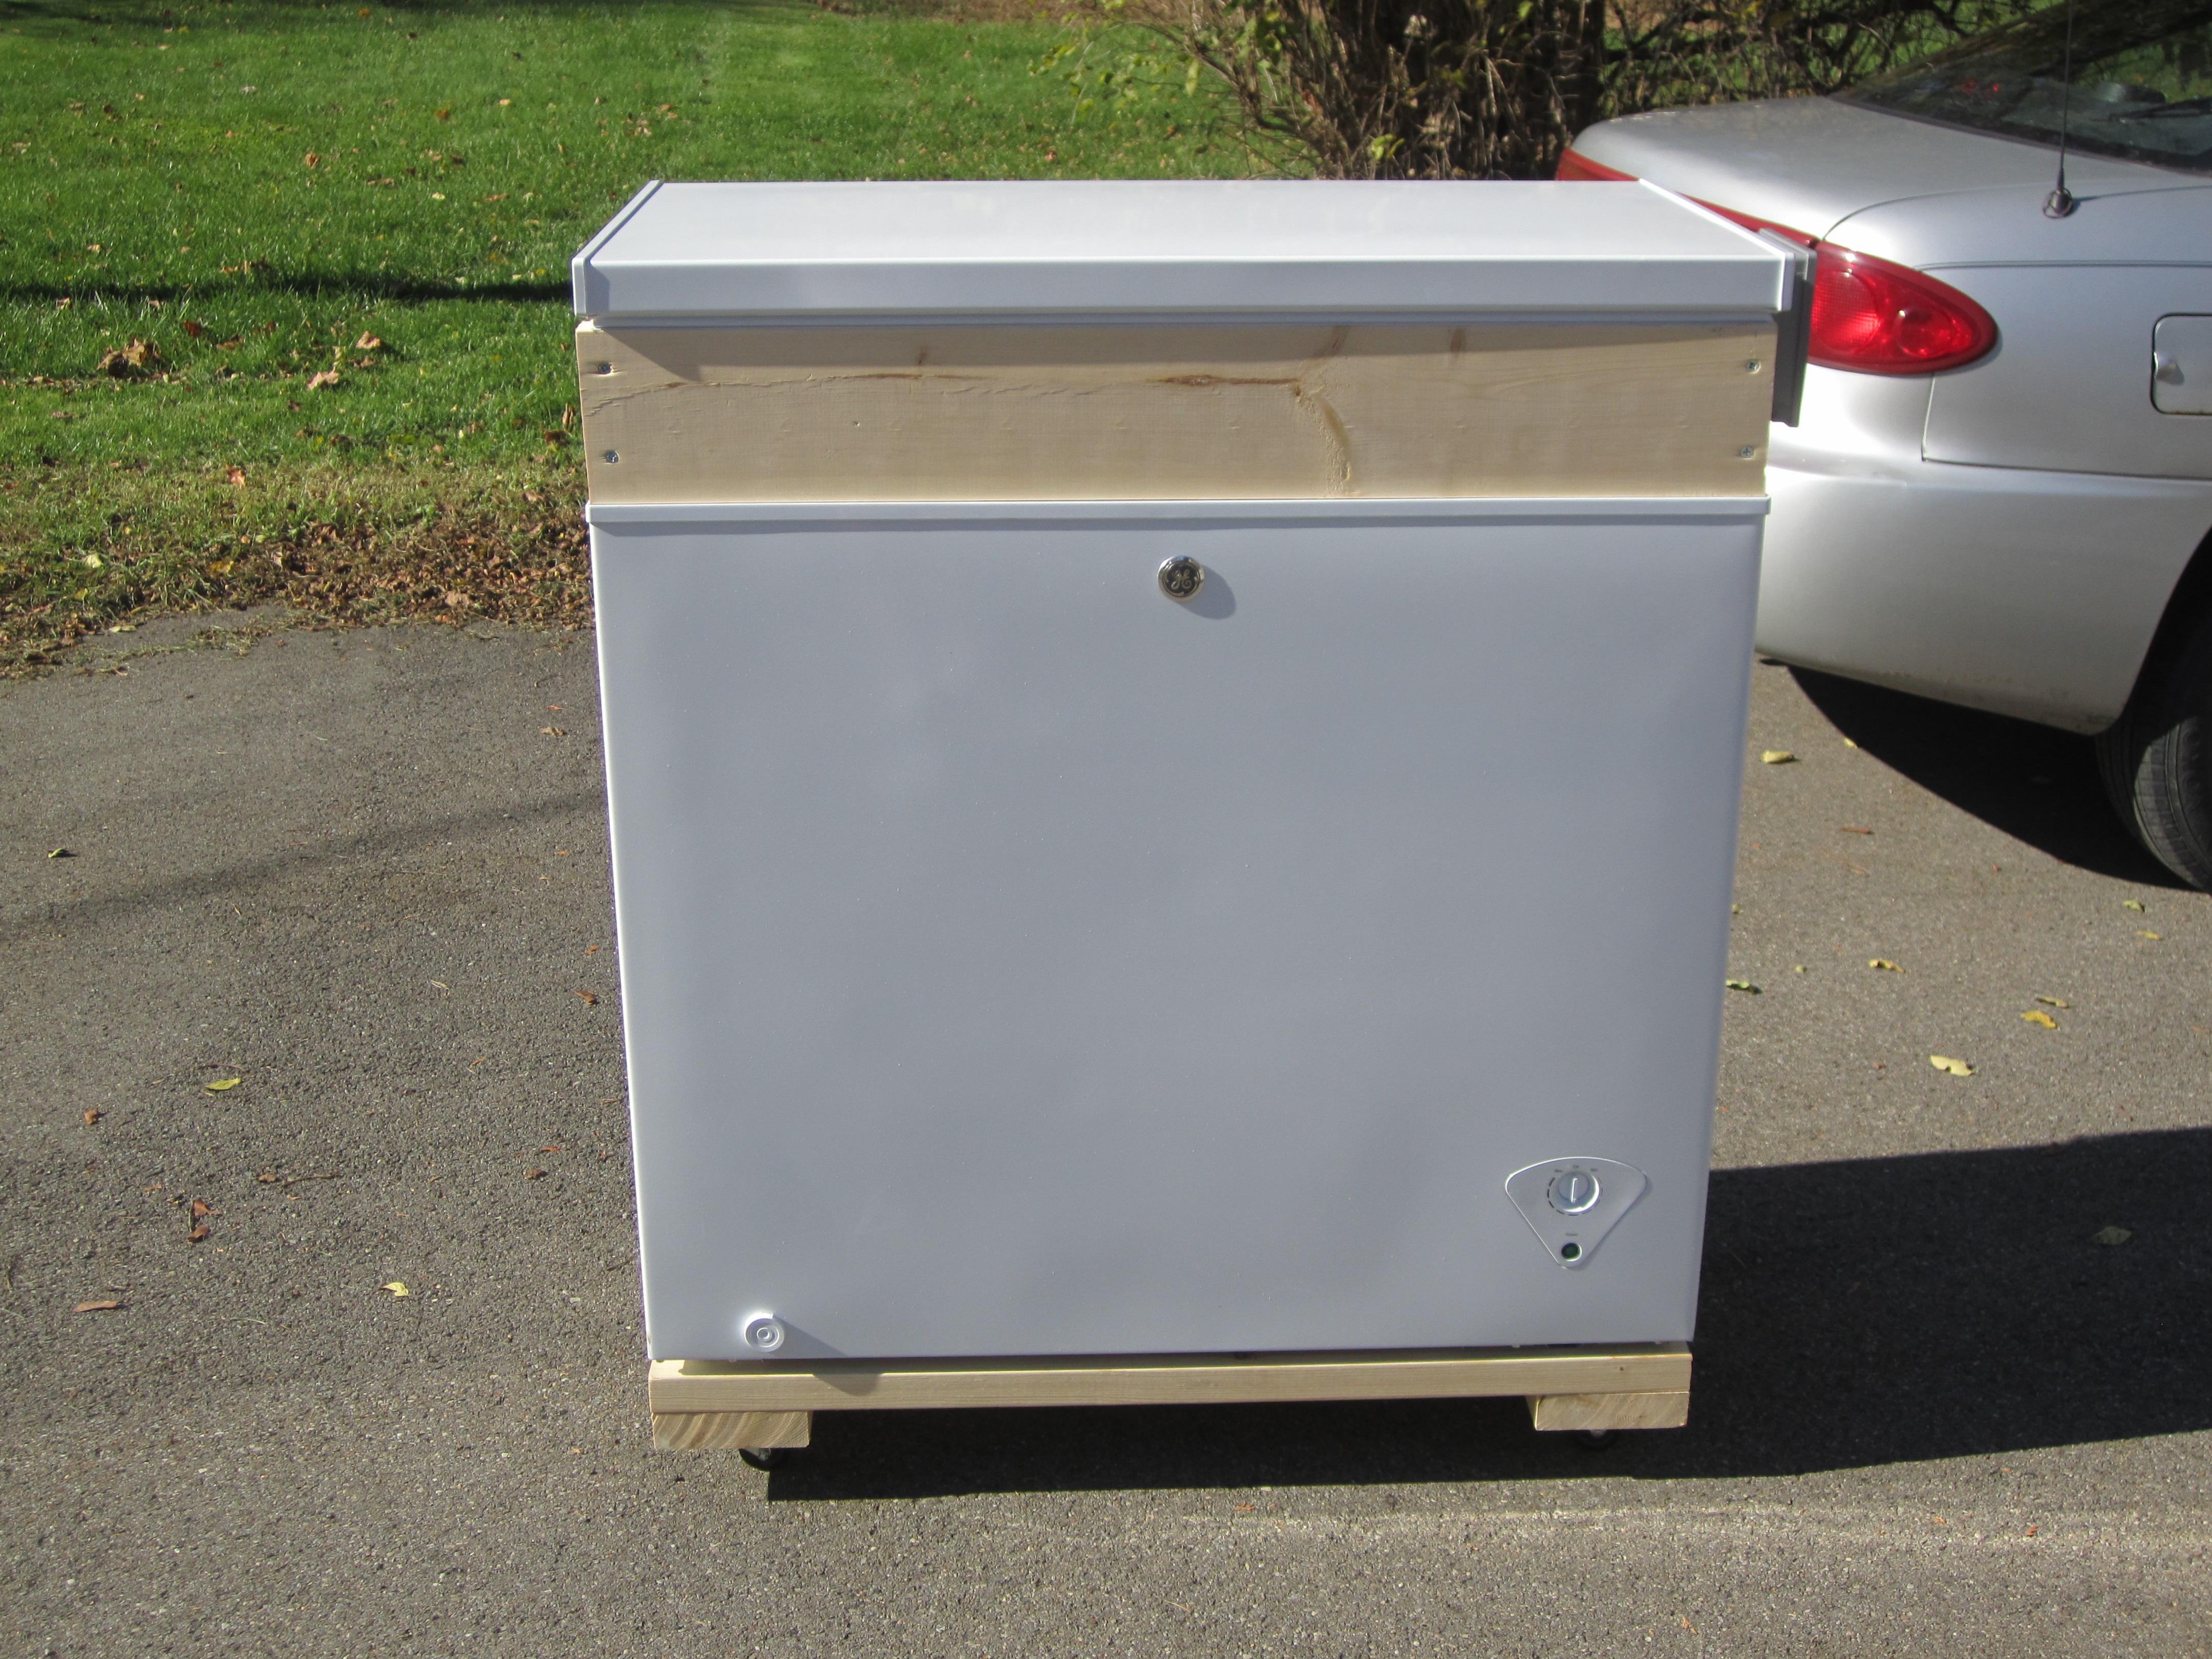
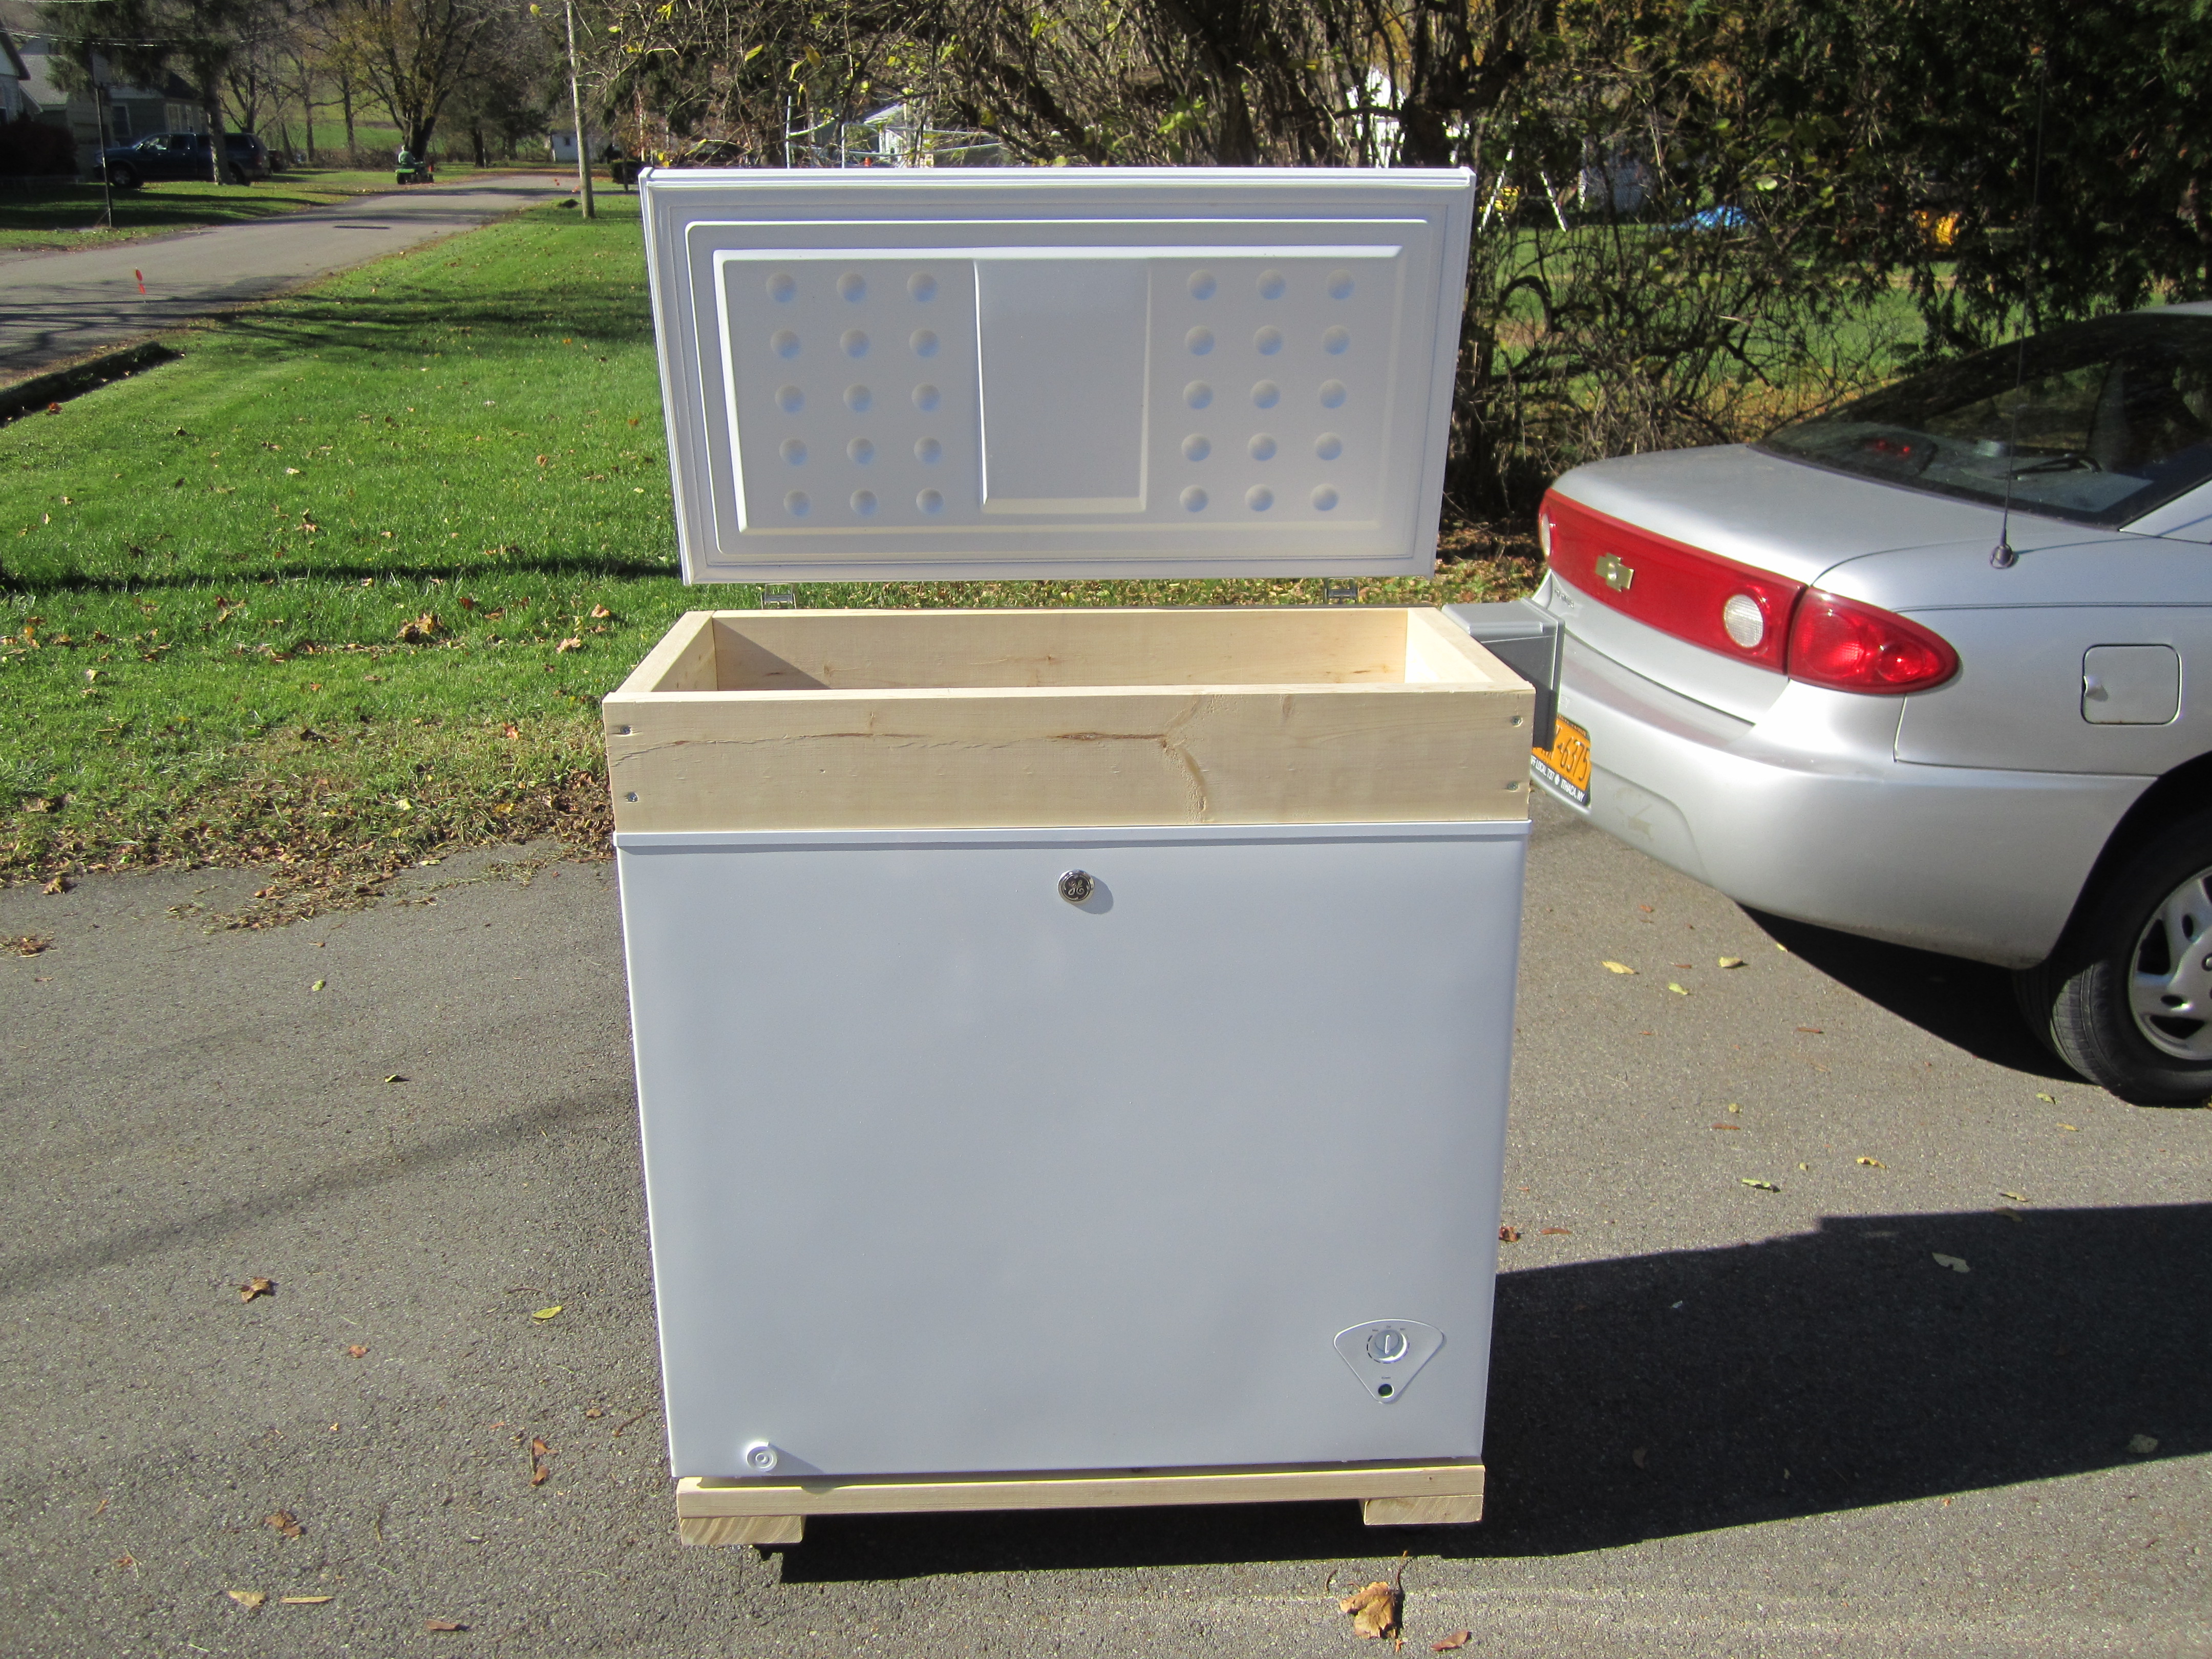
That changes today! This evening I'm going to pick up a used 7cf GE freezer for $75. This will be turned into my Keezer! It will fit 4 ball locks in the deep part and still have room for a 5# CO2 tank on the hump. I'm going to put on a 2x4 collar and add 4 Perlick faucets to the collar. I may even put in a stout faucet, we will see. The plan is to have three beers on tap, and one soda for the wife while she is pregnant. Come Aug, that soda will switch out to another beer until the little one is old enough for soda, then it will most likely switch to root beer or ginger beer.

As always will add pictures as I go along!
 
Well it's been about a week since I picked up the freezer, man life gets in the way quickly. I got a screaming deal on this thing, it is in perfect shape. I borrowed a few kegs to test fit and it will hold four tightly but they do fit!

Now onto the build planning. The plan is to mount a 2x4 collar to the underside of the lid. To that I will mount 4 faucets, a two way distribution block, 3 secondary regs, and a fan. This will allow me to run, four different pressures if I would like.

First step is figuring out how to get the seal off the top, it looks like its sandwiched between the top and the plastic sheet on the bottom of the top. I would like to re-use both.

I also would like to paint the keezer with chalkboard paint, what prep work needs to happen prior to painting it?

Thanks as always.
 
I used a very fine sand paper, and a palm sander to knock down the gloss on the freezer and give the new paint something to stick to. The collar goes between the lid and the chest, secured with silicone calking. Good luck.
 
Thanks Tom.

Yep I have the whole collar thing down as I have already built a fermentation chamber. On that one though I used 2x12 and mounted it to the base and just attached the lid. This one I want to mount to the lid. I think I found that I can remove the seal by hand from the lid.

I found that my secondary regulators are too big to mount to the collar if I just use 2x4. To fix this I will be moving the tank to the outside and building a rack that will sit on the hump that will house my regulators. The manifold will be attached to the collar just above the regs.

My 4 Perlick 425ss will be coming in today. I got my Johnson Controls digital in yesterday. I got all my lines and QD's from my LHBS store the other day along with my 2 way manifold. Now I just need to figure out if I want to put a facing on the collar or not to see what length shanks I need to order.

Making progress slowly!
 
You are moving along quicker than me. I have all the parts, I just have to put the time in. Last week I brewed and want to keg instead of bottle. Hopefully, that will put some spring in my step.
 
Wow, blast from the past, I still have the collar assembled and haven't done anymore with this project, gah!

This weekend the Wife has given permission to move things along so that I can get my two kegs out of the ferm chamber and get another batch brewing. The next batch will be a Christmas ale, that I need to get going SOON!

Will post updates as they happen!
 
Looking forward to your progress.
I did my Christmas ale a month ago.. Going to keg it tomorrow.:mug:
 
Yeah I am not sure that I'm gonna get the Christmas Ale done in time. Will be brewing next weekend as long as I get this project done haha. Worst case is that it's a bit green for Christmas and needs a bit more time.

This past weekend, I got my taps sorted and put some pollyshades pecan gloss on the collar. I also got the collar attached to the lid and sorted all my lines. Made a trip to HD and got my remaining parts, minus a replacement seal :mad:.

The next step is to mount the secondaries to the inside of the lid, mount the lid, put the seal on. Then run lines! Shouldn't take too long once I have two seconds to do it.

View attachment ImageUploadedByHome Brew1446487343.678700.jpgView attachment ImageUploadedByHome Brew1446487353.724657.jpgView attachment ImageUploadedByHome Brew1446487364.543586.jpg
 
Well... I'm building a keezer out of the same freezer, I didn't think that I could fit 4 kegs? Hmm... I have three and they fit fine but I didn't think that a 4th would fit. I'm using ball lock kegs, I only want 3 kegs and would like to use the remaining spot for a 20# CO2 tank. After seeing 4 kegs in the lower portion maybe a 20#'r would fit, being that they are 8" around and a ball lock keg is 9"? Thanks!
 
Guys I am about to you the same size freezer but I am thinking either a 2 x6 collar or a 2x8 collar, which would you recommend?:mug:
 
@daphatgrant, Yeah I thought that the freezer would only fit 3 as well, but it does indeed fit four. They are a very tight fit and you need to play with them a bit to get them to all fit (out of round slightly), but it will fit 4.

@chelishubby, You could do either, I put 2x12's on my fermentation chamber because I needed the height. I went with 2x4's on this build because I am only using kegs on the floor and a 5# CO2 tank on the hump. The 2x4's give me room to have my faucets and a bit of space for mounting my secondary banks to the underside of the lid. Where I will be using this keezer is at the end of my work bench and it just so happened that with 2x4's it also was the exact same height as my work bench, so plus there as well. Just do what works for you.

I will say you really should seal the wood. I didn't on my fermentation chamber and now the outside of the wood is no so nice looking. I will be sanding down that collar and putting some polyshade on that as well!
 
Guys I am about to you the same size freezer but I am thinking either a 2 x6 collar or a 2x8 collar, which would you recommend?:mug:
I am going with a 6" collar or 5.5" because I have it on wheels and didn't want the height to be insane. I'll post some pics tonight.

@daphatgrant, Yeah I thought that the freezer would only fit 3 as well, but it does indeed fit four. They are a very tight fit and you need to play with them a bit to get them to all fit (out of round slightly), but it will fit 4.

Thanks man :D
 
Well... I'm building a keezer out of the same freezer, I didn't think that I could fit 4 kegs? Hmm... I have three and they fit fine but I didn't think that a 4th would fit. I'm using ball lock kegs, I only want 3 kegs and would like to use the remaining spot for a 20# CO2 tank. After seeing 4 kegs in the lower portion maybe a 20#'r would fit, being that they are 8" around and a ball lock keg is 9"? Thanks!

I currently have three kegs in mine with a 20lb co2 tank. I have cobra taps and no collar. You can fit three kegs with a 20lb co2 tank, but its tight. So tight it takes some force to get the last keg in/out. The last time I tried I shook the kegs up a bit and they had to settle for a couple of days (you may or may not have this issue).

One issue I haven't solved yet is that I found the best fit for the co2 tank to be on the back right of the deep part so that the regulator hangs over the hump. Problem is, the regulator faces the back wall and is angled (so the lid shuts) so its hard to monitor and adjust. I also have a wye on my regulator which makes the fit a little more difficult. Eventually, I hope to have three secondary regulators so that could alleviate the problem. Hope this helps.
 
I am going with a 6" collar or 5.5" because I have it on wheels and didn't want the height to be insane. I'll post some pics tonight.


Thanks man :D

I think I have an older model, I'll get the number off the back tonight when I'm working on it.

I'm hoping to have this project almost complete tonight!:ban:

Gotta brew this weekend, need my damn FC back!:rockin:
 
I have two of these freezers, one old model and one new model. I can fit four ball locks in the old one but only three in the new one. The old one has the drain plug on the right, the new one has the drain plug on the left. That's been the most obvious difference between the two if it helps you identify which one you've got.
 
Thanks for the replies guys, I have one of the newer ones so a 4th keg isn't going to fit. I'm OK with that, I just really hope I can fit a 20#'r in there as well.

Here's a pic, cardboard circle is a little over 7"

7rfSXYK.jpg
 
Yeah you have the newer one, mine is the older one with the drain on the right. The model number is FCM7SUCWW.

I didn't get as much done last night as I would have liked too, my three month old son had different ideas! I did get up a bit early and work on it a bit this morning though.

Between last night and this morning, I got all my foam board insulation cut to size. I also got the shank holes cut in the insulation. I'm also going to be putting a corrugated plastic backer on the foam to make it look a bit nicer and make cleaning it a bit easier. I got all these pieces cut to size as well. This morning I also got the inside of the lid to collar attachment sealed up with silicone and placed my weatherstripping on the top of the freezer lip.

Next is install of my shanks and faucets then install of the insulation. Then I will be adding my secondary reg bank to the underside of the lid using drywall anchors. From there I will be mounting the lid to the freezer and then running lines!
 
Awesome man! I picked up my foam insulation and sanded the collars today. I'm interested in seeing what you did with the corrugated backer.

I'll take pics of it this evening, but it will be very similar to this. Only I will be using alum. tape from the collar wood over the foam to the backer.
 
I got a ton done this weekend!

I installed the 2-way gas manifold and 3 bank secondaries. I used drywall screw in anchors to do so. They are holding like a champ.

I installed the foam and corrugated backer this weekend, then put alum tape over it.

Next I fitted the lid with collar to the freezer base.

Ran my gas lines and beverage lines.

Then put a 6 coat chalkboard paint taplist on the lid.

I kicked my keg as soon as I was done gah!:(
 
Thanks for posting your build! I drug my mini fridge from storage to see about a kegerator build only to find out it's too small to fit a 5 gallon corny keg in (was about 3" shy in height). So I've been looking at chest freezers and the 7.0+/- cu. ft. ones can be found relatively inexpensive new (<$200) if one can't find a used one. Seeing your thread and now knowing that 3 kegs fit helps because I was unsure how many I could fit in one as I wanted at least 2, and possibly up to 4.
 
@daphatgrant, this plastic I found in the back of the store near doors. It was on an inconspicuous rack and they carried two sizes 36"x24" and 24"x18". This is what I bought.
 
@daphatgrant, this plastic I found in the back of the store near doors. It was on an inconspicuous rack and they carried two sizes 36"x24" and 24"x18". This is what I bought.

Thanks! Picked up two sheets tonight, haven't found anything good to use for trim, going to try asking the guy who's post you linked to see what he used.
 
I ended up grabbing some of this today to use as trim, it should work, I'll use white extreme weather silicone caulk to fill in the gaps. I'll post some pics soon.

@soccerguy83, thanks for allowing me to jump on your thread, it's been a ton of help and it's been nice to work on a similar project at the same time as someone else.
 
Collars were both pre-stained and then stained today, I'll grab a few pics when I get the polyurethane on and dried. I also changed how I had it opening, I by far prefer to have the collar lift up so you can get into the freezer easier. As soon as I get the collars polyurethaned I'll be ready to assemble it :D.
 
@daphatgrant, nice job! I look forward to seeing pics. I agree it's really nice to have your shanks and all lines lift out of the way when you want to work on something! I have zero regrets about doing mine this way.
 
Just an update but I found that the taps were never really secure being that one side was against wood and the other was on foam. To fix this I bought some 1" PVC pipe, cut it into 7/8" long pieces and put them in the collar around the shank shaft. Now when I go to tighten the shank bolt it pulls against the PVC pipe not only the foam. I can disassemble and throw up a pic if needed.

Cheers! :mug:
 
Back
Top