2 x 2 16 gauge - OK for 15+ gallons?

Homebrew Talk - Beer, Wine, Mead, & Cider Brewing Discussion Forum

Help Support Homebrew Talk - Beer, Wine, Mead, & Cider Brewing Discussion Forum:

This site may earn a commission from merchant affiliate links, including eBay, Amazon, and others.
A few weeks ago I hiked out to an 1898 steel railroad bridge. They leave 'em out in the weather, ya know.

120 years old, not a lick of paint, carries heavy freight and passenger excursions every day. Iron oxide is fine with me. Just call it organic.

Ha! That's a testament. One happy brewer one step closer! Thanks ancient!
 
You are welcome. I should probably mention, I live 500 miles from salt water. If you are near the sea that would change things a bit.

Thanks ancient. I was raised by the ocean, and miss it, but nope, square in dairy country, WI. There might be an issue with methane, but that's about it.:D
 
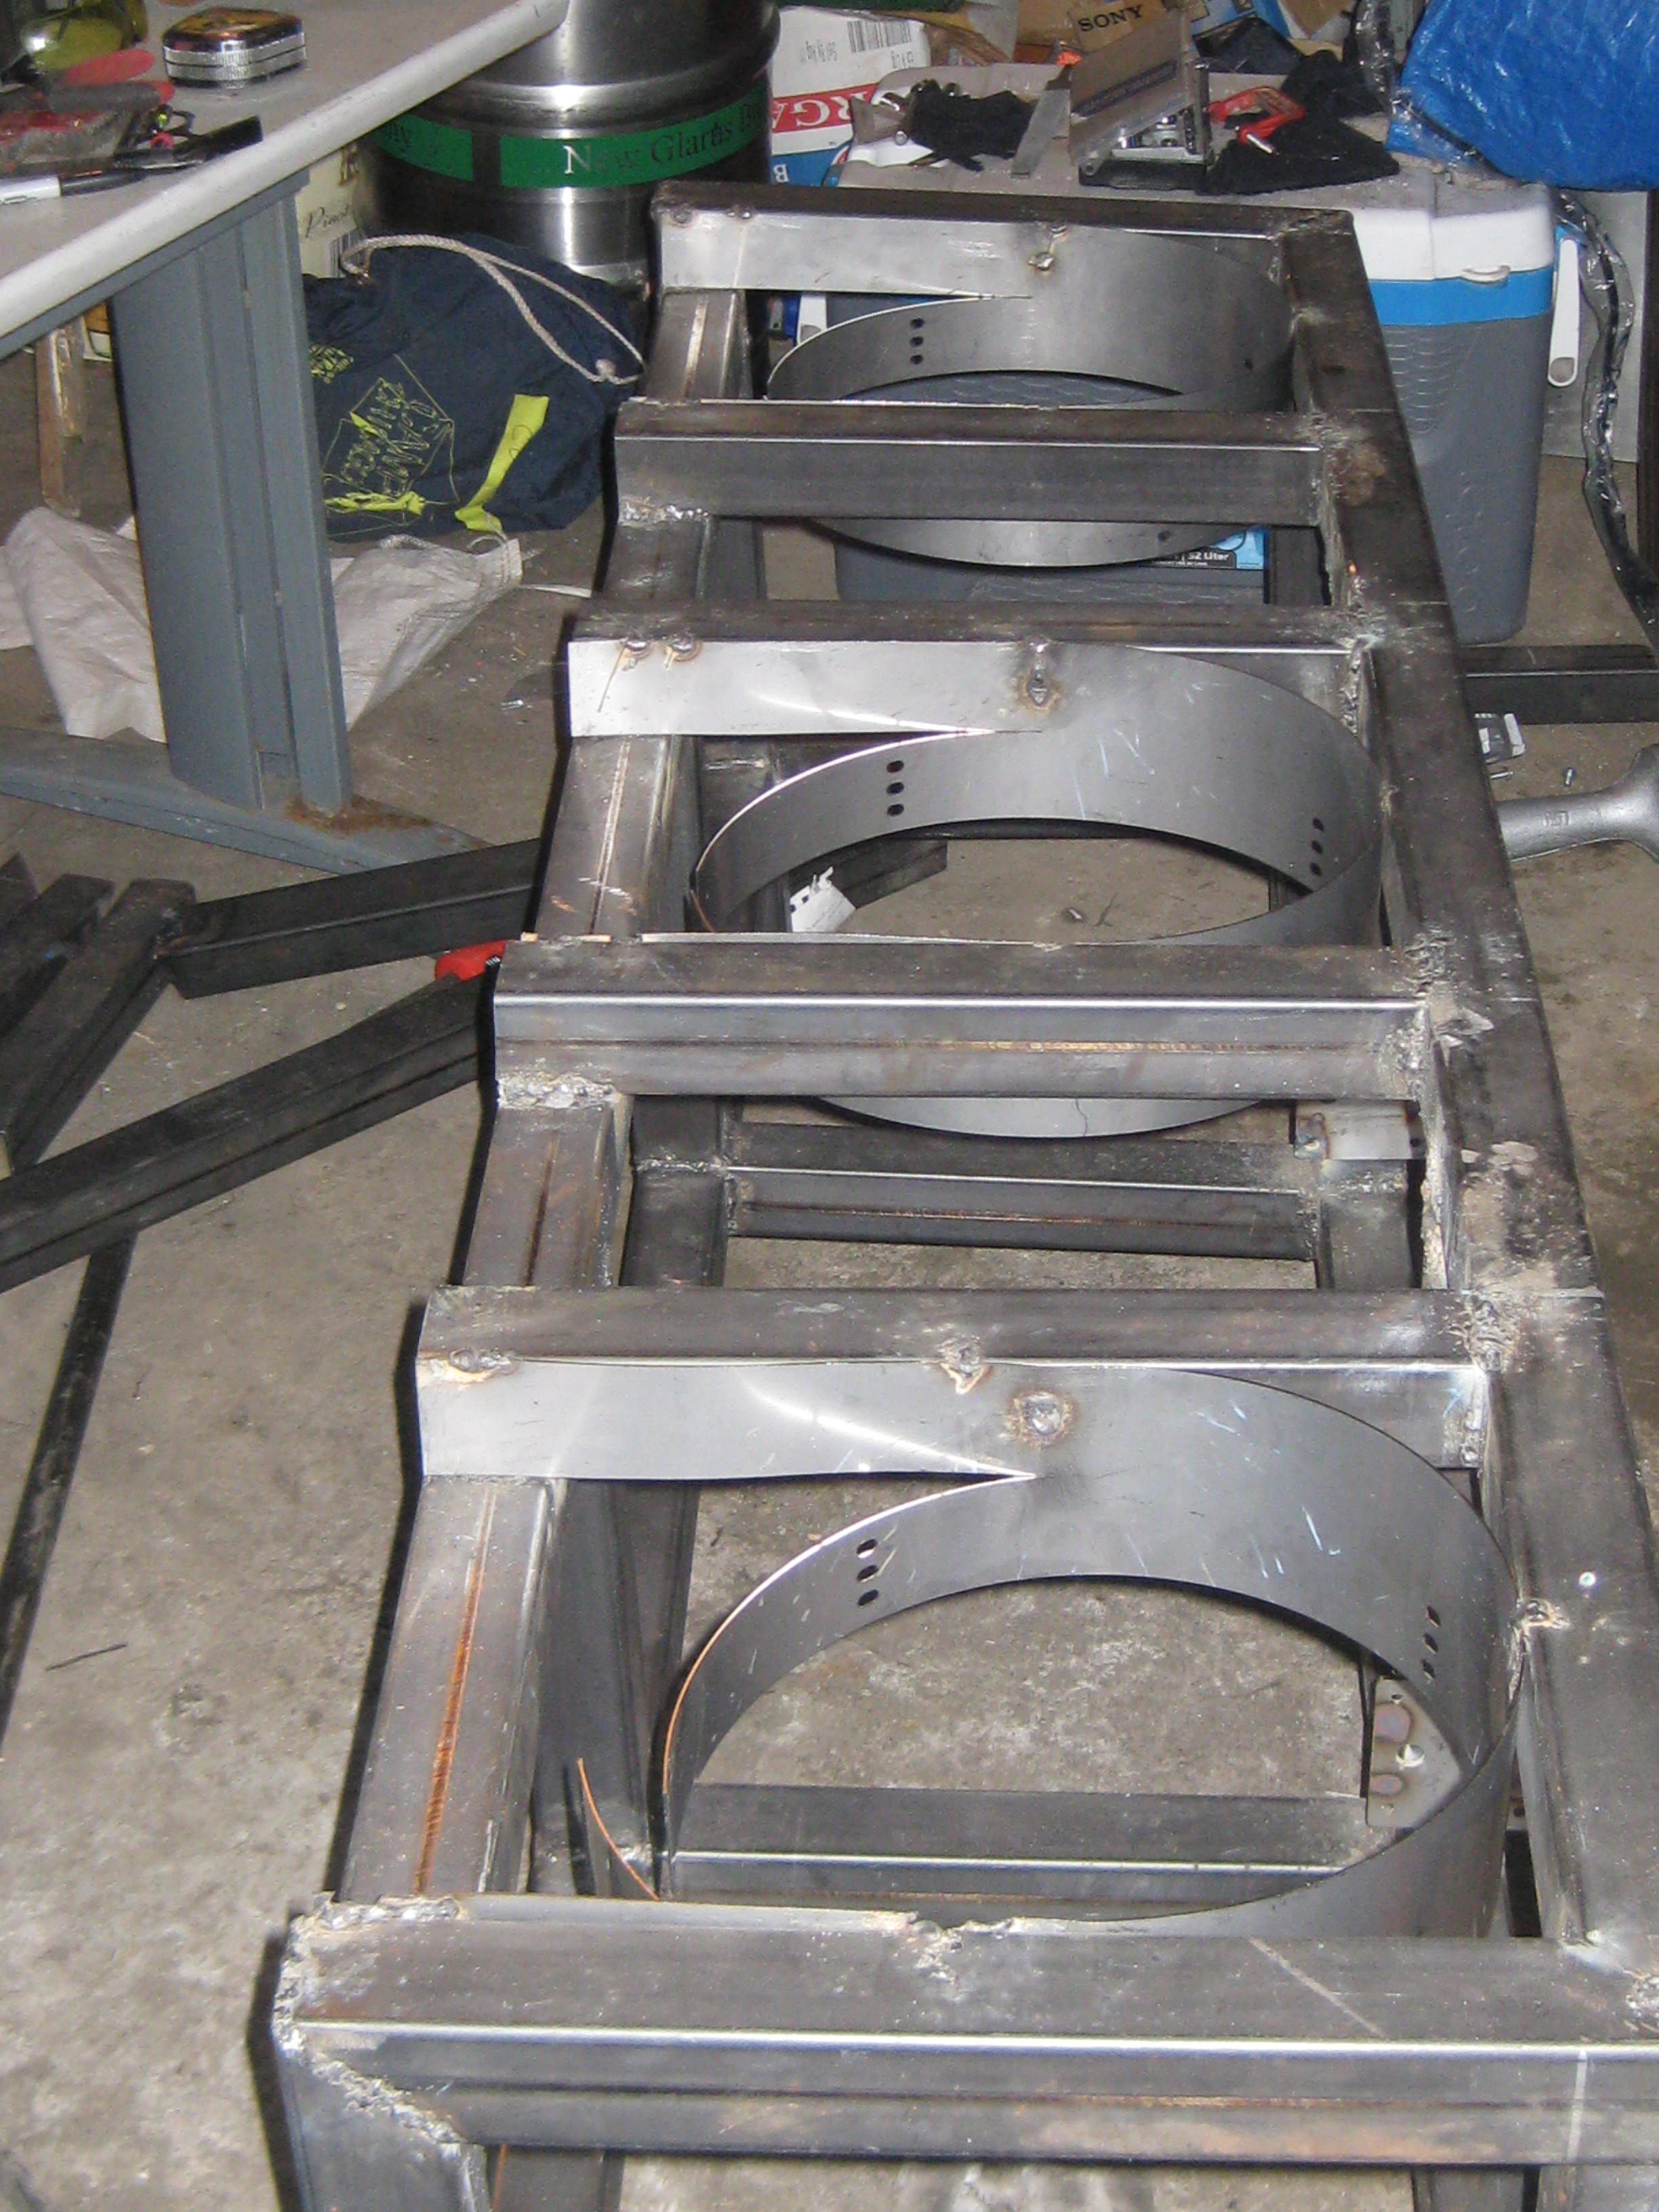
Well, ugly or not, we're very close. Heat shields and pump mounts installed. If I thought my welds on the mild frame were bad, this joining of mild to stainless is really bad and does bring some concern. I stayed with the voltage I had, which was a dumb move, on the shields. You can see the nasty destruction, where I just wanted to tack weld. I stayed with the voltage on the pump mounts, because they are 11 gauge, thicker than the mild. Yet they, too, didn't like that much heat.

Anyway, ugly, and I know they're going to start corroding, but I knew that going in. Already checked my local metal supplier on stainless (they only offer 11 gauge), $9/ft so that's a "way down the road."

Here it is, in all its ugliness. Getting some pump bolts from sandy, member here, and when they arrive, the burners and pumps will be attached, and frame is, I hope, done:

4 shield.JPG
 
Oh and as for the paint, I used high temp spray bombs. I just did some work on the rig and painted it for the first time since building. Way cheaper than powder that will get burnt anyway. My $.02
 
Wow, you don't know how much this means to get a vote of confidence from guys in the know like yourselves. It's really appreciated. It's just going to be a bit before acquiring the final Spike vessel for the HLT, so I thought I'd do something I've never done, a no-sparge or parti-gyle bit of play. Can't wait.

A guy reaches out to shake your many hands, lads. Thank you, thank you.
 
Doesn't look that bad ... but if that was mine , I'd hide it .


...Nah, JK Gad :)
I'd knock down any high spots and sharp edges with a grinder, hit it with some metal-prep (phosphoric acid) and shoot some high-temp paint on it, prolly look like a million bucks.
Brew on!
 
Oh, I probably will get high-falutin' with it, sleepy. We all could use someone to grind down our hard edges, and give us a better pair of clothes to sport around town in. But I hate having to change her name.:D
 
Oh, I probably will get high-falutin' with it, sleepy. We all could use someone to grind down our hard edges, and give us a better pair of clothes to sport around town in. But I hate having to change her name.:D


You can get careless, with your grinding and painting, then no name change needed.......:D
 
You can get careless, with your grinding and painting, then no name change needed.......:D

Hahaha! Hadn't thought of that, stealth. Given my luck at trimming my 'stach, when I've had one, maybe I should just leave well enough alone (crap---out of balance. Just a little bit off this side.....)
 
Done, but for the gas connection between the burners and the manifold. Camera battery died just after I moved the brew frame outside for a shot, lol.

So, right now I have pretty much what I built before, a short run of black pipe with Tees and ball valves off it, totals 10" or so.

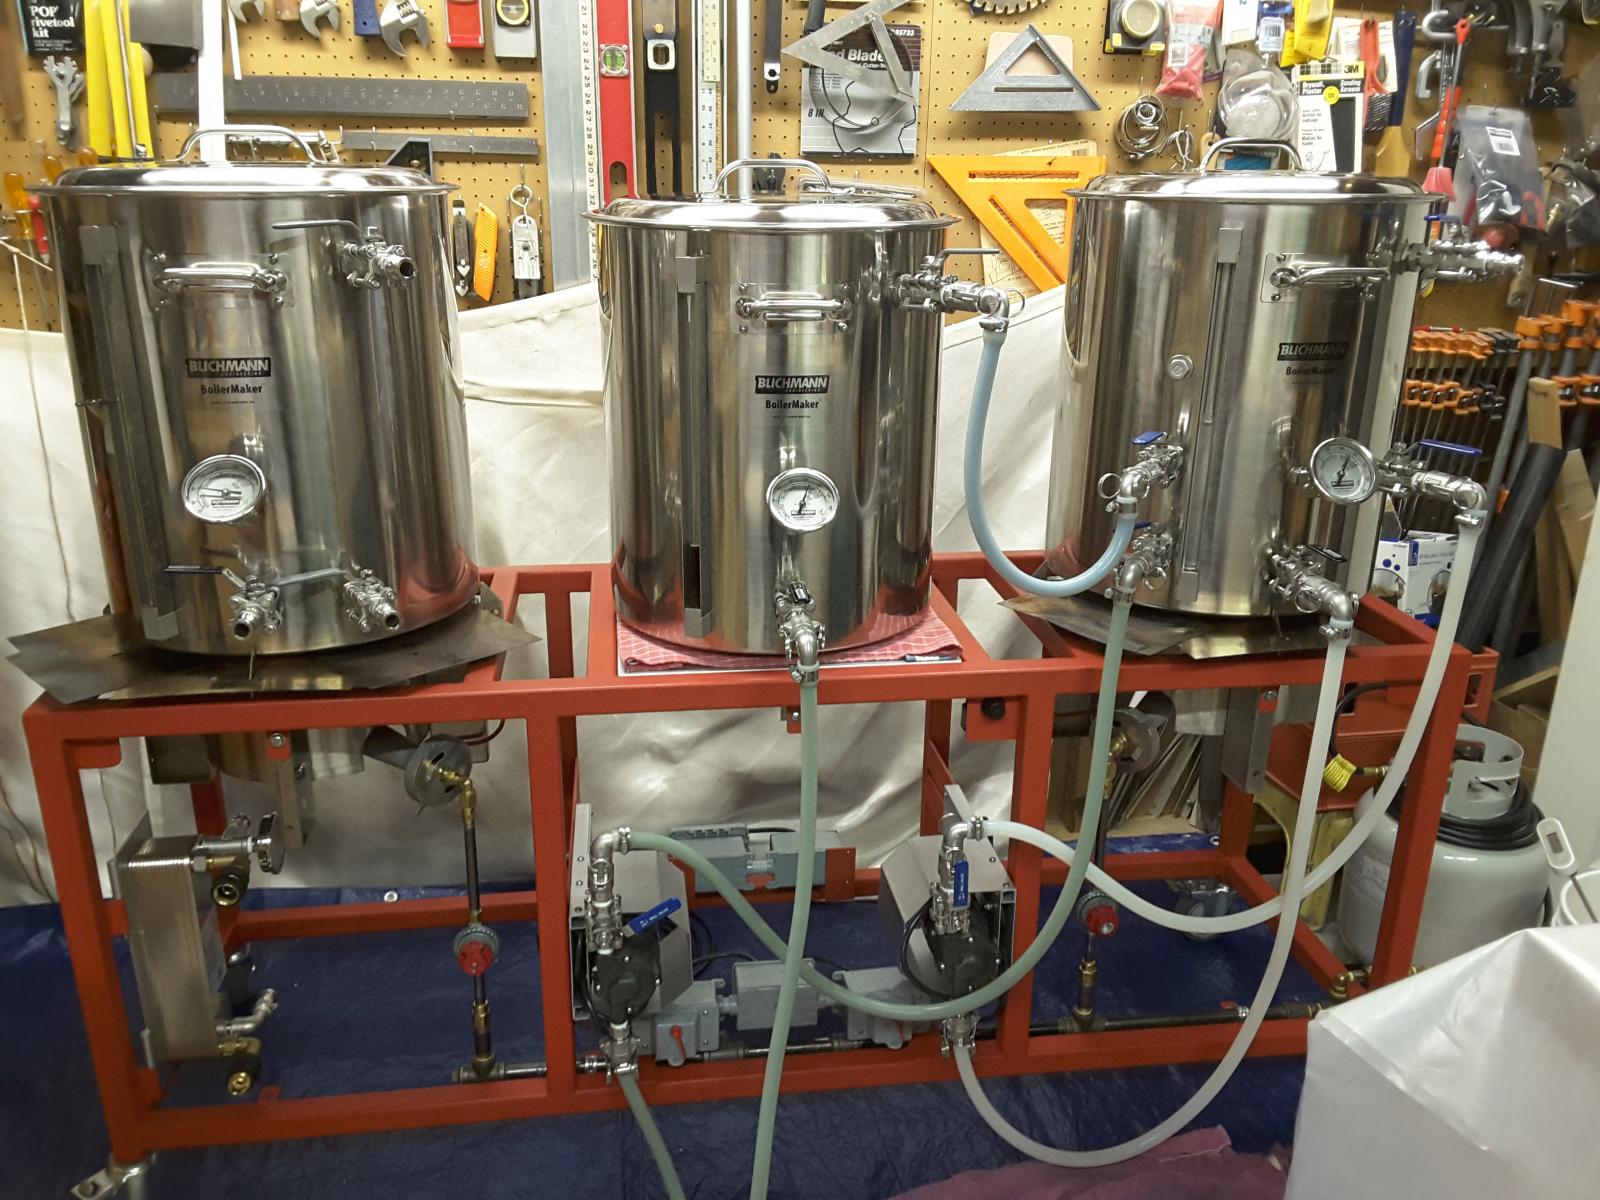
This time I'm thinking of putting the tees directly below the burners, with something other than a ball valve. Trippr if you're around, I like your valves here:

brew_rigs_02.jpg


-Can you tell me the type of make, and where I might get them?

I recall now, too, that that brewery I built 20 years ago had soft copper and compression fittings, IIRC. I Leak-tested each brewday. I think I'd like to maybe go to soft copper this time as well, as finding short runs of propane hoses isn't easy, and I don't feel like paying $75-90 for them, seems ridiculous to me anyway.

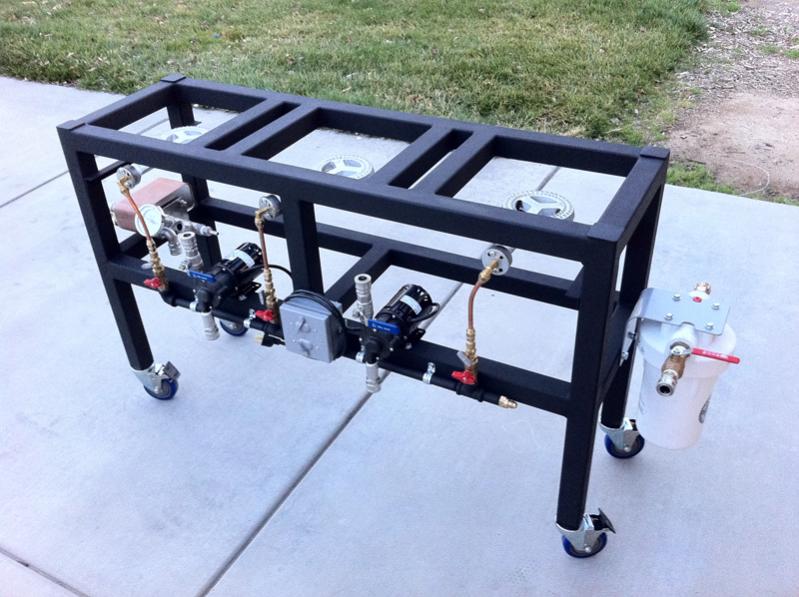
I thought this looked clean. Member, sorry, can't recall where I saw this:

photo.jpg


Questions are: do you guys like copper - or does it wig you out a bit, and if so, what type of hose do you like (I also like that yellow flex-hose stuff, not sure if it comes in like 2' sections). Secondly, if I do go soft copper, I've only used compression, as I said. Something tells me flare's a better/safer option, yes? If so, just some guidance on what's involved - a flaring tool, for the copper? Anything else?

Final pic once the battery is charged, lol.

Thanks all, once again.
 
If you're referring to the gas "valves" with the red knobs, those are actually the 0-10 psi regulators that came with the Blichmann floor burners that I built the rig around. I use a 0-60psi POL style regulator at the cylinder to feed the gas rail.
I used iron and brass adapters mostly because I could and still keep it all inside the frame so it could be laid on its side for transport.
Had the geometry been different I'd have used flex hose between the regulators and the burner orifices...

Cheers!
 
I'd stick with the compression fittings. They were invented to replace the hassle of flaring. Personally, I've never seen flares on anything built after the 1960s.

I'd use soft copper and a spring bender. Polish the copper and brass, give 'em a shot of clear lacquer, and enjoy the warm glow.
 
Trippr, lol, yeah, thanks. Now I recall reading it somewhere, too. My burner ends stick diagonally out an inch or two at the bay corners, so we'll see. I know this one, I don't want to hassle with (the "DIY" fire has done burned out - I want to get brewing!) so may just go for the easiest option, at this point. I'm all the way to black pipe-tees (one elbow)-gas valve FIP-MIP to MFL adaptor. A short FFL-FFL piece of hose would close me off. Brings you in, thanks too, Ancient. I'm certain I did compression now and just checked each time with a soap spray. Bit spent right now trying to pull what I might need from various sources and as I say, it might just come down to me getting lazy and looking for a flex hose or a couple feet at each station. But I like copper, as it can be formed to be well-trimmed and out of the way.

Food for thought, gents, thank you as always.

Oh, I don't often see black pipe gas lines terminating in an elbow going up to a valve. That's what I currently have, 2 tees and the elbow, for 3 burners/valves. Is there something about safety to put in a tee and cap on a black iron line, over an elbow?
 
Sorry for the double hit so closely together, guys, just helps me to retain/organize thoughts to put them in writing in the context of this thread. Crazy, I know.

Anyway, I do think I'd like to go soft copper, ancient, and hear you on the compression fittings. I've looked and cannot find a set of fittings to get me from the valves' FPTs that I have now to the orifices' MFLs, using compression fittings on the copper runs. I should mention I have ball valves, and would prefer a better control - on my first rig, I believe they were needle valves with the very thin little steel-handle, something I'd prefer to avoid this time. If there's a dial valve for this that gets me there (trippr, yes, like your red regulator controls I mistook for valves, lol) I'd appreciate anyone's thoughts here, too.

Oh, I have 3 1/2" MPT-3/8" MFL adapters, too - I'd thought to insert them in the ball valves, when I was looking for hoses. Probably useless now?
 
Ball and butterfly valves are intended to be used like an on-off switch, throttling is not their strong suit. I suggest you look for a 1/2" globe valve. Designed for flow control, but beefier than a needle valve. I found some on Amazon for $10.99. I'd send a link, but I can't seem to make it work on my phone. Anyway, you want a WOG (water oil gas) valve. I use mine for filling my HLT through an RV filter and to control cooling water flow through my CFC. Should work great for burner control as well.
 
Ball and butterfly valves are intended to be used like an on-off switch, throttling is not their strong suit. I suggest you look for a 1/2" globe valve. Designed for flow control, but beefier than a needle valve. I found some on Amazon for $10.99. I'd send a link, but I can't seem to make it work on my phone. Anyway, you want a WOG (water oil gas) valve. I use mine for filling my HLT through an RV filter and to control cooling water flow through my CFC. Should work great for burner control as well.

Awesome, thanks ancient. Something like this (200 psig WOG)?
 
Last edited by a moderator:
That's right. Note that would be ok for gas or cooling water but not for brewing water. You need a low lead or no lead valve for that. Better yet, SS.

OK, great, thanks, ancient. Yep, the only thing I foresee using it on would be the propane manifold. And I am starting to find the pieces - so far, just 1/2" MPT-3/8" compression adapter out of the valve, then it seems just a 3/8" compression-3/8" FFL for the orifice and we're good. I'd thought there was something I needed to get from the pipe thread to the compression, but it seems not - correct?
 
OK, great, thanks, ancient. Yep, the only thing I foresee using it on would be the propane manifold. And I am starting to find the pieces - so far, just 1/2" MPT-3/8" compression adapter out of the valve, then it seems just a 3/8" compression-3/8" FFL for the orifice and we're good. I'd thought there was something I needed to get from the pipe thread to the compression, but it seems not - correct?
That sounds right to me.
 
Might be late now, but investing in a few (even cheap like this) welding squares makes your job much easier. Remember that your material will pull towards the weld as it cools, so don't just start by running a bead on an inside corner without getting it tacked (square) first, or your 90 won't quite be square.
 
Last edited by a moderator:
Might be late now, but investing in a few (even cheap like this) welding squares makes your job much easier. Remember that your material will pull towards the weld as it cools, so don't just start by running a bead on an inside corner without getting it tacked (square) first, or your 90 won't quite be square.

Thank you, Bowen. Yep - knock on wood - the weld is finished. I had one of those squares. Not inexperienced or anything like that, could have used more, and I think as well those corner clamps. Learned more and more throughout the weld (for me, how much easier fillet welds are than joining other faces or edges....some wanted to cold lap, some wanted to burn through like crazy, all with the same voltage. So I started learning to adjust my technique, travel speed, stickout, etc. I didn't want to screw with voltage every time I moved to another type of joint). Unfortunately that means this one is truly ugly. Maybe not Ugly Betty ugly, but, well, YOOGLIE. I am certain this was just a test run for the better one coming, whenever. If I can drum up the guts I'll take some shots of some ugly beads!

Edit: Whoops, thought this was ancient's, lol. Thank you as well, Bowen!
 
Last edited by a moderator:
No, I'm sure it's me who is screwing this up, ancient. I'm seeing this:


Won't work?
You are absolutely correct. You've got me going back to my old engine room manuals I haven't cracked in 30 years. It's good for me, thanks.

Edit: dangit, quoted the wrong bit.

Final answer: You are correct. I was mistaken.
 
You are absolutely correct. You've got me going back to my old engine room manuals I haven't cracked in 30 years. It's good for me, thanks.

Edit: dangit, quoted the wrong bit.

Final answer: You are correct. I was mistaken.

You have been so helpful across this whole project, ancient. You have a very appreciative guy on this end.
 
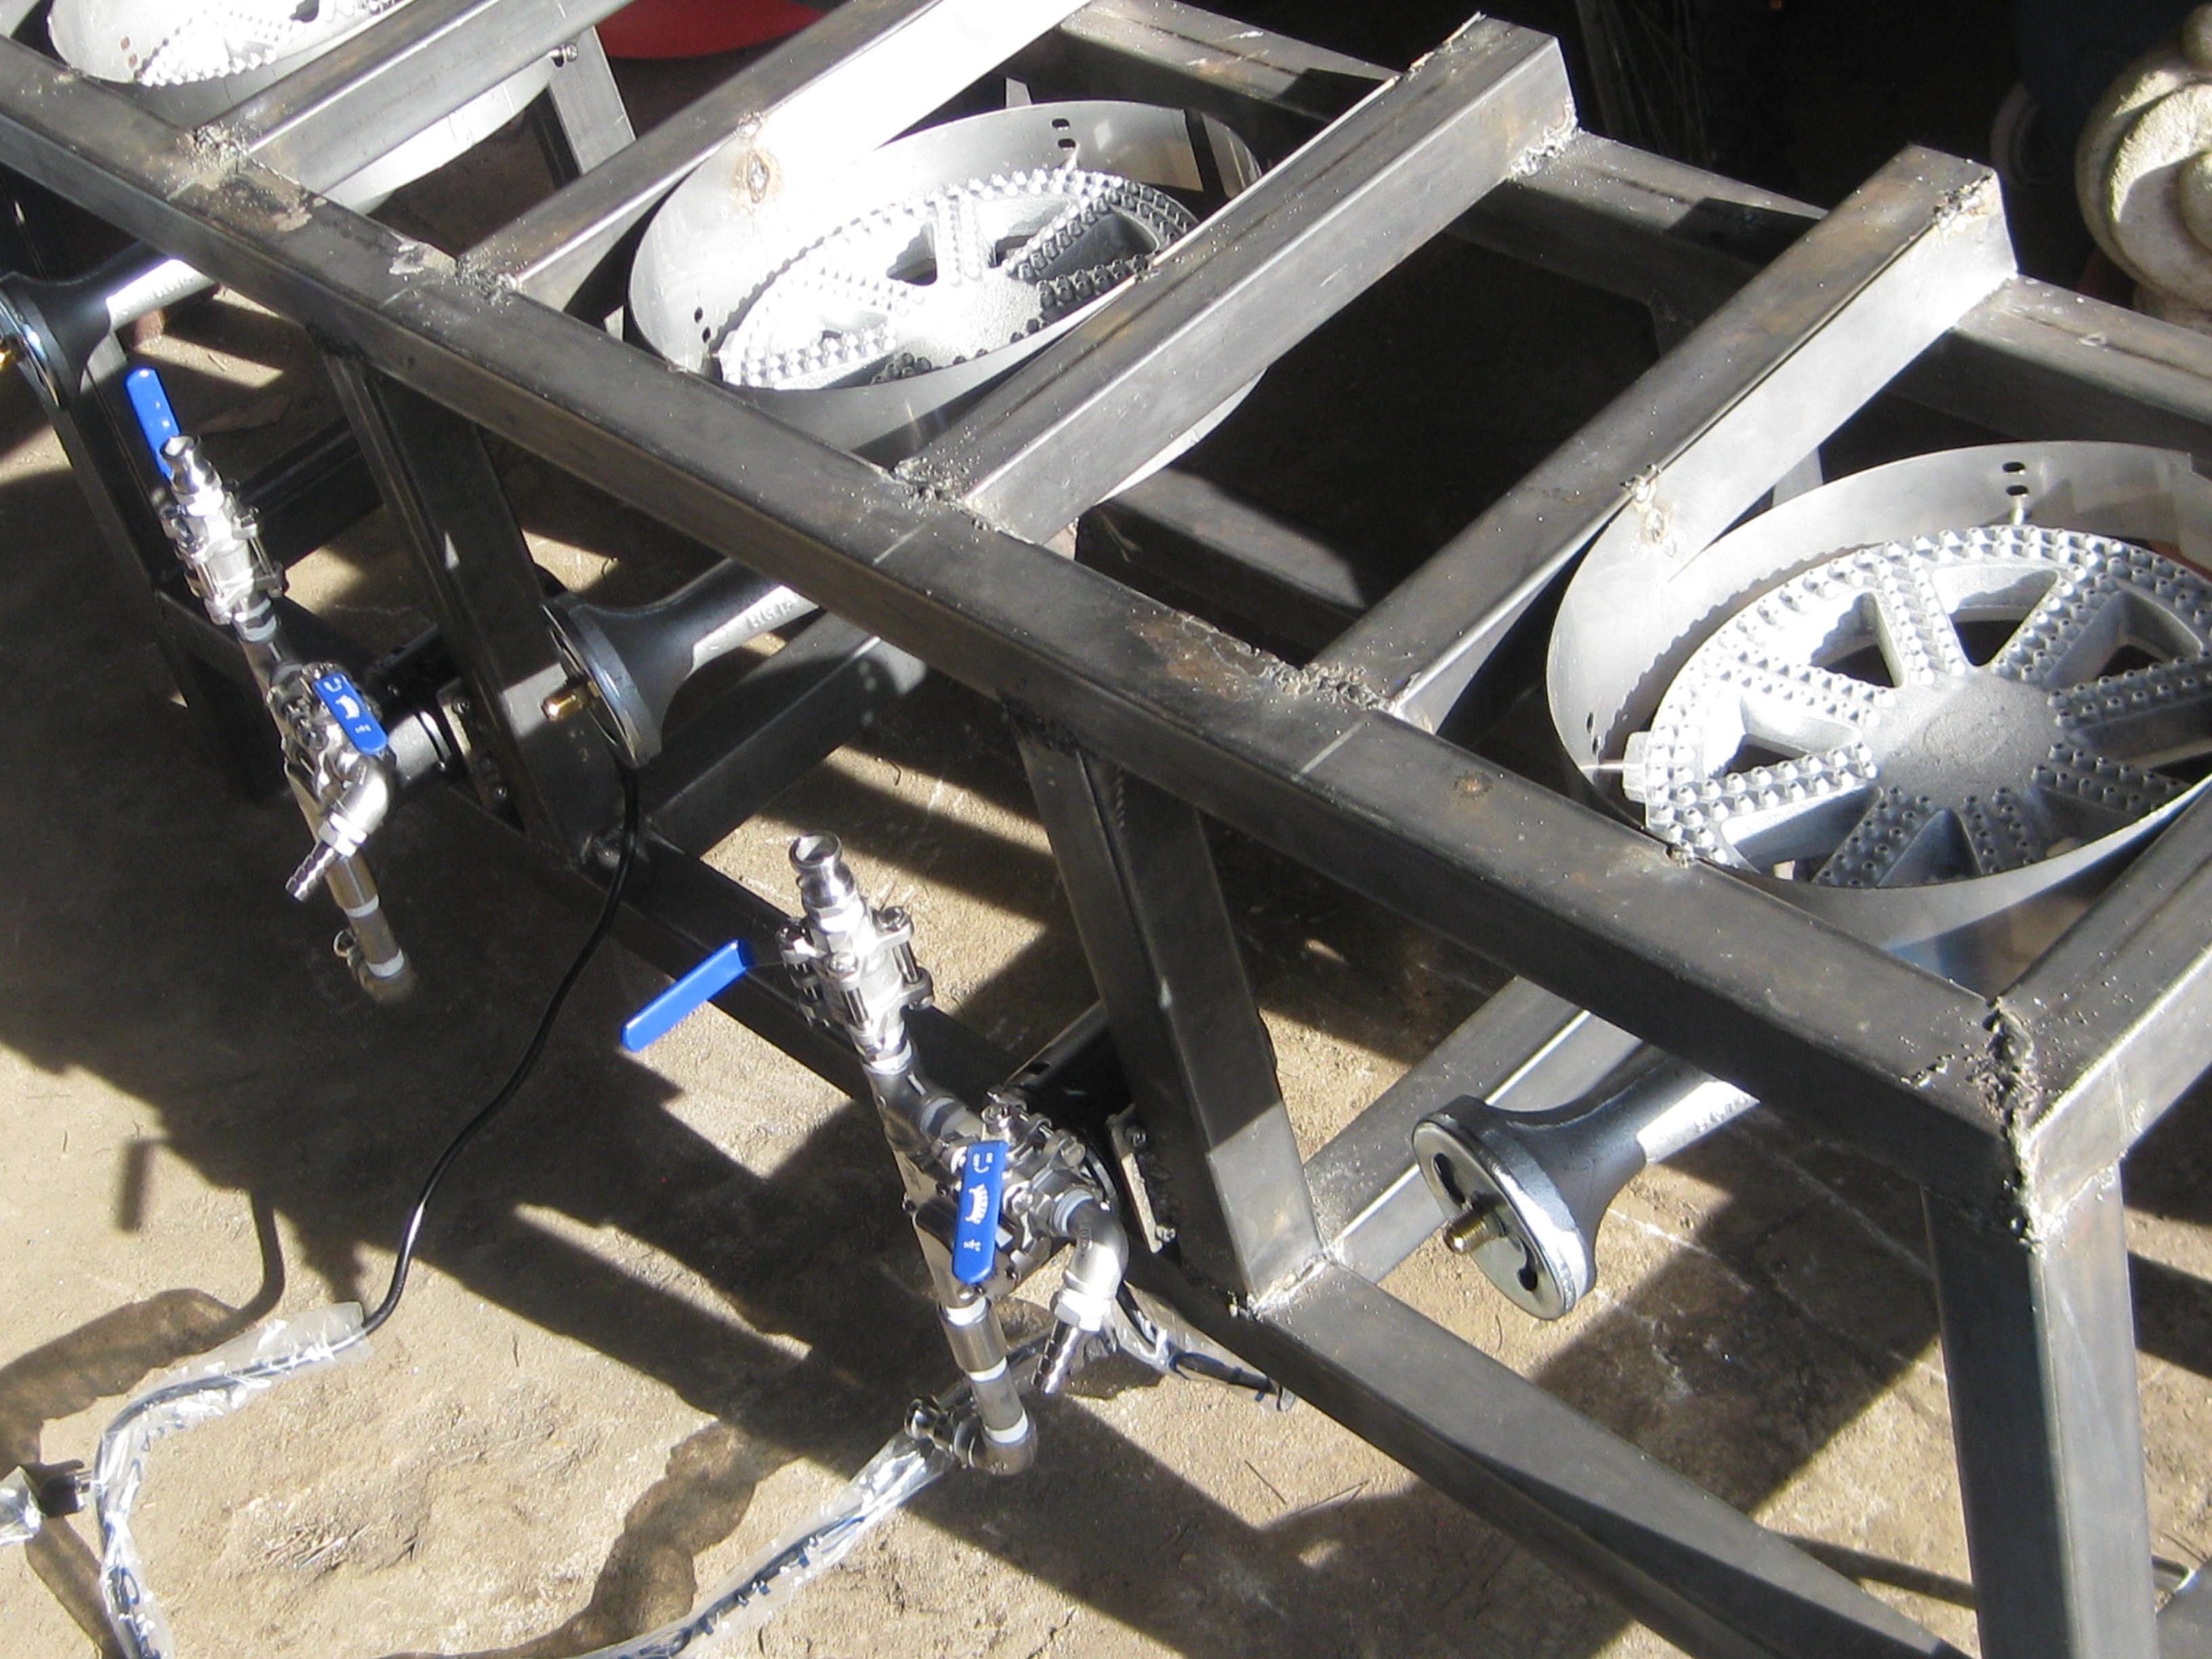
Just a couple pics. Short manifold is the type I built last time and this time again, but per conversation with ancient and the clean line of the longer black pipe run and soft copper, may just get going with this short one since it's built, but replace with the other type. Either way, final vessel, some lab equipment, ingredients, we're rolling.

A general Thanks all!

main 1.JPG
manifold.JPG
 
Nice work. Is it great? NOPE! But it will do fine for you. And you learned a bit along the way. Welding and fabrication is a skillset and a talent.

Good for you for keeping up with it and finishing the welding. Now hurry up and brew some beer!
 
Overall it looks good, but seriously before you finish assembling get yourself a grinder and smooth those welds! It will take some time but will look 1000 times better and you will be glad you did when you are brewing and admiring your creation. At least hit the ones you can see from the top/front.
 
Thanks guys. And I'm going to drive you nuts.

It looks like crap and needs a serious grinding everywhere - I know.
And guess what? I DON'T CARE, hahahahahah. Now get me some malt as I'm gettin' goin!:ban::D

(alright, after false bravado....he asks....it doesn't do anything to functionality, right, to leave it be?:rolleyes:)
 
Other than your kettles resting on the high spots and maybe growing some dents it's just an aesthetic thing.
You'll drive folks crazy with your pics but that's a risk of following HBT...

Cheers! ;)
 
Thanks for the note on dinging the kettles, trippr. I think they'll mostly miss as the kettles aren't on any joints that I can think of, just the flat faces on 3 sides. But I'll check, as I absolutely wouldn't want that on these Spikes.

To be totally honest, I normally care a great deal about aesthetics, but, well, "a billion tiny circuit breakers popping off at once, and micro-fires busting out everywhere and growing..."
 
Well, we're there.

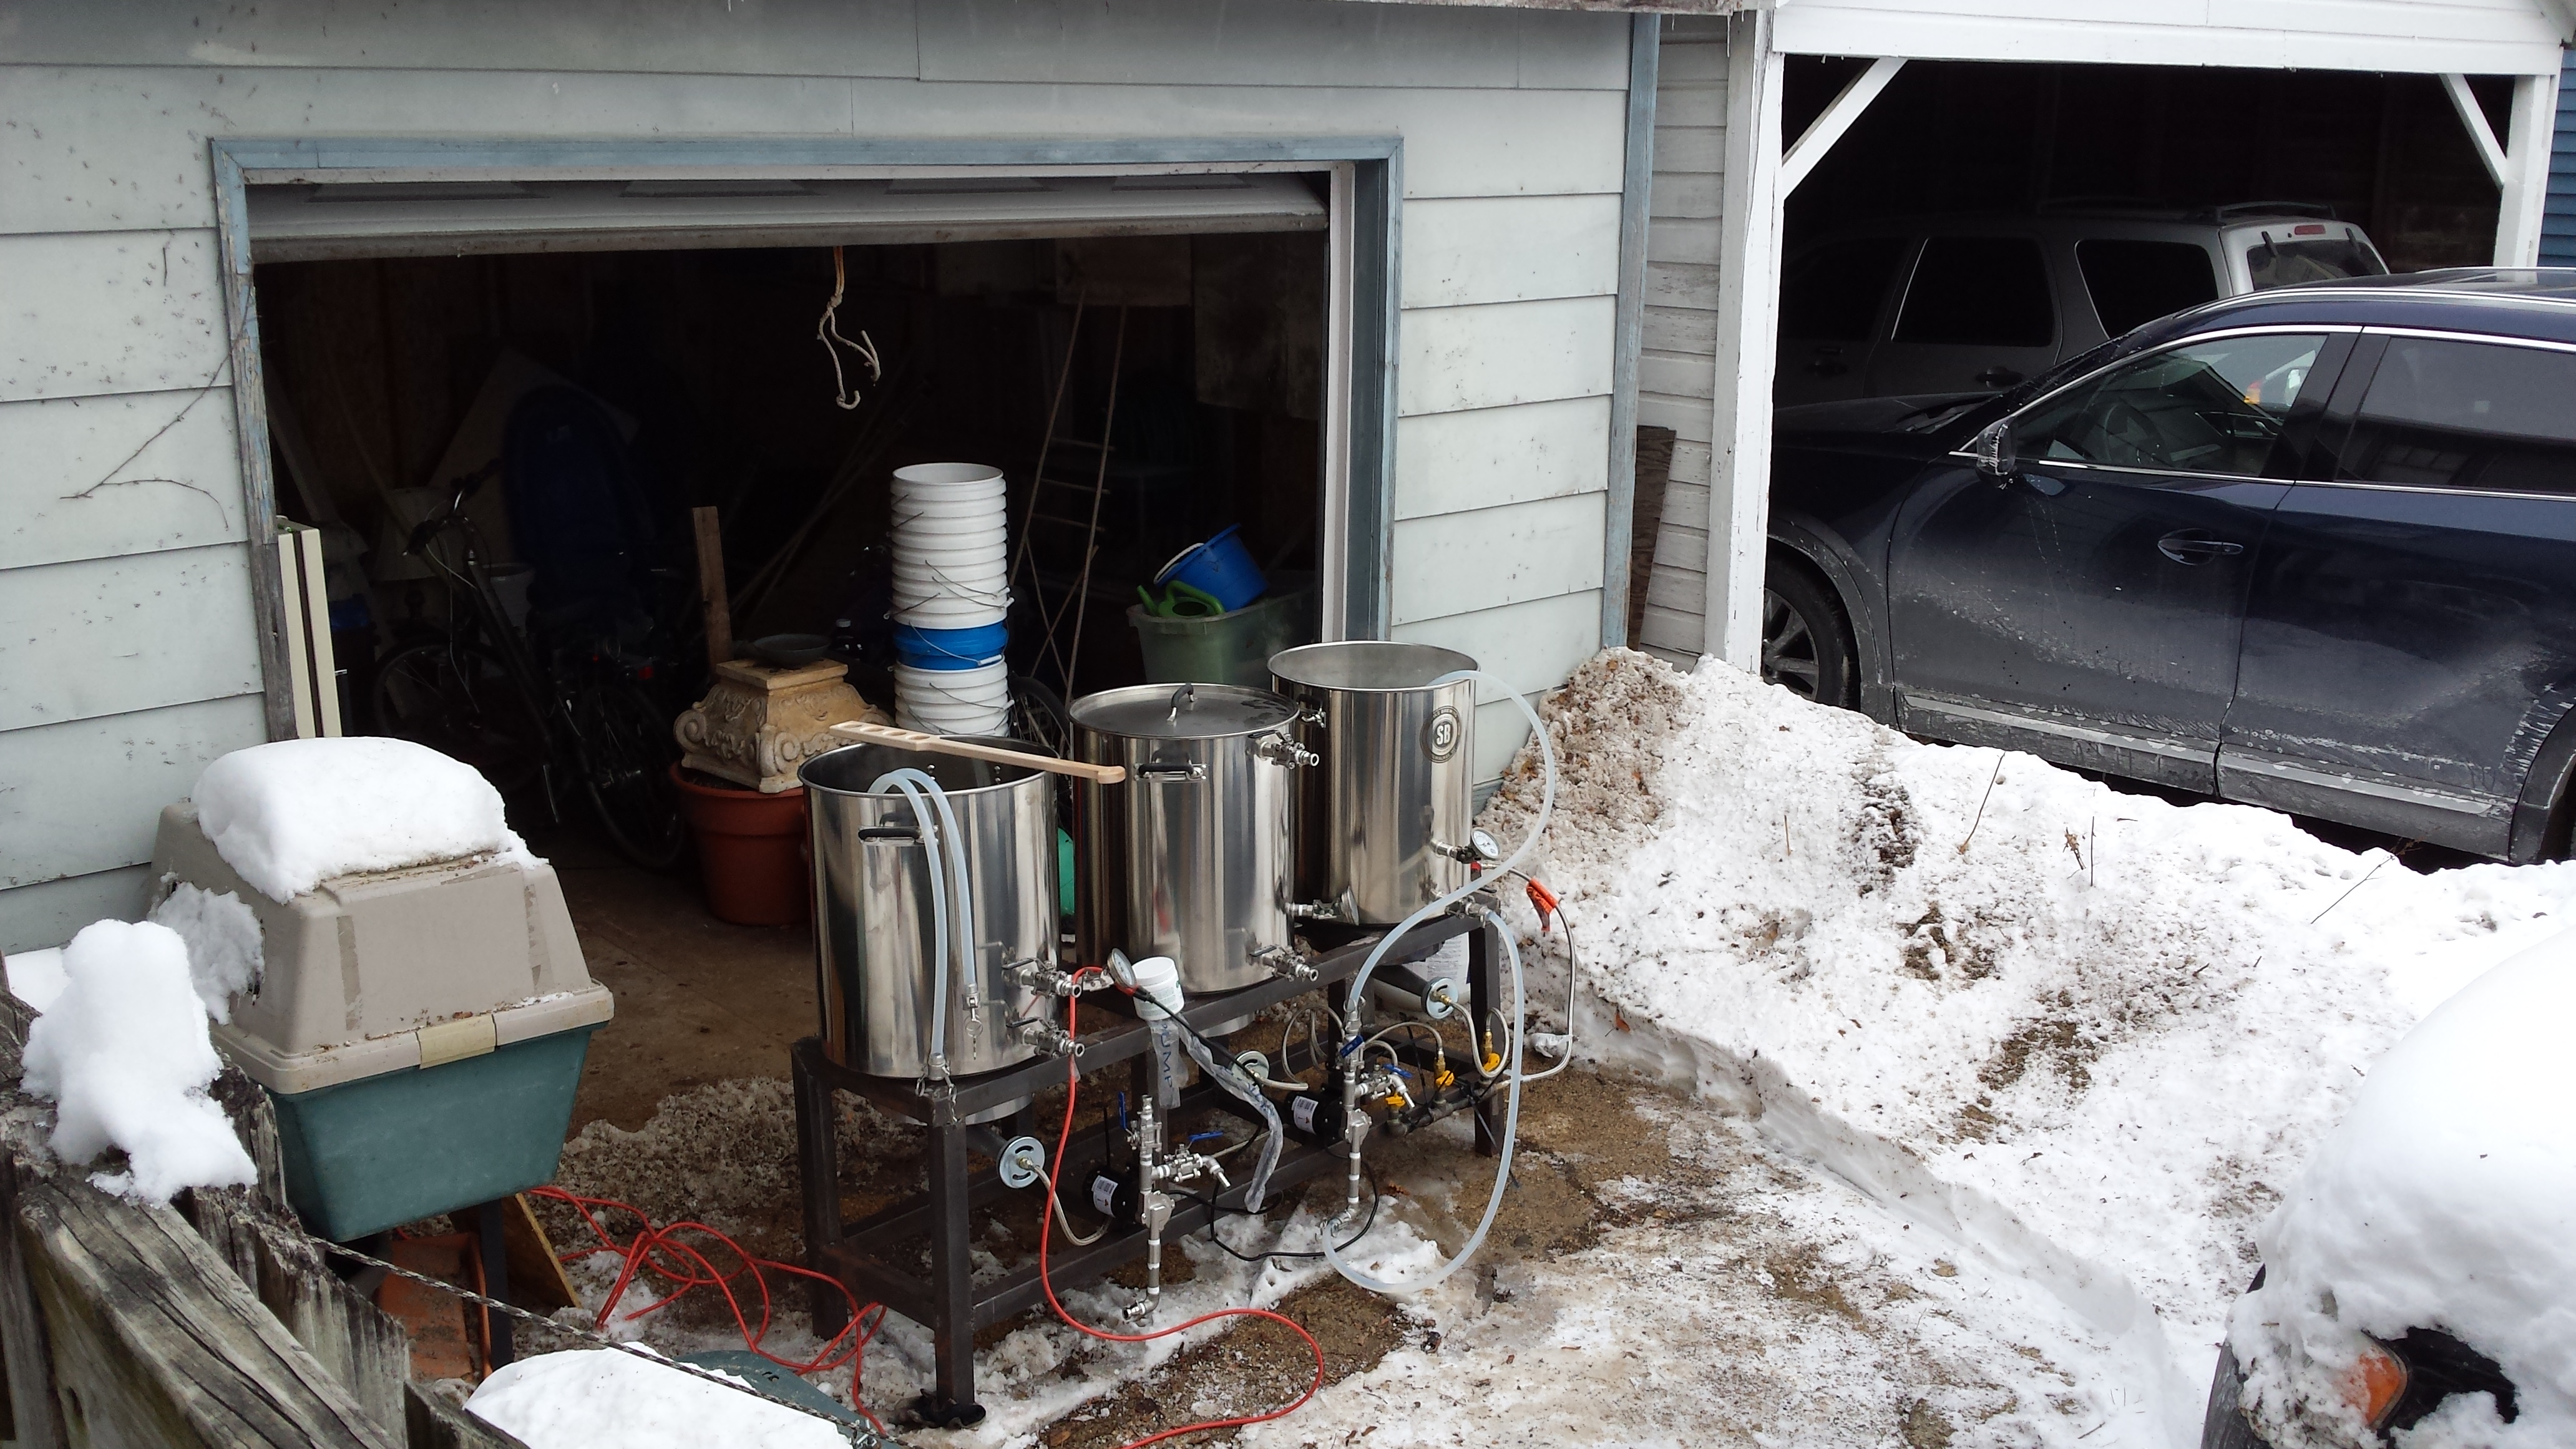
Ugly II in driveway - 2.jpg


To test run pumps, cleaned everything with recirc'ing PBW, and heated to 140F to also test all burners. I am so impressed with the Chuggers - much quieter than I would have thought, and performed perfectly. Really happy with these little critters.

Burners, banjos. Holy crap. I had no idea they kicked out this much power. I had the smallest Cajun long ago, can't remember the model, and this is obviously a different beast. A few issues, wondering if you can help:

Because of the back venting, I cannot light from front. I am using ball valve gas control, which yes, as I'm reminded now, sucks. Probably 6 times or so, got that wonderful "Pwuffff" and loss of hand hair as the thing kicked on. I learned to finesse them by the smallest adjustment of the ball valves, but still too much of a kick on for my tastes. I know full well I'll be evolving this setup (globes, I think - was it ancient? sorry, guys, forgot who recommended it), just wanted to get it up and functional and brewing.

Another, I had to seriously limit the output lest the flames kicked out in force from even the front, from underneath the shield. I would have thought the back venting would avoid that. So, I feel I'm using very little of the potential of these burners. I didn't do a time to boil or evaporation run, that's next, but sure feels like I could exploit these more, if there wasn't an issue of fire pouring out from under the shield, everywhere.

Finally, I've never seen this and don't know why it's happening. I suspect it's dangerous as hell. Many times, I'd see the flame inside the "tunnel" between the orifice and the burner itself. Sometimes it approached the orifice but was pushed back towards the burner by the incoming gas itself. Is this just idiocy on my part, for not shutting down immediately, or is this some kind of normal I've just never noticed? I did turn down significantly but again, especially as this is the BK orifice, this seems a limitation.

Thoughts?

Edit: Venturi tube, right. Creeping back through the tube towards the orifice. I should mention, beautiful blue flames. Just....crazy, as described above.
 
Last edited:
Call it whatever you like, I call it a nice rig! Thanks for showing us.

Yes, globe valves will give much better control, especially when first lighting off. Have you considered electric ignition? Before I gave up on gas, I bought a battery operated spark lighter for a gas grill, but never got around to installing it, so I can't vouch for it from experience.

I've had fires in the mixing area before as well. I covered the air inlets with a gloved hand and they went out. I don't think it is dangerous, because the gas ahead of the orifice can't burn account of no oxygen. But it ain't right, that's for sure.
 
Back
Top