• Please visit and share your knowledge at our sister communities:
  • If you have not, please join our official Homebrewing Facebook Group!

    Homebrewing Facebook Group

Yeast Washing Illustrated

Homebrew Talk

Help Support Homebrew Talk:

This site may earn a commission from merchant affiliate links, including eBay, Amazon, and others.
I'm confused and I tried to search through all these pages on this thread to no avail so hopefully some experienced person won't mind helping me out. In the above statement you say that by mixing the trub with water the heavier hop particles and other junk settle back to the bottom of the jar. Then in the next sentence you say that if you pour the liquid off the stuff thats settled you'll have mostly yeast. That doesn't make sense. So when I see those pictures, I can clearly see stuff has settled but I don't know what the yeast is, the stuff that settled or the stuff on top. I think i saved mostly the stuff on top and now i'm worried that i threw all the yeast out and I'm saving junk!

You are confusing the layers during washing (keep the liquid, throw away the solid settled layer) with the layer left after putting the washed yeast in the fridge (the settled layer is the yeast). While you are washing the yeast stay in suspension longer than the trub and other junk, so when you shake it up and let it settle the trub sinks. You then decant the liquid containing yeast and water into a new container. When you put that in the fridge overnight the yeast will finally settle and you will see a creamy white layer that is your yeast.
 
thanks guys, makes more sense now. Trub settles right away, yeast stays suspended in the liquid. pour off that liquid and in another couple days stuff will begin to fall again but this time that will be mostly yeast.
 
thanks guys, makes more sense now. Trub settles right away, yeast stays suspended in the liquid. pour off that liquid and in another couple days stuff will begin to fall again but this time that will be mostly yeast.

Yep and the second step is aided by cold temps in the fridge. Yeast crash out more easily in the cold.
 
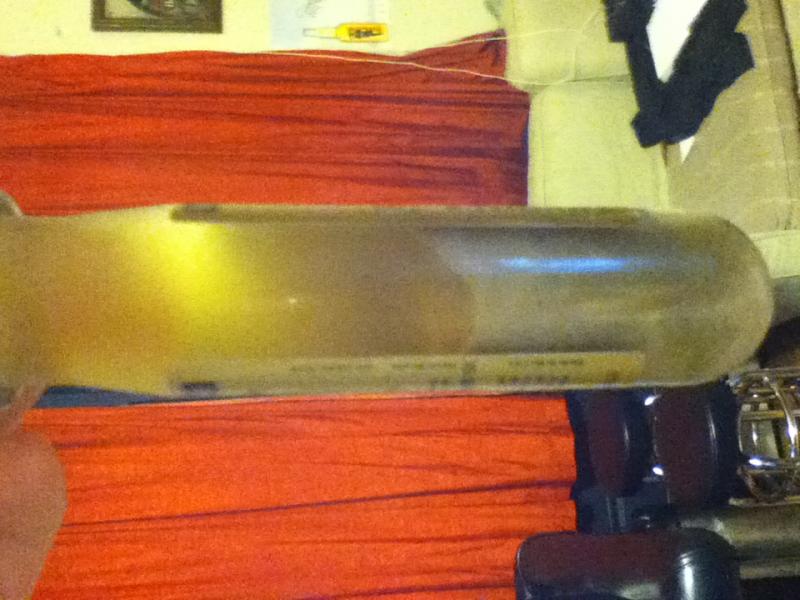
I know there are a million of these type of posts. But I am currently washing some yeast and its been about 20 minutes and here is what I have. is what I want the almost beer like liquid on the top?

ForumRunner_20120303_134855.jpg
 
So I have a question about calculating how big a starter to make. I'm looking at the Mr. Malty Pitching Rate Calculator. I go to the repitched slurry tab, I assume.

Should I just use the default settings on the two sliders? That is, how do I know my yeast concentration and my non-yeast percentage?

I apologize if this question is already listed above, but I haven't the patience to read 139 pages of posts.
 
So I have a question about calculating how big a starter to make. I'm looking at the Mr. Malty Pitching Rate Calculator. I go to the repitched slurry tab, I assume.

Should I just use the default settings on the two sliders? That is, how do I know my yeast concentration and my non-yeast percentage?

You only use the "repitch from slurry" tab if you are using washed yeast. But you also need to input your OG, gals, and harvest date of slurry. Once you do this, you will see the # of cells you need (in billions) and the quantity of thick yeast (in ml.) that you will have to build up to to have an adequate pitching amount. Since I generally use washed yeast, I'm only concerned with the milliliter amount. For instance a 5 gal. 1.060 batch using slurry harvested on Feb. 6, needs 208 bill. cells.
Since I only use the thick yeast that has settled in the bottom of my pint jars, I move the "yeast conc." tab all the way to the right. Notice that the ml. quantity goes down to 111 ml. This helps me because now I know exactly how much I need without any liquid. I don't worry about the bottom tab because when you move this back and forth, it only changes your yeast quantity a little bit. Since my samples are pretty clean, I just leave the tab in the center and use that number. Looking at my example here I have about 40-50 ml. of the yeast on the bottom. Since I basically need to double the amount I will do a 1200-1500 ml. starter and it will get me close. When I add the yeast to the starter, I dump all of the top liquid down the drain first.
This is my way of doing it but there can be many others. This just works for me. Hope it helps.

washed yeast.jpg
 
Perfect. I just washed some yeast for the first time this weekend, so I wanted to determine if I needed a starter at all, and if so, how big. Thanks.
 
I ran out of time yesterday due to craziness. The yeasties on the left were separated from the trub but the second one is trub/yeasties mixed. I have 2 of each. Should I mix it back up and try to get the trub out or leave as is?

In other words, 2 jars went as planned. I had to dump the rest into the other jars to deal with it another time.
 
Here is what came from my blow off tube and bottle after 3 days of very active fermentation. Stuff was quite nasty when I started, but I washed and decanted the contents twice with cooled boiled water which removed O2.

I'm assuming the yeast is still viable? The trub was just plain nasty and still is. Is there anyway to separate the yeast or should I just let it continue to sit in the frig and let the cake settle up some more.

I have washed after 3 weeks when racking twice before, just seems like a waste to dump all this yeast.

1002662w.jpg
 
Given the coarseness of the grain trub, I would think you could resuspend that vigorously, let the trub settle again, and have pretty clean yeast. I love the look of Wolverinebrewer's washed yeast. Looks like 100% yeast. How and how many times was that washed?
 
This may have already been asked before but can I wash the yeast from my secondary?

The reason I am asking is, I just made an wheat beer and I would like to save the yeast for use later on. But I dumped the coriander and orange bitters into the primary. I will rack off that this weekend and probably end up with another yeast cake. Although small than the one in my primary, it will be clean and free of any foreign matter.

Any info would be much appreciated. Thanks.
 
I love the look of Wolverinebrewer's washed yeast. Looks like 100% yeast. How and how many times was that washed?

Only once.
My process is easy and takes about 45 minutes including the 30 minute wait time for the trub to settle. Anyone can do this.
I learned how to wash from this thread but using this method I found that I was getting too much trub and small amounts of yeast. Also, I could never get it clean because of the wave action resulting from pouring from the jars. So now I do not pour from jars.
After bottling, I always want to fill 8 pint jars. In order to get the highest concentration of yeast suspended, I only boil and cool 140 ounces of water and add that to the fermenter with the yeast cake. I put the top on and shake until the cake is all broken up and in solution. The liquid will be greenish. Let it set 30 minutes. The heavier green trub will settle out and you should see only peanut butterish color liquid. Now you can siphon that off into your jars. Sanitize an auto siphon and put a 24" hose on the end. Either boil or sanitize your jars. Put the black tip of the siphon just under the liquid and pump on the siphon while keeping the outlet hose in one of the jars. This process is easier if you have a helper because its hard to hold the hose and operate the siphon but it can be done with one. Once the yeast is flowing, use one hand to slowly lower the siphon keeping it just under the surface. Use the other hand to move the hose from jar to jar. Once all 8 jars are filled the siphon should be just above the green trub. If done right, the tip of the siphon should not have disturbed the trub layer. Now, take a sanitized paper towel and wipe off the rims of the jars. Then dry off your still boiling lids and place on the jars and add the rings. After three days the yeast will settle completely and be nice and clean.
I do want to say that that pic. is either S-04 or US-05 because that is what I use most often. I can't comment on whether my method works for other yeast strains.
 
Wolverinebrewer: Sounds like very good advice. I have only done this once but it did seem to me that 20 min was too short and I ended up with something like BW210 but with about 50:50 yeast trub. That was in large part due to the fineness of my trub and pouring from the carboy. Next time I'm trying your approach. Thanks.
 
It will work for you.
Remember, time is your friend. Yeast will stay suspended for quite awhile so if you need to give the trub more time to settle, it shouldn't be a problem. Just don't rush and cut it too short.
And if you can do this without moving the fermenter and disturbing the trub, your jars will come out very clean.....as long as you don't suck any up. :)
One more thing. Determine how many jars you are using and only boil about 16 ounces of water more than you need to make sure you get a high concentration of yeast in each jar.

And sanitize well!
 
I had a go at this for the first time with my very first batch of beer w/Mr. Beer which was made with HME, DME & Safale US-05. Be kind, I'm trying to absorb a lot of info and I'm having a blast and trying to do a little bit of everything to learn techniques.

Anyway, I followed the OP's instructions and when it was all said & done,I ended up with 3 pint jars with about the same amount of yeast cake as pictured in the OP's jar on the right.

First question, what's the best way to measure the amount of yeast cake in ml's so I can get the numbers recommended by Mr. Malty for pitching?

If I have the numbers, should I still make a starter if I'm going to pitch a day or two after I wash the yeast?
 
Great info on this sticky.

Just did this today with the US-05 yeast from my Blue Moon Clone.
Hoping to make a starter and pitch into a cream ale next weekend.
Will pickup a packet of yeast , just in case....
 
I'm trying to wash my yeast but I wasn't too sure about what to do at the time so I just added some water to the trub swirled it and put it in a WhiteLabs yeast vial. Now half of what is in the vial is sediment/trub and liquid that is left just looks like discolored water. Is there enough yeast in there to make a starter? I have about 3 days before brewing so I can have the starter going for a while if I need to or do I just need to go out and buy more yeast? Pic attached:

IMG_0036.jpg
 
Great thread! I just gave this a try for the first time followed the steps to a T, washed wyeast 1056 american ale from a dfh 60 minute clone. I feel like I ended up with a lot less yeast then all the other pics on this thread, did i do something wrong, or is this enough for a starter? Thanks in advance!

ForumRunner_20120320_213839.jpg
 
I'm trying to wash my yeast but I wasn't too sure about what to do at the time so I just added some water to the trub swirled it and put it in a WhiteLabs yeast vial. Now half of what is in the vial is sediment/trub and liquid that is left just looks like discolored water. Is there enough yeast in there to make a starter? I have about 3 days before brewing so I can have the starter going for a while if I need to or do I just need to go out and buy more yeast? Pic attached:

Make a starter.Pitch it all in or decant a little bit.
 
Great thread! I just gave this a try for the first time followed the steps to a T, washed wyeast 1056 american ale from a dfh 60 minute clone. I feel like I ended up with a lot less yeast then all the other pics on this thread, did i do something wrong, or is this enough for a starter? Thanks in advance!

I just think you washed it really good,good job.
 
I've been following this thread offline and decided to join. I've read about reusing yeast so I followed this and another book about it.

My book said if I could pour off the top layer a day or 2 before repitching and add water to clean it up a little more.
I did this but I'm not sure if I poured off my yeast or if I didn't have it originally. It's sitting in the fridge and I just wanted to make sure I was ok pouring off the top layer of beer after the yeast settled.


Also I'm making a starter in a mason jar with a loose lid...it should bubble just like a regular brew correct?
 
Shouldn't be any problem to pour off the liquid after 2 days of settling. When you add fresh wort it may take overnight at room temperature but you should have a pretty active fermentation going on and a nice dense starter. It should smell like fresh yeast and give a nice foam when you stir it up.
 
hungry4hops said:
Great thread! I just gave this a try for the first time followed the steps to a T, washed wyeast 1056 american ale from a dfh 60 minute clone. I feel like I ended up with a lot less yeast then all the other pics on this thread, did i do something wrong, or is this enough for a starter? Thanks in advance!

That really does not look all too bad and it also seems that it's still cloudy which means you might get a bit more before everything is said and done. Here's a pic of my washed yeast.

image-3977207826.jpg
 
Great thread! I just gave this a try for the first time followed the steps to a T, washed wyeast 1056 american ale from a dfh 60 minute clone. I feel like I ended up with a lot less yeast then all the other pics on this thread, did i do something wrong, or is this enough for a starter? Thanks in advance!

You didn't do anything wrong because if you followed the OP's method that's probably all you are going to get.
One way to get more yeast in each jar is to reduce the amount of water you add and then siphon off almost all of the liquid there is right down to the trub layer. That results in a higher concentration of yeast per ml. of water in each jar.
 
I've been re-using/ washing the same batch of Wyeast 1056 with great success for about 3 batches now, and I have a question on my latest washing. I'm brewing later this week, and as I speak I am getting my starter ready. The mason jar I am going to use has about 2.5-3 fl oz of a yeast cake in the bottom. How can I know if this is the right amount of yeast to use on a 5 gallon 1.050ish beer? Is this cake that appears in the bottom of the jar the "slurry" that mrmalty refers to?
 
Back
Top