What are your tips for keeping costs down

Homebrew Talk - Beer, Wine, Mead, & Cider Brewing Discussion Forum

Help Support Homebrew Talk - Beer, Wine, Mead, & Cider Brewing Discussion Forum:

This site may earn a commission from merchant affiliate links, including eBay, Amazon, and others.
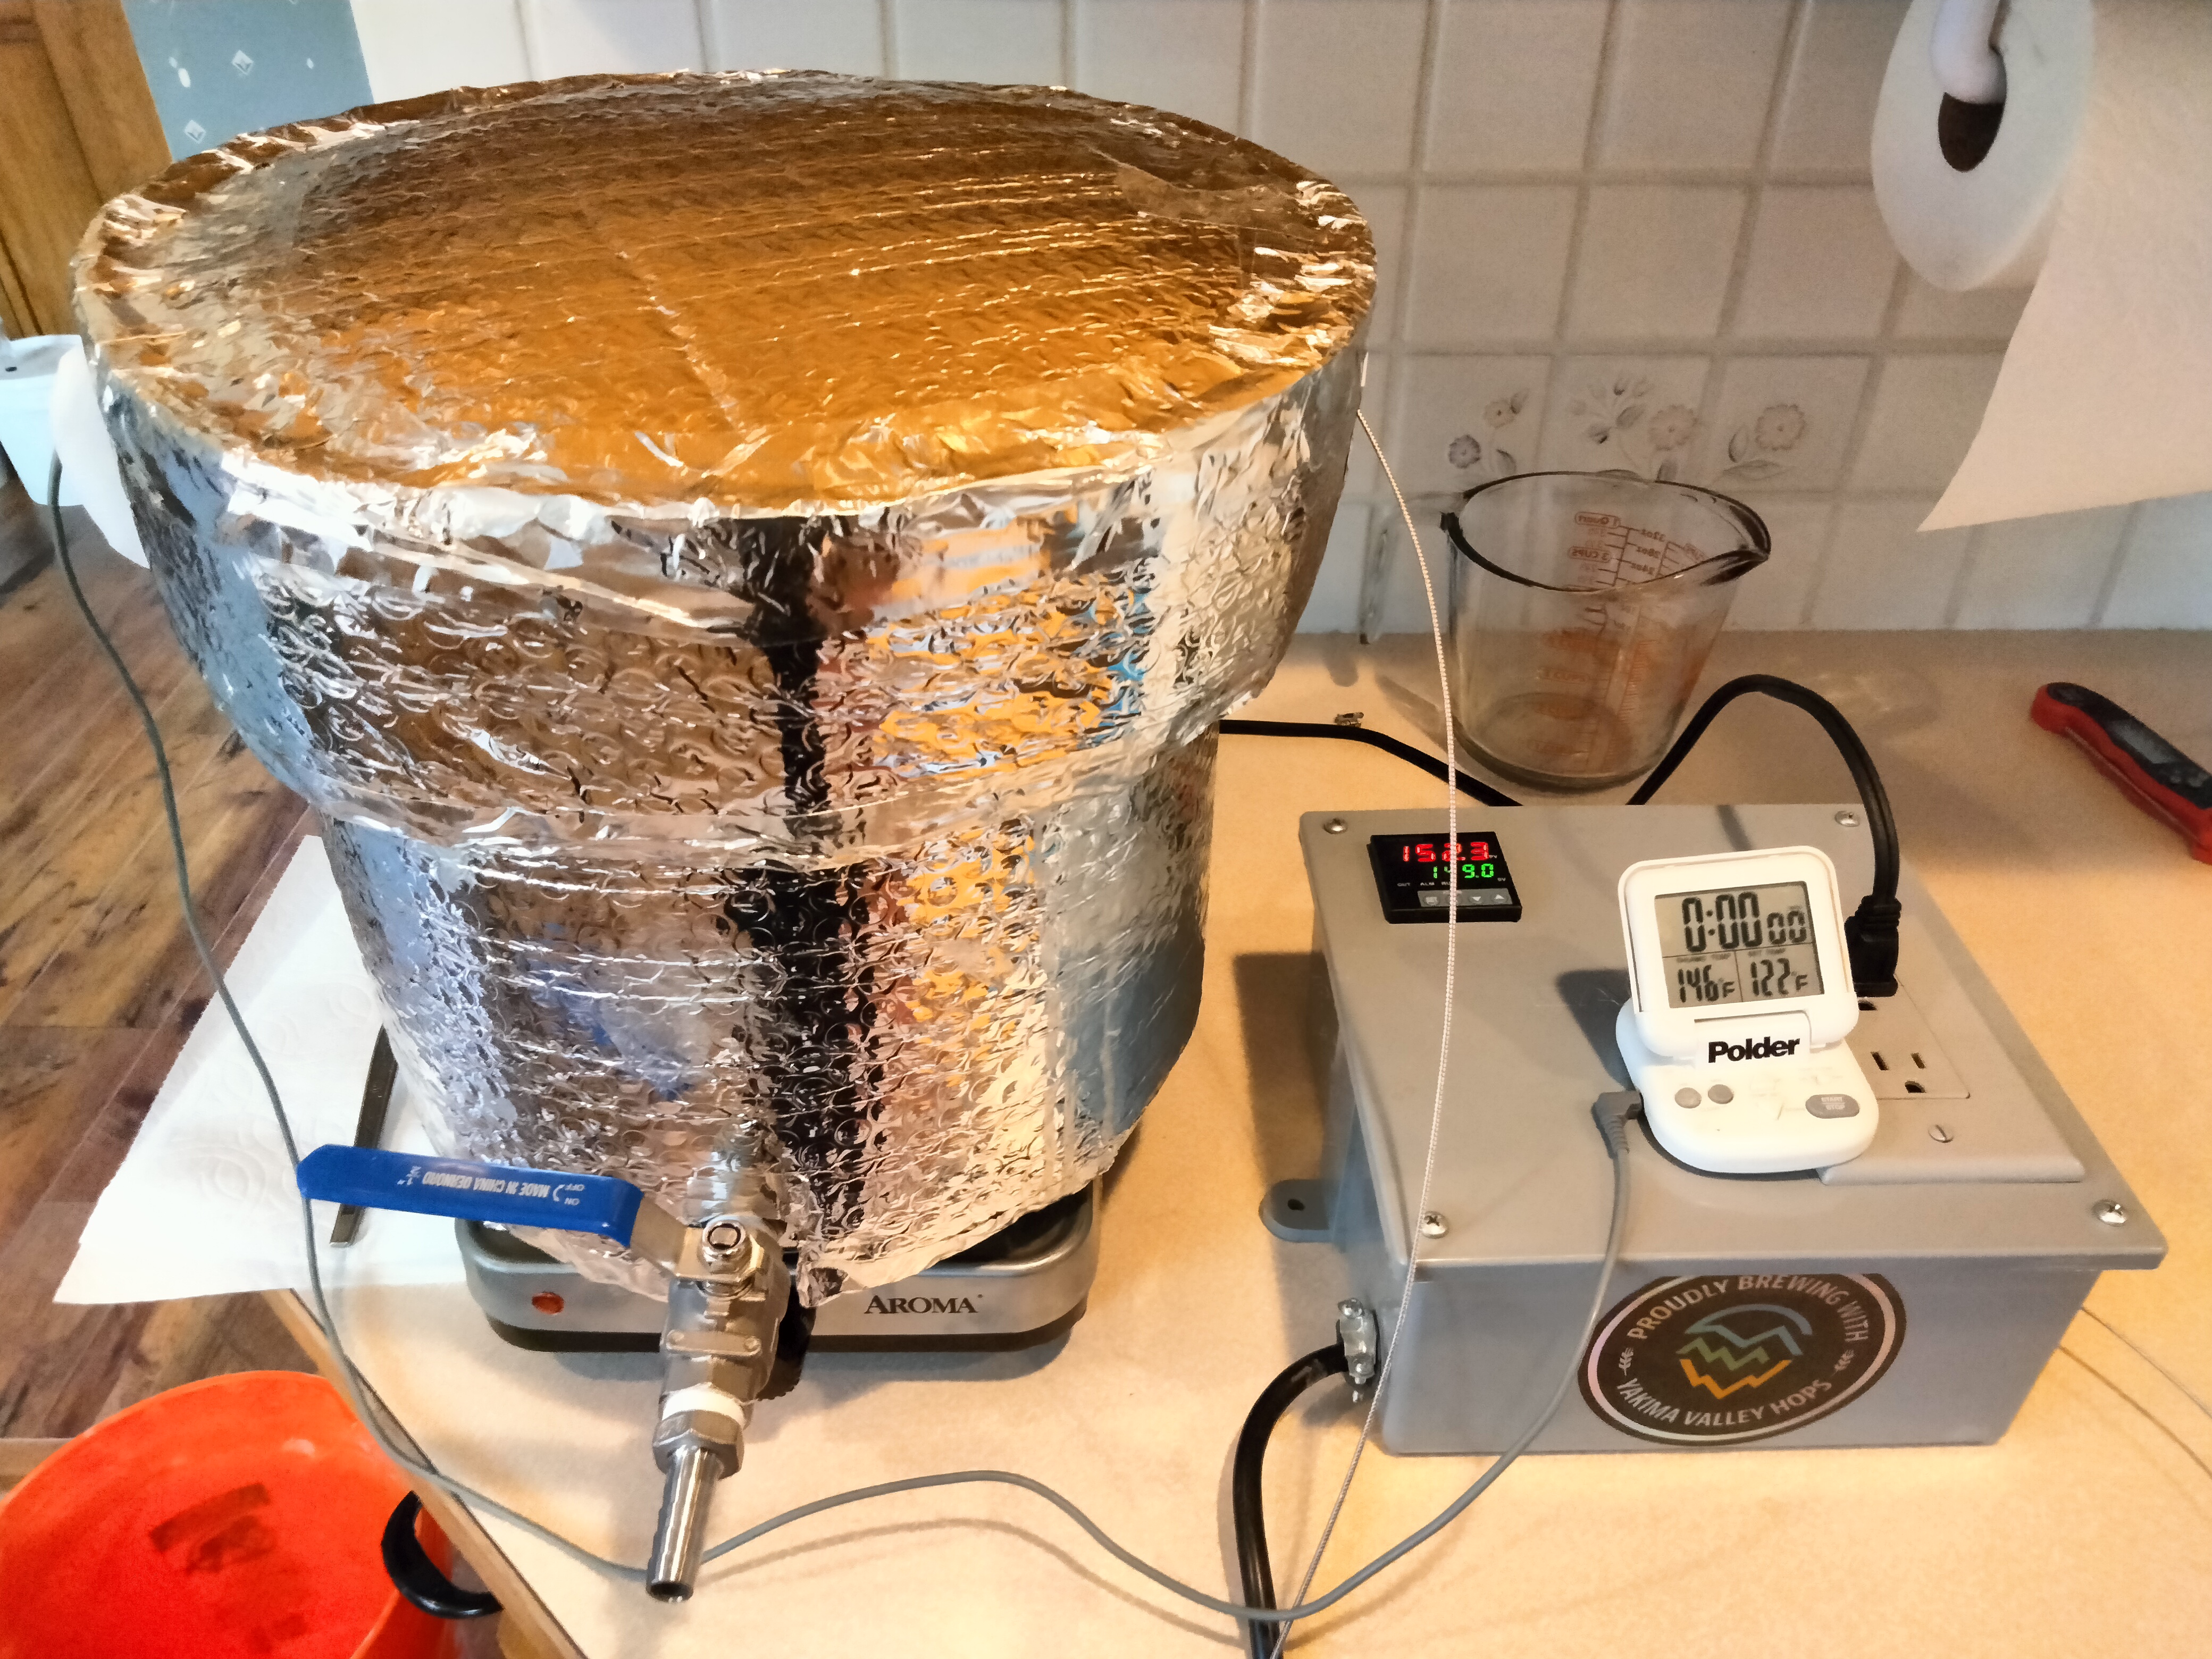
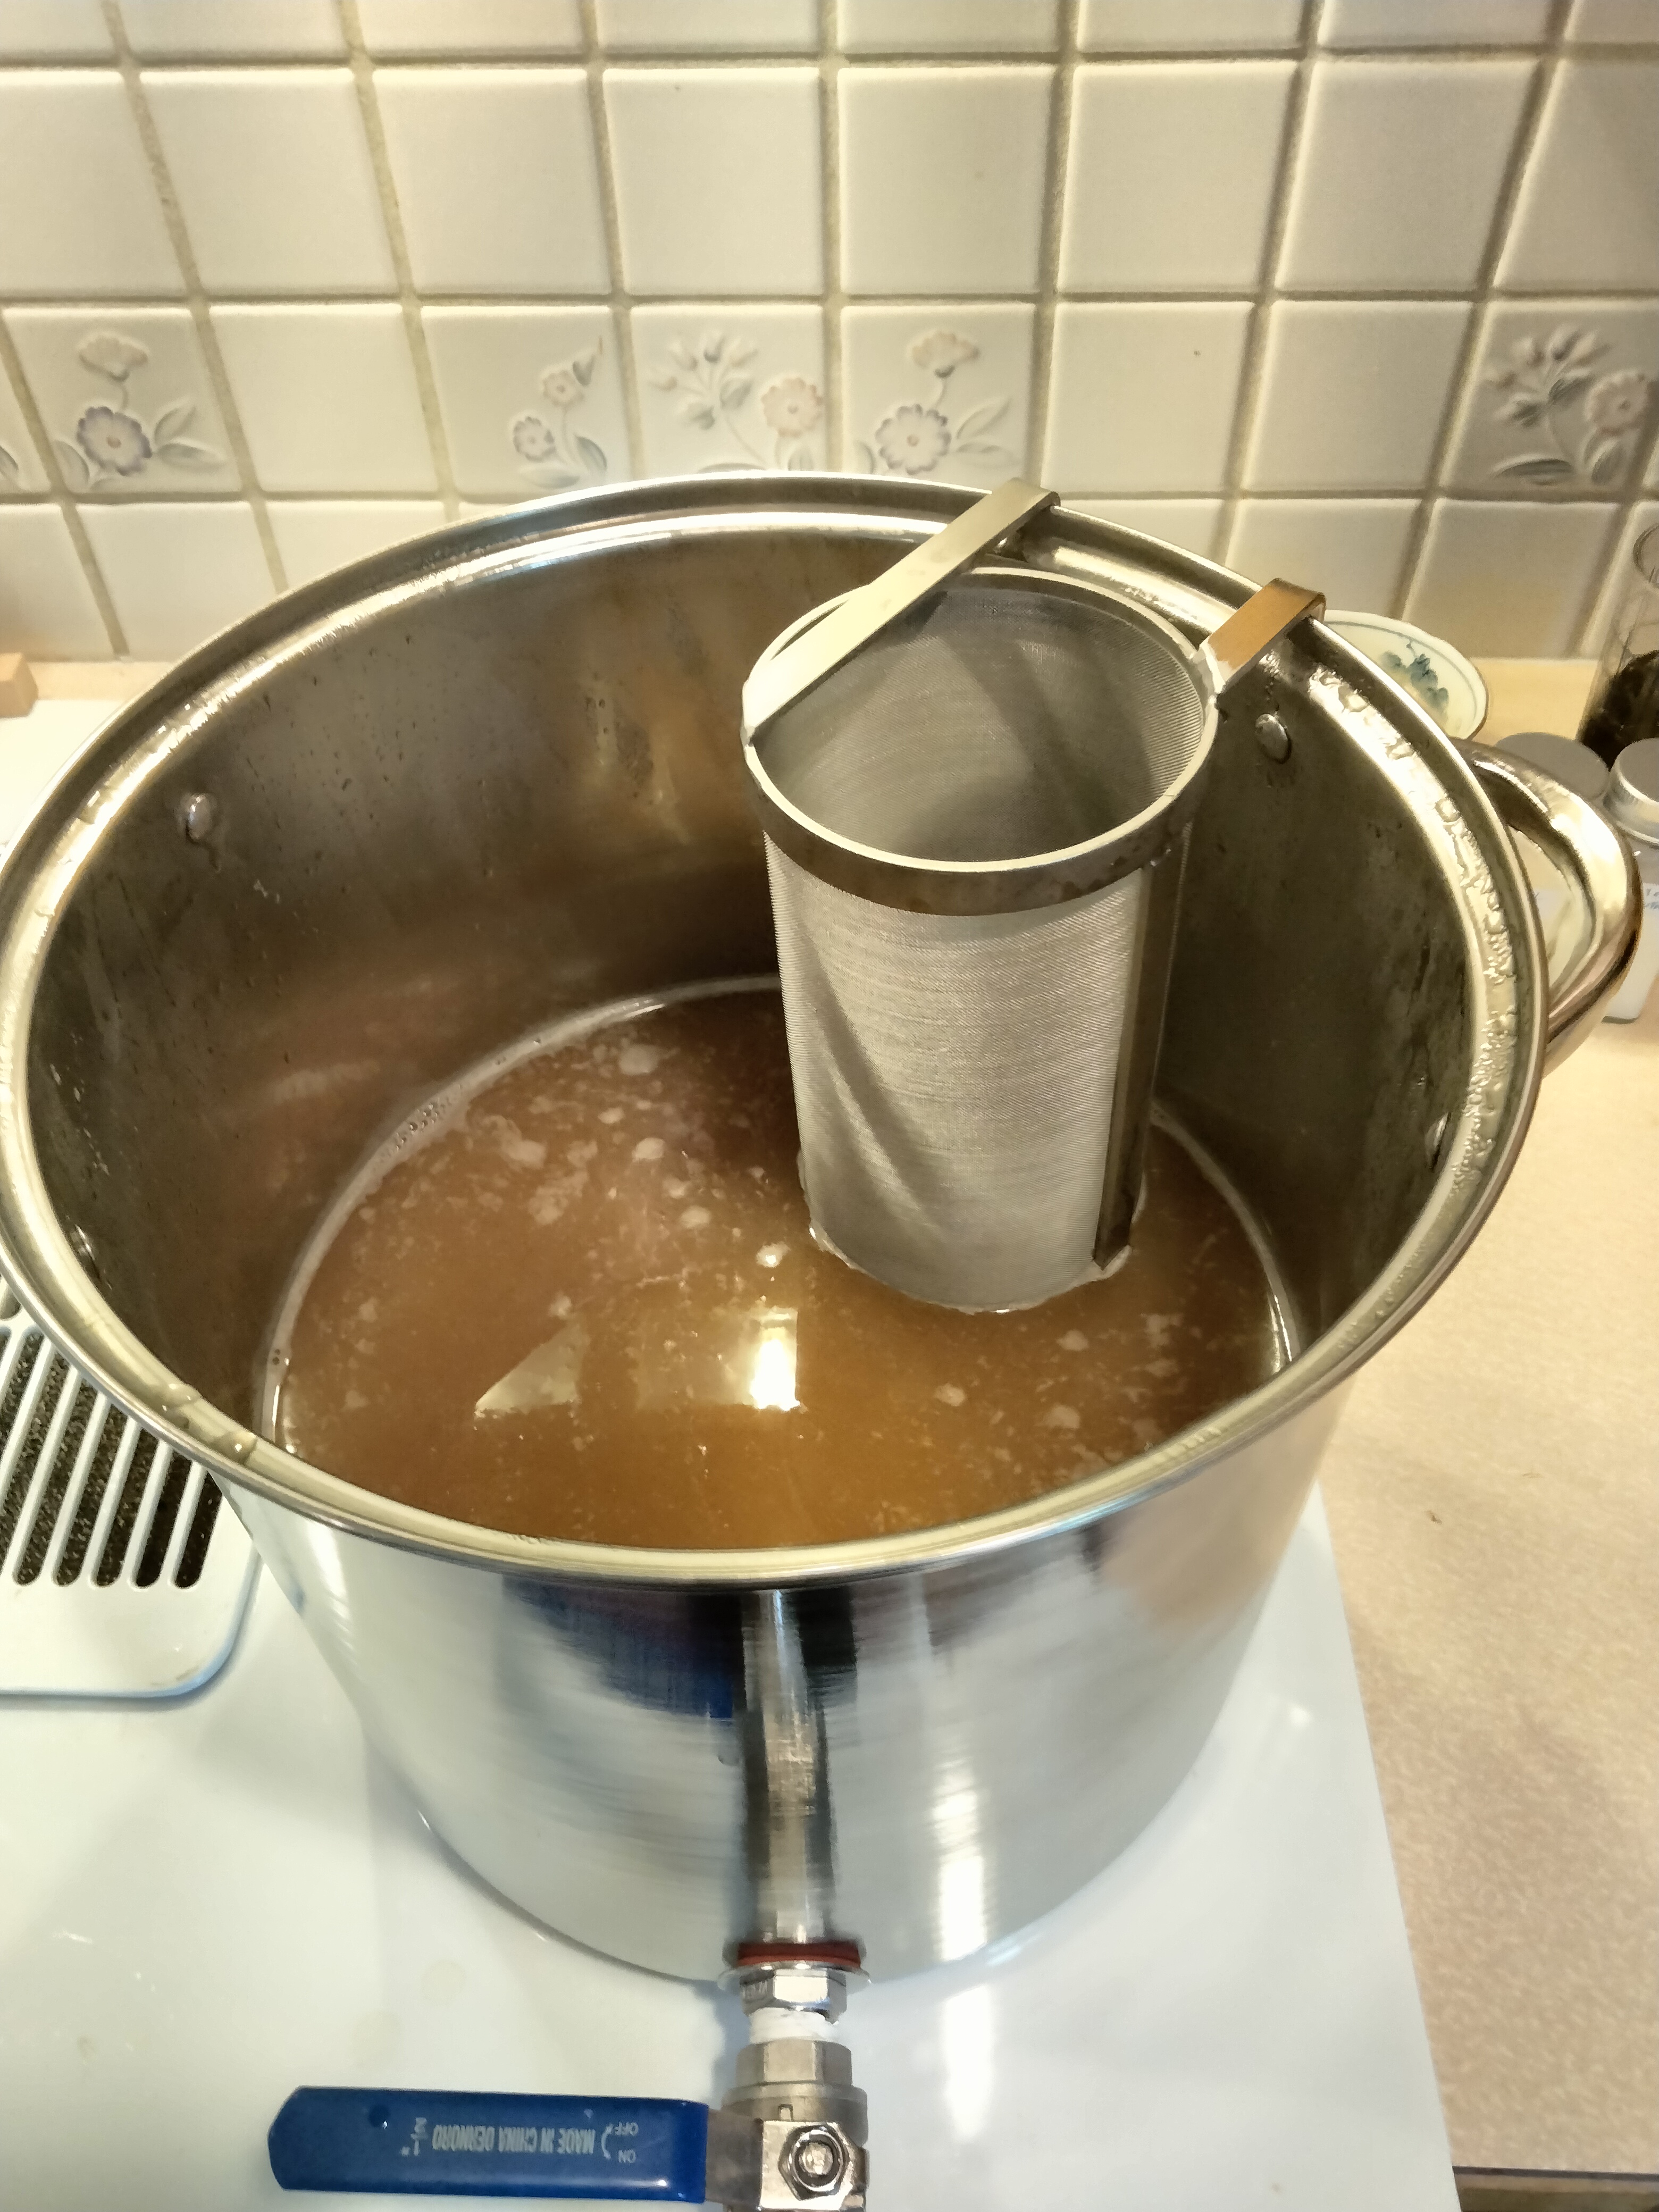
Using extracts saves buying all kinds of boiling equipment. Buy DME in 50 pound bags either from ebay or Amzn. Buy 1 pound (minimum) hops same place. Tap water from hose works for me. Use Grolsch bottles with silicone replaceable seals. Dump hot wort into ice cubes from fridge. Only real elaborate expense was the dedicated window shaker A/C unit used to keep the SS fermenter cold.
 
The #1 cost in homebrewing for almost everybody is equipment. The more you upgrade or chase new equipment the more expensive the hobby gets. You'll never reuse enough yeast or buy hops in bulk enough to make up for the hundreds of dollars in equipment that ends up in the back of your brewing storage. Most of us will make upgrades over time or change the way we brew which comes with the territory but for brewers who buy the new gadget or brewhouse every couple years you're not brewing for the cost conscious. It's fine to buy because you want but if you want to keep costs down really think about those purchases before pulling the trigger.
Very true. But some of us are into lowballing the equipment. (It's still more expensive than we'd like to admit)
 
I would never buy ice. Just freeze a couple of 750 ml soda bottles filled with water in the freezer and add them to the water in the sink that is cooling the boil pot. For some additional chilling, I add a couple of handfuls of ice cubes from the freezer the kettle (which I have to top up to final 3 or 5 gallon volume anyways). Quick and cheap - no chiller, no purchased ice.
 
When starting with all-grain brewing and no mineral (distilled, RO) or low mineral (RO, spring) water, water adjustments can be as simple as measuring spoons or gram scales (for example, see Water Chemistry – How to Build Your Water – Bertus Brewery (link)).

Water additions need not be overly complicated. If you already have a gram scale and some spoons you are halfway there.

I settled on six brewing mineral additions, half of which I could find in my local supermarket:

Three I did need to source online, two have already been mentioned
1. gypsum (CaSO4)
2. calcium chloride (CaCl)

one more:
3. chalk (CaCO3)

Supermarket:
4. Baking Soda (NaHCO3)
5. Epsom Salt (MgSO4)
6. Non-iodized sea salt (NaCl)

With these six minerals and acidulated malt/Phosphoric Acid/Lactic Acid you can dress up RO water to any water profile you can imagine, from a super-soft Czech Pils to an Irish Stout, and everything in between.

Edit: Just now I did see on the link where the author didn't see the need for any of the additions I just suggested.

These six plug into BrewFather quite well, so I kept rolling with it!
 
I would never buy ice. Just freeze a couple of 750 ml soda bottles filled with water in the freezer and add them to the water in the sink that is cooling the boil pot. For some additional chilling, I add a couple of handfuls of ice cubes from the freezer the kettle (which I have to top up to final 3 or 5 gallon volume anyways). Quick and cheap - no chiller, no purchased ice.

My immersion chiller sucks. It will drop the temperature below 100 pretty quickly but stalls around 90 even if the water running thru it is in the low 60's. If I'm pitching kveik yeast, that's fine. :D For everything else, I have 1 liter pop bottles of ice in the freezer. I sanitize one or two with Starsan and add them directly to the fermentation bucket.

I may try doing a lager in the summer by just swapping out ice bottles as they thaw. Or not; I tend to brew with the seasons rather than fighting them. But it could be done ;)
My chiller sucks too.

I should have clarified that what I use the ice for is to pump through my immersion chiller. I keep the ice in an ice chest and then use a pond pump to pump the ice water through the chiller. It will crash a boiling kettle from 200F+ to 110F in about 15 min or less. But then to get from 110 to 70 takes about another hour, even though there's still plenty of ice in the water.
As a quick tip for ICs, agitate the coils.
While you have a high heat transfer coefficient inside the coil, the external heat transfer is driven by the buoyancy effect from the cooling wort.

When I used one, I would lift it up and down slightly to rattle the coils. If you had the inclination to take it further, might rig up some vib motor, but I got tired of doing that, so CFC upgrade keeps high HTCs from moving flows and large temperature gradients.
 
$40/gallon.
$40 for 10 beers? i sure hope you're drinking them from a frosted glass from the bar with a nitro pour or something....
$35 per batch,
yeah, i think you should be able to get some help to widdle that down.... 2 gallons you say?
never reuse enough yeast or buy hops in bulk enough to make up for the hundreds of dollars in equipment that ends up in the back of your brewing storage.
wait, but you can save on bathroom mirrors? just look cool before work and comb your hair in the reflection from the shiny brew kettle, and carry that feeling through the day! :mug:

(hell, you could even repurpose an electric heating element to a hair currler! :p )
 
Thanks. I may give this a try with K1V1116 yeast then. That should give it good attenuation and some esters. (maybe the wrong esters :)) I've used that yeast before in a SMaSH beer with just pilsner malt and I think Sterling hops. It started out good but didn't age well. (next time I'll drink it faster)

Edit: This might be a good recipe to try OYL-033 "Jovaru" yeast. (the yeast will cost as much as the malt, but then I can save and repitch it)
@Miraculix I've been toying with this recipe. I think what I'm going to do is make a hop tea during the mash. Just do a 5 minute boil, with a little noble hops for flavor and aroma, then add the hop tea to the fermenter for bitterness. The boil is just to sterilize the wort and coagulate some of the protein; this recipe has a *lot* of protein from the wheat. Use the Lithuanian farmhouse yeast and ferment it hot.

It's not quite the traditional method but it's close, and it saves me a bunch of propane. And whether the beer is good or bad, I get a story from it for the next HB club meeting. I might try a true no-boil all barley malt beer in a month or two if this goes okay. I think Lars has posted the recipe somewhere.
 
My chiller sucks too.

I should have clarified that what I use the ice for is to pump through my immersion chiller. I keep the ice in an ice chest and then use a pond pump to pump the ice water through the chiller. It will crash a boiling kettle from 200F+ to 110F in about 15 min or less. But then to get from 110 to 70 takes about another hour, even though there's still plenty of ice in the water.
Are you stirring the wort while cooling? I stir until I get a whirlpool going and it accelerates the cooling greatly. I don't even use ice water in the immersion cooler, just my cold tap water (high 50's temp) and I can cool the 200+ degree wort down to 90 in about 15 minutes. Granted I do extract brewing with about a 3 gallon boil and add 2 gallons of cold water to reach the final 70 degree temp.
 
Are you stirring the wort while cooling? I stir until I get a whirlpool going and it accelerates the cooling greatly. I don't even use ice water in the immersion cooler, just my cold tap water (high 50's temp) and I can cool the 200+ degree wort down to 90 in about 15 minutes. Granted I do extract brewing with about a 3 gallon boil and add 2 gallons of cold water to reach the final 70 degree temp.
I'm using a Brewzilla 35L and I typically start to run the recirculating pump a few minutes prior to the end of the boil to make sure everything is sanitized, and then recirculate while chilling until the last 10-15min. Then I turn it off to let everything settle.

Take anything I'm saying with a grain of salt, I'm a total beginer and no idea if what I'm doing is right or proper at this stage. My results thus far do not speak for themselves.
OK you're way beyond me, equipment wise. I just use a 6 gallon kettle on the stove and plastic buckets.
Sounds like the immersion chiller for that unit might be undersized? Just not enough surface area between wort and chiller fluid. If there's a way to add more wort motion across the chiller surface, it would help. I guess as long as it gets down to 100 degrees pretty quickly, it won't harm the beer if it takes a while to get down to the final 70.
 
Last edited:
OK you're way beyond me, equipment wise. I just use a 6 gallon kettle on the stove and plastic buckets.
Sounds like the immersion chiller for that unit might be undersized? Just not enough surface area between wort and chiller fluid. If there's a way to add more wort motion across the chiller surface, it would help. I guess as long as it gets down to 100 degrees pretty quickly, it won't harm the beer if it takes a while to get down to the final 70.
It is 100% under sized. I bought the unit used on Craigslist and it did not come with the original wort chiller. The one I have is homemade (copper tubing) but it seems pretty small compared to the kettle. I have not tried to agitate or move it during chilling so I'll give that a try next time.
 
Walmart (Anaheim) carries Parent's Choice Distilled Water for $1.08/gal in the baby formula section - that would be about a $13.37 savings on a 5 gallon batch. Water Gourmet in Walnut is $.25/gal, which would be a $19.18 savings!
That ones has minerals re-added. The good distilled water is with the bottled water
 
1. Buy grain and hops in bulk. If you join a club or have brewing friends. everyone can do a joint purchase.
2. Learn to wash and re-pitch yeast. With proper procedures you can store yeast in the frig, re-culture and pitch again,
3. Brew in smaller batches. Smaller kettle and mash tun.
4. Install a RO water unit at home.
5. If you have a swimming pool you can use garden hoses to your wort chiller with a small cheap pump.
6. Use plastic buckets for fermenters. Collect beer bottles on recycle day. I walk the neighborhood looking for bottles
7. Purchase PET bottles, you can purchase plastic ball lock posts and then ferment and keg in PET bottles. (another benefit of small batch brewing)
8. Smaller batches allow you to boil on a stove top or BBQ grill burner.
9. Build a small temperature controlled system.
I built one for right around $100.00. Check for my link in the DIY section fir costs and components.
 

Attachments

  • Beer1.jpg
    Beer1.jpg
    3.7 MB · Views: 0
  • Beer2.jpg
    Beer2.jpg
    2.8 MB · Views: 0
I see quite a few posts on saying to wash and re-pitch yeast. Can you (or anyone else) point to a reliable and sure fire way on how to do this?
Google yeast washing on Youtube, there are several really good videos. Basically you take the yeast from your primary and put that into a mason jar. Chill and let the dead yeast settle. You should see three levels in the mason jar, water at the top, live yeast int the middle and dead yeast and trub on the bottom. Syphon the live yeast into another mason jar. Add sterile water and repeat several times. Work under a propane torch. Creates a sterile environment. Take a small 8 oz mason jar and store in the frig. Every 6 months re-culture yeast again and store back in the frig.

Re-culture yeast when you want to use to ferment with. Google culturing yeast on youtube for procedures. When using new yeast I culture a larger sample and right before pitching I pour some in an 8 oz mason jar and store in the frig. You can repeat this process as long as your yeast stays healthy.

If you want to go deeper get the "Yeast

The practical guide to beer fermentation" Great book, the theory section is a little technical, but the section on setting up a small lab goes into really good procedures on how to save yeast.

Cheers

Joe
 
If you use K-97 yeast (and a few others) it's even easier than that. You ferment in a bucket so you can easily get to the top. After a couple of days fermentation, you just scoop some of the foam off the top of the fermenter and put it in a sanitized jar and put it in the fridge. You get nice clean active yeast. Look for the words "top cropping" in the yeast description.

I use both the simple yeast storage method (no washing,) and top-cropping, depending on the yeast. I like top crop better when it's suitable.
 
I jumped into this hobby uncharacteristically with both feet without really thinking about it too thoroughly. I had friends say to me why homebrew, when you can just buy better beer for less money and hassle. I had my second brew day and that was running through my mind as I dropped $30 on ingredients at the homebrew supply shop and $30 on distilled water and ice to recirculate through the wort chiller.

So I'm curious what do you do to keep costs down?

Welcome to the obsession. The truth is you might not save money by brewing your own beer, at least until you've spent a bunch of money on "stuff". There was a time that you could provide yourself with styles unavailable, but that's not really true anymore either.

Why do we brew beer? It's a calling from somewhere inside us, the way a person becomes a priest or a doctor. We just need to do it.
 
@Miraculix I've been toying with this recipe. I think what I'm going to do is make a hop tea during the mash. Just do a 5 minute boil, with a little noble hops for flavor and aroma, then add the hop tea to the fermenter for bitterness. The boil is just to sterilize the wort and coagulate some of the protein; this recipe has a *lot* of protein from the wheat. Use the Lithuanian farmhouse yeast and ferment it hot.

It's not quite the traditional method but it's close, and it saves me a bunch of propane. And whether the beer is good or bad, I get a story from it for the next HB club meeting. I might try a true no-boil all barley malt beer in a month or two if this goes okay. I think Lars has posted the recipe somewhere.
You can add some Irish moss if you want to push the hot break a little bit. Otherwise, sounds good to me! Be careful with the hop tea. I managed to overhop one of my raw ales because I tried to compensate for something which didn't need to be compensated for. I added too much hops at the end. The amount you would usually use for the batch is usually ok for hop tea as well.
 
Thank you! This looks like it is exactly what I am looking for. I have bookmarked it.
An alternate is to overbuild a starter and drop some of it into a mason jar before you pitch the rest into the wort of the day, which avoids the harvesting and cleaning hassle. There’s also a genetic predisposition to harvest the more well flocculating yeasts, but this takes some generations to show up in your beer (at which point other mutations may take hold), so you may have reset with a fresh purchase of yeast by that point anyhow.
 
The only practical way to save money home brewing is drink less. Everything else is either more money in equipment or more time. But the most advantageous aspect of home brewing is self-sufficiency. Considering the way things are going in this world, the ability to make your own food, clothing & beer might become priceless.

Don't buy bottles. Save the bottles and carriers when you purchase beer and use them for your homebrew.
My friends who drink bottled beer always have pry off bottles to give me. I do have some flip cap bottles for when I am kegging. I can fill 4-6 pints for friends and keg the rest.
 
I am on a well and due to hardness and clear water iron (northern MN) I have a softener on it. So I either buy 8 gallons of spring water from a dollar store, $1 gal or go to grocery store and get RO for $0.39 per gallon and add a bit of minerals. When I do 3 gal batches on an induction plate I put a gallon jug in the freezer. No chiller needed. Cut the jug and put frozen block of ice in a large stock pot and pour the 2.25 gallons of hot wort in, cover and come back an hour later. If I need it cooler placing it in a sink of cold water finished it off.

Let some people know you brew, I was given for free cornie kegs, a CO2 tank and regulator/manifold, flip cap bottles and a monster mill by someone who said it was just collecting dust. In exchange I will give him some beer. Someone may have a large stock pot they are no longer using and give it for a few bucks or a few bottles of home brew.
Oh and join a brew club, members are always trying to reduce the amount of good used equipment they have on hand.
 
Well since this has happened to me once too many times, I am done with it.
When dryhopping in a corney, I put one small marble in the bag with hops. I use thin dental floss to tie it and have the floss come thru the corney opening. Normally after pressurizing, there is no leak. I give ample sting length so when the keg goes down you can get more chance of a leak with the weight of bag if strings hanging. But what happened is I ran out of CO2 which was at the end of use and went out and got a refill. Hooked it up, checked everywhere for leaks, and no problem showed. After a few hours I checked again and a leak appeared at the string coming out of the corney keg thru the gasket. This keg was still pretty full so I was really surprised. So no more of that in future. I opened the lid and just dropped the bag in. Hopefully I don't have a problem dispensing. Next time maybe tie it to the release valve under lid? Anyone else dealt with this? Really pissed me off at losing some CO2 money down the drain. Or maybe just nix the marble?
 
Next time maybe tie it to the release valve under lid? Anyone else dealt with this? Really pissed me off at losing some CO2 money down the drain. Or maybe just nix the marble?
If there's something you can tie it to, sure. But none of my lids come standard with a hook, or anything protruding, to tie a string to.

I did buy 5 kegs from a brewery, they had welded a tab or nut onto the bottom of their lids. So those kegs/lids are being used when I know I'm going to be dry hopping in the keg. ;)

I use a piece of very thin (picture hanging) stainless wire to keep the bag suspended. The wire is easier and faster to attach to that tab than fumbling with dental floss. Or I prepare the bag hanging from a spare lid that has a tab, and switch them out even faster while streaming CO2 into the headspace through the gas post at a decent rate.

BTW, I use a small handful of glass marbles, I doubt a single one has enough weight to prevent it from floating.
 
I see quite a few posts on saying to wash and re-pitch yeast. Can you (or anyone else) point to a reliable and sure fire way on how to do this?
I’ve read that washing has mostly fallen out of favor. Just like moving beer to a secondary for a week, it mostly isn’t needed and only increases the chances of contaminatio.
 
For several years, I used a 22 quart pressure canner that I had already for a kettle. It worked just fine, and a standard paint strainer bag from the hardware store fit it perfectly. I moved up to a used 32 quart kettle that I bought from someone in the HB club, and bought a Wilser (sp?) bag to fit it, and I like that better because I can do larger batches and the bag is sturdier, but it other than that it really doesn't work any better and it takes more fuel to fire the larger kettle.

All roads lead to beer :D You adapt your process for the types of beer you like, the yeast you use, and the equipment you have. I've gone back to using 2 fermenters (in the bad old days we called the 2nd one a "secondary", which it seldom is unless you're brewing something weird) I start out with a plastic bucket (and if it's the right kind of yeast, which it seldom is, I top-crop it.) After a week or so, I transfer to a carboy and airlock and add a tablespoon of sugar*. When that's finished and cleared, I bottle directly from the carboy, and I pour the sludge at the bottom into a sanitized mason jar and put it in the fridge. I usually don't save the trub from the bucket, but if I do I usually wash that because it's full of hops, grain dust, cold-break protein, and other crap. That's what works for me; you might come up with something totally different and better for you.

*the sugar is to energize the yeast and get it to consume oxygen the beer picked up during the transfer. That's my theory anyway.
 
I'm not ashamed to say I buy almost exclusively when Yakima Valley has their "flash sales".


hmm, i have two 22lb bags of 2016 crystal hop pellets, Hops Direct were giving away for shipping.....i'm thinking 'light' "hazy" .... i do have 24" hop bags and just worried about needing a pully to get them out of the boil!
 
hmm, i have two 22lb bags of 2016 crystal hop pellets, Hops Direct were giving away for shipping.....i'm thinking 'light' "hazy" .... i do have 24" hop bags and just worried about needing a pully to get them out of the boil!

When you need a pulley to get your hop bag out of the boil, you're either doing something horribly wrong or wonderfully right!
 
Back
Top