StandEight
Well-Known Member
Looks awesome! What's your mashtun wrapped with?

Would anyone care to post some updated photos to their build progress? Im feeling overwhelmed with burner selection and plumbing, and would love to look at some pictures. Thanks in advance!


StandEight said:Nice setup Ox. What did you paint the stand with?
Cheers,
Brad


Anyone have good pics on how you did the gas line?
High temp engine paint. Not sure how it is going to hold up, because you are supposed to bake it after you spray it on. Not sure about you, but I do not have an oven that big!


Looks awesome! What's your mashtun wrapped with?

High temp engine paint. Not sure how it is going to hold up, because you are supposed to bake it after you spray it on. Not sure about you, but I do not have an oven that big!
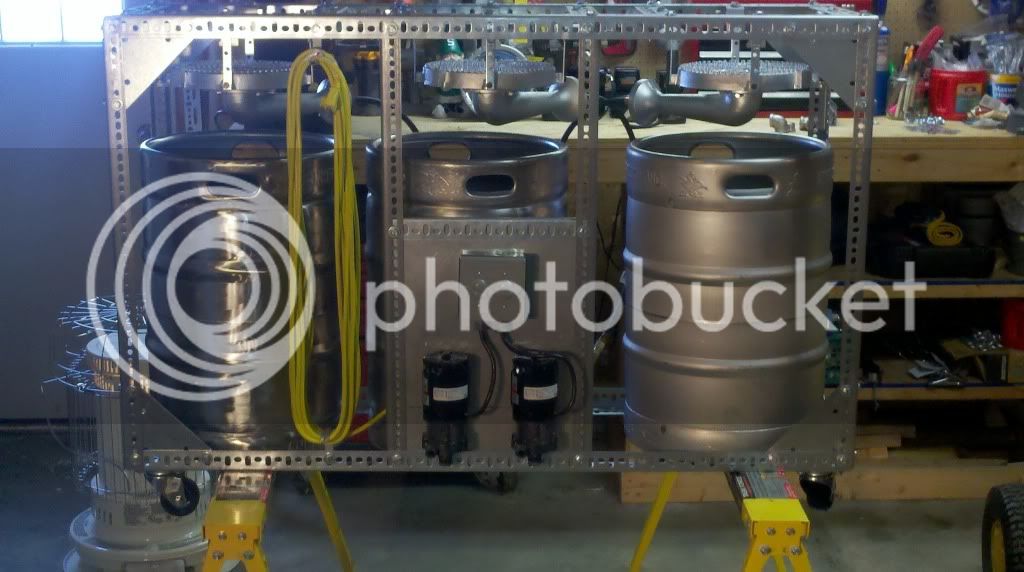
Here is my latest contraption...still need to mount the gas pipe and casters, but we're coming along.
Holy crap... this forum is going to cost me some money. I currently have a make-shift 3-tier system using a polarware BK for 5 gal batches and a keggle (only have top cut off) for 10 gal batches. I have been trying to come up with a cheap 3-tier structure that will work with 3 keggles ( have two kegs waiting in the garage). every time i get on this site and look at stuff i start changing my mind on what i want to do. I have a brew hut built in the back yard and space is a bit limited but i think a single tier would fit. but then i need to buy pumps in addition to a structure and finishing my kegs. i am just so undecided now.
looks good to me. How much higher did you make your legs in order to put the kegs under there? you think the controls on the back side and low are going to be an issue for adjustments? Damn, I sure like this non-welding structure... I'm so confused...
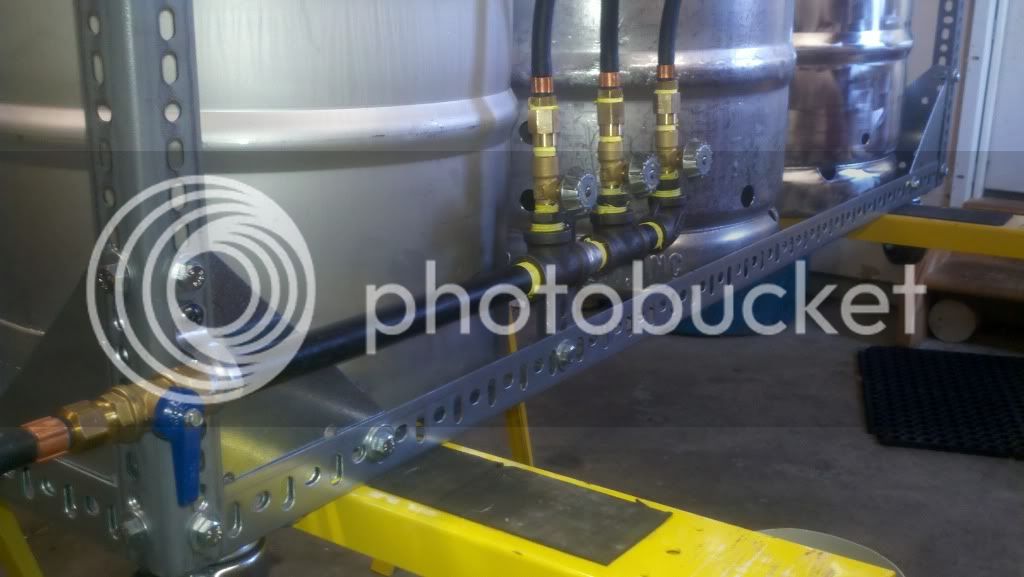
ok, pictures as promised - this is using 1/2" black iron pipe.
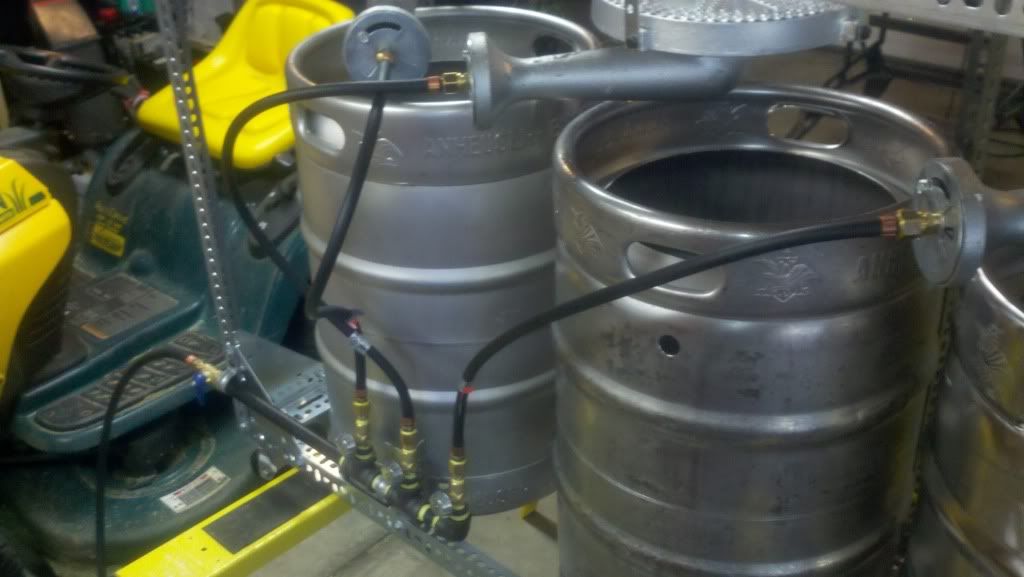
Burner propane connectors & pumbing -
http://i722.photobucket.com/albums/ww229/Strongbad_can/DSCN0541.jpg
http://i722.photobucket.com/albums/ww229/Strongbad_can/DSCN0542.jpg
http://i722.photobucket.com/albums/ww229/Strongbad_can/DSCN0539.jpg
http://i722.photobucket.com/albums/ww229/Strongbad_can/DSCN0538.jpg
waterproof switch mount wired up -
http://i722.photobucket.com/albums/ww229/Strongbad_can/DSCN0545.jpg
http://i722.photobucket.com/albums/ww229/Strongbad_can/DSCN0544.jpg
Got my propane manifold built, pressure tested, and then fired up all 3 burners successfully.
Question about your gas line. Can you give a parts lit for it? I am about to build this and this is the only area that I am lost on. Specifically, what kind of rigid pipe are you using and where did you get the parts?
Any help you could give would be great. I am thinking of using a similar design. I might have it run all the way across the bottom.
Thanks in advance,
JM
Sure... the rigid pipe is all 1/2" black pipe and all these parts except for the 3 hoses and needle valves were all from lowes:
Brass valve 1/2" F npt on one end and 3/8" M flare on the other (x1)
12" black pipe nipple (x1)
2" black pipe nipple (x2)
1/2" black pipe tee (x2)
1/2" black pipe 90* (x1)
1/2" x 1/4" black pipe reducing bushing (x3)
1/4" needle valves (x3) that I got online
1/4" brass close nipple (x3)
1/4" F x 3/8" F coupler (x3)
And then the hoses I got online from some RV parts dealer
I didn't see the need to run it all the way across the stand... I wanted to allow room for me to get my keggles under the rig from the back side for storage, and if I had run the manifold all the way across, it would have just been one more thing to maneuver around, plus why spend the extra on longer pipe?
Hope that helps!
That is kind of starting from where the tank regulator hooks up, and working my way up to the burner hookup.


![Craft A Brew - Safale BE-256 Yeast - Fermentis - Belgian Ale Dry Yeast - For Belgian & Strong Ales - Ingredients for Home Brewing - Beer Making Supplies - [3 Pack]](https://m.media-amazon.com/images/I/51bcKEwQmWL._SL500_.jpg)


