SanMarzano
Well-Known Member
Anyone have a list of gas parts to buy to put together burners?

Anyone have a list of gas parts to buy to put together burners?
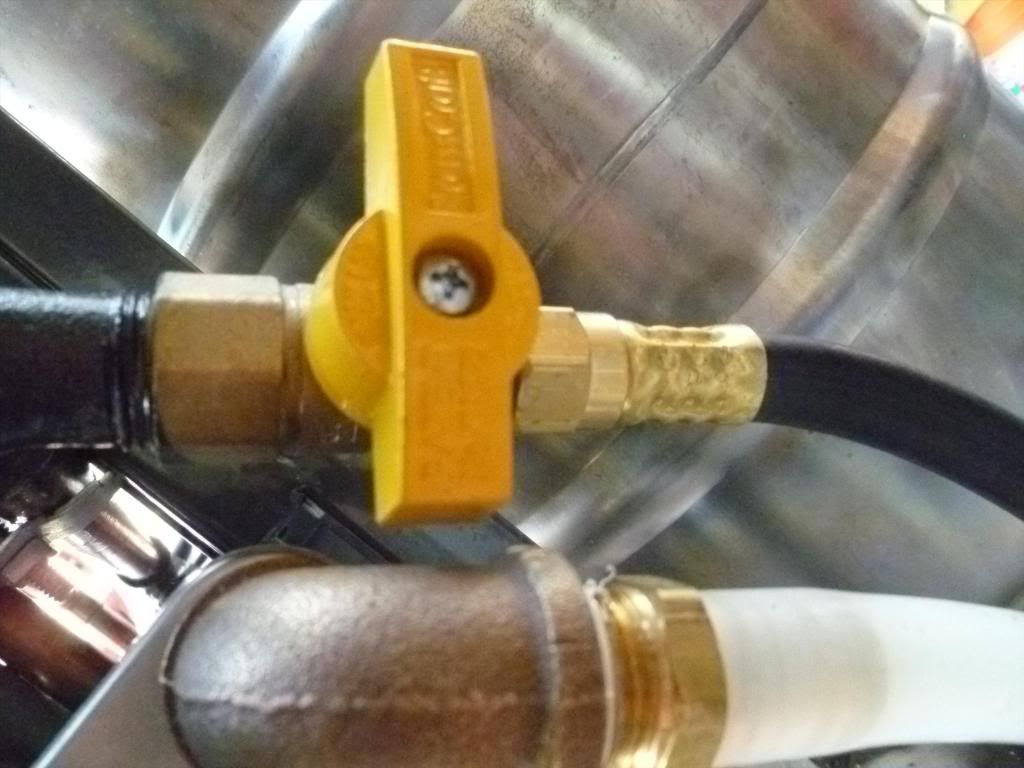


thanks for the pics and links. but what about needle valves to control the exact flow to the burners? I thought ball valves were mostly used for on/off gas applications?
So it looks like I was charged $204...14 of that was tax.....so 25 bucks for shipping.....Not great but could be worse(Cheaper than a welder)
[/url]


Tripping the valve?
Is it a set 30 PSI or an adjustable?
Have each of the burners been dialed in? (Air/fuel ratio adjusted)
BTW: interesting valves...
I used a miter saw with a 10" metal cutting (fiber) blade. You're doing all straight cuts so the saw you're looking at should do the job.
Did it do any damage to the mitre saw? Searching around google some people mentioned sparks damaging the mitre saw table, wasn't sure.
Hey guys might be something I overlooked in the thread but where did y'all buy the galvanized metal? And how did you get it cut? On your own or by a shop!
Builds look great
Just ordered all of the parts to get my build going! Really excited! I added (12) additional 90 degree angles and (2) additional packs of the nuts & bolts. My idea is to add (4) of the 90 degree angles to the top of my stand, under each burner for additional support. Do you all think this was a good idea? Probably worthless, but I thought I would try it out anyways.
Just ordered all of the parts to get my build going! Really excited! I added (12) additional 90 degree angles and (2) additional packs of the nuts & bolts. My idea is to add (4) of the 90 degree angles to the top of my stand, under each burner for additional support. Do you all think this was a good idea? Probably worthless, but I thought I would try it out anyways.
Guys,
I'm getting started on mine this weekend, angle iron is in the mail.
I need some help on the cutting. I saw someone mention the cut off saws at Harbor Freight before, I was wondering if this one would work:
http://www.harborfreight.com/power-tools/cut-off-saws/6-inch-cut-off-saw-41453.html#pr-header-41453
Seems like it might be a bit too small, but I didn't know if anyone had any experience. I'd rather not go the angle grinder route since I haven't used one before.
Angle grinder is an awesome tool for cutting locks, sharpening blades/axes, fashioning tools to fight off zombies, and all sorts of other things. They are rather affordable as you don't need a high end model to be effective. While it's not something I use too often with my home renovations/projects...when I do need it, it's worth every penny.
The jet?Stupid question, but could someone link me the jet from Morebeer.com that is required to hook up the piping to each burner? There are a couple, and I dont want to get the wrong one. :\
Thanks!
...and with the zinc burnt off, it will rust...Let it burn for awhile in the open or a very good ventilated area. The coating needs to burn off.

...and with the zinc burnt off, it will rust...
What is everyone using to seal the threads for all the propane lines? regular teflon tape? something like Rectorseal? I finally got all the plumbing parts and ready to put it together. Thanks.


![Craft A Brew - Safale BE-256 Yeast - Fermentis - Belgian Ale Dry Yeast - For Belgian & Strong Ales - Ingredients for Home Brewing - Beer Making Supplies - [3 Pack]](https://m.media-amazon.com/images/I/51bcKEwQmWL._SL500_.jpg)


