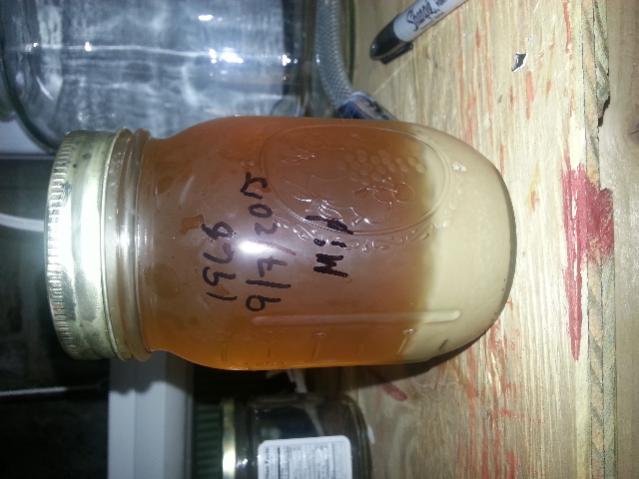
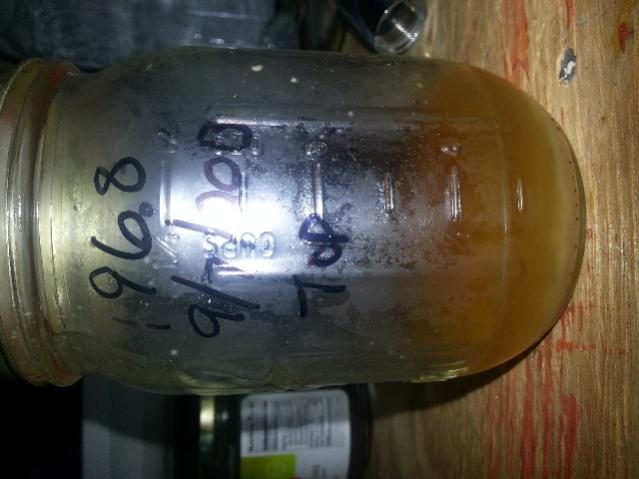
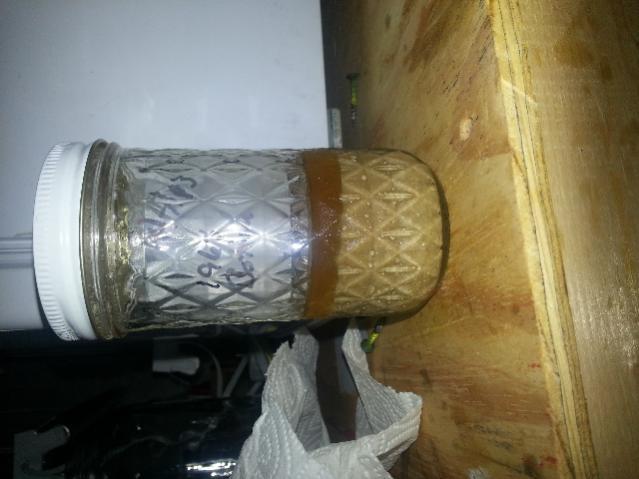
I'm new to washing and I guess I picked a doozy to start with 1968. We boiled water with six mason jars for about 20 minutes. Let cool at room temperature for about 10 hours covered. After we racked our ESB we poured all 6 mason jars full of water on to the cake. We then mixed it up like a madman poured all the contents into a large jar. We allowed to settle for about 40 minutes and then poured the contents into 6 mason jars. The first 4 contained almost all liquid. The last 2 contained the middle section which look to be mostly yeast. We then sanitized two more jars and poured the bottom section which looked to be trub and yeast. We allow them to cool in the refrigerator for 3 days. Here are the photos
You are using an out of date browser. It may not display this or other websites correctly.
You should upgrade or use an alternative browser.
You should upgrade or use an alternative browser.
Washing 1968
- Thread starter dhotnisky
- Start date

Help Support Homebrew Talk:
This site may earn a commission from merchant affiliate
links, including eBay, Amazon, and others.
It seems that the middle section has the most viable yeast. However, we are going to add some sterile water to the bottom samples shake them up and put them back in the refrigerator for another 3 days. After that we will shake them up again and see how they settle out. We will possibly decant off the viable yeast that we see. In addition we are going to make an IPA out of 2 of the top samples. One of them being the 4th one poured which had about twice the amount of yeast seen in the picture. Let you guys know how the IPA turns out and how the washing of the bottom section turns out


As someone who has used 1968 quite extensively let me advise you: take a sanitized spoon and scoop it out of the fermenter. You will select for poor flocculation using homebrewing washing methods. Washing 1968 doesn't work. Washing is a waste anyways.
Thank you for the sound advice rexbanner. You got me to do some more searching on the web and I found a lot of advice!
With regards to this experiment, I think I'm going to continue with what I started and see where it takes me. However, in the future I'm going to either use top cropping or saving some of the starter from first step in creating a step up starter.
More to report:
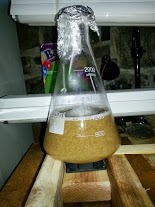
I got a bit nervous, too many beers and after midnight does that to me LOL, and pitched more yeast into the starter. I was worried that the yeast would not flocculate the way 1968 does. What I pitched was one of the bottom samples but I cleaned it up a bit. Sorry no pic for this one :
:
1. Boiled RO water for 20 min.
2. Cooled to 65 F
3. Added it to the decanted and warmed up sample. Filled to near the top.
4. Mixed it up by shaking.
5. Let set for 10 min at which time there was an obvious layer of yeast on the bottom and trub on the top.
6. Poured trub off
7. Add more water from step 1 above
8. Mixed by shaking
9. Let set for 10 min at which time the trub was now on the bottom (what little was left) and the top looked to be mostly yeast (very white and creamy).
10. Poured the top layer into the yeast starter.
Yeast starter looks good, a lot of flocculated yeast spinning around
I will keep you posted.....
With regards to this experiment, I think I'm going to continue with what I started and see where it takes me. However, in the future I'm going to either use top cropping or saving some of the starter from first step in creating a step up starter.
More to report:
I got a bit nervous, too many beers and after midnight does that to me LOL, and pitched more yeast into the starter. I was worried that the yeast would not flocculate the way 1968 does. What I pitched was one of the bottom samples but I cleaned it up a bit. Sorry no pic for this one
1. Boiled RO water for 20 min.
2. Cooled to 65 F
3. Added it to the decanted and warmed up sample. Filled to near the top.
4. Mixed it up by shaking.
5. Let set for 10 min at which time there was an obvious layer of yeast on the bottom and trub on the top.
6. Poured trub off
7. Add more water from step 1 above
8. Mixed by shaking
9. Let set for 10 min at which time the trub was now on the bottom (what little was left) and the top looked to be mostly yeast (very white and creamy).
10. Poured the top layer into the yeast starter.
Yeast starter looks good, a lot of flocculated yeast spinning around
I will keep you posted.....
![Craft A Brew - Safale S-04 Dry Yeast - Fermentis - English Ale Dry Yeast - For English and American Ales and Hard Apple Ciders - Ingredients for Home Brewing - Beer Making Supplies - [1 Pack]](https://m.media-amazon.com/images/I/41fVGNh6JfL._SL500_.jpg)
$6.95 ($17.38 / Ounce)
$7.47 ($18.68 / Ounce)
Craft A Brew - Safale S-04 Dry Yeast - Fermentis - English Ale Dry Yeast - For English and American Ales and Hard Apple Ciders - Ingredients for Home Brewing - Beer Making Supplies - [1 Pack]
Hobby Homebrew

$172.35
2 Inch Tri Clamp Keg Manifold With Ball Lock Posts, Pressure Gauge, PRV (0-30 PSI) – Homebrew, Fermentation, Kegging System
wuhanshijiayangzhiyimaoyiyouxiangongsi

$479.00
$559.00
EdgeStar KC1000SS Craft Brew Kegerator for 1/6 Barrel and Cornelius Kegs
Amazon.com

$58.16
HUIZHUGS Brewing Equipment Keg Ball Lock Faucet 30cm Reinforced Silicone Hose Secondary Fermentation Homebrew Kegging Brewing Equipment
xiangshuizhenzhanglingfengshop

$53.24
1pc Hose Barb/MFL 1.5" Tri Clamp to Ball Lock Post Liquid Gas Homebrew Kegging Fermentation Parts Brewer Hardware SUS304(Gas MFL)
yunchengshiyanhuqucuichendianzishangwuyouxiangongsi

$10.99 ($31.16 / Ounce)
Hornindal Kveik Yeast for Homebrewing - Mead, Cider, Wine, Beer - 10g Packet - Saccharomyces Cerevisiae - Sold by Shadowhive.com
Shadowhive

$39.22 ($39.22 / Count)
Brewer's Best Home Brew Beer Ingredient Kit - 5 Gallon (Mexican Cerveza)
Amazon.com

$7.79 ($7.79 / Count)
Craft A Brew - LalBrew Voss™ - Kveik Ale Yeast - For Craft Lagers - Ingredients for Home Brewing - Beer Making Supplies - (1 Pack)
Craft a Brew

$176.97
1pc Commercial Keg Manifold 2" Tri Clamp,Ball Lock Tapping Head,Pressure Gauge/Adjustable PRV for Kegging,Fermentation Control
hanhanbaihuoxiaoshoudian

$33.99 ($17.00 / Count)
$41.99 ($21.00 / Count)
2 Pack 1 Gallon Large Fermentation Jars with 3 Airlocks and 2 SCREW Lids(100% Airtight Heavy Duty Lid w Silicone) - Wide Mouth Glass Jars w Scale Mark - Pickle Jars for Sauerkraut, Sourdough Starter
Qianfenie Direct

$53.24
1pc Hose Barb/MFL 1.5" Tri Clamp to Ball Lock Post Liquid Gas Homebrew Kegging Fermentation Parts Brewer Hardware SUS304(Gas MFL)
Guangshui Weilu You Trading Co., Ltd

$22.00 ($623.23 / Ounce)
AMZLMPKNTW Ball Lock Sample Faucet 30cm Reinforced Silicone Hose Secondary Fermentation Homebrew Kegging joyful
无为中南商贸有限公司

$20.94
$29.99
The Brew Your Own Big Book of Clone Recipes: Featuring 300 Homebrew Recipes from Your Favorite Breweries
Amazon.com

$28.98
Five Star - 6022b_ - Star San - 32 Ounce - High Foaming Sanitizer
Great Fermentations of Indiana
Thanks again for all the advice!
What I found was that when the starter was put in the fridge I had a large amount of yeast crash out. However, unlike other starters there was still a haze in the beer. The FG was 1.004 which is a bit low and the smell was very fruity.
Based on this and rexbanner's advice I tossed this starter and all of the yeast samples.
Moving forward I'm going to take yeast samples from my starters by making about 500 mL more than I need and pour off that portion into a mason jar.
Similar threads
- Replies
- 149
- Views
- 16K


