
OP
OP
I also found a site that custom makes multilevel switches... but I bet they are $$$$$$ expensive $$$$$
http://www.auberins.com/index.php?main_page=product_info&cPath=7_32&products_id=339
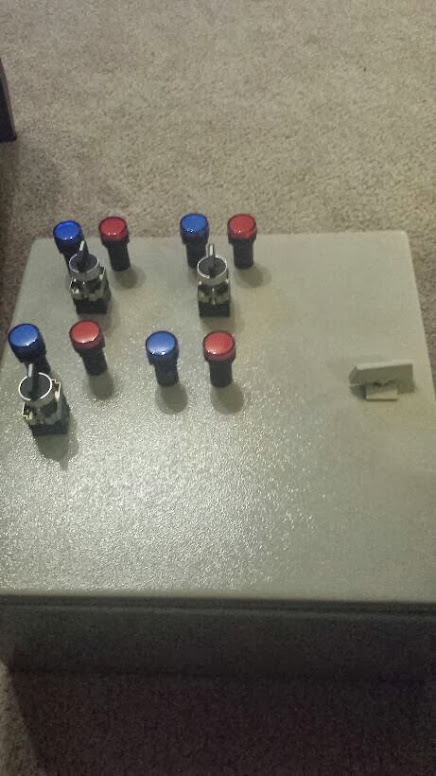
Here she is
")


![Craft A Brew - Safale BE-256 Yeast - Fermentis - Belgian Ale Dry Yeast - For Belgian & Strong Ales - Ingredients for Home Brewing - Beer Making Supplies - [3 Pack]](https://m.media-amazon.com/images/I/51bcKEwQmWL._SL500_.jpg)


 That means tonight/tomorrow can start the wiring... I think.
