This is losely brewing related, but a question.

Homebrew Talk - Beer, Wine, Mead, & Cider Brewing Discussion Forum

Help Support Homebrew Talk - Beer, Wine, Mead, & Cider Brewing Discussion Forum:

This site may earn a commission from merchant affiliate links, including eBay, Amazon, and others.
..but it does work for deculming...
Great news @bracconiere , some times the road you take is not as important as is getting to the destination.


subbed in case kart shows up to ad sensors, wifi and cameras to this device..
Ha! @Homebrew Harry , a bit out of my wheel house. I was a lonely Maytag repair man and also in HVAC for a while. A good wiring diagram can lead you to the problem on those older mechanical machines pretty easy. My dad had a motto: "It's a mechanical thing, if every thing is right, it has to work. As much as it seems sometimes, they have no mind of their own."
Glad I was able to help a little on this project. If wifi is needed, some one else is going to step up (LOL)

Cheers, :mug:
Joel B.
 
@kartracer2 you know i had a buddy over to help me fix my bathtub drain. he brought a drill, too bad i wasn't thinking or would have haven him drill the holes for the switches...which leads me to another question. these switch have TINY screws that are really close to each other, what kind of wire should i be using for a 6A 120v motor? the switches say their for 15A but...for some reason, they make me nervous?

:mug:
 
@bracconiere as for wire size 14 is great plenty and you could get by with 16 for this. Yeah, those screw terms, you'll need some crimp on wire ends if you use stranded wire. There might be enough wire unused on the machine that would work. Either eyelet or fork will work for termination and I would use the non-insulated type (I hate those) and then some heat shrink tubing on them but it's not really required. Actually I would solder them on (the wire ends) unless you have a good crimp tool, but that's a me deal. Don't forget to put the tubing on the wire before you put the ends on if you use it (LOL).
Cheers, :mug:
Joel B.
EDIT> I dislike the insulated wire ends
 
Does that resistor have any #'s on it? (like 4500? as in ohm) I only see one resistor on the wire diag. and not sure what it did for sure. I'm just curious, it has no relevance any longer. Just me being me.
Cheers, :mug:
Joel B.
I'm not sure what that resistor is for either, but it looks like it may have been for low heat.
 
@kartracer2 hey so i found out i had some, three way on-off-on switches, rated for 125vac 20A....i got this wired up, testing it....


i have hot wired to all four hots, get continuitity....between them and neutral....but i'm nervous because even with the switch in slow steady instead of three phase jump start it still has continuity, even though, i only have three of the lead going to neutral.....i'm 'trying to do it MY way just because i had the switch lying around.....i have the push button and switch, but when i was digging threw my junk box where my soldering iron is someplace the three way switches were right on top, and the old wiring stuff fit perfectly over the terminals on the three way switch! wouldn't budge onto the push button or switch....


sorry for the long post but....if the start motor doesn't have a 'garbage bag' for used up electrons, but it's not getting new electrons to dispose of, is it going to get to hot?
 
well i got my undwear in a bind right now.....i'm deculming with this thing, if i turn it too...one on it hums, and turns, if i switch it too off it keeps turning, but stops humming.....i have a fire exstinguisher out of the box next to it, just in case!!! ;) :mug: i hope the loud humming is what i DON'T need besides getting it rolling....
 
well i got my undwear in a bind right now.....i'm deculming with this thing, if i turn it too...one on it hums, and turns, if i switch it too off it keeps turning, but stops humming.....i have a fire exstinguisher out of the box next to it, just in case!!! ;) :mug: i hope the loud humming is what i DON'T need besides getting it rolling....
Yeah, the humming thing is not good. If you get running without the humming you should be good. I don't think the switch you have is actualy what they call a "3-way" switch. How many terminels are there on the switch? 3 or 6?
 
Yeah, the humming thing is not good. If you get running without the humming you should be good. I don't think the switch you have is actualy what they call a "3-way" switch. How many terminels are there on the switch? 3 or 6?


6 terminals, but the old wiring from the dryer slipped over them nice and snug....it hasn't caught fire yet? i've got it pluged into a surge protector, and switch the switch to the position it humms at first then i flip the switch to what should be off? but it stops humming, keeps spinning...and on a plus hasn't caught fire yet......!!! :mug:

do you know how to wire a 6 terminal three way switch so i don't need the push button? it's got on-off-on, but if i turn it to the other on side like this it blows the circuit?


(sorry for my typing, not that it's ever that good....but this oat malt is looking great!!! just need to figure out how to make it not so precarious! working great....)
 
Does the switch look like this but with spade terms instead of screws?
DPDT_On-Off-On_Switch.png

Edit- forgot to load photo the first time.
 
Does the switch look like this but with spade terms instead of screws?View attachment 748450
Edit- forgot to load photo the first time.

looks exactly like that, without the holographic layout? and i would with the way i have it hooked up now, if i flip it to far to the other on postion, it blows my surge protector, but works great between one one side, and in the off position.....which i need to think more about, because i think i have the motor hard wired to the power cable, but only the start coil wired to the switch....

i think i'd be better off taking your advice and just soldering the wires to the switch and push button at this point...i got some really clean malt out of it, but this isn't a stable solution. just have to dig deeper in the junk bin for my soldering iron...

:mug: :mug: :mug: i do appreciate your willingness to help...


(i've successfuly deculmed two batches with your help so far! but it's still shady)
 
@bracconiere Hey I think this should work for you. (See Diagram)
Switch is center off.
One position will send power to both the start & run windings to get the motor going. Hold for a 1/2 to 1 second and then quickly move switch to the other position and it should remain running. With the toggle "up" power flows to the bottom contacts and vice-versa. If you look at the last pic I sent you, you can see what contacts make in what switch position. (Look by the toggle lever)
DPDT_On-Off-On_wire.png

Also a couple of helpful links (1) & (2) about those kind of switches
Cheers, :mug:
Joel B.
 
^ Or instead use 2 single pole switches, like $2-3 regular light switches. Put them next to each other. One switch to engage the Run winding the other to momentarily turn on the Start winding to get the drum rolling.

[ADDED] Those small lever switches are not really made for thick and stiff wiring. But as @kartracer2 said, use spade connectors to connect the wiring to the (small) electronics switch. Shrink tubing over the bare ends.
 
Last edited:
@bracconiere Hey I think this should work for you. (See Diagram)
Switch is center off.
One position will send power to both the start & run windings to get the motor going. Hold for a 1/2 to 1 second and then quickly move switch to the other position and it should remain running. With the toggle "up" power flows to the bottom contacts and vice-versa. If you look at the last pic I sent you, you can see what contacts make in what switch position. (Look by the toggle lever)
View attachment 748473
Also a couple of helpful links (1) & (2) about those kind of switches
Cheers, :mug:
Joel B.

i think that may work like i want it to....appreciate the help again, will report back if i'm still alive, and if it works! :mug:

^ Or instead use 2 single pole switches, like $2-3 regular light switches. Put them next to each other. One switch to engage the Run winding the other to momentarily turn on the Start winding to get the drum rolling.

[ADDED] Those small lever switches are not really made for thick and stiff wiring. But as @kartracer2 said, use spade connectors to connect the wiring to the (small) electronics switch. Shrink tubing over the bare ends.

i just pulled all the original wiring out of the dryer, and am using it with their spades....
 
just hooked up the switch as suggested, works perfect! Thanks again! :mug: :mug:

edit: and to put people's minds at ease, this will ONLY be plugged in while it's being used for deculming! ;) (and into to a surge protector)
Oh yeah, I know where I'm coming if I ever find myself with some extra sprouted grain !
 
Oh yeah, I know where I'm coming if I ever find myself with some extra sprouted grain !


if you ever get into malting, the bucket/storage tote to bucket, works...but if you can get a cheap used dryer...this thing really cleans the malt good! it'd be nice if it had a bigger lint trap though. have to stop the dryer and empty it about 3-4 times during the rolling....but it's some of the cleanest malt i've made! the batteries are dead in my camera AGAIN, i think i got two pics with these rechargeable ones....lol when i figure out how to get the side panel with the switch and power cord back together, i'll post what i ended up with... :mug:
 
Also, this thread has been a very enjoyable read, designing and troubleshooting a weird dryer modification!


i'll try and post all the stuff i had to do to turn it into a deculmer when it's 100% complete....i did have to pull the back SS vent from the drum, and reatach it with SS screen door screen under it....(but really if i knew how to hook up a 220v dryer to a 120v cord in the first place, i think this would have been 2-3 posts! ;))
 
.(but really if i knew how to hook up a 220v dryer to a 120v cord in the first place, i think this would have been 2-3 posts! ;))
HA HA hahahaaa, no offense buddy but yeah, I would tend to agree!! Think of the lessons though, you should be a wiser man today than before you started,,, RIGHT? (LMAO):drunk::thumbsup:

@Homebrew Harry Hey, don't worry about my toes, I have used both the tops and the bottoms most my life. When you are "McGyver-ing", there are many different ways to make a silk purse from a sow's ear. (LOL)

Cheers, :mug:
Joel B.
P.S. Waiting for the big brown truck with a shipment of home made "CBW" from @bracconiere (LMAO,, just kidding)
 
I agree...Hats off to Brac for making it happen and Kart for tech support !
There were a few times I wanted to chime in on the wiring, but did not want to step on any toes.
Good thread indeed


if anyone ever needs how to hot-wire a dryer, for an emergency sesh....now google will know where to point them!

speaking of which... @kartracer2 i didn't actually learn my lesson though? so would i have hooked the 120v cord to the middle and top or bottom? of a three prong hook up?
 
@bracconiere In you particular situation see the attached photo. It may or may not apply to any other dryer you find. That's where a wiring diagram is important. You can tell from the actual wiring (following the paths) if you know what to look for also.
Brac-dryer-back.png


As far as lessons, I was referencing to centrifugal motor switches and the like. I'm not scolding you for tearing ass in to your dryer, I'm not that way.
Referring back to my dad, he believed that it was more important to understand how and why things work. Only then, can you find the problem when they are not.

Cheers, :mug:
Joel B.
 
@bracconiere In you particular situation see the attached photo. It may or may not apply to any other dryer you find. That's where a wiring diagram is important. You can tell from the actual wiring (following the paths) if you know what to look for also.
View attachment 748514

As far as lessons, I was referencing to centrifugal motor switches and the like. I'm not scolding you for tearing ass in to your dryer, I'm not that way.
Referring back to my dad, he believed that it was more important to understand how and why things work. Only then, can you find the problem when they are not.

Cheers, :mug:
Joel B.


LOLOLOL.....so that's all i would of had to done? let me laugh harder!!! but what the hell had a LOT of fun!!! and it works....never would have learned about jumping a ac motor with fake 3 phase? i think that's what the start coil does right? kinda like hitting the nitrous in a hollywood car race?
 
jumping a ac motor with fake 3 phase? i think that's what the start coil does right? kinda like hitting the nitrous in a hollywood car race?
LOL,, not really. Maybe the start coil you are thinking about might be a capacitor start motor, a different animal. Not going to get into those at this point.
We just bypassed the broken start switch, (and every thing else), no witch craft or fake 3ph. involved. (LOL)
Cheers, :mug:
Joel B.
 
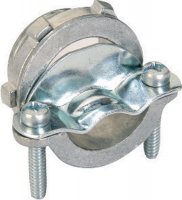
Hey @bracconiere , I got to thinking that I would strongly recommend using something like this where your yellow cable enters the dryer. Should be able to find one at any local hardware store. (Ace, Do It Best, Home Depot, etc.) Would hate to see the vibration rubbing through the insulation and causing a short. Just thinking of safety and all. ;)
Wire-clamp.jpg

Cheers, :mug:
Joel B.
 
Would hate to see the vibration rubbing through the insulation and causing a short. Just thinking of safety and all. ;)


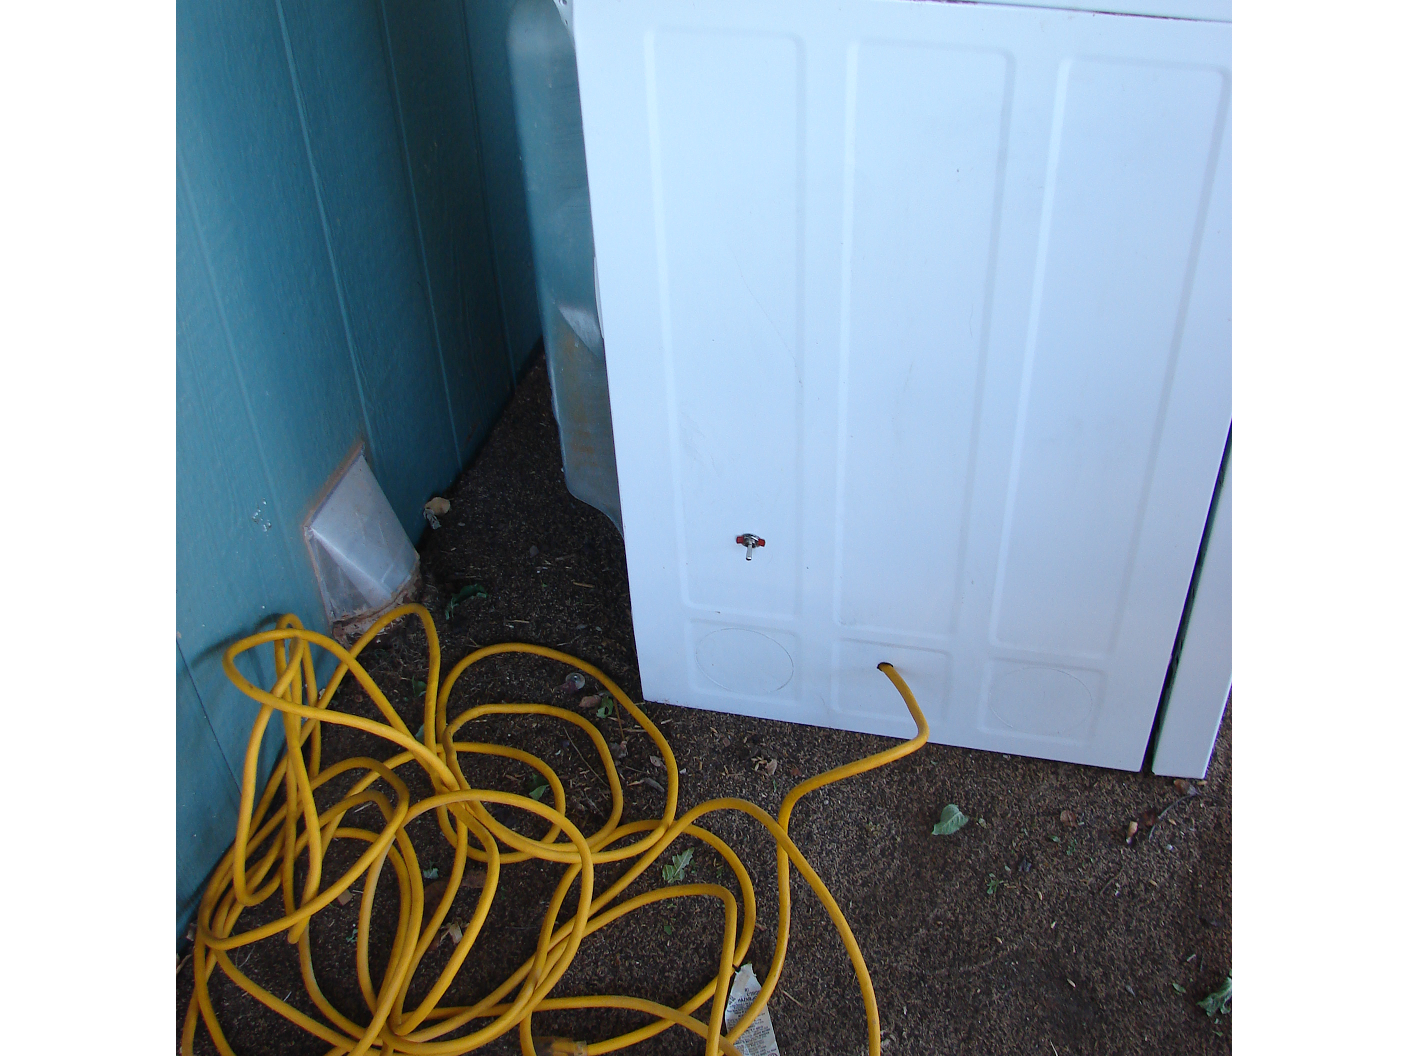
wouldn't have thought about slow cutting force.....do they make a rubber grommet i don't have to take the thing apart to install? as you can see i still didn't really get it BACK together all that well already....but it does work...
 
Hey @bracconiere , I got to thinking that I would strongly recommend using something like this where your yellow cable enters the dryer. Should be able to find one at any local hardware store. (Ace, Do It Best, Home Depot, etc.) Would hate to see the vibration rubbing through the insulation and causing a short. Just thinking of safety and all. ;)
View attachment 748652

Cheers, :mug:
Joel B.
I was just gonna mention it seeing the yellow wire coming out like that!

Or in a pinch, as a temporary workaround, but a thick layer of tape around the wire where it goes through the metal sheeting. And some extra on the inside as a "stress relief."

Regardless, make sure that dryer cabinet is indeed properly grounded!
 
Just thinking of you buddy!!


appreciate it! i only have one house, and no money to replace it! :mug:

at worst, now i know to pull the cord out before each use, and inspect it, then push it back in.....it's a thick cord, so it's not going to fray in the 20-30 minutes of use each time.....
 
Last edited:
Well you could tie a knot in the cord inside the dryer or a zip tie wrapped around the cord a couple of times then zip it real tight so it doesn't pull out. I have done that but the hole was rounded over (no sharp edges). And yeah, tape the hell out of it if you don't use the proper clamp.
Cheers, :mug:
Joel B.


i did zip tie it inside, i was worried if it was "loose" (;)) it would get caught in the drive belt, and yanked out......but it's got a bit of slack, what do you think of the 1/2" rubber grommet? should help keep water out too, it's out back on the covered deck....
 
Back
Top