Spike Conical- observations and best practices

Homebrew Talk - Beer, Wine, Mead, & Cider Brewing Discussion Forum

Help Support Homebrew Talk - Beer, Wine, Mead, & Cider Brewing Discussion Forum:

This site may earn a commission from merchant affiliate links, including eBay, Amazon, and others.
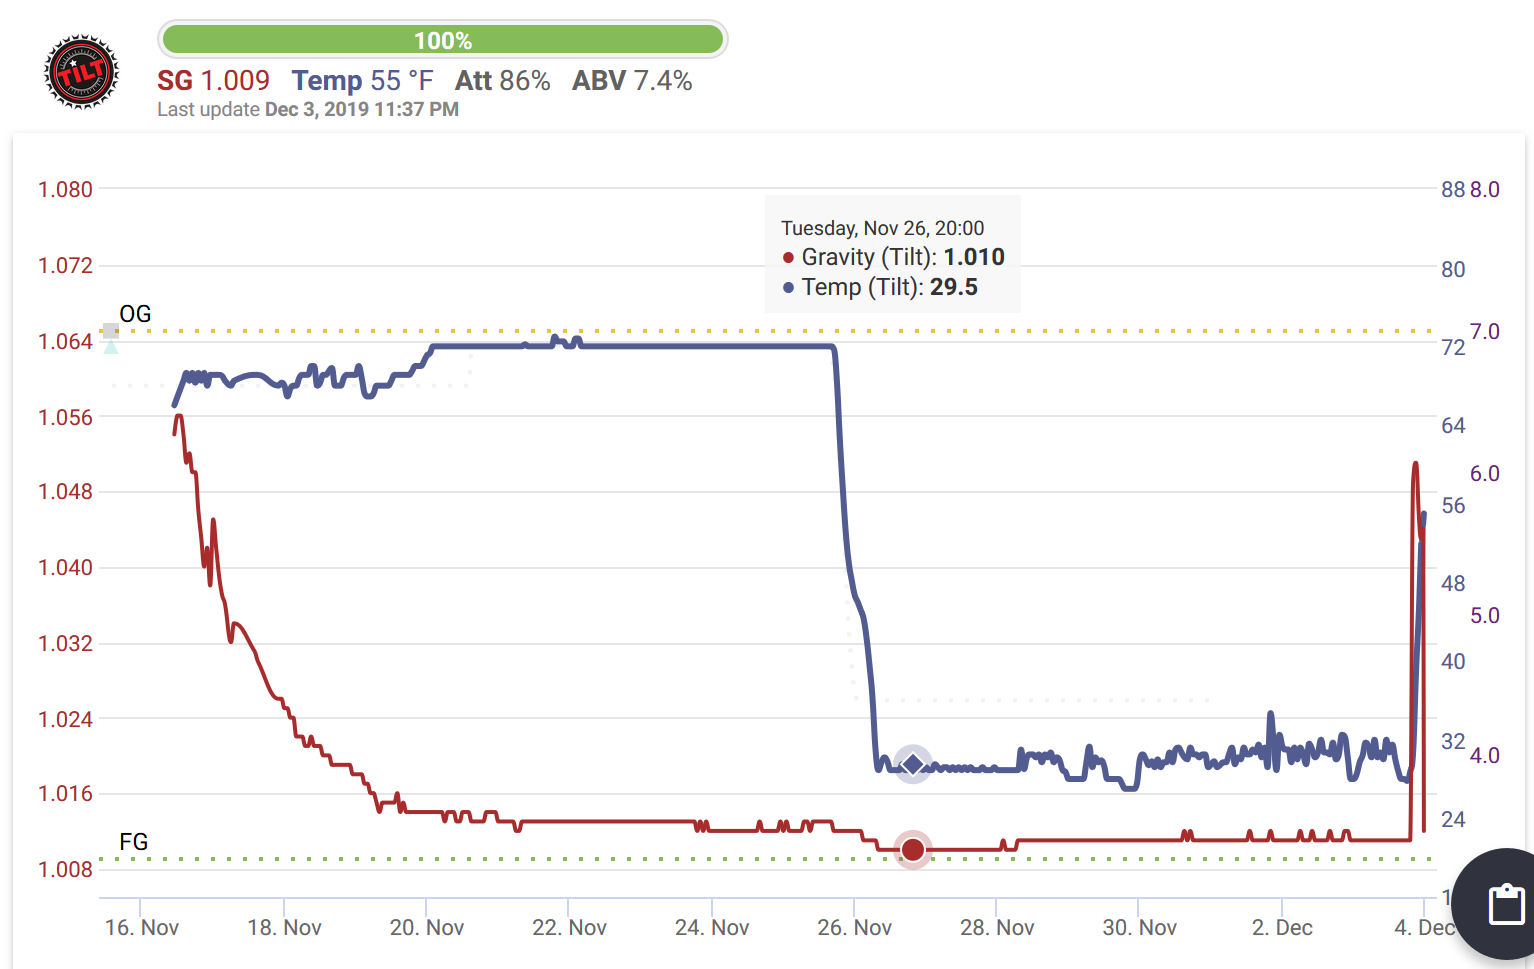
That and a wi-fi Inkbird that lets you monitor and control temp remotely (and go on vacations during fermentation with less stress!). "Set it and forget it" across almost any temp is wonderful! I'm now about to dabble in the world of Tilt hydrometers, which will be "nice to have" but will not have the same impact of the glycol chiller and wi-fi controller, which are now essential tools for me.

If you like that wi-fi Inkbird, you should check out what a Fermentrack or BrewPiLess can do. Absolutely insane amount of control. I can schedule a fermentation profile, track my Tilt hydrometer, record fermentation procedure, and it controls temps within .1 degree.

I didn't think a Tilt would be as big a deal as it turned out to be. Watching the arc as your fermentation reaches FG is intensely satisfying, but it also lets you be 100% sure when the fermentation is finished.

BrewPi requires some DIY soldering, but it's not too bad. Fantastic project if you're into that kind of thing.
 
Just curious about 1 thing for the app for tilt. Can I download the app on 2 different smart phones to monitor the same tilt ? I have an old phone and thought I could leave it connected to tilt next to my fermenter and also use my current phone to watch the progress when I'm not at home .
 
Just curious about 1 thing for the app for tilt. Can I download the app on 2 different smart phones to monitor the same tilt ? I have an old phone and thought I could leave it connected to tilt next to my fermenter and also use my current phone to watch the progress when I'm not at home .

You don't need the app on a second cell phone. The real purpose of the app is to link the tilt using BT so that the data can be uploaded to the cloud.

You can follow and monitor the fermentation either through something like Google Sheets or through your brewing software if the software has the Tilt integration in it.....like Brewfather for instance.

Here is an example with Brewfather...

Pocahontas Pumpkin Ale.PNG
 
This thread kills it! After my last question on here with the responses about brewing a 5g batch in the CF10, I pulled the trigger on a CF10. Just getting it put together. Do you think the highest Port on the side of the conical is too high for the temperature port for 5g batches? If so what do people who brew 5g batches do for this port?

Again, thanks for everything. You guys are awesome! Cheers!

View attachment 663716

The location of that port was designed by Spike to allow the use of a thermowell with 5-gallon batches. I use it with the Inkbird controller supplied with the temp control kit, and it's usually within a degree of what my TILT hydrometer indicates.
 
You don't need the app on a second cell phone. The real purpose of the app is to link the tilt using BT so that the data can be uploaded to the cloud.

You can follow and monitor the fermentation either through something like Google Sheets or through your brewing software if the software has the Tilt integration in it.....like Brewfather for instance.

Here is an example with Brewfather...

View attachment 663769

That's cool . So if I use my current phone what happens when I'm away ? It sounds like I'm better off using an old phone that sits next to the fermenter. I'm not computer or tech savvy so please forgive me.
 
This thread kills it! After my last question on here with the responses about brewing a 5g batch in the CF10, I pulled the trigger on a CF10. Just getting it put together. Do you think the highest Port on the side of the conical is too high for the temperature port for 5g batches? If so what do people who brew 5g batches do for this port?

Again, thanks for everything. You guys are awesome! Cheers!

View attachment 663716

I see you have the sample port located in the racking port? You also have a valve located before the port and below your sight glass? I'm just curious what your doing? Are you plan on doing closed transfers to kegs?
 
That's cool . So if I use my current phone what happens when I'm away ? It sounds like I'm better off using an old phone that sits next to the fermenter. I'm not computer or tech savvy so please forgive me.

Mine just uploads to a Google sheets doc in the cloud; I simply access it via a webpage using whatever device I'm using (laptop or smart phone).

And anyone can access that. Here's the link to my most recent brew:

https://docs.google.com/spreadsheet...HFRSJBxO6zYcN0/edit?ts=5e193734#gid=189348009
 
That's cool . So if I use my current phone what happens when I'm away ? It sounds like I'm better off using an old phone that sits next to the fermenter. I'm not computer or tech savvy so please forgive me.

As @mongoose33 wrote, use can use your current cell phone to access Google Sheets. Use your old cell phone sitting next to the fermenter to connect via Bluetooth to the Tilt inside the fermenter.
 
As @mongoose33 wrote, use can use your current cell phone to access Google Sheets. Use your old cell phone sitting next to the fermenter to connect via Bluetooth to the Tilt inside the fermenter.

And I think @Jag75 will discover that once he can access the TILT file with the phone or laptop, there will be little need to go to where the fermenter is located. It's nice to sit in an easy chair, beer in my hand, and monitor my fermenting beer without having to go anywhere near that fermenter.

Not that going near the fermenter is a bad thing......and who knows, maybe it's fun to monitor the blowoff jar.... ;)
 
Thanks guys I just wasnt aware if there had to be something within range of the tilt for it to work . This will be my next purchase . It will come in handy for brewing lagers and ramping the temp up at the precise time .
 
Thanks guys I just wasnt aware if there had to be something within range of the tilt for it to work . This will be my next purchase . It will come in handy for brewing lagers and ramping the temp up at the precise time .

Well, there does have to be something within range of the tilt. If it's a phone, pretty close by. I have a Raspberry Pi unit that is about 3 feet from the fermenter, and it connects to the web via the WIFI in my house.
 
Well, there does have to be something within range of the tilt. If it's a phone, pretty close by. I have a Raspberry Pi unit that is about 3 feet from the fermenter, and it connects to the web via the WIFI in my house.

I'm not so much wanting it for graphs and info I can look back on , my main goal for it is keeping an eye on and knowing when my Lager is about 75% done .
 
This thread kills it! After my last question on here with the responses about brewing a 5g batch in the CF10, I pulled the trigger on a CF10. Just getting it put together. Do you think the highest Port on the side of the conical is too high for the temperature port for 5g batches? If so what do people who brew 5g batches do for this port?

Again, thanks for everything. You guys are awesome! Cheers!

View attachment 663716

Did they send you different color handle valves or did you purchase them from another source? That would drive me nuts.

Any reason you put the casters in the bottom of the legs and not in the outer threads of the extended brace?

Does anyone know what the size and thread pitch of the bolts are off hand? The ones they gave me with the bracing shelf don't really thread into the legs all that much. Might get some longer ones for piece of mind.
 
Those long leg extensions on that concrete floor would give me nightmares. How stable is it with those extensions?
 
Those long leg extensions on that concrete floor would give me nightmares. How stable is it with those extensions?

It's surprisingly stable, but if you're inclined at all to move it when it's full (10-gallon batch), you have to grab the legs just below where they attach to the conical, and use your foot to push it along, such that any pushing happens at the bottom, not the top.

And yeah, I'm wondering why the casters aren't in the extended area of the bottom shelf; that's why they started offering that expanded shelf, to widen the stance.
 
I see you have the sample port located in the racking port? You also have a valve located before the port and below your sight glass? I'm just curious what your doing? Are you plan on doing closed transfers to kegs?

Hey thanks for the input from everyone on here. I was literally being a moron. I think I fixed it with the advice of people on here!

The valve above and below the site glass I was thinking of using to harvest yeast. Again, super newbie to this. Was thinking of leaving top valve open during fermentation. Then close top valve once it’s over, harvest yeast. Then repeat if I was going to DH. No? I’m totally new so any advice is welcome. Current setup looks like this now....
AB560A16-7EC7-4FA5-AF73-74B76A34075C.jpg
 
Did they send you different color handle valves or did you purchase them from another source? That would drive me nuts.

Any reason you put the casters in the bottom of the legs and not in the outer threads of the extended brace?

Does anyone know what the size and thread pitch of the bolts are off hand? The ones they gave me with the bracing shelf don't really thread into the legs all that much. Might get some longer ones for piece of mind.

I sourced the blue ones from Amazon. Trying to cut a corner or two where I could. I didn’t even think about putting them on the outside that would probably definitely help with support and stability huh? I was just so excited I decided to be a moron last night.
 
No judgement just curious if you had a reason for it. Screws that came with my extended bracing were fairly short. Didn't seem like they screwed up into the legs all that much with the thickness of the brace and rectangle support. I went to Lowes and grabbed some ss bolts and washers. The size is 3/8" -16 if anyone is wondering. Went with 1" long and some flat washers. I hear ya on trying to get the best price. The accessory prices add up quicker than the tank itself.
 
Just switched it out and if anyone is wondering it’s 500% more stable. *face palm*

That'll probably be the last mistake you'll ever make with brewing. :)

We'd probably all feel better if you took a pic showing the casters through the outside holes of the shelf. :)
 
....................The valve above and below the site glass I was thinking of using to harvest yeast. Again, super newbie to this. Was thinking of leaving top valve open during fermentation. Then close top valve once it’s over, harvest yeast. Then repeat if I was going to DH. No? I’m totally new so any advice is welcome. Current setup looks like this now....View attachment 663867


I'd go to NorCal Brewing Solutions' sight and get their yeast brink. They sell one without the sight glass/mason jar if you already have those. (LINK)

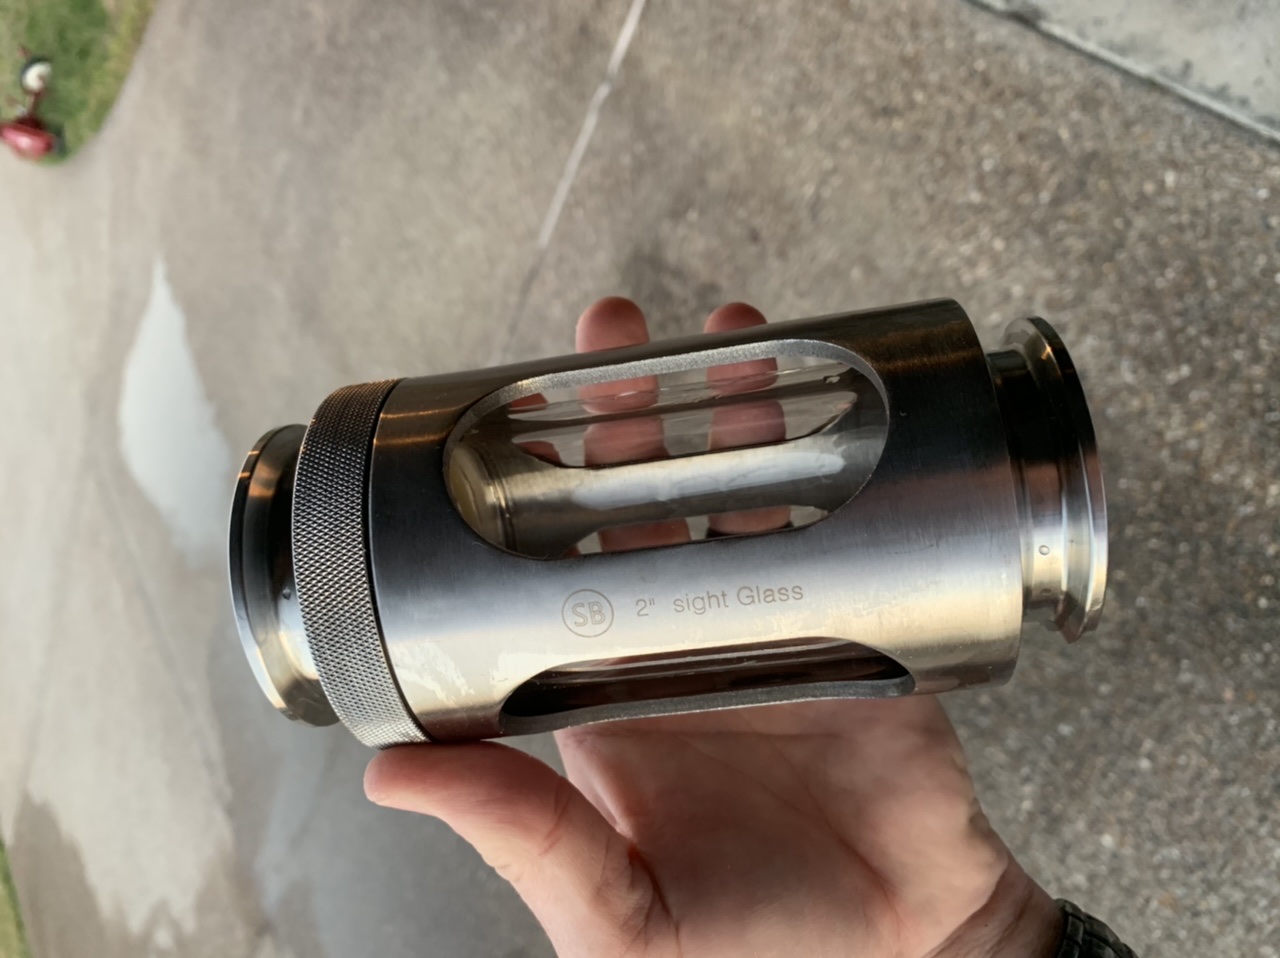
I like how Spike's sight glass can be screwed/unscrewed for cleaning instead of using the 4 threaded posts that hold the assembly together. That sight glass, along with the yeast brink, will be the first accessory I'm adding to mine.

The only thing I'm concerned about is the yeast brink recommends a sight glass at least 6.5" in length. Spike's is a bit shorter at 6". Maybe Jaybird (the owner) can confirm whether Spike's sight glass will work or not.

@Jaybird Can the downcomer tube be trimmed, if it has to, for the Spike sight glass?
 
So just a post to say I had my first really good kegging experience with my CF15. I think it was about my 5th batch on the unit. By really good I mean zero clogs and took not more than 10 min per keg and I got 3 full kegs or at least 120 16oz pints packaged. The beer was perfectly carded and pouring great day after kegging. I got a lot of help from this thread and want to pay it back with some of the changes in process I made to get to this point. I’m sure these are not all necessary or mandatory but it’s where I am on this journey as of today.

1. I followed suggestion to put my carb stone on the sample port and left it there for entire fermentation
2. I started out with nearly 18 gallons in the fermentor.
3. After two hours I dumped 1 gallon of trub, oxygenated using the stone, and pitched yeast
4. About day 5 with fermentation slowing, I dumped yeast, dry hopped, swapped blowoff for manifold and flushed headspace with CO2. I backed off on dry hop pellets and just added 8oz.
5. Two hours later I roused the dry hop pellets with a blast of CO2 through the bottom dump valve.
6. Next day I roused the dry hops again.
7. Next day I cold crashed to 28.5F. I had some pressure in the tank from final fermentation so did not need to pressurize during crash.
8. I let it sit very cold for 4 days. During this time I dumped hops once, then again right before kegging.
9. Day before kegging I carbonated with the stone for 12 hours. I was pushing about 12 PSI.
10. Full starsan purge of my kegs, left them at 10 PSI using a spunding valve.
11. Pressurized headspace of tank to 14 PSI and pushed the beer into kegs fitted with 10 PSI spunding valve. Did it on package postage scale and stopped when I reached 41 lbs (tared keg). Racking arm in down position for entire transfer. Got a wee bit of gunk that was stopped by my filter but never had to dump and clean out filter.

Probably left out a few of the things I did differently but wow I was so happy at how well it worked had to share in case there are other new users getting discouraged from first couple transfers.

PS my cleaning plan worked great too and I’ve got to say PBW + heat works really really well.

Edited to add racking arm in down position during entire process.
 
Last edited:
I'd go to NorCal Brewing Solutions' sight and get their yeast brink. They sell one without the sight glass/mason jar if you already have those. (LINK)

I like how Spike's sight glass can be screwed/unscrewed for cleaning instead of using the 4 threaded posts that hold the assembly together. That sight glass, along with the yeast brink, will be the first accessory I'm adding to mine.

The only thing I'm concerned about is the yeast brink recommends a sight glass at least 6.5" in length. Spike's is a bit shorter at 6". Maybe Jaybird (the owner) can confirm whether Spike's sight glass will work or not.

@Jaybird Can the downcomer tube be trimmed, if it has to, for the Spike sight glass?

yes. Since we build the brink ourselves (in house) we can do whatever you want with it. Most all custom parts or manipulation of our parts do come with a custom price but honestly it's normally very low.
If you have a custom request feel free to just shoot me an email. I have a spot directly on our website for custom stuff. Here is my personal Email addy

[email protected]

I really like doing custom stuff via email other then here as its a whole lot easier to track the communication and make sure you get the best service.

Cheers
Jay
 
I really like doing custom stuff via email other then here as its a whole lot easier to track the communication and make sure you get the best service.

Cheers
Jay

Totally understandable, but I like seeing everyone's ideas and what you're able to do for them. ;)
 
Man I screwed up and used a stainless scrubber and scratched the nice glossy finish on the inside. Ugh! Think I’ll have any problems with the scratches harboring bacteria over time? Very faint scratches but still
 
Man I screwed up and used a stainless scrubber and scratched the nice glossy finish on the inside. Ugh! Think I’ll have any problems with the scratches harboring bacteria over time? Very faint scratches but still
No, it may make it slightly harder to clean in the future though.... You can try bar keepers friend or polishing compound to polish them out with a polisher like the ones harbor freight sells.. I have found it works well to remove fine scratches caused by abrasive scrubbies...
 
Hey thanks for the input from everyone on here. I was literally being a moron. I think I fixed it with the advice of people on here!

The valve above and below the site glass I was thinking of using to harvest yeast. Again, super newbie to this. Was thinking of leaving top valve open during fermentation. Then close top valve once it’s over, harvest yeast. Then repeat if I was going to DH. No? I’m totally new so any advice is welcome. Current setup looks like this now....View attachment 663867

I see you have a Mongoose-style hop dropper (I think). I like the concept, but am concerned about having a BF valve below the sight glass and PRV on the manifold. (Obviously that is needed to make this work). While it can probably be managed by careful operation, the engineer in me says to never set up a pressure vessel where it can be isolated from its PRV. Maybe you've addressed this elsewhere?
 
I see you have a Mongoose-style hop dropper (I think). I like the concept, but am concerned about having a BF valve below the sight glass and PRV on the manifold. (Obviously that is needed to make this work). While it can probably be managed by careful operation, the engineer in me says to never set up a pressure vessel where it can be isolated from its PRV. Maybe you've addressed this elsewhere?

Thanks for the concern. Obviously my posts don’t really exude anything to give anyone confidence, and I don’t blame you. Haha.

I was copying Mongoose-style. My thoughts were to leave the BV open at all times until I’m ready to load the sight glass with hops then purge, and dump. Then keep the BV back to open. Ideally it should only be closed when I’m filling the sight glass with hops. But, I understand if I do forget when cleaning it or something there’s a possibility I could seal the entire conical during active fermentation. Thanks for the catch. I think I might re-think this a bit.
 
Yeah, I like to idiot-proof things as much as possible, because I've repeatedly demonstrated that I can be that idiot (e.g. burning up a heating element!). I still like the concept, as I have plans for a lot of big dry-hopped ales this year.

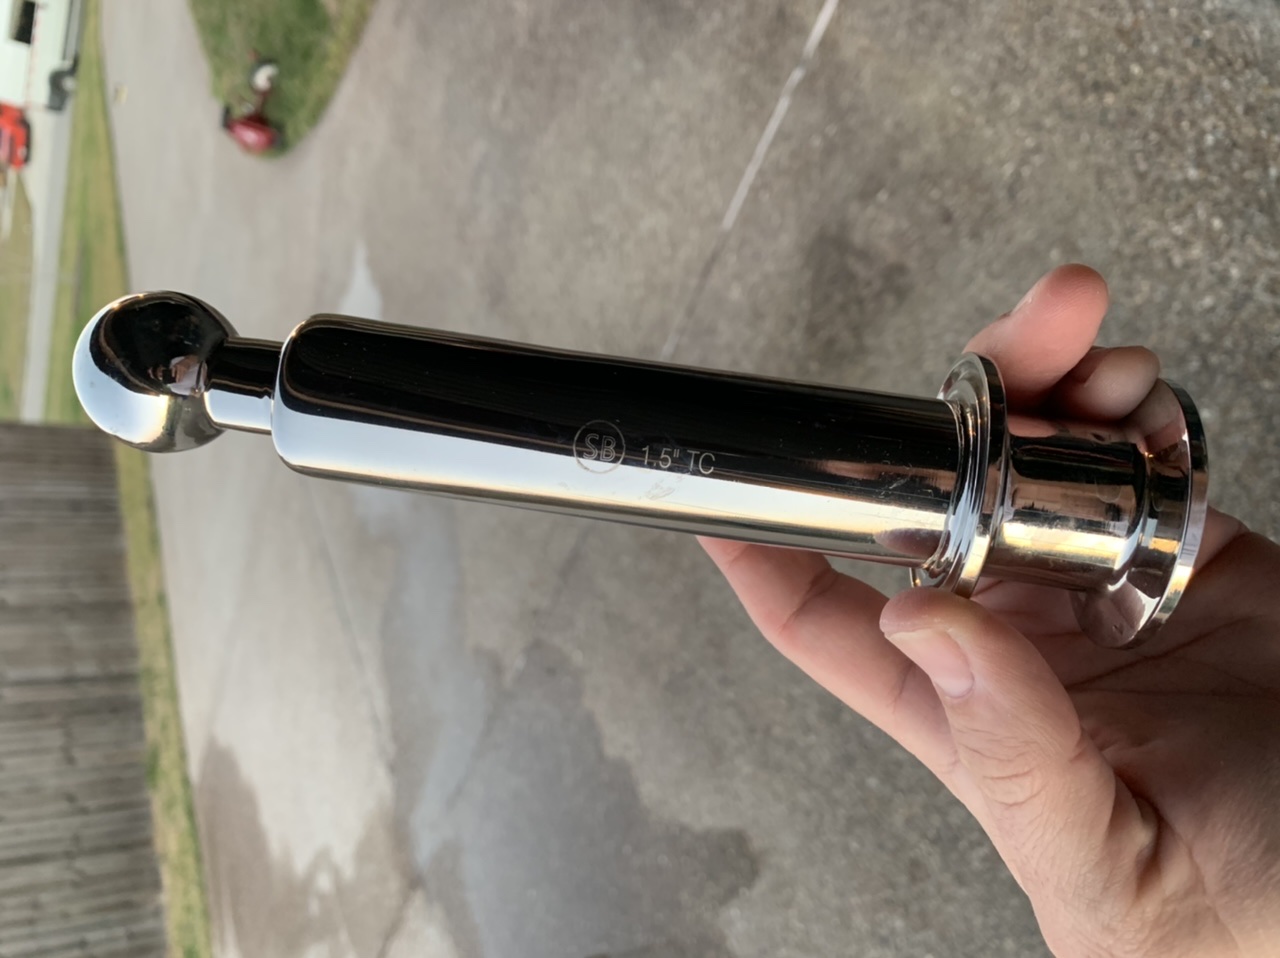
One solution would be to put in a 1.5" regular tee (not an instrument tee) between the conical and butterfly valve, and a 1.5" TC x ball lock gas post on top of the sight glass. I have a feeling that having gas available from above could be useful at times. You could probably also get by with just a cap.

Then you could put your Spike manifold on the side of the tee, such that you would: 1) have a gauge always reading tank pressure, 2) have gas supply available for both the conical and sight glass (e.g. you could use it to help purge the sight glass or the conical headspace), and 3) always have the conical protected with a PRV.

I wish I could find a "lateral Y" type of fitting instead of using the tee (45deg side leg instead of 90deg), so that any hop material that might want to escape sideways would simply fall back down instead of getting "caught on the ledge". The only one I could find is more of an industrial-grade one, and for only $275! I think I can live with a little inconvenience (you can always use the gas post to blow back any stray hop material.

The downside of this sol'n is an even taller system, which could cause problems for people putting the conical in a fridge. That's not a concern for me, as I use a glycol chiller. I will post a pic once I get it together.

[EDIT: Actually, the instrument tee would be preferable, as it has a shorter side leg and the same length. I was thinking it had a longer length than a regular tee, but they are the same.]
 
Last edited:
The downside of this sol'n is an even taller system, which could cause problems for people putting the conical in a fridge. That's not a concern for me, as I use a glycol chiller. I will post a pic once I get it together.

.]

Actually if you are chilling in a fridge there are other options. I’ve designed on paper a couple of these that would go through the 4” TC opening that you glycol guys use for your chilling coil.

I’d start with something like this and build it up from there.

https://www.glaciertanks.com/tri-cl...M-C_i44lfSHiZVtG76A6IsMtxe-h3mWwaApsXEALw_wcB
 
When you guys clean your conicals, do you put them all back together right after cleaning/drying or wait closer to brew day? I washed my CF10 earlier in anticipation of a brew day tomorrow. My Flex + has seen one batch, but I haven't put it back together yet. Do you all:

1) After cleaning & drying, put it back together so it's ready to go for the next brew day. Pour sanitizer inside of it like you would a normal carboy on brew day.

or

2) Leave it broke down until brew day. Soak all the parts in Star-San. Then put the conical together and pour some sanitizer in it like you would a normal carboy.

I'm leaning toward 2. Soak all the smaller parts then put everything together as the boil winds down. Then "hose" the inside of the conical down with a spray bottle filled with Star-San.

Right now, I have both the CF10 and Flex+ broke down. I have towels draped across the top to minimize dust, critters, etc.

For me, option #2 above.
As soon as possible after use (i.e. transferred to keg) i brrak down, soak parts in pbw, clean inside, etc. Put parts away loose to dry.
On brew day, during mash boil etc. Take parts, soak in star san, and i use a spary bottle of star stan to spary inside of body. Easier than dumping in star san for me.
I like knowing the whole thing was dripping with star san while put together. Pressurize it, check for leaks, let all the star san drip down for 30 mins or so, then blow it out the bottom 2" valve.
Bingo bango ready to go.
Each batch i do it i get faster.
Note- i have a cf5. If i had a 15 or 30, i am sure my process would be different.
I also do the same. Cheers
 
Back
Top