
nostalgia
Well-Known Member
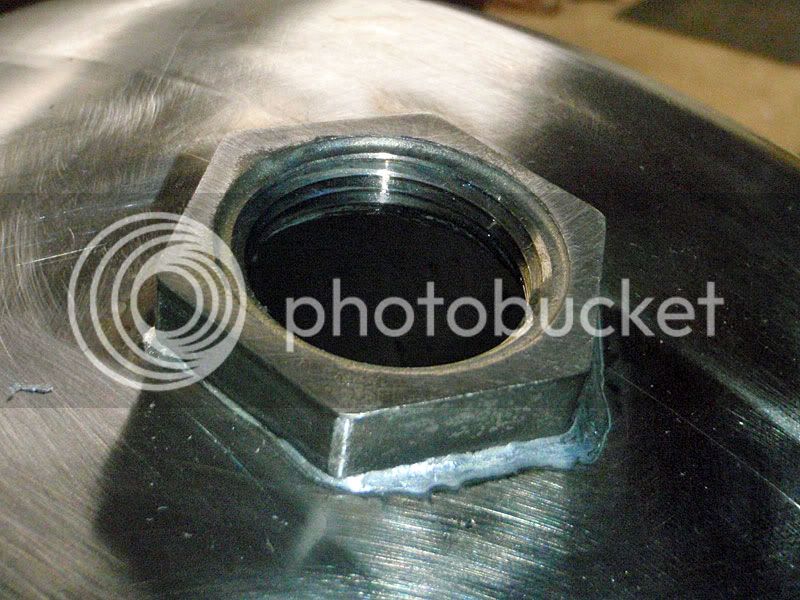
I went the solder-a-fitting-on route. It worked perfectly and was very easy. Steps I took:I want to put a electric element into a keg with out cutting the top off the keg. so there will be no access to the inside, would you recommend that i solder a fitting onto the side, or is it possible to just thread the keg shell and screw it in?
- Drilled a hole in the side of the kettle so the element would go through (I think 1 1/16" or 1 1/8").
- Sanded and cleaned the outside of the kettle.
- Sanded and cleaned the 1" NPT locknut.
- Fluxed the outside of the kettle around the hole.
- Put two rounds of 1/16" solder around the hole.
- Fluxed the bottom of the locknut and sat it on top of the solder.
- Heated the locknut (which by proxy heated the kettle) until the solder flowed.
- Let it cool without touching it.
- Profit!
-Joe
")


![Craft A Brew - Safale S-04 Dry Yeast - Fermentis - English Ale Dry Yeast - For English and American Ales and Hard Apple Ciders - Ingredients for Home Brewing - Beer Making Supplies - [1 Pack]](https://m.media-amazon.com/images/I/41fVGNh6JfL._SL500_.jpg)


