• Please visit and share your knowledge at our sister communities:
  • If you have not, please join our official Homebrewing Facebook Group!

    Homebrewing Facebook Group

Single Vessel Brewing System Temperature Stability

Homebrew Talk

Help Support Homebrew Talk:

This site may earn a commission from merchant affiliate links, including eBay, Amazon, and others.
I'm not trying to convince you of anything. If you don't think a sight glass is important, great.

I've always had them for (obviously) measuring levels. But in the case of the mash tun, it was VERY useful (especially the one BELOW the false bottom). When I detected the differential in the mash tun sight glasses, I stirred the grains, which typically bought me some time, or solved the problem.

My mash tun. In left image, note the two sight glasses.

View attachment 820263
Roger. BTW I didn't mean to imply that I didn't believe that your system didn't have sight glasses. Just that the stuff I've looked at did not.
 
Most kettles these days don't have sightglasses due to the interior etching or embossing. However, a sight glass that extends below the false bottom/bag is a great visual indicator that you're trying to recirculate faster than the bag/mash can flow. It could be the difference between a dry fire/scorched batch and not. It's not as fool proof as a float switch though, since you actually have to see the level drop on the sight glass to catch the problem.
 
Most kettles these days don't have sightglasses due to the interior etching or embossing. However, a sight glass that extends below the false bottom/bag is a great visual indicator that you're trying to recirculate faster than the bag/mash can flow. It could be the difference between a dry fire/scorched batch and not. It's not as fool proof as a float switch though, since you actually have to see the level drop on the sight glass to catch the problem.
Roger. Thanks for the info
 
Hey Bobby,
I'm thinking about setting up my brew kettle with your whirlpool and recirculation setup. Is the position for the whirlpool fitting important? I know on a lot of kettles it's placed higher up than the draining fitting, but it looks like on yours they're at the same vertical position.
 
Hey Bobby,
I'm thinking about setting up my brew kettle with your whirlpool and recirculation setup. Is the position for the whirlpool fitting important? I know on a lot of kettles it's placed higher up than the draining fitting, but it looks like on yours they're at the same vertical position.
The whirlpool function works fine down lower. In a BIAB setup, it's mandatory that the whirlpool sits below the false bottom and bag to be able to stir that area.
 
I bought a Spike 15 gallon kettle with 2 horizontal ports along with the necessary pump, tubing and fittings to build a system like the one Brew Hardware sells, except that mine has a BoilCoil and no false bottom. I went with the BoilCoil because my immersion chiller would work with it. Otherwise it works like Bobby's setup - it splits wort into the whirlpool and recirculation stream during the mash. I previously had a kettle with a BoilCoil and no recirculation which was very unstable and required a lot of manual stirring to maintain my target mash temp.

I brewed a lower gravity beer a few days ago to test the system and I was VERY pleased with the temperature stability. It held my target temp perfectly and the measured temperature of the recirc wort was dead-on or one degree off. My OG was also right on target. The only (minor) thing I don't like so much is that with the Spike kettle geometry and side pickup tube I am using, about 3 quarts of wort get left on the bottom. I can tilt the kettle and get more, but then I also get more trub. But maybe it's just a matter of leaving it in the kettle vs in the fermenter. I'll see if I have less trub volume in the fermenter than in the past when I just dumped everything in.

Overall, I am very happy with this system and a big believer in Bobby's "stir while recirculating" configuration.
 
Last edited:
Found this thread after having had a similar idea after seeing the brew tools lineup, and having had some uneven temps on my DIY rig.

I have 2-2.5" clearance height wise, and 1" from the kettle to the malt pipe. Is it essential that the pickup tube end is between the kettle wall and the malt pipe, or can it still have a decent effect if below?

Getting the liquid below the malt pipe spinning should have at least partial effect on the narrow perimeter as well. Certainly any angling upwards would also help.
 
If I had read this discussion before I started homebrewing, I would have taken up some other hobby instead.

Something like starting a rocket company or launching my own constellation of internet satellites... ;)
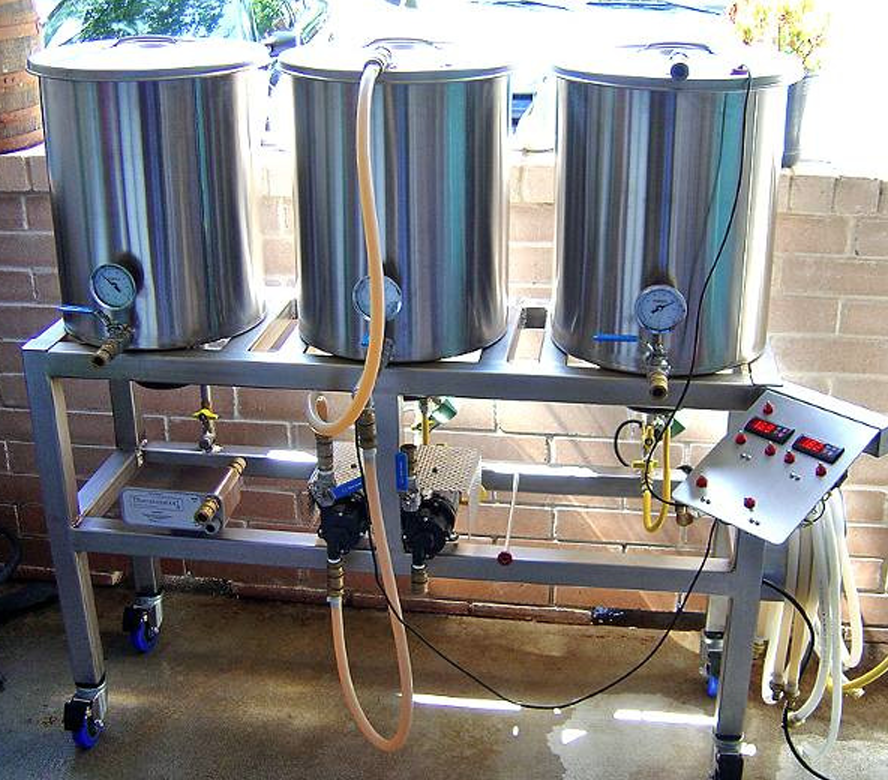
I assume this is tongue in cheek, but just in case, keep in mind that many people were drooling over and aspiring to build this when I first go into brewing:

1752413891498.png
 
I assume this is tongue in cheek, but just in case, keep in mind that many people were drooling over and aspiring to build this when I first go into brewing:

View attachment 879848
Three vessel almost turned me away from brewing when I first realized home brew was a thing. It was cost prohibitive and complicated. Fortunately I spoke with a brewery owner who convinced me that extract brewing was a good way to make beer and how he started out.

Fast forward, I'm now doing BIAB with the same 10 gallon brew kettle I originally bought for extract, with a few upgrades here and there. It serves me well as I don't ever plan on being a professional brewer and I enjoy the beer I'm making.

I wanna say thank you for your original post. Although I take a simple approach to brewing, your research and testing provides a lot of good information for the entire brewing community. I'm really thankful that there are brewers that study the science of beer making and share it on HBT.

i also enjoy the follow up comments because they add balance to any discussion, but wish it didn't get so personal. You're a hardware guy and have opinions that lean towards a specific system which is perfectly acceptable. You're input is necessary and appreciated. Thanks!
 
Last edited:
i also enjoy the follow up comments because they add balance to any discussion, but wish it didn't get so personal.
The funny thing is that I had long forgotten about some of friction I received back when this was initially posted. Reading back through, I could tell that I was defensive about it but I have some better perspective about it now. I think we tend to assume that our reputation follows us around like a thought bubble over our head. No one really knows our intentions though and it's even harder in a single serve experience on a forum. It's an ego problem. Ideas and posts should stand on their own without a vibe of "trust me" as a prerequisite.
 
I have a question, or a curiosity, about the "dead space" in between the walls of a ebiab basket.

It is accepted that this dead space leads to a loss of efficency.

And while that is accepted I remember @doug283cz reporting that when tested, the loss in efficiency was actually less than expected.

I wonder if it is due to diffusion? We have slain the scred cow that laying a layer of co2 will block o2. Turns out that diffusion just intermingles the two gases.

Would the principle of diffusion do the same thing in the walls? The non moving wort in between the walls actually sits on top of the hot and circulating wort.
I'm sure it doesn't stay perfectly still because particles just don't do that very well but how much it mixes is a bit of a mystery. My Blichmann kettle sight glass will stay almost 100% water through the entire mash if I don't blow into the top to exchange it. It's a more isolated chamber than the area in question, but it's still and example of isolation.

I think the more full the system is, but more isolated the upper layer of water would be.

You could test it just by slipping a piece of narrow tubing down between the malt pipe and wall and pulling a sample. Test the gravity with a refactometer and compare it to the recirculating output all the way through the mash.
 
I have a question, or a curiosity, about the "dead space" in between the walls of a ebiab basket.

It is accepted that this dead space leads to a loss of efficency.

And while that is accepted I remember @doug283cz reporting that when tested, the loss in efficiency was actually less than expected.

I wonder if it is due to diffusion? We have slain the scred cow that laying a layer of co2 will block o2. Turns out that diffusion just intermingles the two gases.

Would the principle of diffusion do the same thing in the walls? The non moving wort in between the walls actually sits on top of the hot and circulating wort.

Yes, diffusion will cause some mixing, but diffusion in liquids is orders of magnitude slower than diffusion in gases.

The "testing" I reported on was actually a calculation that assumed zero diffusion, and the results were for the specific geometry of one AIO system that has a fairly small gap between the malt pipe and vessel wall. The larger the gap between the malt pipe and vessel wall is, the greater the loss in lauter efficiency will be if all of the wort is not homogenized before the final lifting and draining of the malt pipe.

Brew on :mug:
 
Very interesting.

Which leads me to the question of solutions to the problem. If I see it as a problem, for me, as worth fixing at all.

I can't really do @Bobby_M method (which is prefered) of a second recirc pipe going into a metal second entrance into the vessel. I have a Brewzilla.

I could do the gentle lift and lower method, but then that may lead to compaction issues. It also introduces o2 to the grains, and I'm trying to avoid that.

I assume the safest solution for me is to install a Y valve in my recirculation outlet pipe and insert a second hose down one of the basket's lifting holes. But I have a worry about that too. I overnight mash, and I keep imagining this second hose popping out and spraying all of the wort over the entire basement. Which is a bad outcome in many respects, including heater damage, lost wort and marital issues. Hard to get a good night's sleep.

Currently my method is to do nothing and just buy an extra half kilo of grain. If this half kilo of grain makes my life happier, that is a good trade.

But if you gents have suggestions, I'm all ears. The only idea I have not tried is, when I get up in the morning, picking up the recirc hose and directing it into the lifting hole for few minutes while I'm watching. Then return it to the top of the mash and go upstairs for coffee for half an hour before returning for a lift and boil. Or maybe do this in the evening, for half an hour while I'm cleaning up the brewery.

I'm guessing that this would assist, but the amount would be trivial, not significant. Has anyone tested this? Maybe I will test it one day.
 
Last day before vacation and I tweaked my back- so what better thing to do than to read through some threads.
This Is a good one,
Anytime someone takes the time to put this type of discussion on a public forum, it deserves to be read and discussed.
It was/ Is a good read, after all isn' t the subject matter of brewing why we are all here, I know it's something I never thought about all that much,( dead space along the malt tube) maybe my process is such that it's not an issue, but it's something ill now think about.,sometimes we just accept things for what they are without examining every aspect.With all the posts and questions about efficiency- this thread is yet another example of a possible solution for those that don't have a diffinative answer for their problems.
 
I can't really do @Bobby_M method (which is prefered) of a second recirc pipe going into a metal second entrance into the vessel. I have a Brewzilla.
Nothing is impossible.

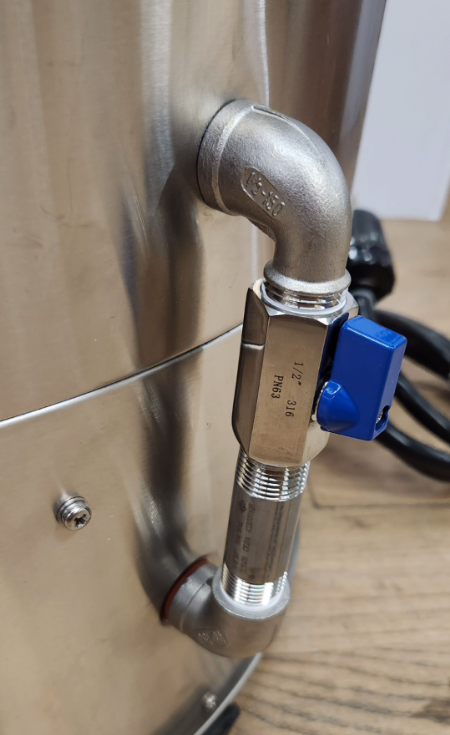
This is a mod I made to a 100L brewzilla but it works on all the sizes.

1756416300264.png


The bottom port in the skirt is where the stock drain valve usually is. The upper port is a fresh hold drilled for the whirlpool fitting.
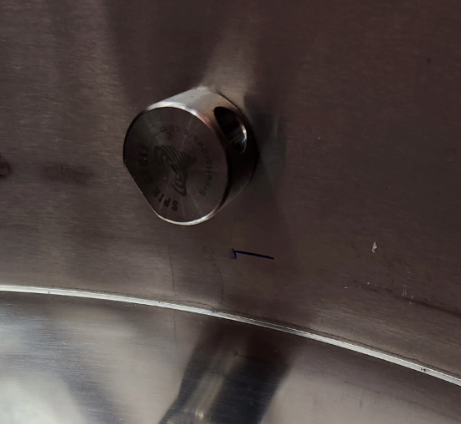
On the inside it looks like this... the intent was to get it above the pump filter false bottom.. Note the slight upwards angle:
1756416493759.png


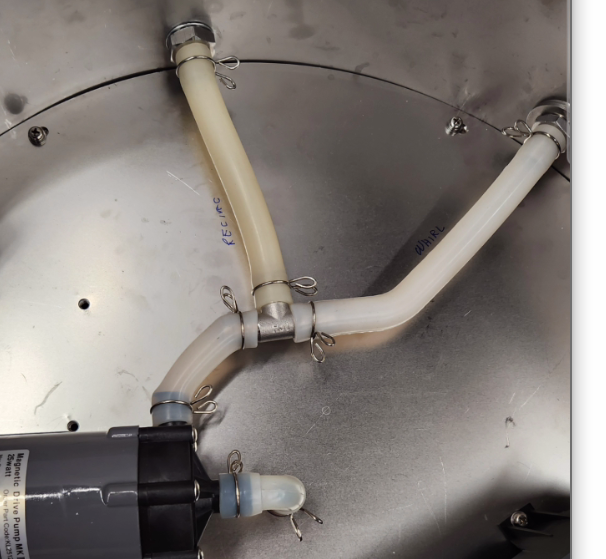
Output of the pump goes to the recirculation tube and the new whirlpool return.

1756416522485.png


The install isn't too tricky. I get the assembly attached to the existing skirt hole and then get it plumb.. Then I trace around the elbow with a narrow felt tip pen and carefully mark the center for drilling. You really don't want to mess up the hole height by more than a millimeter.


If the fear is too great, you can leave the drain spigot in place and connect it to the whirlpool with a short piece of hose. In that case the whirlpool would get a 90 degree hose barb on it.
 
I believe I'm going to build this. I have been annoyed at that lower tap, sitting there and doing nothing. Now it will have a purpose.

I"m planning to buy the following hardware. I'm making an error, @Bobbi_M please let me know. Also I'd rather order them from your store if you have them. thx


either this valve

https://www.ontariobeerkegs.com/ss-mini-ball-valve-1-2-f.html

or this three way valve:

https://www.ontariobeerkegs.com/welded-kettle-kit.html

plus


https://www.brewhardware.com/ProductDetails.asp?ProductCode=SpinCycleSubmerge&CartID=1

https://www.ontariobeerkegs.com/welded-kettle-kit.html

two of these: https://www.ontariobeerkegs.com/street-elbow-ss.html
 
Last edited:
I'm willing to get some measurements on the 35L version of the brewzilla to make sure the parts all line up to put the whirlpool just above the built in false bottom. I have one in the store but I won't be back there until Tuesday morning.

From memory:

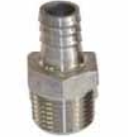
1. Once the stock valve/bulkhead combo is removed from the skirt of the unit, I push the threads of this through the hole.
https://www.brewhardware.com/product_p/hosebarb12mx12.htm
1756584389058.png

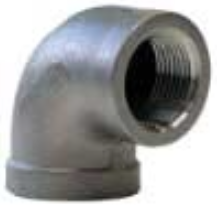
2. On the outside, a regular 90 degree F/F elbow threads on:
https://www.brewhardware.com/product_p/nptelbow90.htm

1756584460988.png

First caveat... based on NPT thread standard randomness, these together may not squeeze the skirt metal tightly. Having a thick and thin SS washer and a squishy silicone one on hand will let you fine tune the shimming on the inside to make this snug and sturdy. It's not critical but it makes operating the valve feel better.
https://www.brewhardware.com/product_p/sswash12thick.htm
https://www.brewhardware.com/product_p/sswash12thin.htm
https://www.brewhardware.com/product_p/gasket12npt.htm

Once you figure out what combo of shims make a snug fit when fully threaded together, the threads get teflon tape for the final install.


3. From the elbow going upwards, it's some length of 1/2" NPT pipe nipple (determined later...) The one on the 100L was a 3" if I recall.

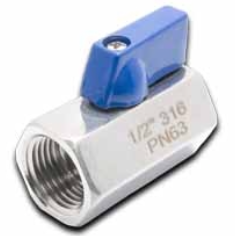
4. Then you get the mini ball valve with F/F 1/2" NPT threads.
https://www.brewhardware.com/product_p/minibv12ff.htm
1756585005949.png


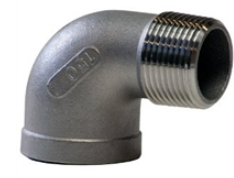
5. Finally to turn back towards the kettle, a 1/2" NPT "Street" elbow.
https://www.brewhardware.com/product_p/nptelbowstreet12.htm
1756584991161.png


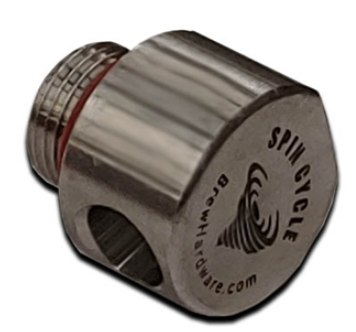
6. The through-wall fitting on the upper hole is actually the Spincycle "SHORTY".
https://www.brewhardware.com/product_p/spincycleshorty.htm
1756585067215.png

This version of the fitting has really short undersized 1/2" NPT threads. The undersizing of the threads makes it thread all the way in to any female threaded fitting so that the captured oring absolutely makes contact with the wall. In this usage, you do need teflon tape on the threads to seal to the street elbow. When you thread this in, you have to submit to its own free will of which direction the side opening lands on. Obviously pointing downward or straight upwards is not going to stir anything but you tighten it to the point where the gasket is at least touching the sidewall and the output hole is either horizontal left or right or slightly angled upwards (ideal) left or right. The softness of the oring allows enough leeway to make this work in every install I've done so far.
 
I'm willing to get some measurements on the 35L version of the brewzilla to make sure the parts all line up to put the whirlpool just above the built in false bottom. I have one in the store but I won't be back there until Tuesday morning.

From memory:

1. Once the stock valve/bulkhead combo is removed from the skirt of the unit, I push the threads of this through the hole.
https://www.brewhardware.com/product_p/hosebarb12mx12.htm
View attachment 883172
2. On the outside, a regular 90 degree F/F elbow threads on:
https://www.brewhardware.com/product_p/nptelbow90.htm

View attachment 883173
First caveat... based on NPT thread standard randomness, these together may not squeeze the skirt metal tightly. Having a thick and thin SS washer and a squishy silicone one on hand will let you fine tune the shimming on the inside to make this snug and sturdy. It's not critical but it makes operating the valve feel better.
https://www.brewhardware.com/product_p/sswash12thick.htm
https://www.brewhardware.com/product_p/sswash12thin.htm
https://www.brewhardware.com/product_p/gasket12npt.htm

Once you figure out what combo of shims make a snug fit when fully threaded together, the threads get teflon tape for the final install.


3. From the elbow going upwards, it's some length of 1/2" NPT pipe nipple (determined later...) The one on the 100L was a 3" if I recall.

4. Then you get the mini ball valve with F/F 1/2" NPT threads.
https://www.brewhardware.com/product_p/minibv12ff.htm
View attachment 883175

5. Finally to turn back towards the kettle, a 1/2" NPT "Street" elbow.
https://www.brewhardware.com/product_p/nptelbowstreet12.htm
View attachment 883174

6. The through-wall fitting on the upper hole is actually the Spincycle "SHORTY".
https://www.brewhardware.com/product_p/spincycleshorty.htm
View attachment 883176
This version of the fitting has really short undersized 1/2" NPT threads. The undersizing of the threads makes it thread all the way in to any female threaded fitting so that the captured oring absolutely makes contact with the wall. In this usage, you do need teflon tape on the threads to seal to the street elbow. When you thread this in, you have to submit to its own free will of which direction the side opening lands on. Obviously pointing downward or straight upwards is not going to stir anything but you tighten it to the point where the gasket is at least touching the sidewall and the output hole is either horizontal left or right or slightly angled upwards (ideal) left or right. The softness of the oring allows enough leeway to make this work in every install I've done so far.


Much appreciated Bobby. You enjoy your weekend and we'll look forward to this, next week.
 
Back
Top