Show us your sculpture or brew rig

Homebrew Talk - Beer, Wine, Mead, & Cider Brewing Discussion Forum

Help Support Homebrew Talk - Beer, Wine, Mead, & Cider Brewing Discussion Forum:

This site may earn a commission from merchant affiliate links, including eBay, Amazon, and others.
99.9% complete.

Tier.jpg
 
Santa was good to me this year. Son in Law built the stand at the manufacturing company where he works. Wife went overboard on the Kettles (lol)!!! I was looking for 20 gal and 30 gal was all she could find in stock. The LHBS guy gave her a good deal on them.... or so she says!!!!! Unfortunately I am back overseas and I haven't gotten a chance to complete the build.... I'll need to replace the propane system first.... then probably add a second pump! My pantry is full of brew gear.... The only down side to this hobby is it takes up a lot of space (lol)!!!!!

Butch's Brew Stand.jpg


Butch's Brew Stand 1.jpg


Butch's Brew Stand 2.jpg
 
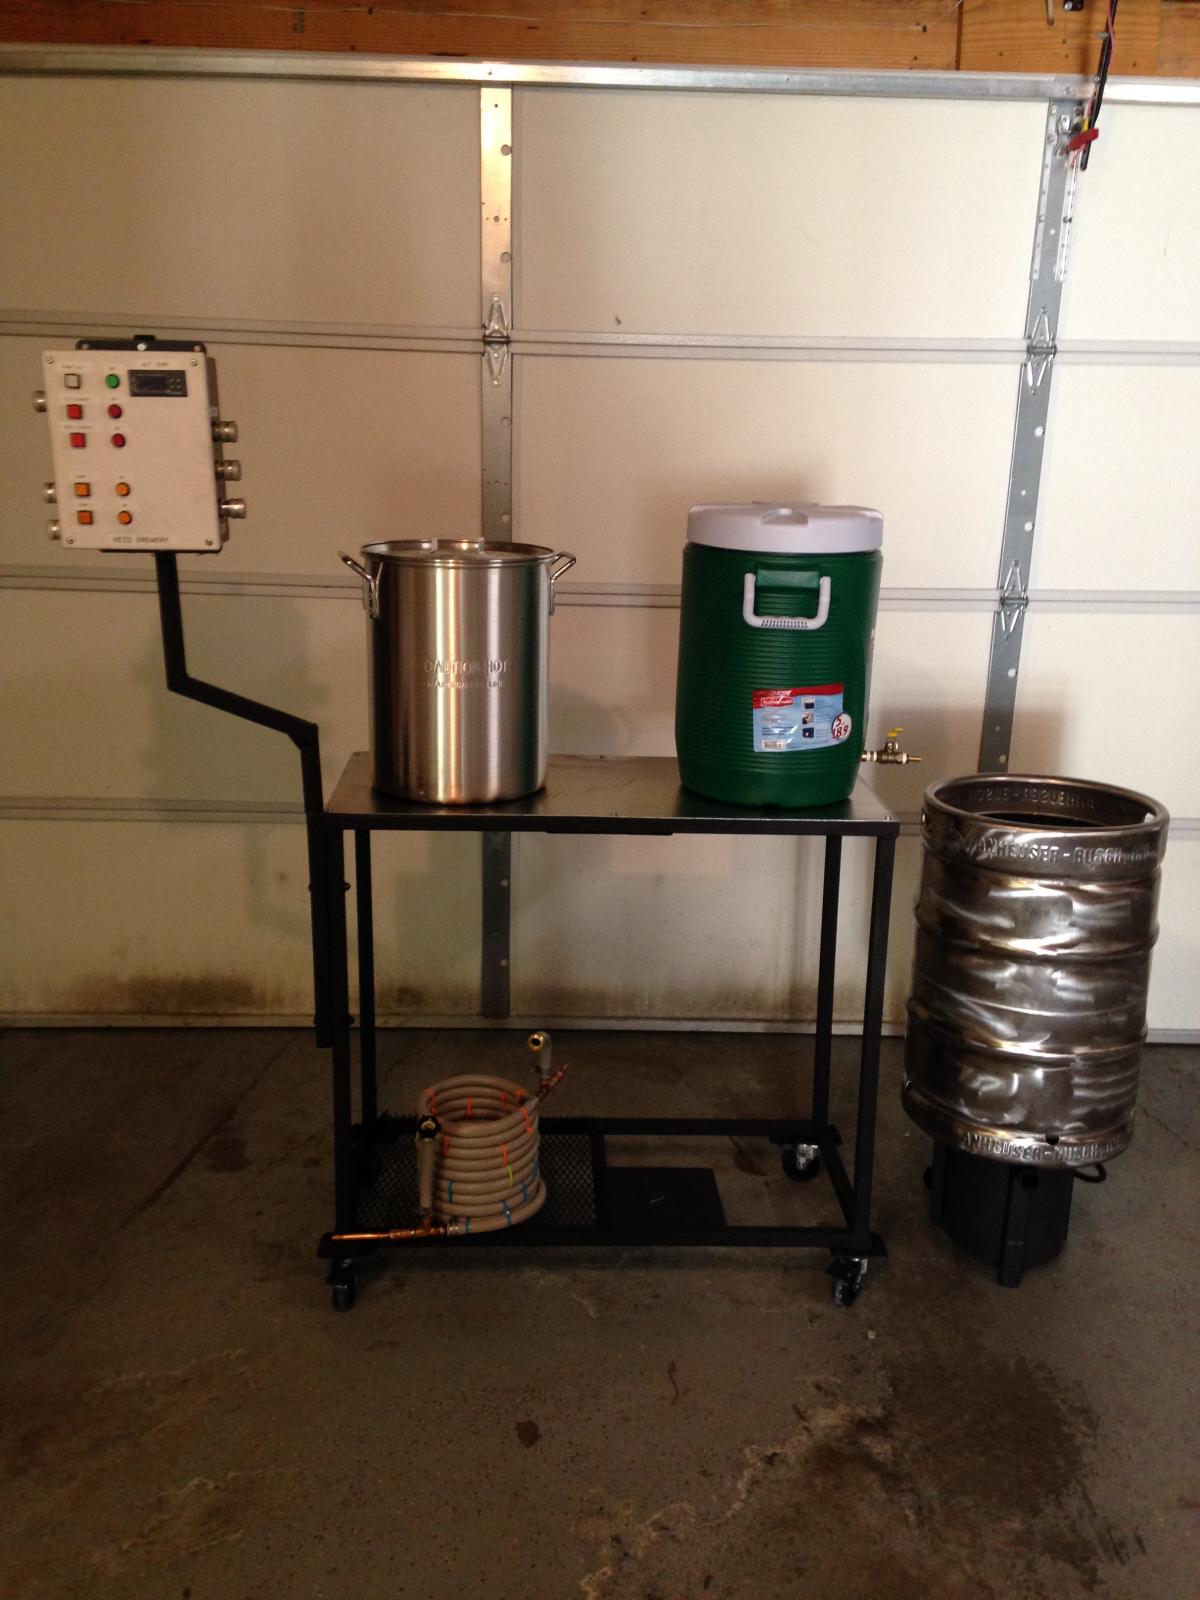
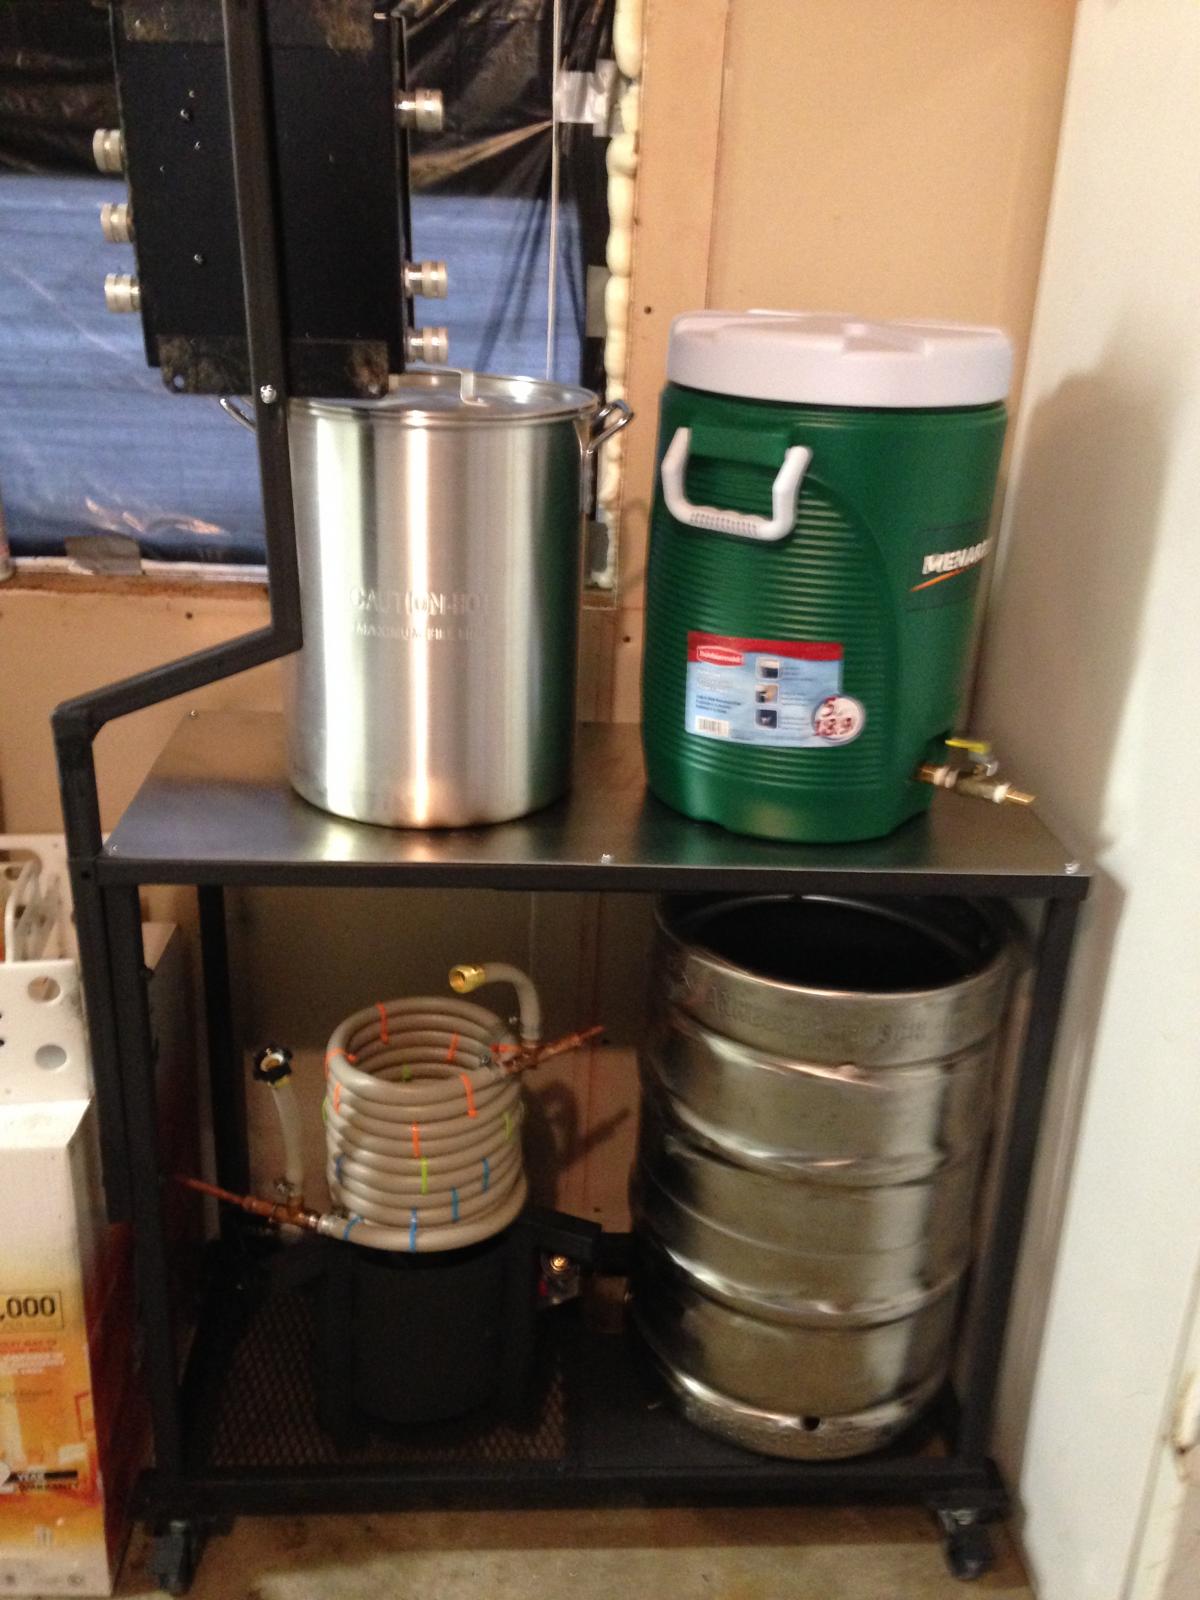
I made mine with the intentions of keeping a small footprint when not in use, so the control panel rotates. 17"x36" footprint when packed up. Pics are from before I finished wiring.

Heis Brewery Build 1-2015 (1).jpg


Heis Brewery Build 1-2015 (2).jpg
 
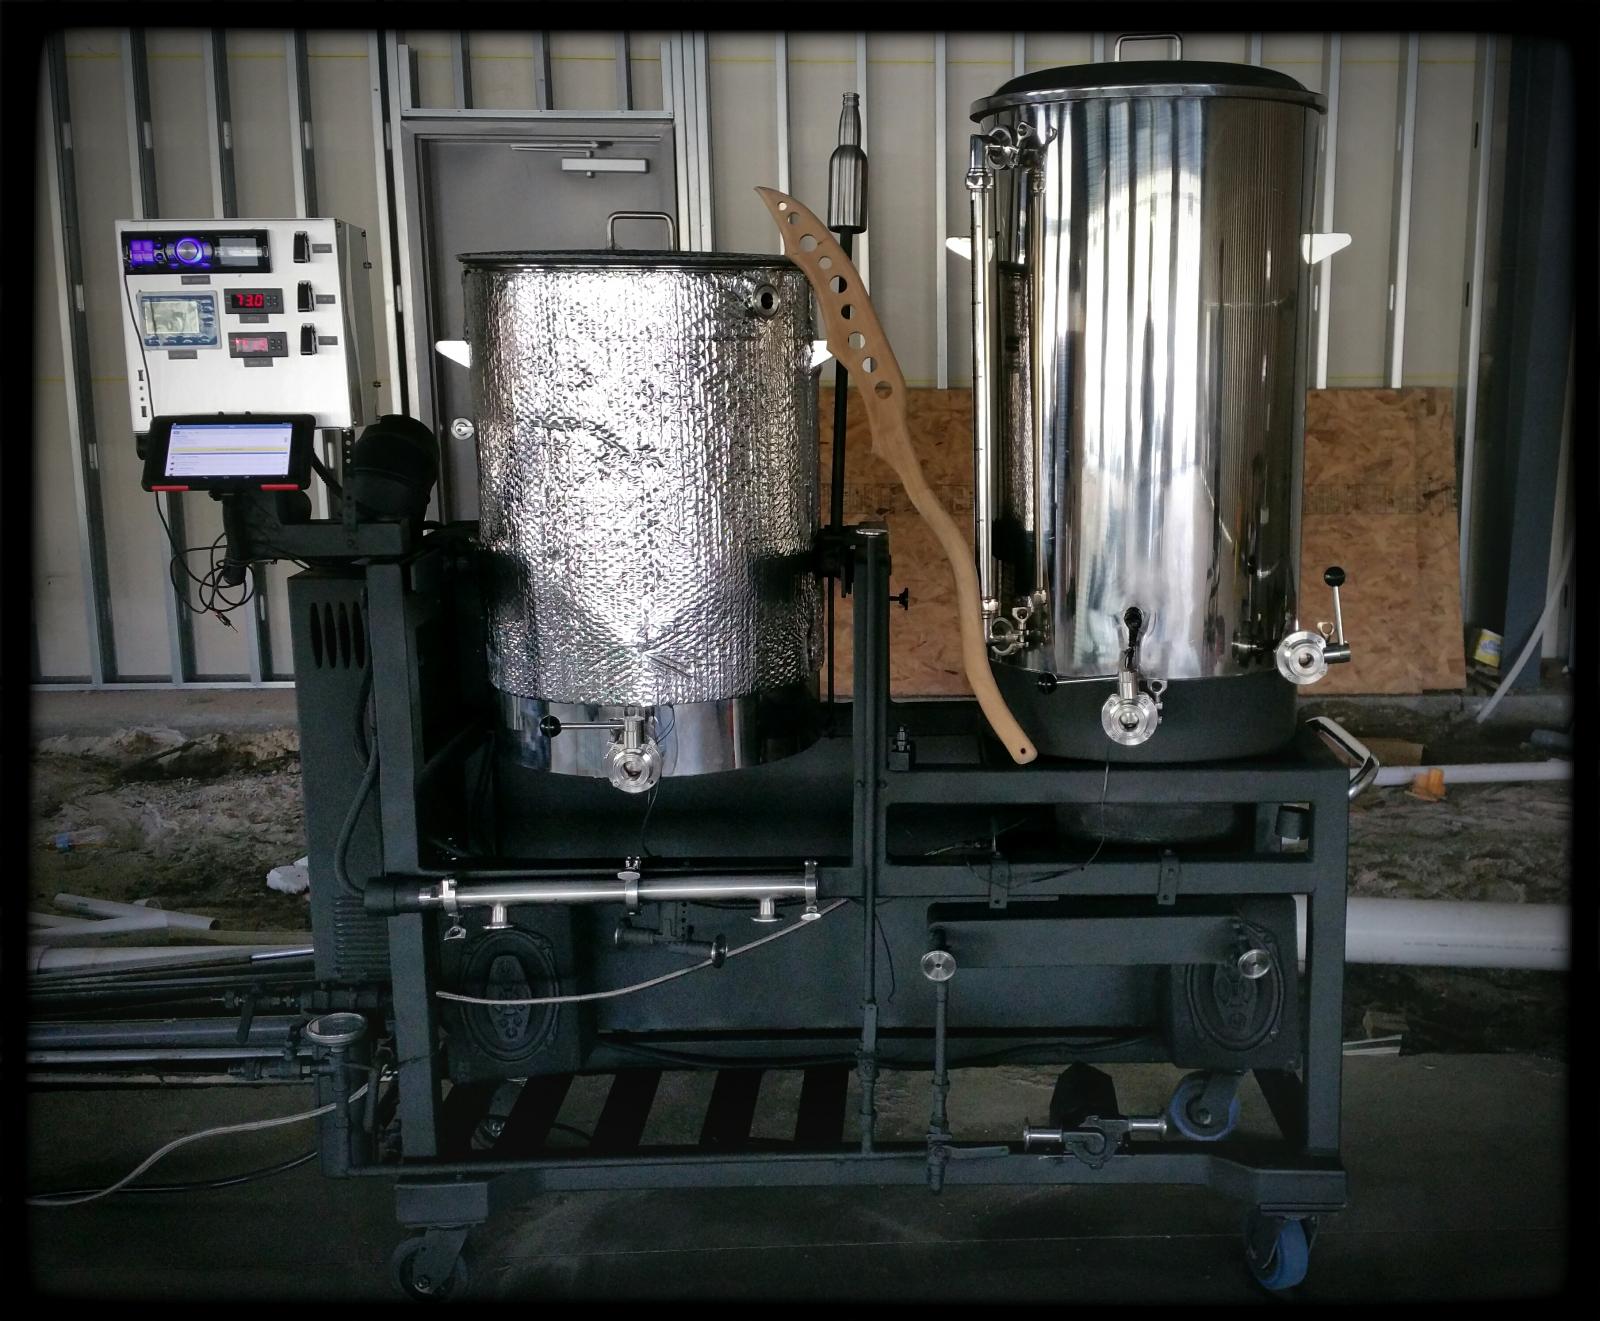
I designed this 1 BBL brew sculpture. It has an on demand water heater for the strike and sparge that is controlled by flow control in the control panel. The mash tun is mounted in a tippy dump with locking mechanisms to hold the mash tun in 2 different positions. The stand also features an automated rims mounted under the mash tun controlled by a temperature controller in the control panel. All the water is piped through copper piping with sanitary tri claps. The 210,000 btu burner is lit with an electric igniter. the 45 gallon kettle also has a probe installed to display the temp in the control panel. A plate chiller is mounted under the kettle and is hard piped into the copper water line. It also has a filter mounted before the on demand water heater and the stand is piped in a way to allow this to be bypassed when running the chiller. It also has a temp prob on the water input to get accurate reading of ground water temp. The stand also has a car media player installed in the control panel with two 6x9 speakers mounted on the bottom of the stand. I also mounted a tablet under the control panel to run Beer Smith and Pandora. I added USB chargers to charge all my brew day devices. I call it the NINKASI 30!

20141023_141133.jpg


20141024_102013.jpg
 
I designed this 1 BBL brew sculpture. It has an on demand water heater for the strike and sparge that is controlled by flow control in the control panel. The mash tun is mounted in a tippy dump with locking mechanisms to hold the mash tun in 2 different positions. The stand also features an automated rims mounted under the mash tun controlled by a temperature controller in the control panel. All the water is piped through copper piping with sanitary tri claps. The 210,000 btu burner is lit with an electric igniter. the 45 gallon kettle also has a probe installed to display the temp in the control panel. A plate chiller is mounted under the kettle and is hard piped into the copper water line. It also has a filter mounted before the on demand water heater and the stand is piped in a way to allow this to be bypassed when running the chiller. It also has a temp prob on the water input to get accurate reading of ground water temp. The stand also has a car media player installed in the control panel with two 6x9 speakers mounted on the bottom of the stand. I also mounted a tablet under the control panel to run Beer Smith and Pandora. I added USB chargers to charge all my brew day devices. I call it the NINKASI 30!

Well done.
 
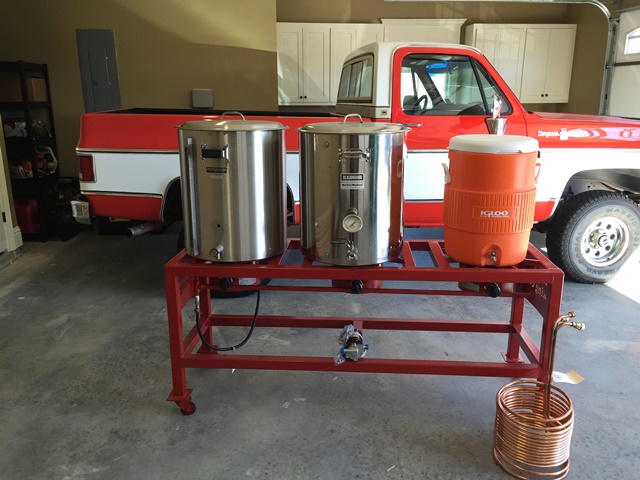
Here is my rig ... many thanks to Derrin over at Brewer's Hardware for all the help!!

I am on a natural gas hookup, with 2 burners and 2 chugger pumps. I'm about to switch over to a 2 T-valve manifold to eliminate hose switching from pump to kettles. Doing 11-gal batches and loving it! :)
--LexusChris

Finally got my 1st brewday in with the new manifold. Here are some pictures from that day with the manifold hooked up.

Manifold_s.jpg


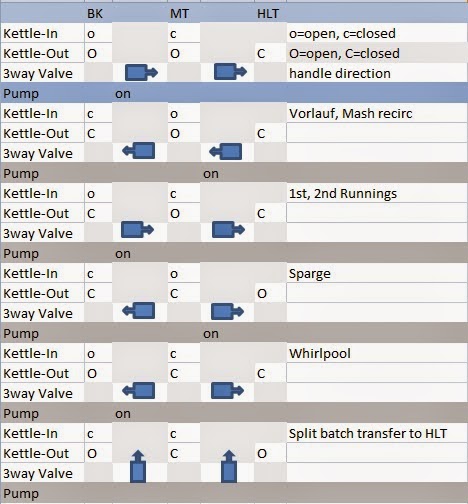
The Boil Kettle (BK) is on the left, Mash Tun (MT) in the middle, and Hot Liquor Tank (HLT) on the right. The BK has a tangential inlet for whirlpooling, and the MT has a inlet near the top for the sparge/vorlauf steps. I have my plate chiller inline before it hits the BK inlet.

Here are the port/valve states for the different parts of the brewday.

Manifold_states.bmp


I am still working through the settings for the CIP steps after brewday, but it is essentially following the brewday. Put the PBW in the HLT and work it through the major steps of the day. I just need to make sure to spin the 3-way valves when the manifold is static and full of solution. That way all sides of the valve head get cleaned.

:mug:
--LexusChris
 
Finally got my 1st brewday in with the new manifold. Here are some pictures from that day with the manifold hooked up.


Manifold_s.jpg


The Boil Kettle (BK) is on the left, Mash Tun (MT) in the middle, and Hot Liquor Tank (HLT) on the right. The BK has a tangential inlet for whirlpooling, and the MT has a inlet near the top for the sparge/vorlauf steps. I have my plate chiller inline before it hits the BK inlet.


Here are the port/valve states for the different parts of the brewday.


Manifold_states.bmp


I am still working through the settings for the CIP steps after brewday, but it is essentially following the brewday. Put the PBW in the HLT and work it through the major steps of the day. I just need to make sure to spin the 3-way valves when the manifold is static and full of solution. That way all sides of the valve head get cleaned.


:mug:

--LexusChris


Now that is one thing of beauty great job man, what kettles are they?
 
This is my simple Top Tier rig. All gravity to kettle, but then I have to pump thru plate chiller and 75 feet of tubing (no infections yet!) to the fermenter.

top tier rig.jpg
 
I posted this a while back but not fully in use. Today was my first AG brew day, and it went ok but not without its challenges (stuck sparge being no. 1).

Placeholder for pictures.
 
I'v been out of commission brewing for several brutal months here in north Toronto, very cold winter, so I got the bug and started a tuneup. Here's my freshened rig ready to go, I really cannot wait............:mug:

FullSizeRender.jpg


IMG_2793.JPG


IMG_2800.JPG


FullSizeRender_1.jpg


brew.jpg
 
Tragic.

Sounds like a summer project is to trench in a water line and a drain line.
If I had a space like that <drooling a bit here> it'd be viable year 'round...

Cheers! :)
 
Ohhh I would my friend but I have no water this time of year this garage is not attached to the house....:mad:

PS tonight -25C (-13F) Ahhhh....

Tragic.

Sounds like a summer project is to trench in a water line and a drain line.
If I had a space like that <drooling a bit here> it'd be viable year 'round...

Cheers! :)

Or buy some buckets now...:drunk:
 
This is my simple Top Tier rig. All gravity to kettle, but then I have to pump thru plate chiller and 75 feet of tubing (no infections yet!) to the fermenter.

I pot wheels on my fermenters the best thing I ever did, roll in and out of ferment chamber with a beer in one hand.....
 
This is my simple Top Tier rig. All gravity to kettle, but then I have to pump thru plate chiller and 75 feet of tubing (no infections yet!) to the fermenter.

I put wheels on my fermenters the best thing I ever did, roll in and out of ferment chamber with a beer in one hand..... no 75 feet hose
 
I'v been out of commission brewing for several brutal months here in north Toronto, very cold winter, so I got the bug and started a tuneup. Here's my freshened rig ready to go, I really cannot wait............:mug:


What burners are those they look pretty sweet what type of Btus they put out?
 
I'v been out of commission brewing for several brutal months here in north Toronto, very cold winter, so I got the bug and started a tuneup. Here's my freshened rig ready to go, I really cannot wait............:mug:

Where did you get those kettles? I have the 60 quart Concords, which are beefy, but the only complaint I have is the excessive evaporation during the boil.
 
Where did you get those kettles? I have the 60 quart Concords, which are beefy, but the only complaint I have is the excessive evaporation during the boil.

We were selling them on Greatbreweh but ran out, I am talking with China again on them because this manufacture made really good tanks (the company disappeared but resurfaced new name?). After one year use there is not a spot of rust on any weld meaning they were made from proper SS. Personally been very satisfied and yes small percentage evaporation from them.

I lose 0.75 to 1 Gallon after 1 hour.

PS their conical's are badass (as seen in picture) also from my experience, I have 3

Just out of curiosity, what's the capacity of those, and what WAS the price?
 
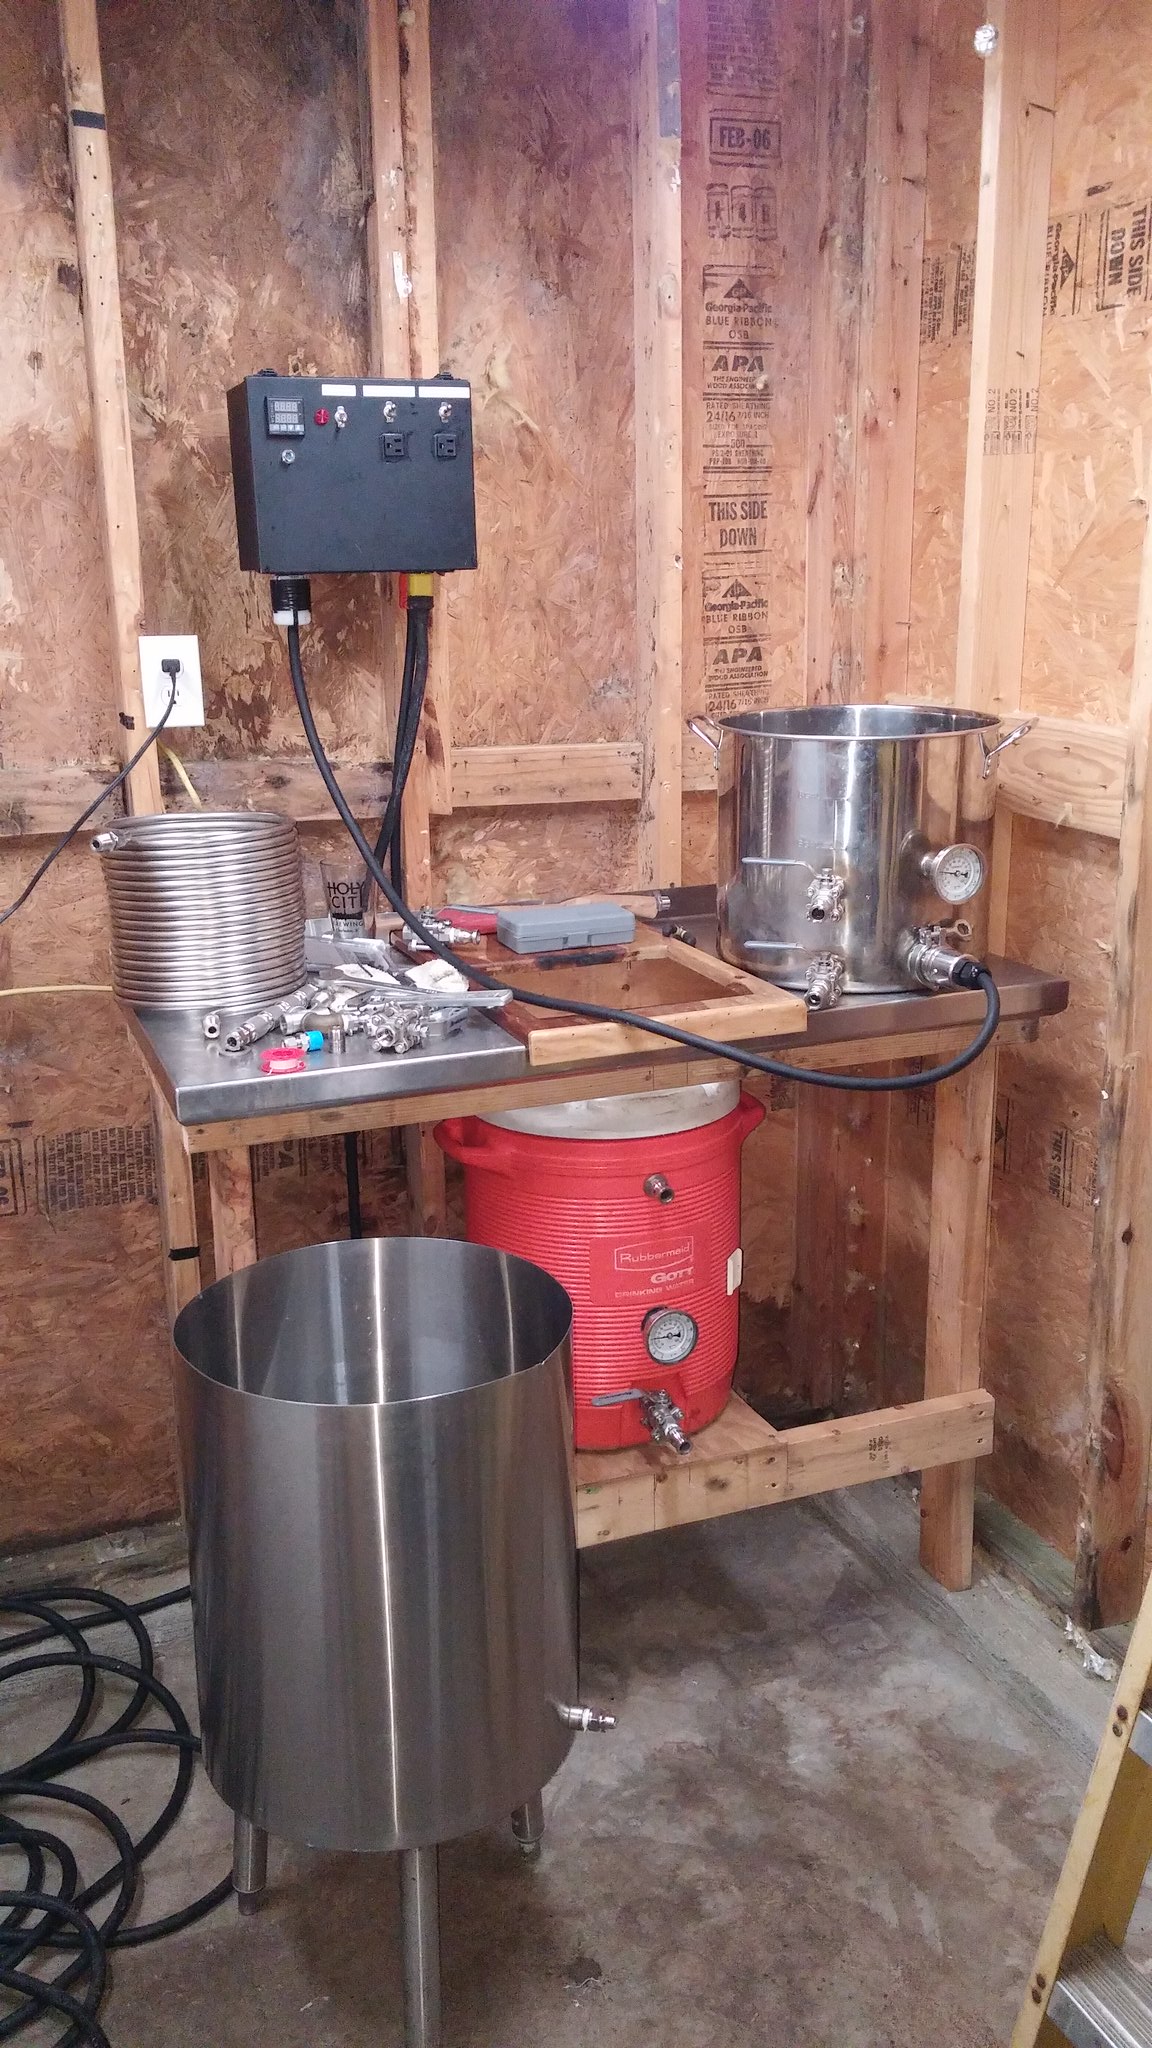
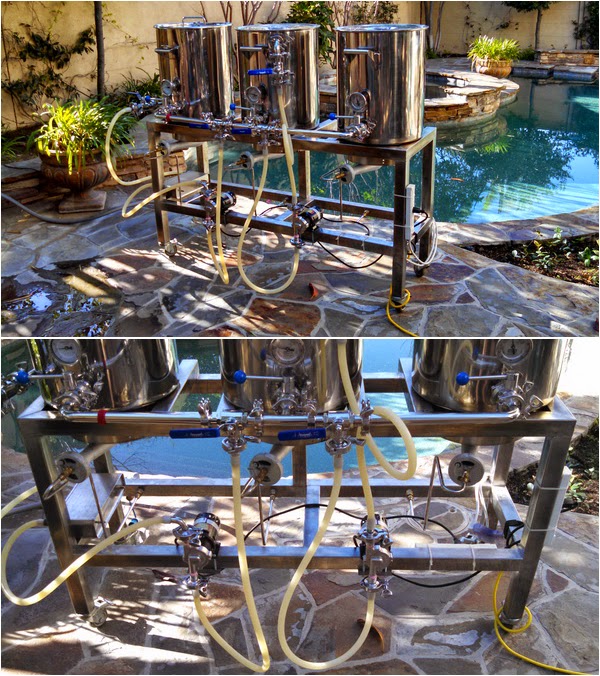
I posted very early pics of my system but there have been many upgrades and changes so I posting the latest version. I just put the wooden sculptures together over the weekend. I'm a fan of modular so I can put things away as I'm done using them. Also, I had back surgery last September so maneuverability is a plus. Less lifting, more rolling. :) Anyway, pics are below with a description of features.

Here's a breakdown of the features by piece:
HLT - Tri-Clamp fittings throughout. It's a Sabco HLT. It has 1/2" fittings welded for use as a normal HLT but I can swap the stainless immersion chiller out of the BK and it doubles as a HERMS Coil. I don't currenlty use it in that way, but I could if I wanted to. :)

MLT - Tri-Clamp fitting throughout. I recently had the 1/2" fittings that were originally on the MLT & BK replaced with 3/4" fittings. I can get some SERIOUS movement of wort now during the mash and chilling. It is a direct-fired RIMS. The control panel is an Auber PID that turns the NG on and off. There is also a relay timer that turns the Hot Surface Ignition on waits 4 seconds before opening the solenoid to allow gas flow. There is also a vacuum gauge that ensures I'm not pulling a vacuum during recirculation. Before replacing the 1/2" TC w/ 3/4" it was difficult to get a good flow. Now though, I can have it full bore and there is no vacuum whatsoever.

BK - Tri-Clamp fittings throughout. Removable Tri-Clamp stainless immersion chiller. Sits on a hydraulic lift table that allows me to adjust the height during transfers to the fermenter.

PUMP - Tri-Clamp fittings throughout. Has a bleeder valve to release air and for samples if needed. Again, the modular method allows me to use only the one pump and move it around as needed.

IMG_2370.jpg


IMG_2371.jpg


IMG_2372.jpg


IMG_2373.jpg


IMG_2374.jpg


IMG_2376.jpg


IMG_2377.jpg


IMG_2378.jpg


IMG_2379.jpg


IMG_2382.jpg
 
We were selling them on Greatbreweh but ran out, I am talking with China again on them because this manufacture made really good tanks (the company disappeared but resurfaced new name?). After one year use there is not a spot of rust on any weld meaning they were made from proper SS. Personally been very satisfied and yes small percentage evaporation from them.

I lose 0.75 to 1 Gallon after 1 hour.

PS their conical's are badass (as seen in picture) also from my experience, I have 3

Soo those look pretty sweet. Very similar to the Stout Tanks equipment. Are they full-drain?
 
Soo those look pretty sweet. Very similar to the Stout Tanks equipment. Are they full-drain?

Wow they do I went to their site and yes.

these are not theirs mind you and not full drain if that means as it sounds but i tilt them and do full drain very easily.

New ones are setup for all electric if ever one decides to convert with HERMS coil in HLT.
 
I posted very early pics of my system but there have been many upgrades and changes so I posting the latest version. I just put the wooden sculptures together over the weekend. I'm a fan of modular so I can put things away as I'm done using them. Also, I had back surgery last September so maneuverability is a plus. Less lifting, more rolling. :) Anyway, pics are below with a description of features.

Here's a breakdown of the features by piece:
HLT - Tri-Clamp fittings throughout. It's a Sabco HLT. It has 1/2" fittings welded for use as a normal HLT but I can swap the stainless immersion chiller out of the BK and it doubles as a HERMS Coil. I don't currenlty use it in that way, but I could if I wanted to. :)

MLT - Tri-Clamp fitting throughout. I recently had the 1/2" fittings that were originally on the MLT & BK replaced with 3/4" fittings. I can get some SERIOUS movement of wort now during the mash and chilling. It is a direct-fired RIMS. The control panel is an Auber PID that turns the NG on and off. There is also a relay timer that turns the Hot Surface Ignition on waits 4 seconds before opening the solenoid to allow gas flow. There is also a vacuum gauge that ensures I'm not pulling a vacuum during recirculation. Before replacing the 1/2" TC w/ 3/4" it was difficult to get a good flow. Now though, I can have it full bore and there is no vacuum whatsoever.

BK - Tri-Clamp fittings throughout. Removable Tri-Clamp stainless immersion chiller. Sits on a hydraulic lift table that allows me to adjust the height during transfers to the fermenter.

PUMP - Tri-Clamp fittings throughout. Has a bleeder valve to release air and for samples if needed. Again, the modular method allows me to use only the one pump and move it around as needed.


Can you please explain the spring strain relief on the hose. Did you make it or buy it?
 
Can you please explain the spring strain relief on the hose. Did you make it or buy it?


I initially got the idea from here:


In the video he used wire wrapped around his tubing to keep it from kinking. These are the none kinking garden hose thingys. They came on a hose I bought for my chiller. I put them on my recirculation hose and it works great.
 
Last edited by a moderator:
I initially got the idea from here:
http://www.youtube.com/watch?v=Ge5ur5SuxLk

In the video he used wire wrapped around his tubing to keep it from kinking. These are the none kinking garden hose thingys. They came on a hose I bought for my chiller. I put them on my recirculation hose and it works great.


Very neat. I'll have to see if I can get my hands on a few of those.
 
Back
Top