You are using an out of date browser. It may not display this or other websites correctly.
You should upgrade or use an alternative browser.
You should upgrade or use an alternative browser.
Show us your sculpture or brew rig
- Thread starter Onescalerguy
- Start date

Help Support Homebrew Talk:
This site may earn a commission from merchant affiliate
links, including eBay, Amazon, and others.
Mischief_Brewing
Well-Known Member
I made my ghetto stand "slightly" less ghetto by adding some wall paneling I found in the garage attic. Still cost me a grand total of $0...
I'm here to make you all feel much better about your equipment...
Here is the Gaptooth Brewhouse.

Just finished her last weekend. Brewed the very next day and couldn't be happier
very nice gents!
Grasslands
Well-Known Member
Great job! Once you've gone all-grain you'll never go back. It's nice and compact - just be careful with that HLT. Maybe a little new paint, but WTH, it's ready to brew!
Yeah...I've yet to receive this (will get it next week), but I'm def. gonna take it slow & safe.
I kinda like the chippy paint job it's got!
nevadashawn
Member
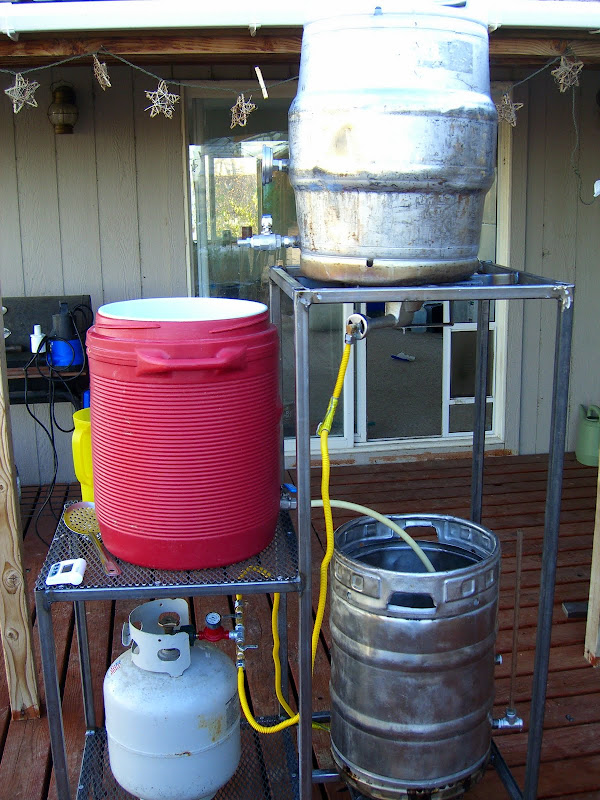
Here's mine. I put the finishing touches on yesterday, and brewed a fresh hop APA on her last night. Much better than lifting those keggles up and down off of my wifes gardening table. It's powered by 2 high pressure burners and an adjustable regulator from agrisupply.com. The 1" square tube and expanded metal came from S&S metals in Reno for $70. I welded it up with a friends MIG. Grinding and painting is in the works, but I just couldn't wait to use it once it was functional. I found the plans for it at the Google Sketchup Wharehouse http://sketchup.google.com/3dwarehouse/details?mid=cc3a8a78b94d2745befb94a335d281b8&prevstart=0 The plans sure look a lot like Dude's stand from page 2 of this thread.
- Joined
- Nov 6, 2007
- Messages
- 62,016
- Reaction score
- 6,923
To those with the BK super low like this. I assume you're using an IC and then just lifting the full fermenter somewhere to drain?


$7.79 ($7.79 / Count)
Craft A Brew - LalBrew Voss™ - Kveik Ale Yeast - For Craft Lagers - Ingredients for Home Brewing - Beer Making Supplies - (1 Pack)
Craft a Brew

$53.24
1pc Hose Barb/MFL 1.5" Tri Clamp to Ball Lock Post Liquid Gas Homebrew Kegging Fermentation Parts Brewer Hardware SUS304(Liquid Hose Barb)
Guangshui Weilu You Trading Co., Ltd


$53.24
1pc Hose Barb/MFL 1.5" Tri Clamp to Ball Lock Post Liquid Gas Homebrew Kegging Fermentation Parts Brewer Hardware SUS304(Liquid MFL)
yunchengshiyanhuqucuichendianzishangwuyouxiangongsi


$49.95 ($0.08 / Fl Oz)
$52.99 ($0.08 / Fl Oz)
Brewer's Best - 1073 - Home Brew Beer Ingredient Kit (5 gallon), (Blueberry Honey Ale) Golden
Amazon.com


$176.97
1pc Commercial Keg Manifold 2" Tri Clamp,Ball Lock Tapping Head,Pressure Gauge/Adjustable PRV for Kegging,Fermentation Control
hanhanbaihuoxiaoshoudian


$33.99 ($17.00 / Count)
$41.99 ($21.00 / Count)
2 Pack 1 Gallon Large Fermentation Jars with 3 Airlocks and 2 SCREW Lids(100% Airtight Heavy Duty Lid w Silicone) - Wide Mouth Glass Jars w Scale Mark - Pickle Jars for Sauerkraut, Sourdough Starter
Qianfenie Direct


![Craft A Brew - Safale S-04 Dry Yeast - Fermentis - English Ale Dry Yeast - For English and American Ales and Hard Apple Ciders - Ingredients for Home Brewing - Beer Making Supplies - [1 Pack]](https://m.media-amazon.com/images/I/41fVGNh6JfL._SL500_.jpg)


$10.99 ($31.16 / Ounce)
Hornindal Kveik Yeast for Homebrewing - Mead, Cider, Wine, Beer - 10g Packet - Saccharomyces Cerevisiae - Sold by Shadowhive.com
Shadowhive


$58.16
HUIZHUGS Brewing Equipment Keg Ball Lock Faucet 30cm Reinforced Silicone Hose Secondary Fermentation Homebrew Kegging Brewing Equipment
xiangshuizhenzhanglingfengshop

$22.00 ($623.23 / Ounce)
AMZLMPKNTW Ball Lock Sample Faucet 30cm Reinforced Silicone Hose Secondary Fermentation Homebrew Kegging joyful
无为中南商贸有限公司


$20.94
$29.99
The Brew Your Own Big Book of Clone Recipes: Featuring 300 Homebrew Recipes from Your Favorite Breweries
Amazon.com

nevadashawn
Member
That's exactly what I had to do. I just put it up on the MLT shelf and drain it from there. Not ideal, but I didn't want to make the HLT any higher. I envision a pump system in the future. To pump water up to the HLT from the BK, and to drain/cool the BK.
hungrymonkey
Well-Known Member
Almost there.
I just need to finish up a few things. box the burners in, then paint.
It should be 100% gravity, even to the fermenter.

I just need to finish up a few things. box the burners in, then paint.
It should be 100% gravity, even to the fermenter.
bmckee56
Well-Known Member
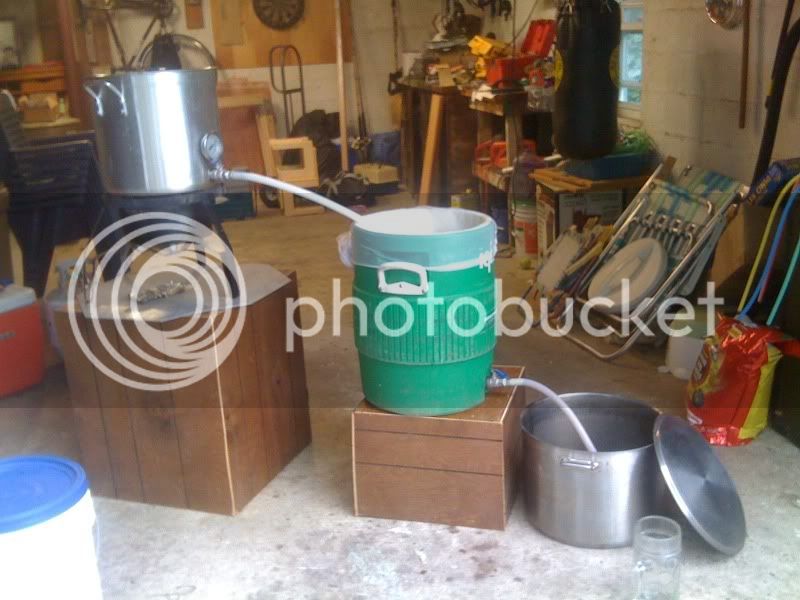
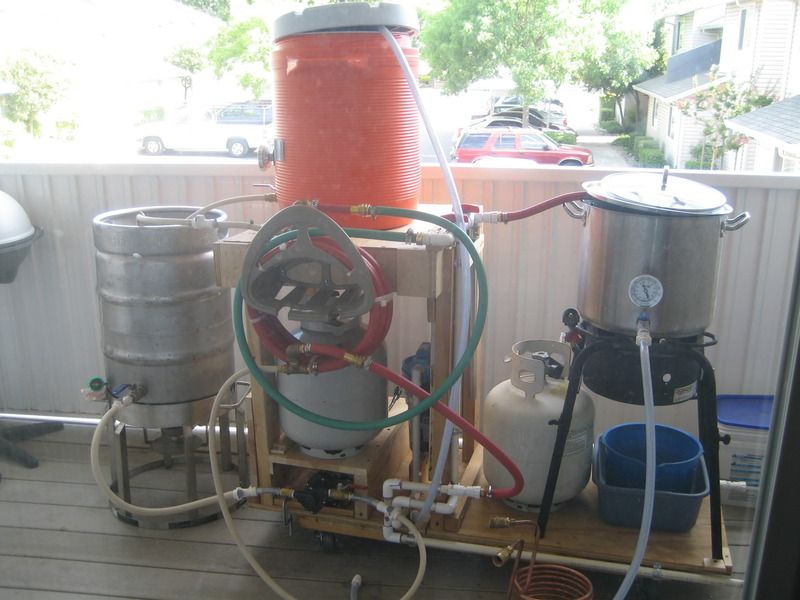
Here's mine, but it is not quite finished. Several more things to do and add.

More pictures here: https://www.homebrewtalk.com/f51/my-brew-rig-works-all-material-free-rig-195001/
It is a 5 gallon rig right now, but I have an MLT cooler for 10 gallon future brews.
Salute!
More pictures here: https://www.homebrewtalk.com/f51/my-brew-rig-works-all-material-free-rig-195001/
It is a 5 gallon rig right now, but I have an MLT cooler for 10 gallon future brews.
Salute!
springer
Well-Known Member
new rig. I still need to add the shirron plate chiller ,water plumping and charcoal filter

This is a Pinupbrewery rig
This is a Pinupbrewery rig
wilserbrewer
BIAB Expert Tailor
I made my ghetto stand "slightly" less ghetto by adding some wall paneling I found in the garage attic. Still cost me a grand total of $0...
I'm here to make you all feel much better about your equipment...
Nothing wrong about that at all...nice functional 3 tier...the best thing about $0 invested is you are free to make a change if and when desired. The barley and hops can't see the bling ya know. Nice work!
dutch101st
Well-Known Member
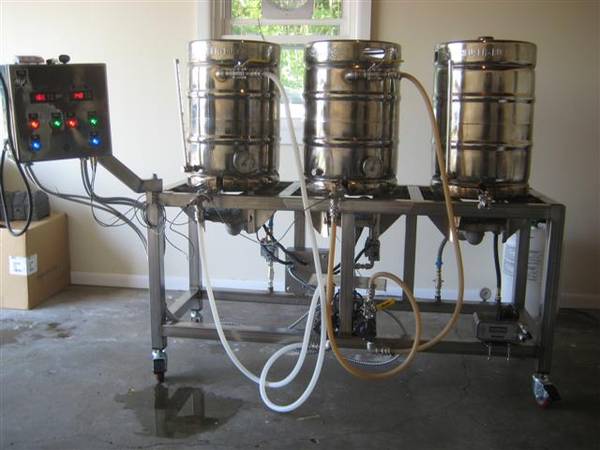
Still have the control box to build and wire...plus testing. But here is my 2.0 brewery, built by hand from the ground up, I even welded together the stand.

So much nicer than brewery 1.0 that I was useing...
So much nicer than brewery 1.0 that I was useing...
klyph
Well-Known Member
Damn, brewery 1.0 has got some character.
dutch101st
Well-Known Member
Yea...my cop friends told me I had a nice looking meth lab there...ugh.
Gotta love cop humor.
Gotta love cop humor.
-TH-
Well-Known Member
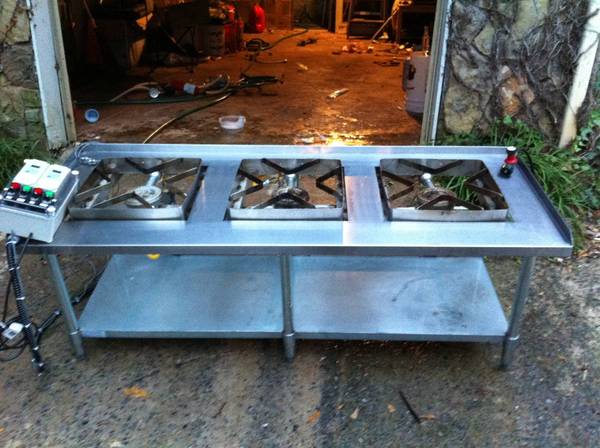
Put this together about a year ago and have used it quite a bit. The cart was a freebee and the work surface top was $5 from Herman Miller. I recently added the front panel with propane control valves and piezo ignitor, which I have to say works pretty slick. Someday I hope to add another burner and turn it into a 10 gal rig, but for now this will work just fine.
During vorlauf...
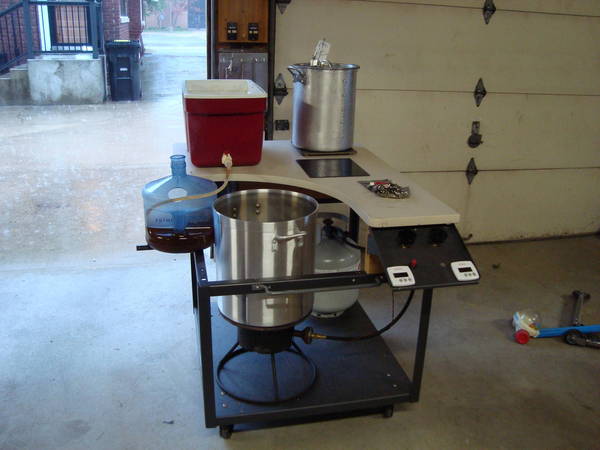
Notice the little fold out arm to hold the vorlauf container...
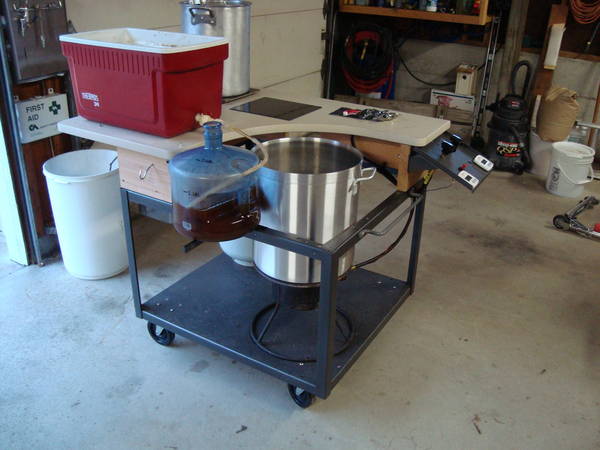
Final runnings

During vorlauf...
Notice the little fold out arm to hold the vorlauf container...
Final runnings
Fritztheelephant
Well-Known Member
My new rig. Ready for it's maiden voyage.
BrewBeemer
Well-Known Member
Yea...my cop friends told me I had a nice looking meth lab there...ugh.
Gotta love cop humor.
Swell, a "meth lab", looking good I like your end keggle stand.
BTW Shane, have you had a chance to stop in at CHI company in town
to find out what Matt has in corny's, kegs as well those stainless
conicals he was to start importing last year?
lehr
Well-Known Member
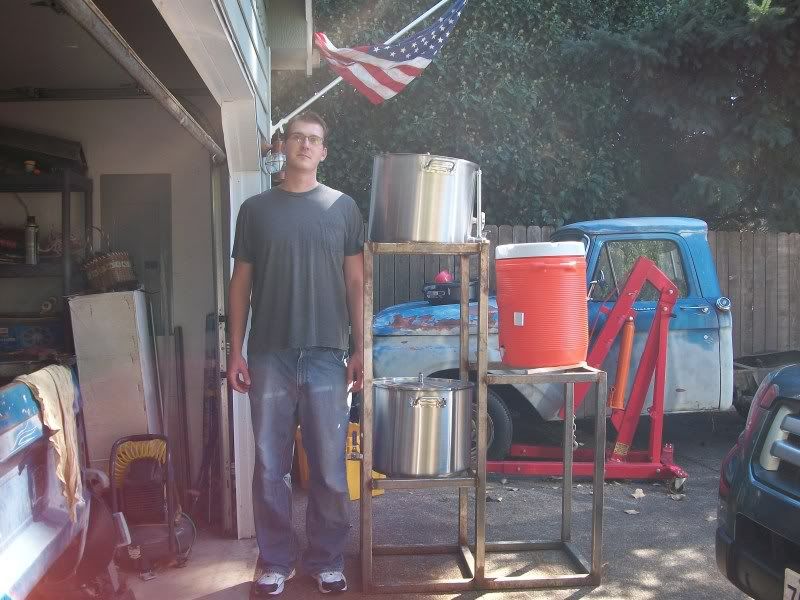
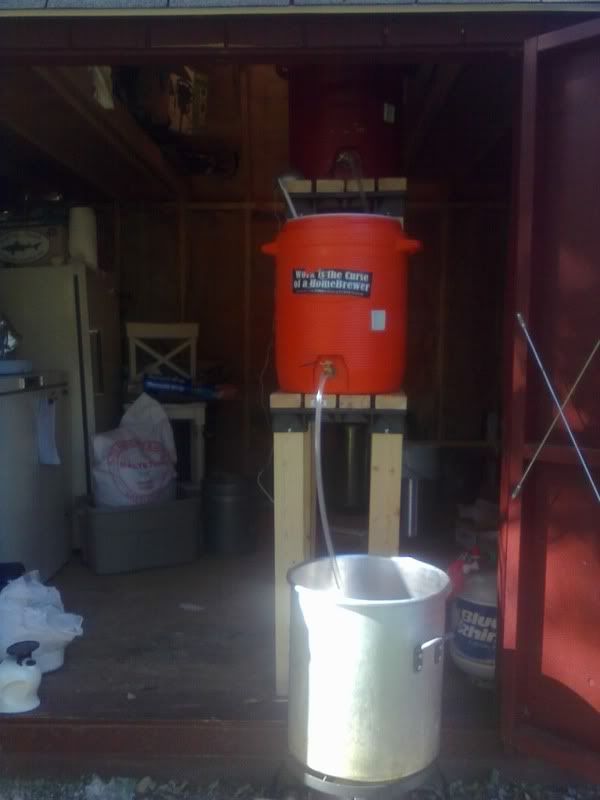
My very "thrown together" set up now. It will work for the next few months until I get my keggles built, then I will NEED a stand!

I like this guy's last name !
The other Lehr.

wilceaser
Well-Known Member
She may be ugly but she's all mine!
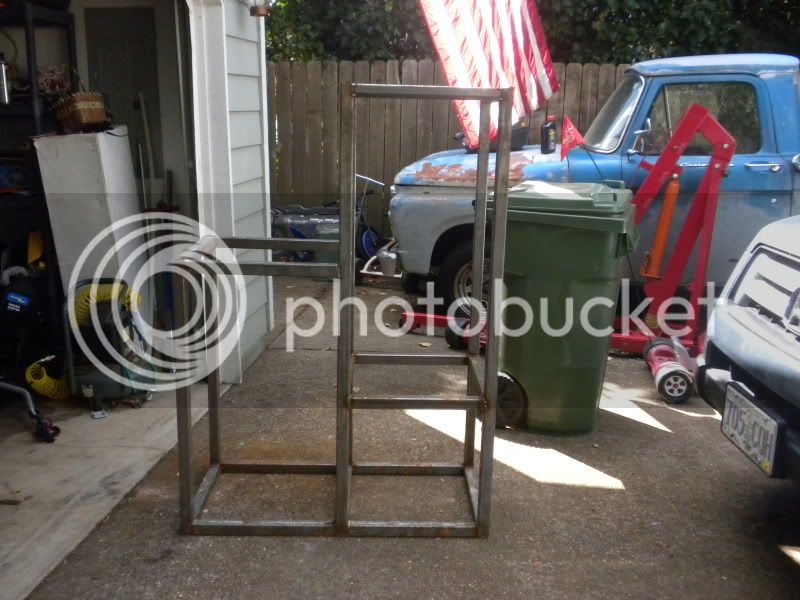
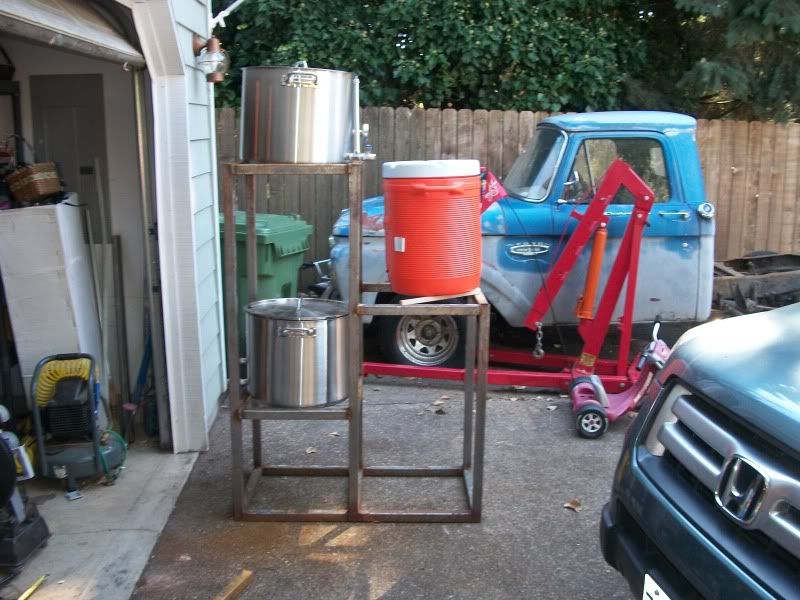
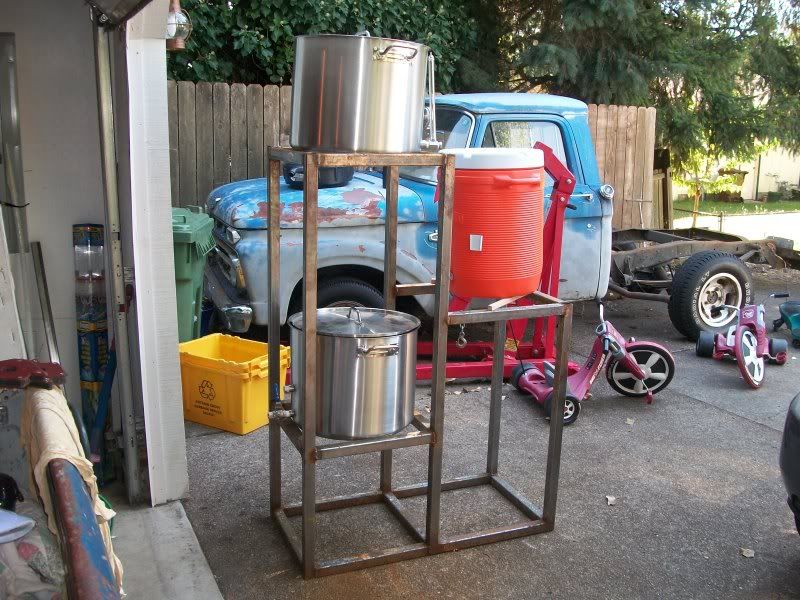
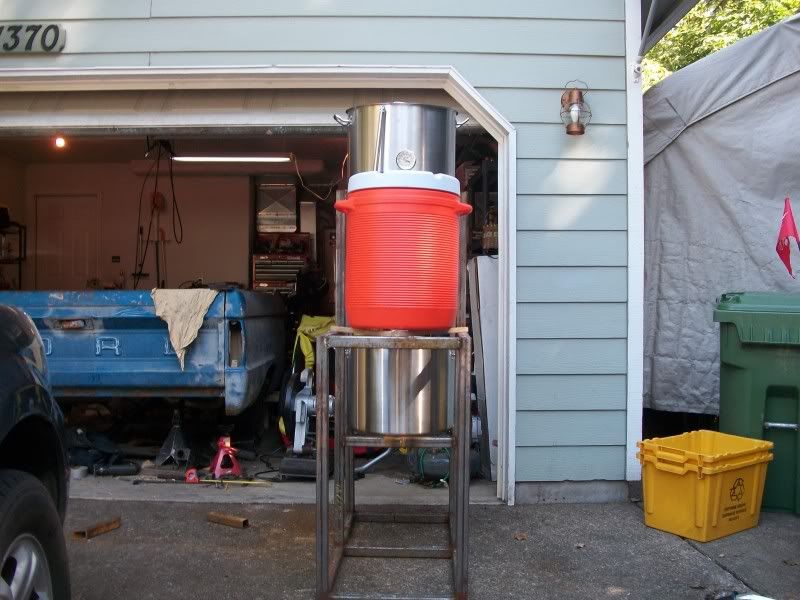
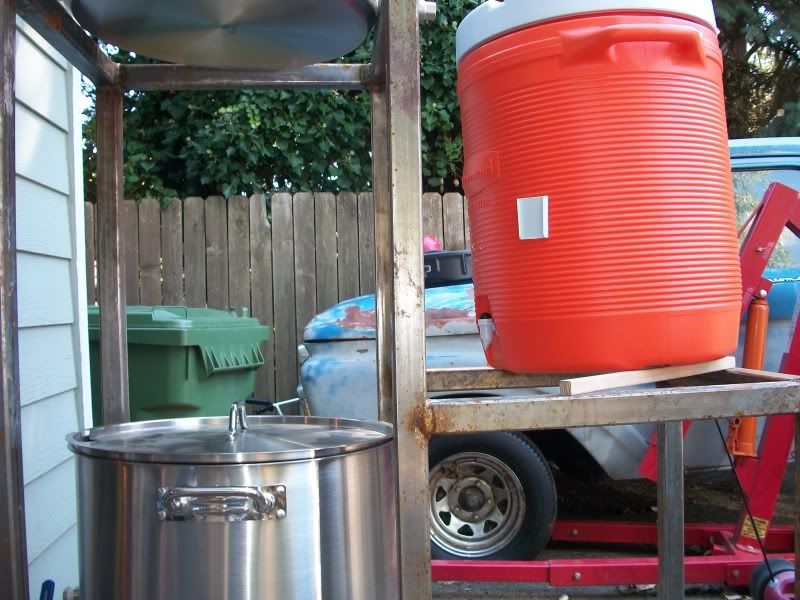
A sneak peek at my build. Designed a few different approaches in my head and this one triumphed based on my needs. It is a Blichmann-esque principal with a twist. It collapses to a maximum length of no more than 3 feet and fits in the trunk of my TL-S with room to spare. It is lite and can be assembled in a few minutes with a handful of bolts and two wrenches. Burners etc.. should be here Friday. Third keggle not pictured  Everything used can be purchased at Lowe's. Full write up to come.... Cheers!!!


Everything used can be purchased at Lowe's. Full write up to come.... Cheers!!!
klyph
Well-Known Member
Will you be securing that top keg some how? It doesn't appear level, and I don't imagine 10 gallons of strike water dumping out on you would be very pleasant.
That could be an optical illusion. The ladder in the background doesn't look level, so it could make the other objects in the picture look unlevel (is that a word?) too.
I'm wondering how strong that center piece is. Will it hold the weight?
I'm wondering how strong that center piece is. Will it hold the weight?
Hsmithmathews
Member
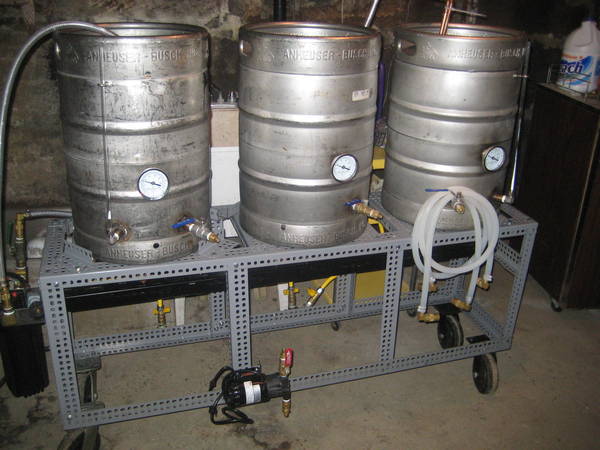
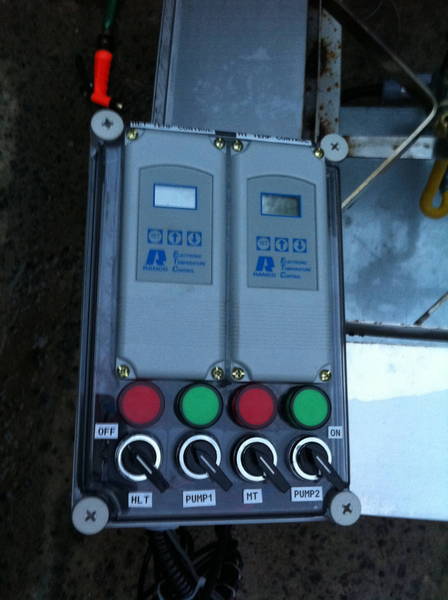
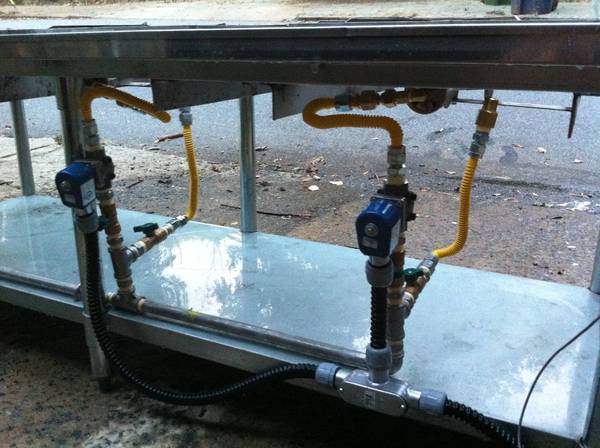
This is my sculpture, its a work in process. just finished the automated valves
Hsmithmathews
Member
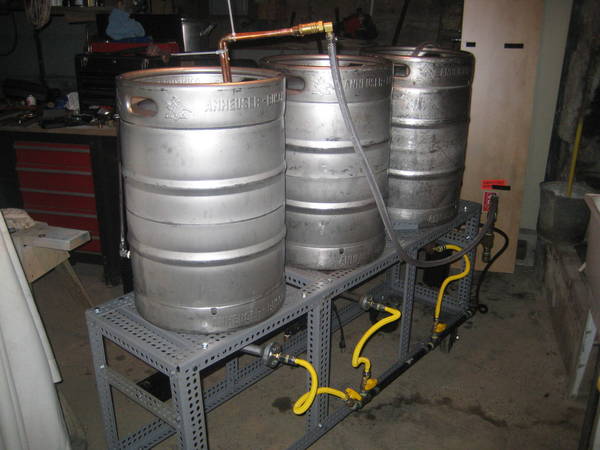
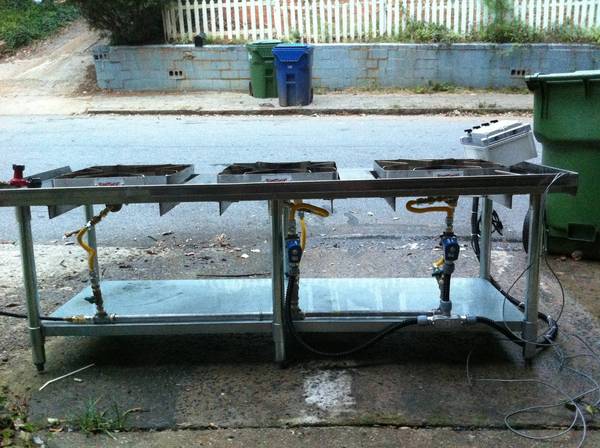
Here are more images, let me know what you think...
klyph
Well-Known Member
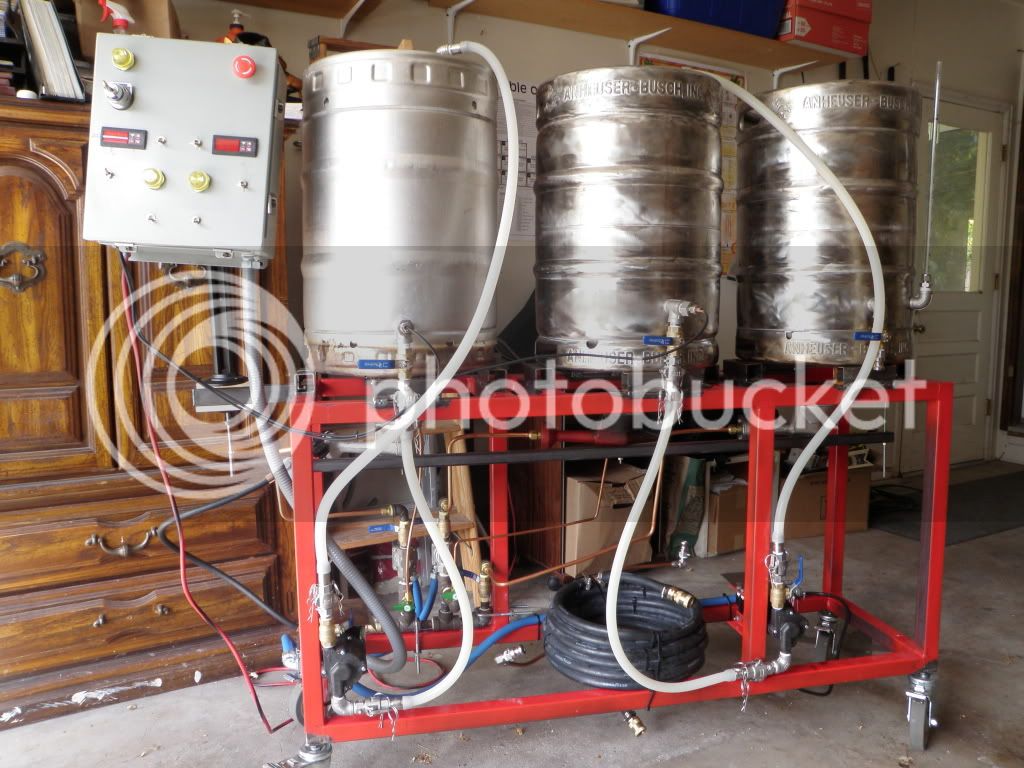
Very nice, not the most compact design, but very utilitarian, I bet you'll brew some mighty fine beer on it. I like the control panel.
Will you be securing that top keg some how? It doesn't appear level, and I don't imagine 10 gallons of strike water dumping out on you would be very pleasant.
Yes it will be secured. :cross: I am planning on welding some small uprights on each platform to secure the bottom from sliding and then using straps around the keg to the stand itself. I was in Wal Mart this weekend and found what function like a bunjee(sp) but are thin and wide like a strap. They are adjustable and fit perfectly around the keg and hook into the square tubing.
The stand does sit slightly crooked in the pic but the ladder makes it look way off. The reason it sits crooked is that when I was tacking it all togethar it was flat on the concrete but when I welded the underside of the legs(vertical L channel to the square runners) it threw everything out of whack from the bead line. A little grinding should fix that. I am also planning on putting some form of adjustable leveling pads on the ends of the legs.
Each leg can be unbolted from the square tubing and the square tubing comes apart in three sections and each platform is removable. I need to take a pic of it disassembled. It can easily be assembled, disassembled, and carried by one person. Although it may never be the roaming brew stand, space is a concern in suburbia since my automotive fetish gets the majority of the garage. This will be stored in the "brew room" (spare bed room) next to my kegorator/fermentation chamber.
 Temp controlled chamber that fits 4 carboys and the kegorator side that still holds 8 cornys. Yet another work in progress..... :rockin:
EarthBound
Well-Known Member
Here's my rig

I just went through this entire thread at work, and I've got to say that it's interesting to see such a diverse range of equipment being incorporated here. I am brewing 5 Gal AG batches, using a plastic fermenter as an HLT, and a 10 gallon cooler as a mash tun... I am a fit guy, but lugging around huge pots of scalding hot water is disheartening indeed. I would love to built one of these brew rigs, but I am just starting to scratch the surface in terms of HERMS, RIMS, and whatever else there is to learn. I would love to get beyond using my refrigerator and a table chair to create a makeshift 3 tier brewery, there is some real inspiration in here, if only I had some skills in welding.
What is the mecanno looking stuff I have seen in here? It looks like it is pre-rigged with holes for simple fabrication. Is this stuff cost effective/reliable? Are there any other examples of this stuff being used for brew rigs?
By the way, that green beast above is a real 'beaut.
What is the mecanno looking stuff I have seen in here? It looks like it is pre-rigged with holes for simple fabrication. Is this stuff cost effective/reliable? Are there any other examples of this stuff being used for brew rigs?
By the way, that green beast above is a real 'beaut.
Similar threads
- Replies
- 11
- Views
- 1K
- Replies
- 132
- Views
- 9K
- Replies
- 45
- Views
- 5K
