OP
OP
Is there a media that actually polishes? I'd think you'd end up with a nice looking, but matte finish that way.

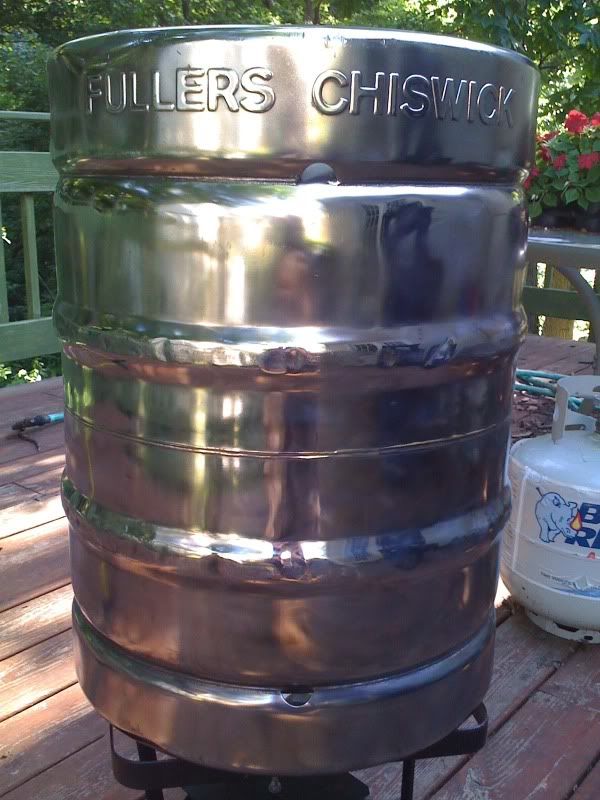
So I am hoping these are the swirl marks that the polishing compounds will remove?
I didnt read this entire thread before jumping into it and bought some wheel polish at advanced auto. Wrong stuff I think, didnt really work.
And I couldnt really tell from your pics but Im guessing you didnt get in between the letters imprinted on the keg? I couldnt get in there with the pad on the grinder.
Is there a media that actually polishes? I'd think you'd end up with a nice looking, but matte finish that way.
I found the correct stuff at lowes today and got the #2 cleaning compound and the #5 polishing compound. I used the compounds on the polishing pads on my grinder and they really didnt do the trick? My keg still looks the same as in that picture. Looks better in the picture than it really does looking straight at it. It looks like it is dented all over, which it isnt. Just the way the grinder made it look. I thought the polishing compounds would remove those and make it mirror like. Not the case. Maybe I am doing something wrong? Also, the cleaning and polishing compounds are very hard out of the tube. How are you guys using it, rubbing it on the pads first or turning the grinder on and pressing the compound against the pad so it fills the pad?


![Craft A Brew - Safale S-04 Dry Yeast - Fermentis - English Ale Dry Yeast - For English and American Ales and Hard Apple Ciders - Ingredients for Home Brewing - Beer Making Supplies - [1 Pack]](https://m.media-amazon.com/images/I/41fVGNh6JfL._SL500_.jpg)


You need to push the compound stick into the pad as it spins. I think from there you just need to spend some time. The polishing step takes a while. Let the machine do all the work. I start with a medium pressure for a while then lighten up to buff it smooth. Then you move to the finer grit and repeat. Check out post #18 where I show a spot going from the fine gator grit finishing pad to the #2 polish.
The compounds I found included a #2 which was a cleaner. The #5 is the polish. The way I tried was the blue gator grit (fine) sanding pad, then, went to the #2 cleaning compound, then tried the #5 polish. Really isnt working. I want that mirrored finish but it is hard to get. Even spending time with the cleaner and polish it isnt taking away the "dented" look. Granted it is shiny all over but it looks like those stainless steel countertops that you purposely put swirl marks on with a grinder.
Did you use an angle grinder the entire time or did you switch to a drill with the correct buffing pads you are supposed to use with the compounds?
I have more time polishing those things than I do in the whole system.
First I grind them with a 3-m scotch bright deburing pad and then I go over them with a DA-grinder with 80 grit and keep working my way down until I get to 400 grit then I polish it with a big air polisher and buffing rouge.
It does suck after a while. I broke the 3-4 procedure down to spaced out 30 minutes sessions to let my back recover.
I just got my Caswell order in the mail Saturday with a bunch of sisal and cotton 4" wheels and two grades of polishing compound.
Anyone try to keg into a 5 gallon cylinder (Sierra Nevada) ? I think it has a Sanke type bung on top.