- Joined
- Jan 3, 2020
- Messages
- 3,267
- Reaction score
- 3,965
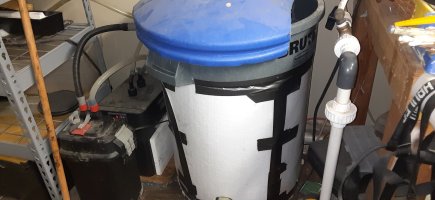
I had an idea to save water while chilling that I will call a perpetual spring. The idea is to store a large enough volume of water in a tank to cool a 5.5 gallon batch of wort. Then, instead of letting the water drain or capturing it to be used up later, the water is returned to the tank and left to cool thus being available for the next brew in perpetuity. Consider my setup that follows as a guide to potentially implementing this into your own brewing system. It will require the space that at least a barrel will occupy, one or two pumps, and then some fittings and hoses. I could have used both the pumps on my brew rig but I chose to just use only my wort pump and I added an inexpensive submersible pump. I had a lot of these parts laying around as well.
Locally I picked up a 35 gallon barrel to test my idea out, call that phase I. I did some calculations initially with the idea that the cooling done would occur in two stages. I felt that that the second stage would be needed for lagers, since the tank water was unlikely to be below lagering temperatures. The options for the second stage will be covered later but I estimated that the 35 gallon size would do. As it turned out, this type of barrel made the construction much easier than initially considered. I originally thought I would need a bulkhead fitting low on the tank. Not a particular problem, these can be had from rain barrel suppliers. But this barrel has a removable and mostly flat sealing lid. So opted to make all connections through the lid.
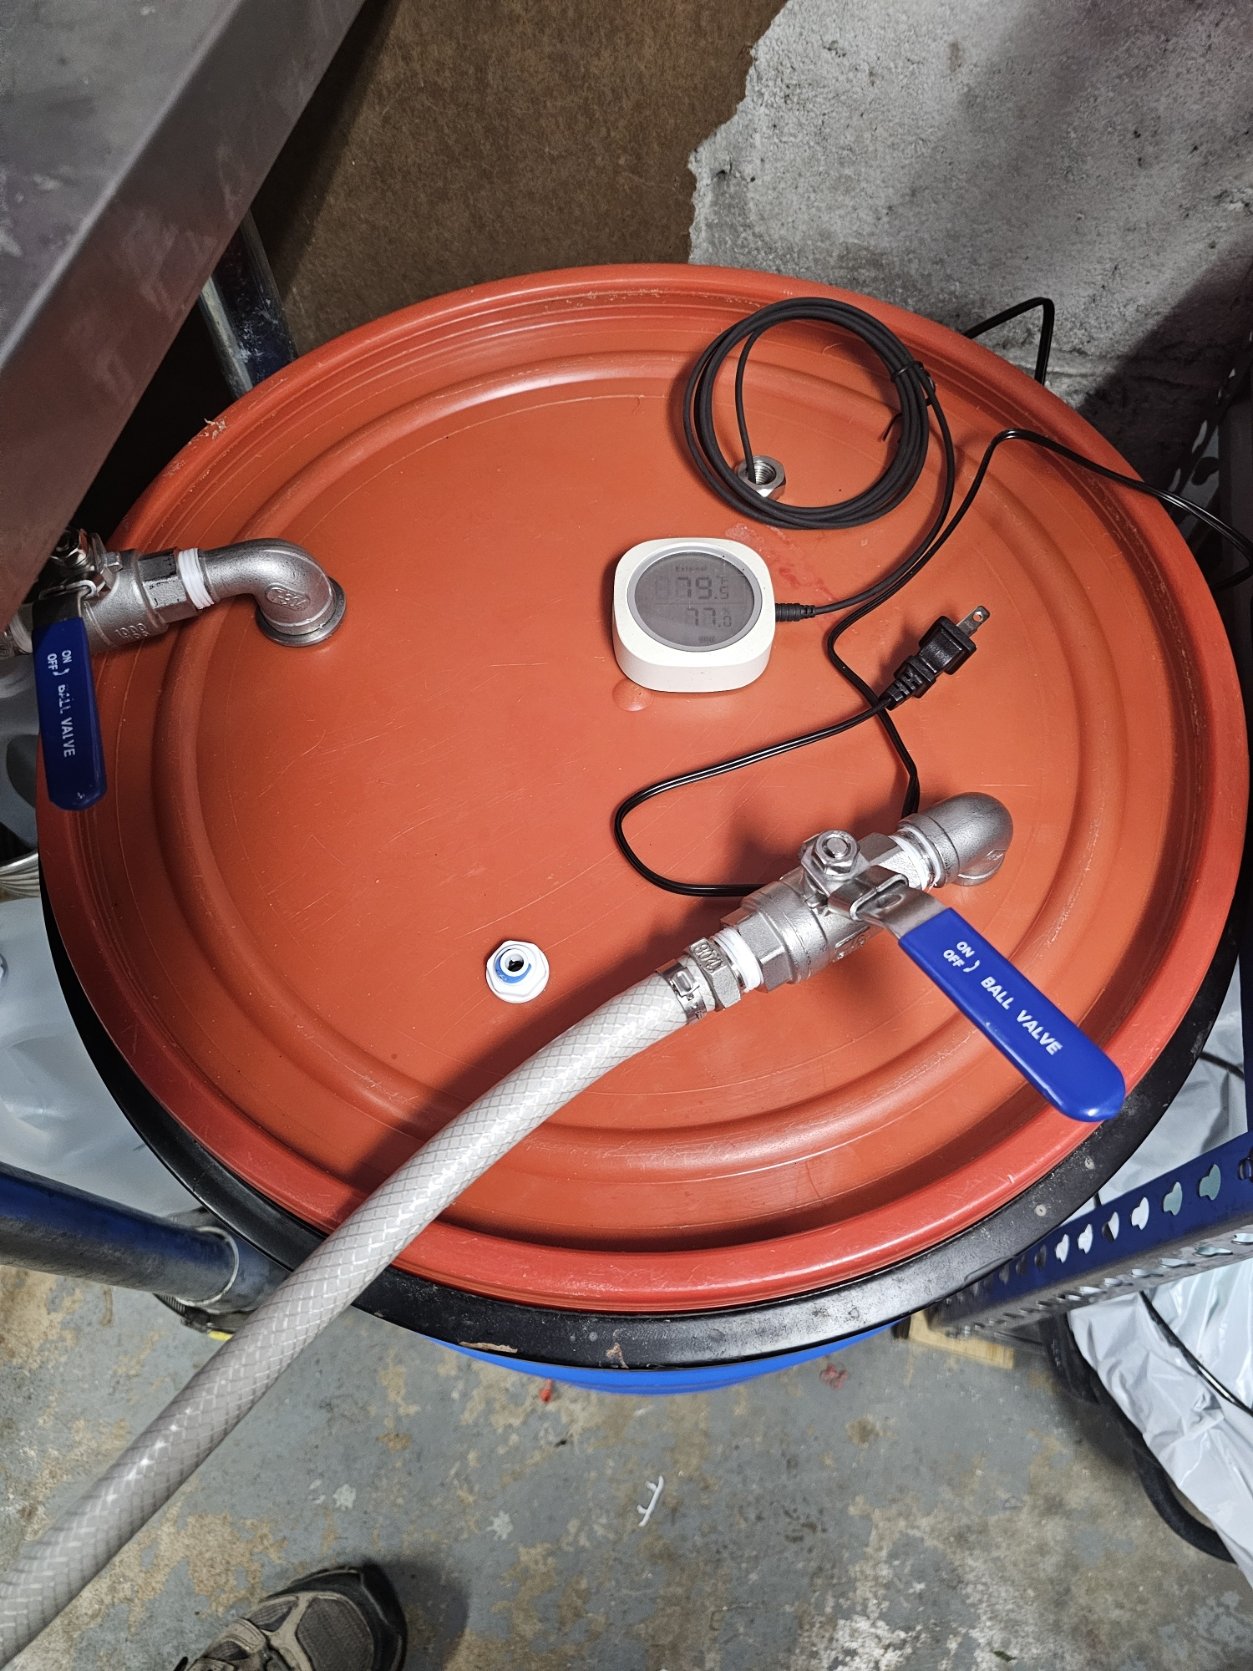
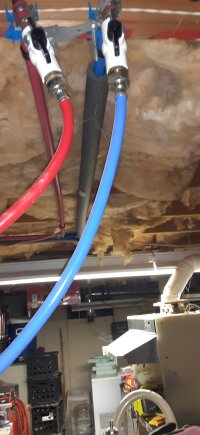
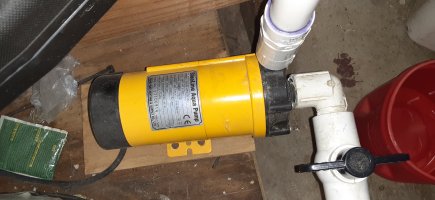
In order to get the water out, I opted for a small submersible pump. I turned to my favorite which is the Vivosun 800gph model, I now have 5 of these and they never cost more than $20. On my garden hoses and chillers, I use brass disconnects that I purchased in sets and I had extras. I had an old rv water hose that had a hole but I saved it and salvaged the rest. I ran the hoses to the lid of the barrel. I had some extra stainless steel elbows, valves, hex nuts, some washers and gaskets too. That Vivosun comes with extra ½” NPT plastic barbs in three barb sizes and I had some of those too. The basic idea of a weldless bulkhead is usually a nipple or a street elbow even through the wall with a gasket, washer perhaps, and a hex nut. Since I went through the top, it doesn’t have to be perfect. There’s a feed and a return in the lid. I added a push to connect bulkhead and a thermowell, consider those extra. That’s mostly it, peruse the pictures and you can see how it all fits together.
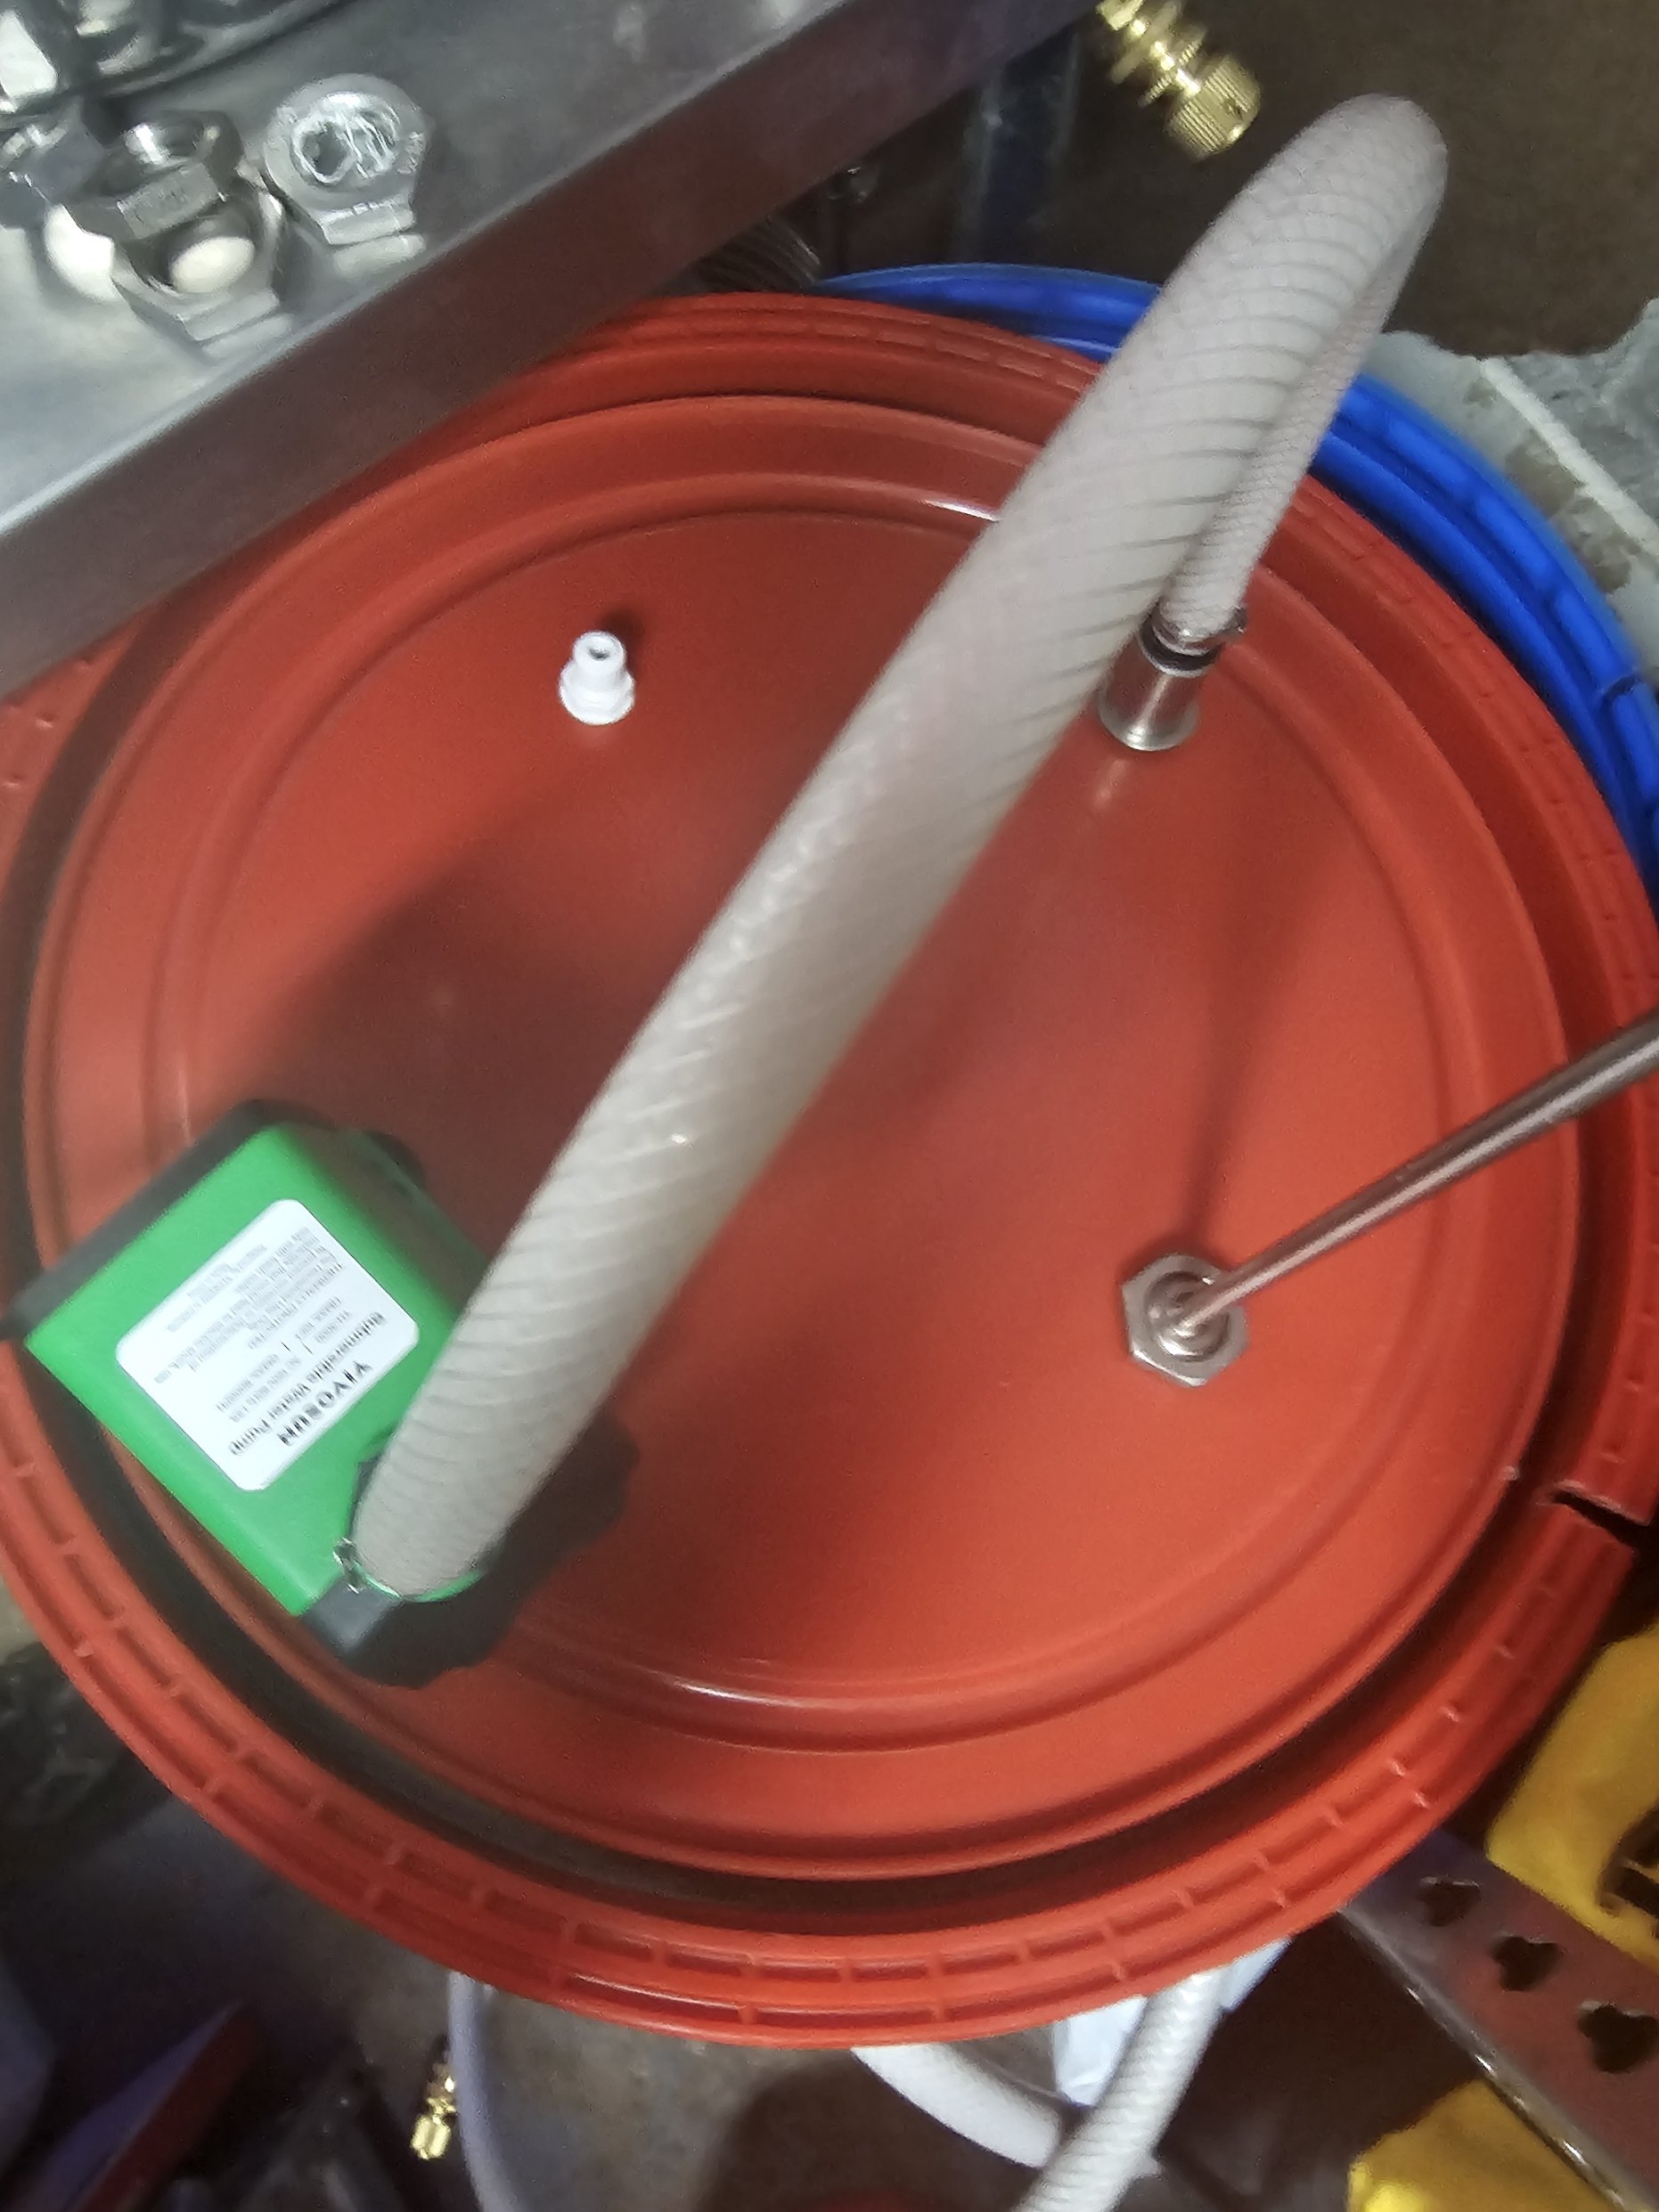
Photo is of lid underside, pump sits at bottom of the barrel. The small notch allowed for the cord to go through the lid and the cord sits behind the sealing band.
So how good does Phase I work? I filled the barrel with the waste water from my RO system first to find out. (That’s what the ptc bulkhead was for.) I have used it twice, and both times using 75-77F room temperature water, it brought the wort down to 96F. The thermowell was for a temperature logger I had that wasn’t being used, an Inkbird but that particular model doesn’t connect to their newer app and I couldn’t get it to connect to the old app either. So I don’t know how long it took but it was about 15 minutes of recirculation. This project can incorporate an immersion chiller, cfc, or plate chiller. The idea is that the wort and the tank water will equalize and the time to do that will depend on your chiller. I have found my CFC to be slightly slower than a plate chiller in general, but an IC is a bit longer. If you had an IC, a pump wouldn’t be strictly necessary for the wort but whirlpooling helps a lot there so at least have a spoon available.
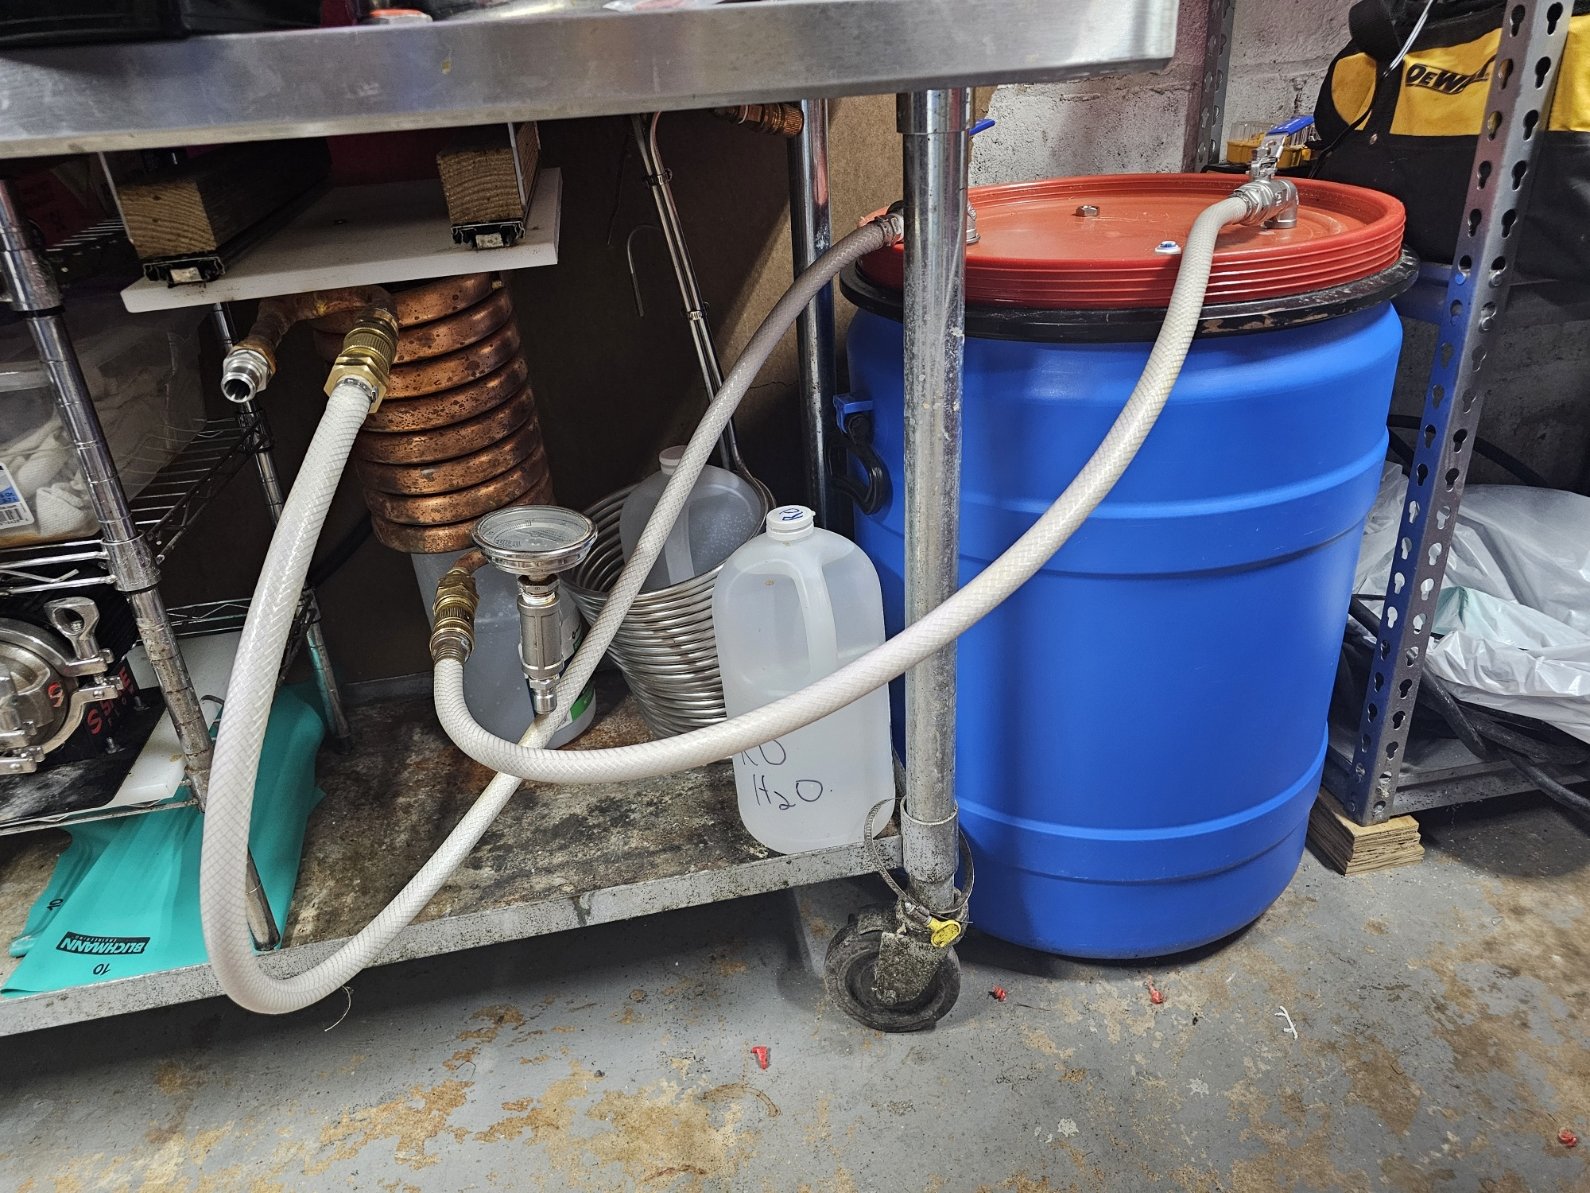
Phase 2 options I can think of four. Continuing to riff on the perpetual spring, a second smaller vessel such as a cooler or bucket could hold a few gallons of water to which reusable ice blocks could be added. This ice could simply be in soda bottles. The water could be saved and reused by keeping the lid on the ice water vessel. Second option, transfer the wort to its fermentation vessel and place in a refrigerated fermentation chamber, let cool to pitching temperature. Third, seal the wort in its fermenter and let cool to pitching temperature. Fourth is to use a glycol chiller to cool to pitching temperature.
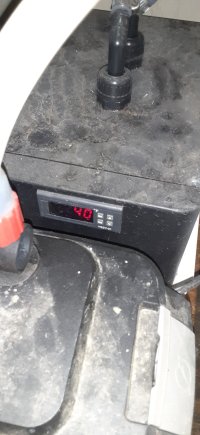
Option 1 would certainly work, as that has been used successfully for chilling lagers. I was looking to test out my glycol chiller so I used option 4 on an ale and a lager. I didn’t capture the data properly with the ale but it was a couple hours. I have an Icemaster 100 and the ale was in a unitank with a coil. I also didn’t record the glycol temperature. The second go was a lager. This took way longer as I initially had the temperature around 50F but then kept forgetting to properly set the temperature at the end of setting it. It was stuck at 65 for hours. This brew went into a carboy as well and the coil is small (Anvil carboy coil). I did end up building a cozy for it out of a camping sleeping mat and duct tape. The insulation works great and the lager is fermenting at 52F.
Additional thoughts:
1. A 2.5-3 gallon batch could certainly be brought to about room temperature. But an ice bath there could probably do it too and the water could be saved as in option 1.
2. A 10 gallon batch could be done similarly but you would need a bigger barrel 70-80 gallons. A 55 gallo might be too small in my opinion but you could go bigger with the ice water mix in phase II.
3. Option 4 with the glycol chiller might be considered a little taxing on the chiller as I have seen recommendations to not have the wort more than 100F. The only brew I had cooling was the one being tested each time so I don’t feel I strained it excessively. In the future, I will be working with option 1 as I have a new chest freezer finally with some extra space to freeze blocks of ice and reusable blocks.
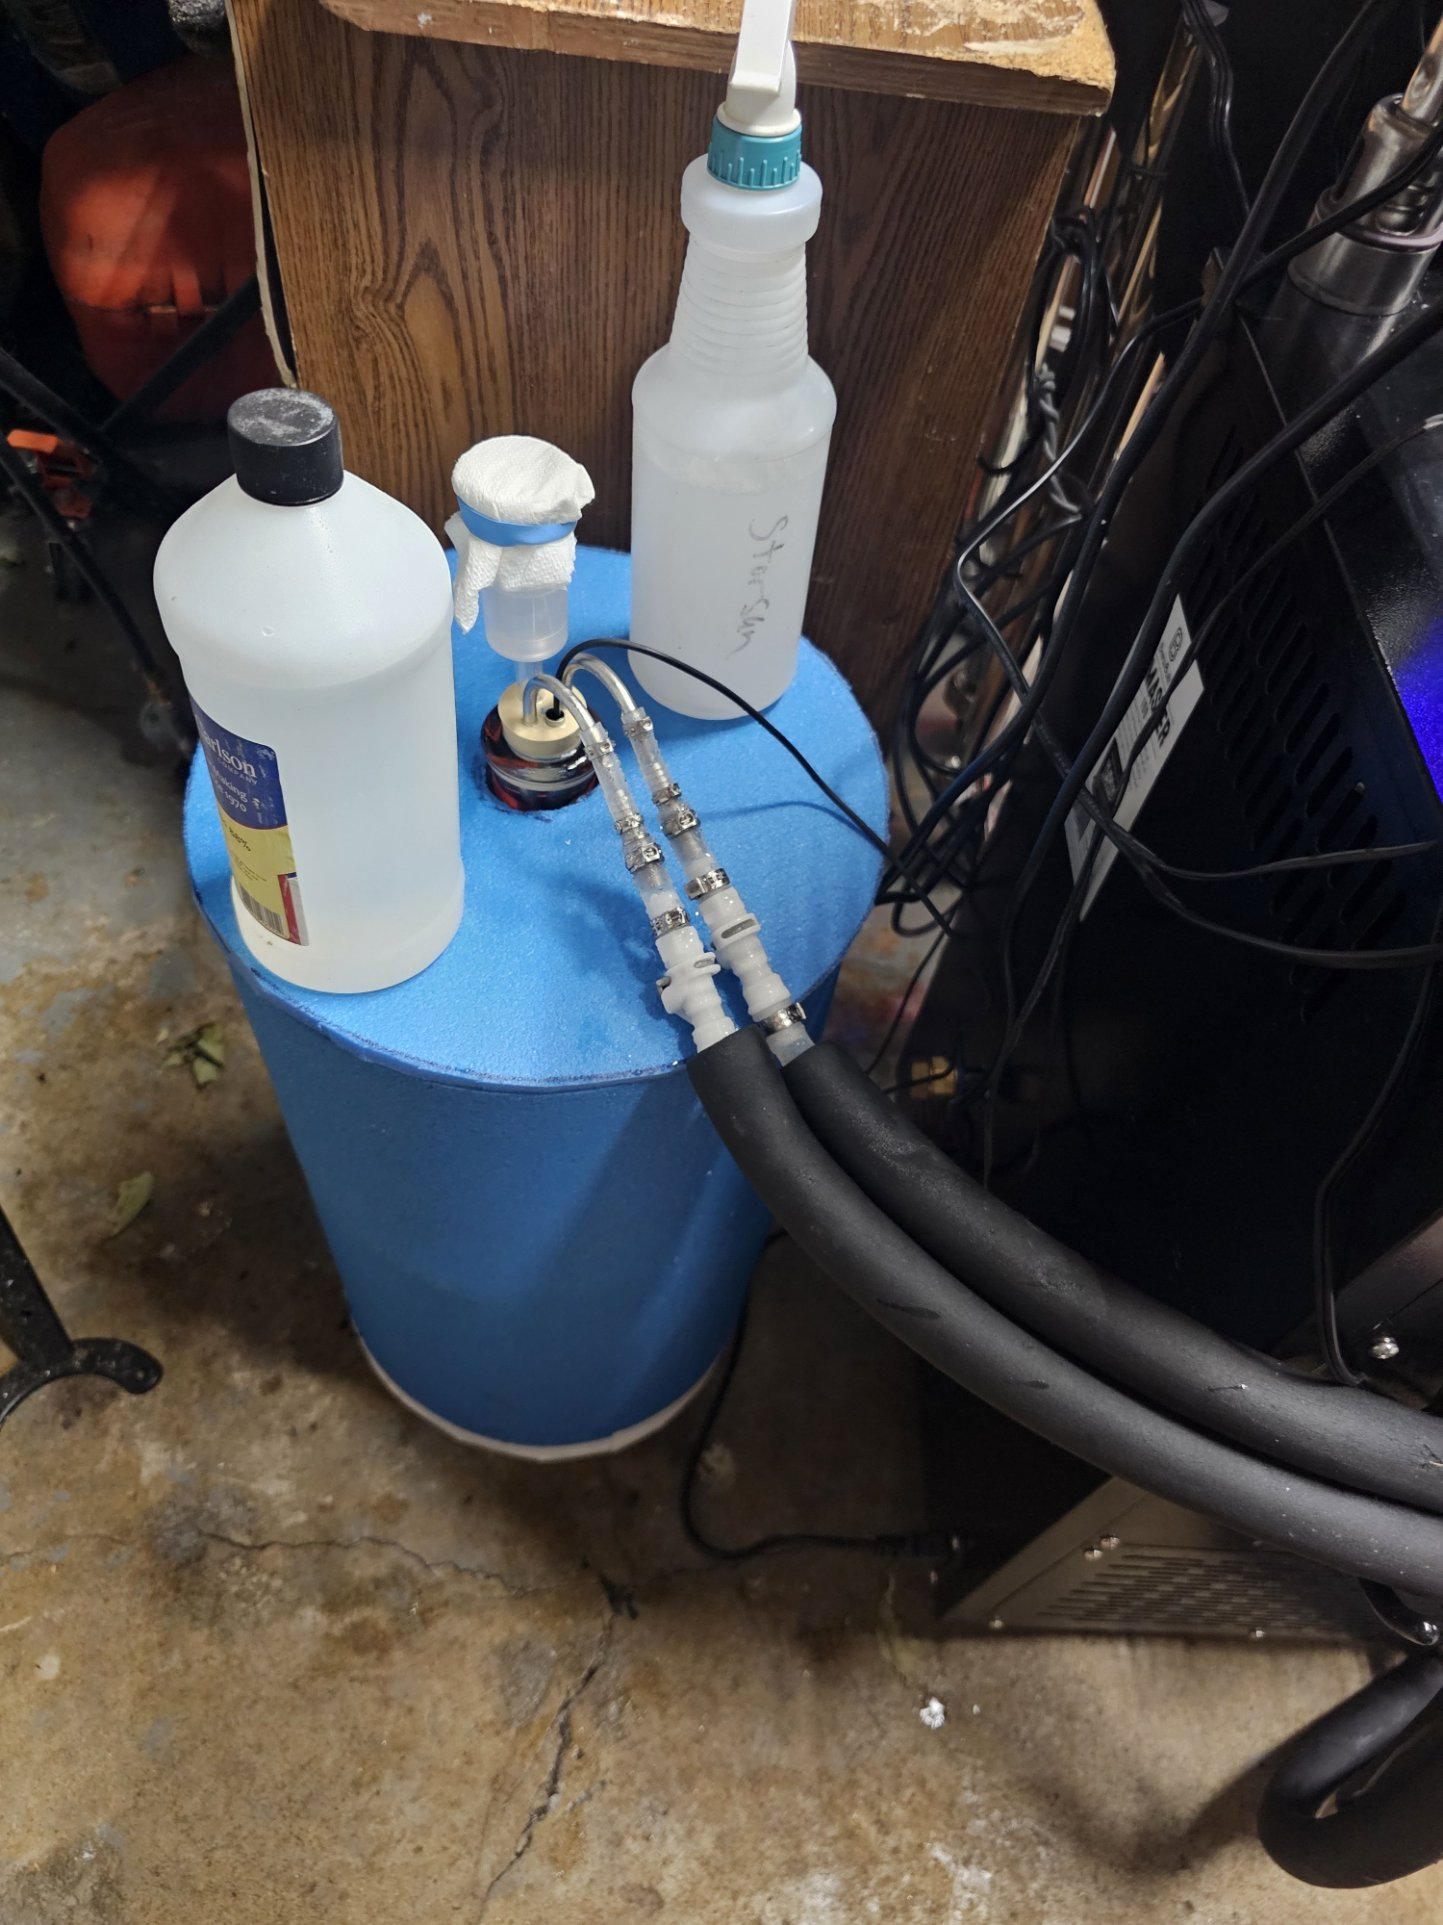
Carboy cozy. Make a cylinder first, then trace the cylinder diamter on the pad. Circle cutouts sit on the cylinder walls, not inside the cylinder. Sweat does build up on the stopper, saran wrap could fix that so it doesn't drip at the neck and stopper intersection.
Locally I picked up a 35 gallon barrel to test my idea out, call that phase I. I did some calculations initially with the idea that the cooling done would occur in two stages. I felt that that the second stage would be needed for lagers, since the tank water was unlikely to be below lagering temperatures. The options for the second stage will be covered later but I estimated that the 35 gallon size would do. As it turned out, this type of barrel made the construction much easier than initially considered. I originally thought I would need a bulkhead fitting low on the tank. Not a particular problem, these can be had from rain barrel suppliers. But this barrel has a removable and mostly flat sealing lid. So opted to make all connections through the lid.

In order to get the water out, I opted for a small submersible pump. I turned to my favorite which is the Vivosun 800gph model, I now have 5 of these and they never cost more than $20. On my garden hoses and chillers, I use brass disconnects that I purchased in sets and I had extras. I had an old rv water hose that had a hole but I saved it and salvaged the rest. I ran the hoses to the lid of the barrel. I had some extra stainless steel elbows, valves, hex nuts, some washers and gaskets too. That Vivosun comes with extra ½” NPT plastic barbs in three barb sizes and I had some of those too. The basic idea of a weldless bulkhead is usually a nipple or a street elbow even through the wall with a gasket, washer perhaps, and a hex nut. Since I went through the top, it doesn’t have to be perfect. There’s a feed and a return in the lid. I added a push to connect bulkhead and a thermowell, consider those extra. That’s mostly it, peruse the pictures and you can see how it all fits together.

Photo is of lid underside, pump sits at bottom of the barrel. The small notch allowed for the cord to go through the lid and the cord sits behind the sealing band.
So how good does Phase I work? I filled the barrel with the waste water from my RO system first to find out. (That’s what the ptc bulkhead was for.) I have used it twice, and both times using 75-77F room temperature water, it brought the wort down to 96F. The thermowell was for a temperature logger I had that wasn’t being used, an Inkbird but that particular model doesn’t connect to their newer app and I couldn’t get it to connect to the old app either. So I don’t know how long it took but it was about 15 minutes of recirculation. This project can incorporate an immersion chiller, cfc, or plate chiller. The idea is that the wort and the tank water will equalize and the time to do that will depend on your chiller. I have found my CFC to be slightly slower than a plate chiller in general, but an IC is a bit longer. If you had an IC, a pump wouldn’t be strictly necessary for the wort but whirlpooling helps a lot there so at least have a spoon available.

Phase 2 options I can think of four. Continuing to riff on the perpetual spring, a second smaller vessel such as a cooler or bucket could hold a few gallons of water to which reusable ice blocks could be added. This ice could simply be in soda bottles. The water could be saved and reused by keeping the lid on the ice water vessel. Second option, transfer the wort to its fermentation vessel and place in a refrigerated fermentation chamber, let cool to pitching temperature. Third, seal the wort in its fermenter and let cool to pitching temperature. Fourth is to use a glycol chiller to cool to pitching temperature.
Option 1 would certainly work, as that has been used successfully for chilling lagers. I was looking to test out my glycol chiller so I used option 4 on an ale and a lager. I didn’t capture the data properly with the ale but it was a couple hours. I have an Icemaster 100 and the ale was in a unitank with a coil. I also didn’t record the glycol temperature. The second go was a lager. This took way longer as I initially had the temperature around 50F but then kept forgetting to properly set the temperature at the end of setting it. It was stuck at 65 for hours. This brew went into a carboy as well and the coil is small (Anvil carboy coil). I did end up building a cozy for it out of a camping sleeping mat and duct tape. The insulation works great and the lager is fermenting at 52F.
Additional thoughts:
1. A 2.5-3 gallon batch could certainly be brought to about room temperature. But an ice bath there could probably do it too and the water could be saved as in option 1.
2. A 10 gallon batch could be done similarly but you would need a bigger barrel 70-80 gallons. A 55 gallo might be too small in my opinion but you could go bigger with the ice water mix in phase II.
3. Option 4 with the glycol chiller might be considered a little taxing on the chiller as I have seen recommendations to not have the wort more than 100F. The only brew I had cooling was the one being tested each time so I don’t feel I strained it excessively. In the future, I will be working with option 1 as I have a new chest freezer finally with some extra space to freeze blocks of ice and reusable blocks.

Carboy cozy. Make a cylinder first, then trace the cylinder diamter on the pad. Circle cutouts sit on the cylinder walls, not inside the cylinder. Sweat does build up on the stopper, saran wrap could fix that so it doesn't drip at the neck and stopper intersection.


![Craft A Brew - Safale S-04 Dry Yeast - Fermentis - English Ale Dry Yeast - For English and American Ales and Hard Apple Ciders - Ingredients for Home Brewing - Beer Making Supplies - [1 Pack]](https://m.media-amazon.com/images/I/41fVGNh6JfL._SL500_.jpg)


