• Please visit and share your knowledge at our sister communities:
  • If you have not, please join our official Homebrewing Facebook Group!

    Homebrewing Facebook Group

Perpetual Spring Chilling

Homebrew Talk

Help Support Homebrew Talk:

This site may earn a commission from merchant affiliate links, including eBay, Amazon, and others.

Deadalus

Supporting Member
HBT Supporter
Joined
Jan 3, 2020
Messages
3,258
Reaction score
3,960
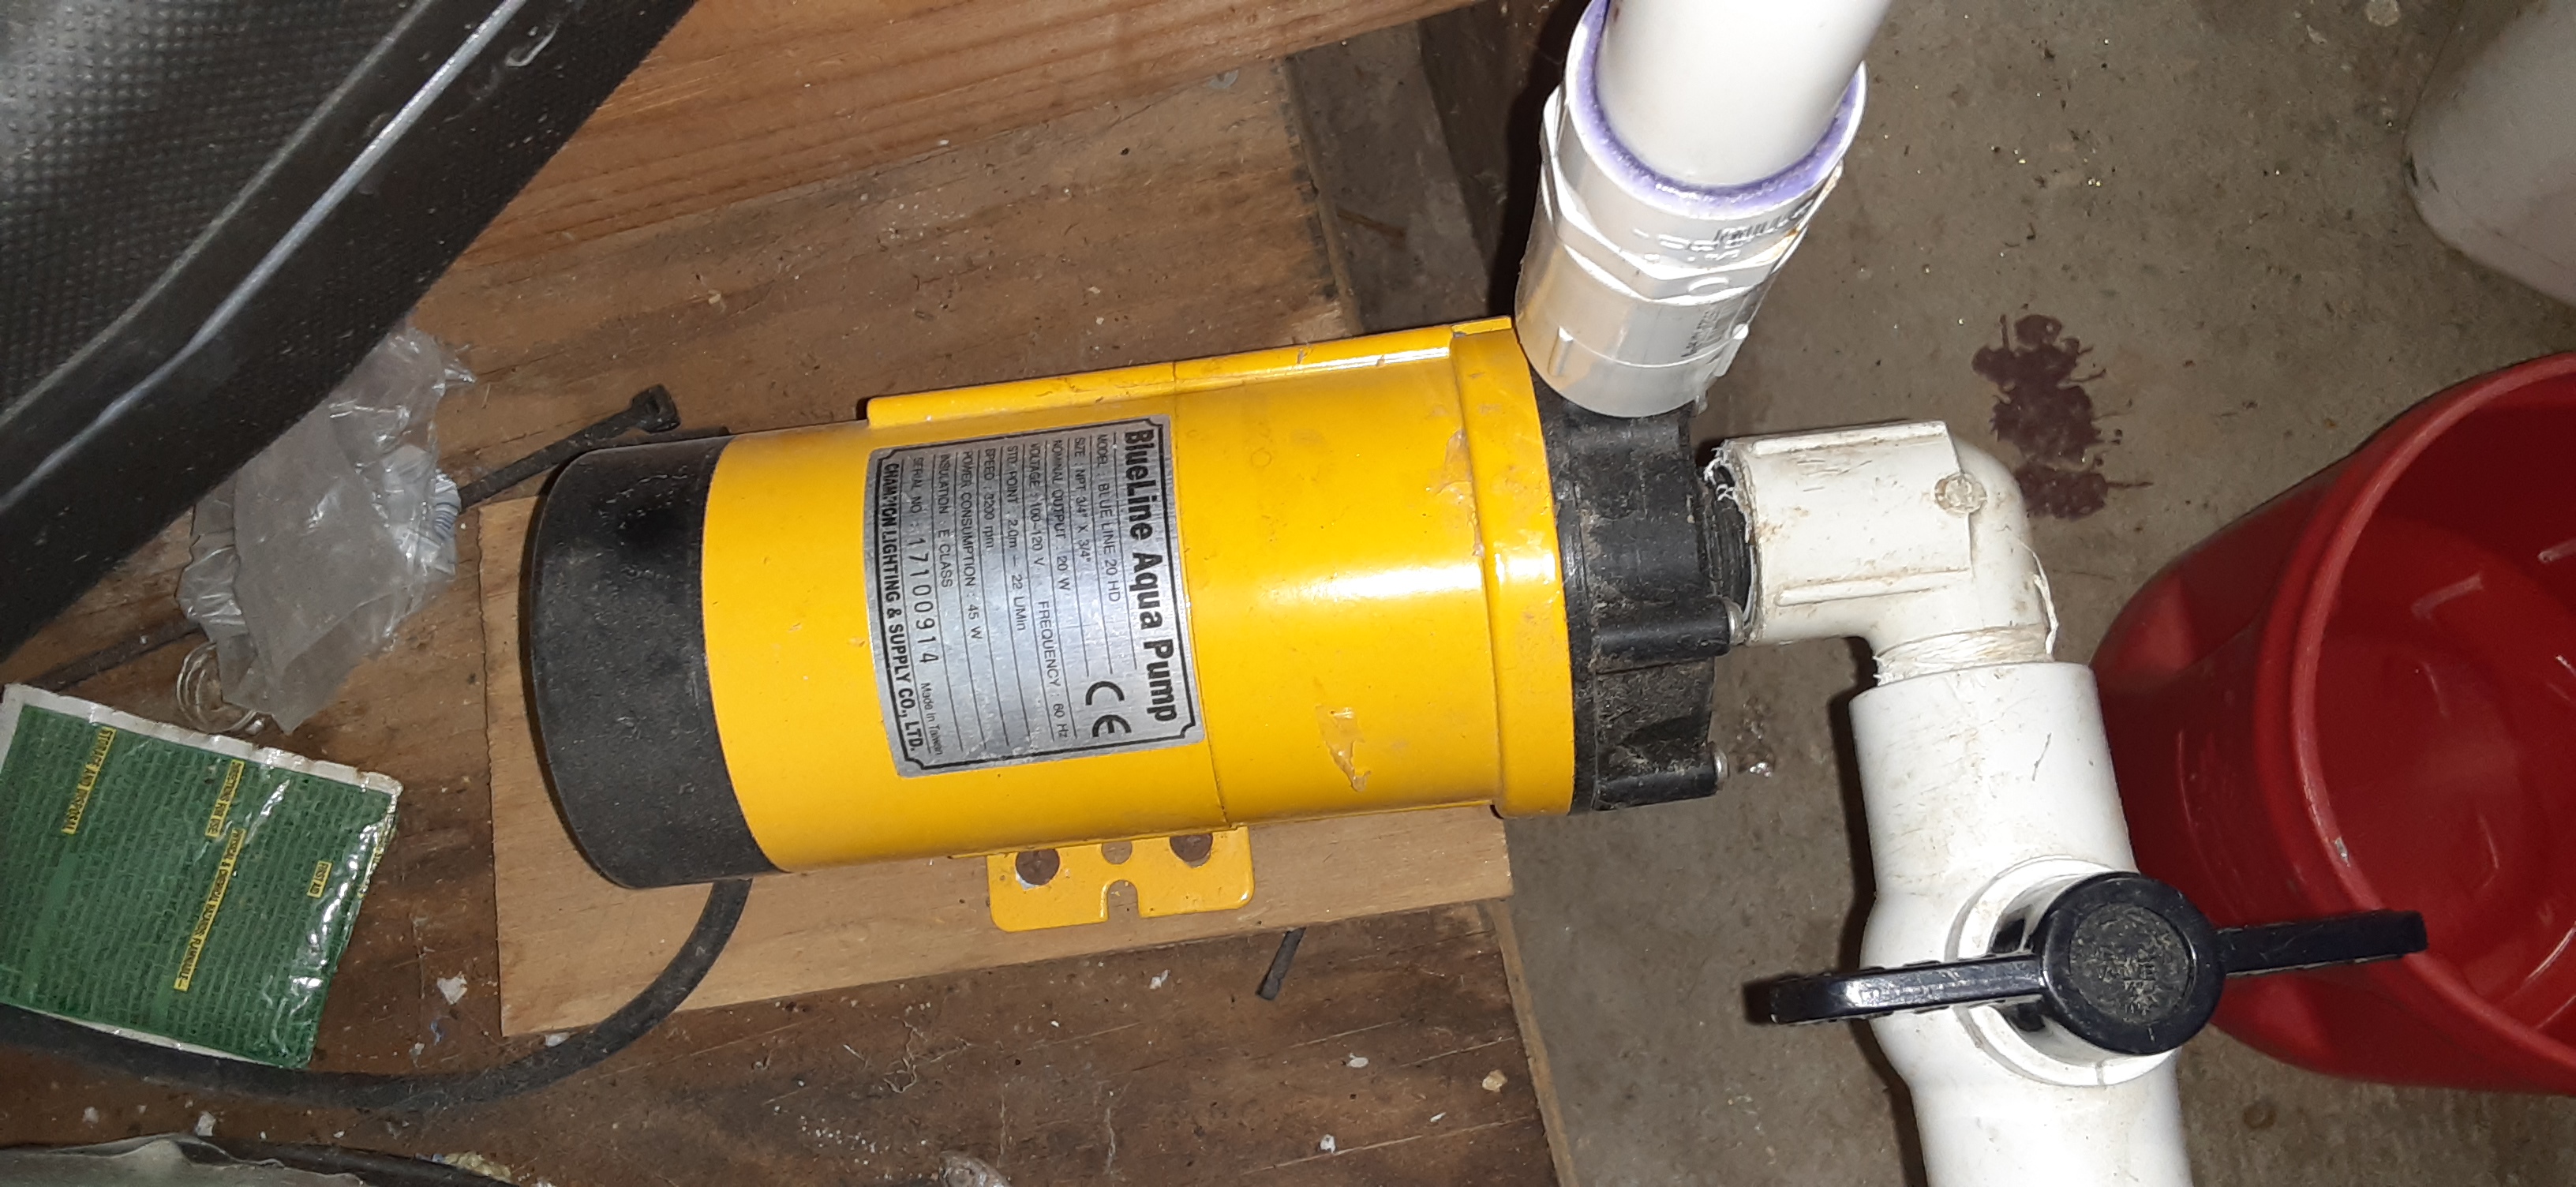
I had an idea to save water while chilling that I will call a perpetual spring. The idea is to store a large enough volume of water in a tank to cool a 5.5 gallon batch of wort. Then, instead of letting the water drain or capturing it to be used up later, the water is returned to the tank and left to cool thus being available for the next brew in perpetuity. Consider my setup that follows as a guide to potentially implementing this into your own brewing system. It will require the space that at least a barrel will occupy, one or two pumps, and then some fittings and hoses. I could have used both the pumps on my brew rig but I chose to just use only my wort pump and I added an inexpensive submersible pump. I had a lot of these parts laying around as well.

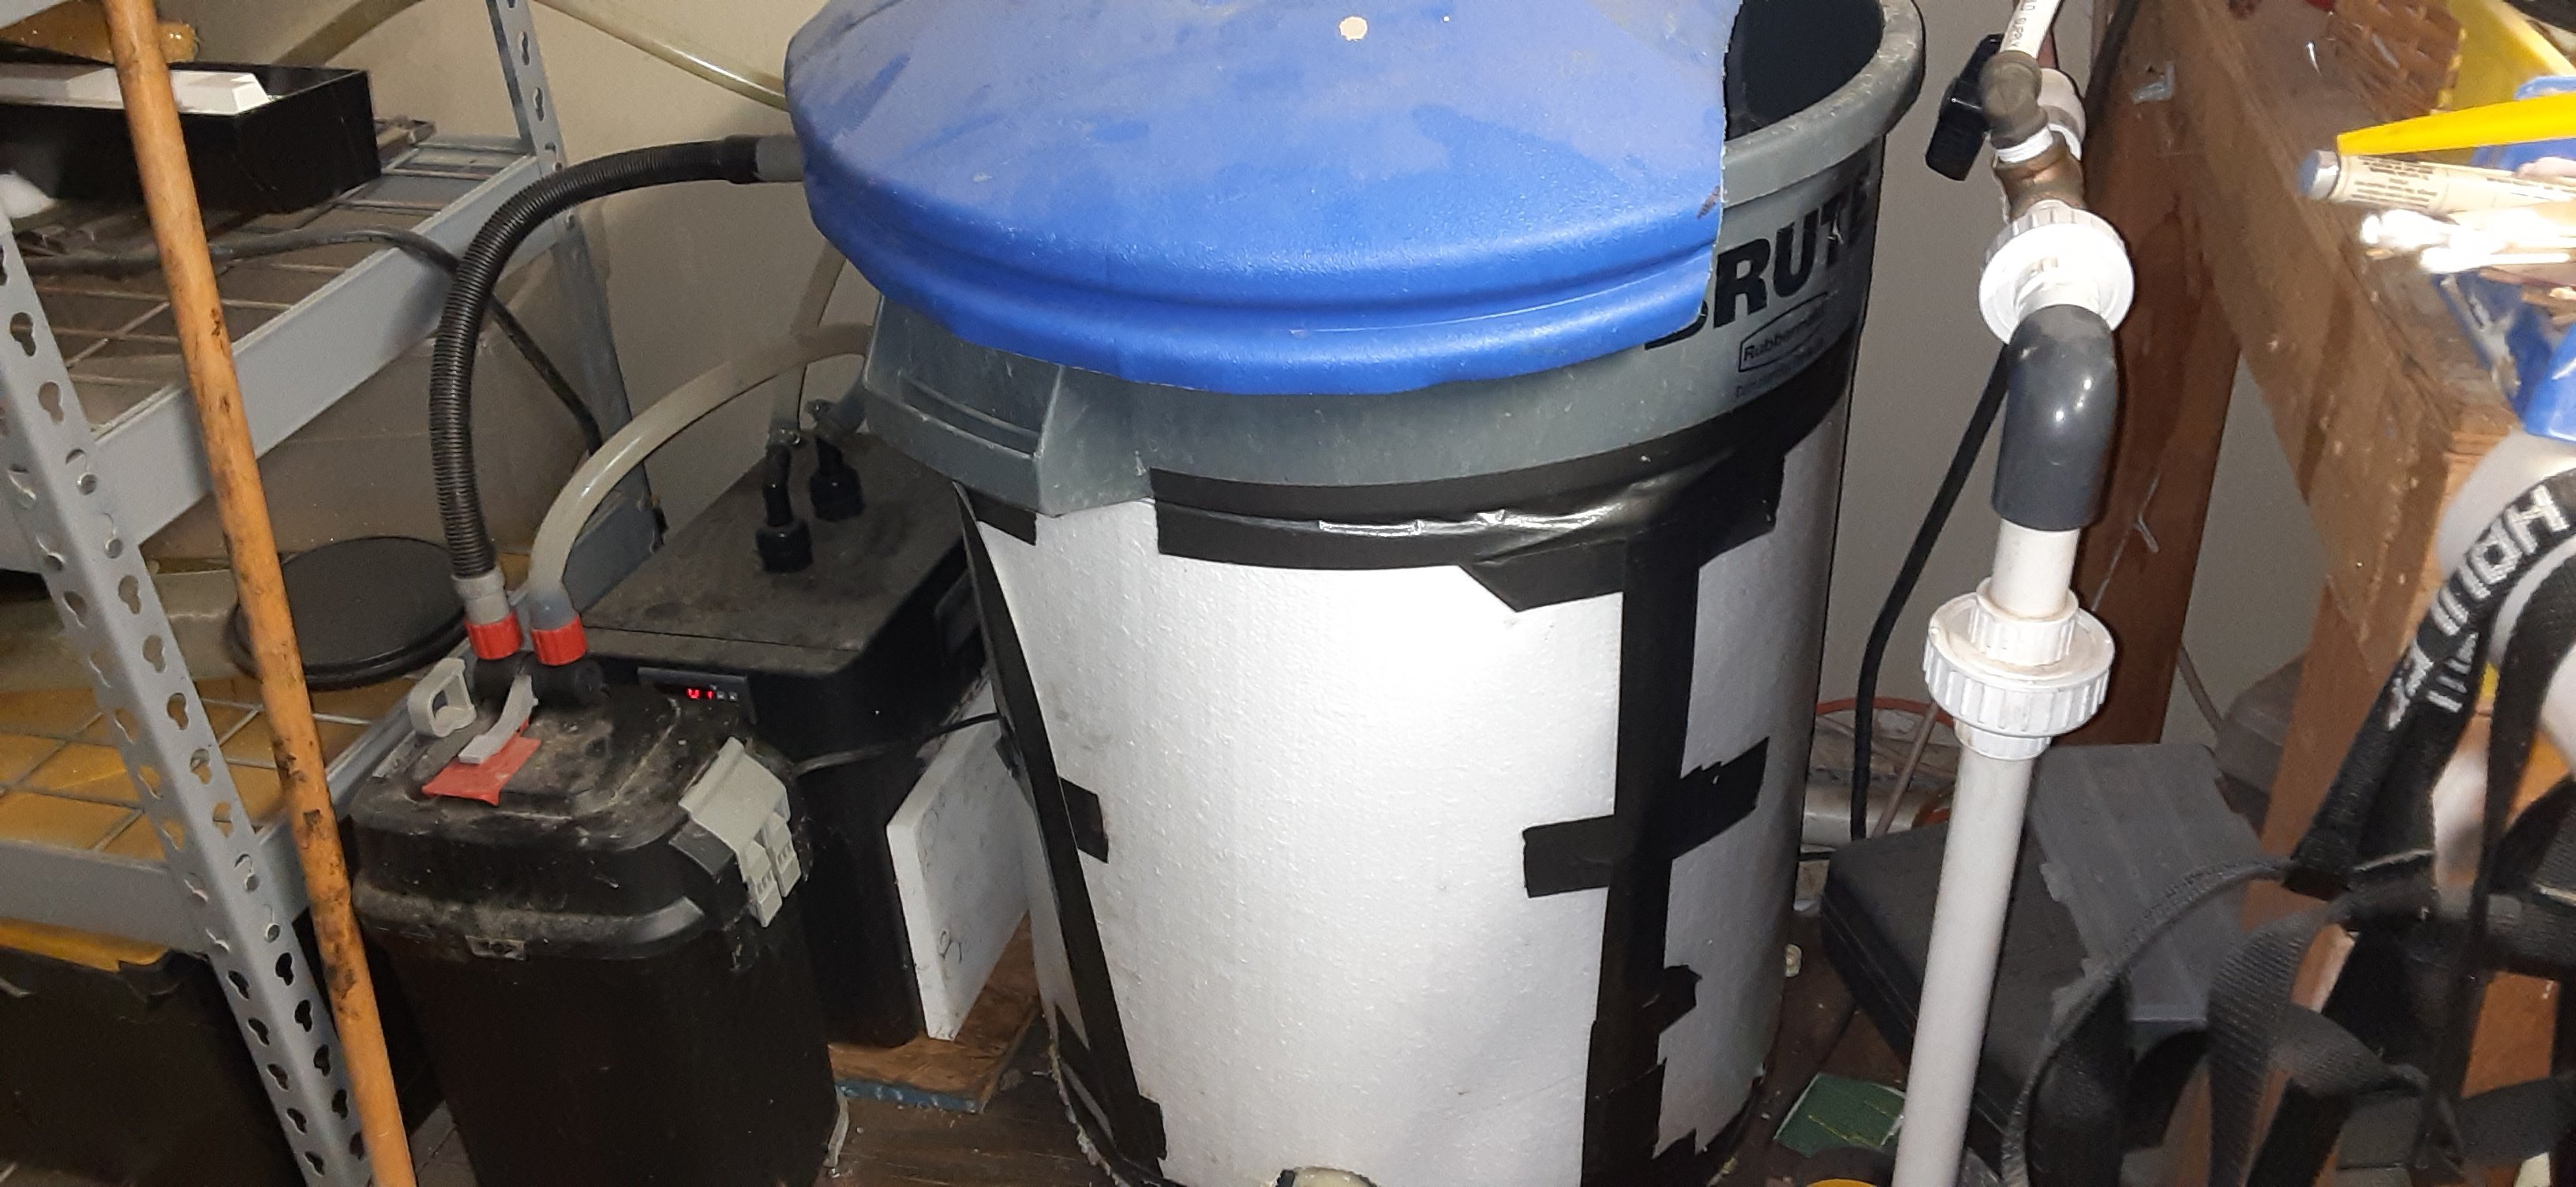
Locally I picked up a 35 gallon barrel to test my idea out, call that phase I. I did some calculations initially with the idea that the cooling done would occur in two stages. I felt that that the second stage would be needed for lagers, since the tank water was unlikely to be below lagering temperatures. The options for the second stage will be covered later but I estimated that the 35 gallon size would do. As it turned out, this type of barrel made the construction much easier than initially considered. I originally thought I would need a bulkhead fitting low on the tank. Not a particular problem, these can be had from rain barrel suppliers. But this barrel has a removable and mostly flat sealing lid. So opted to make all connections through the lid.
1721930499179.jpeg

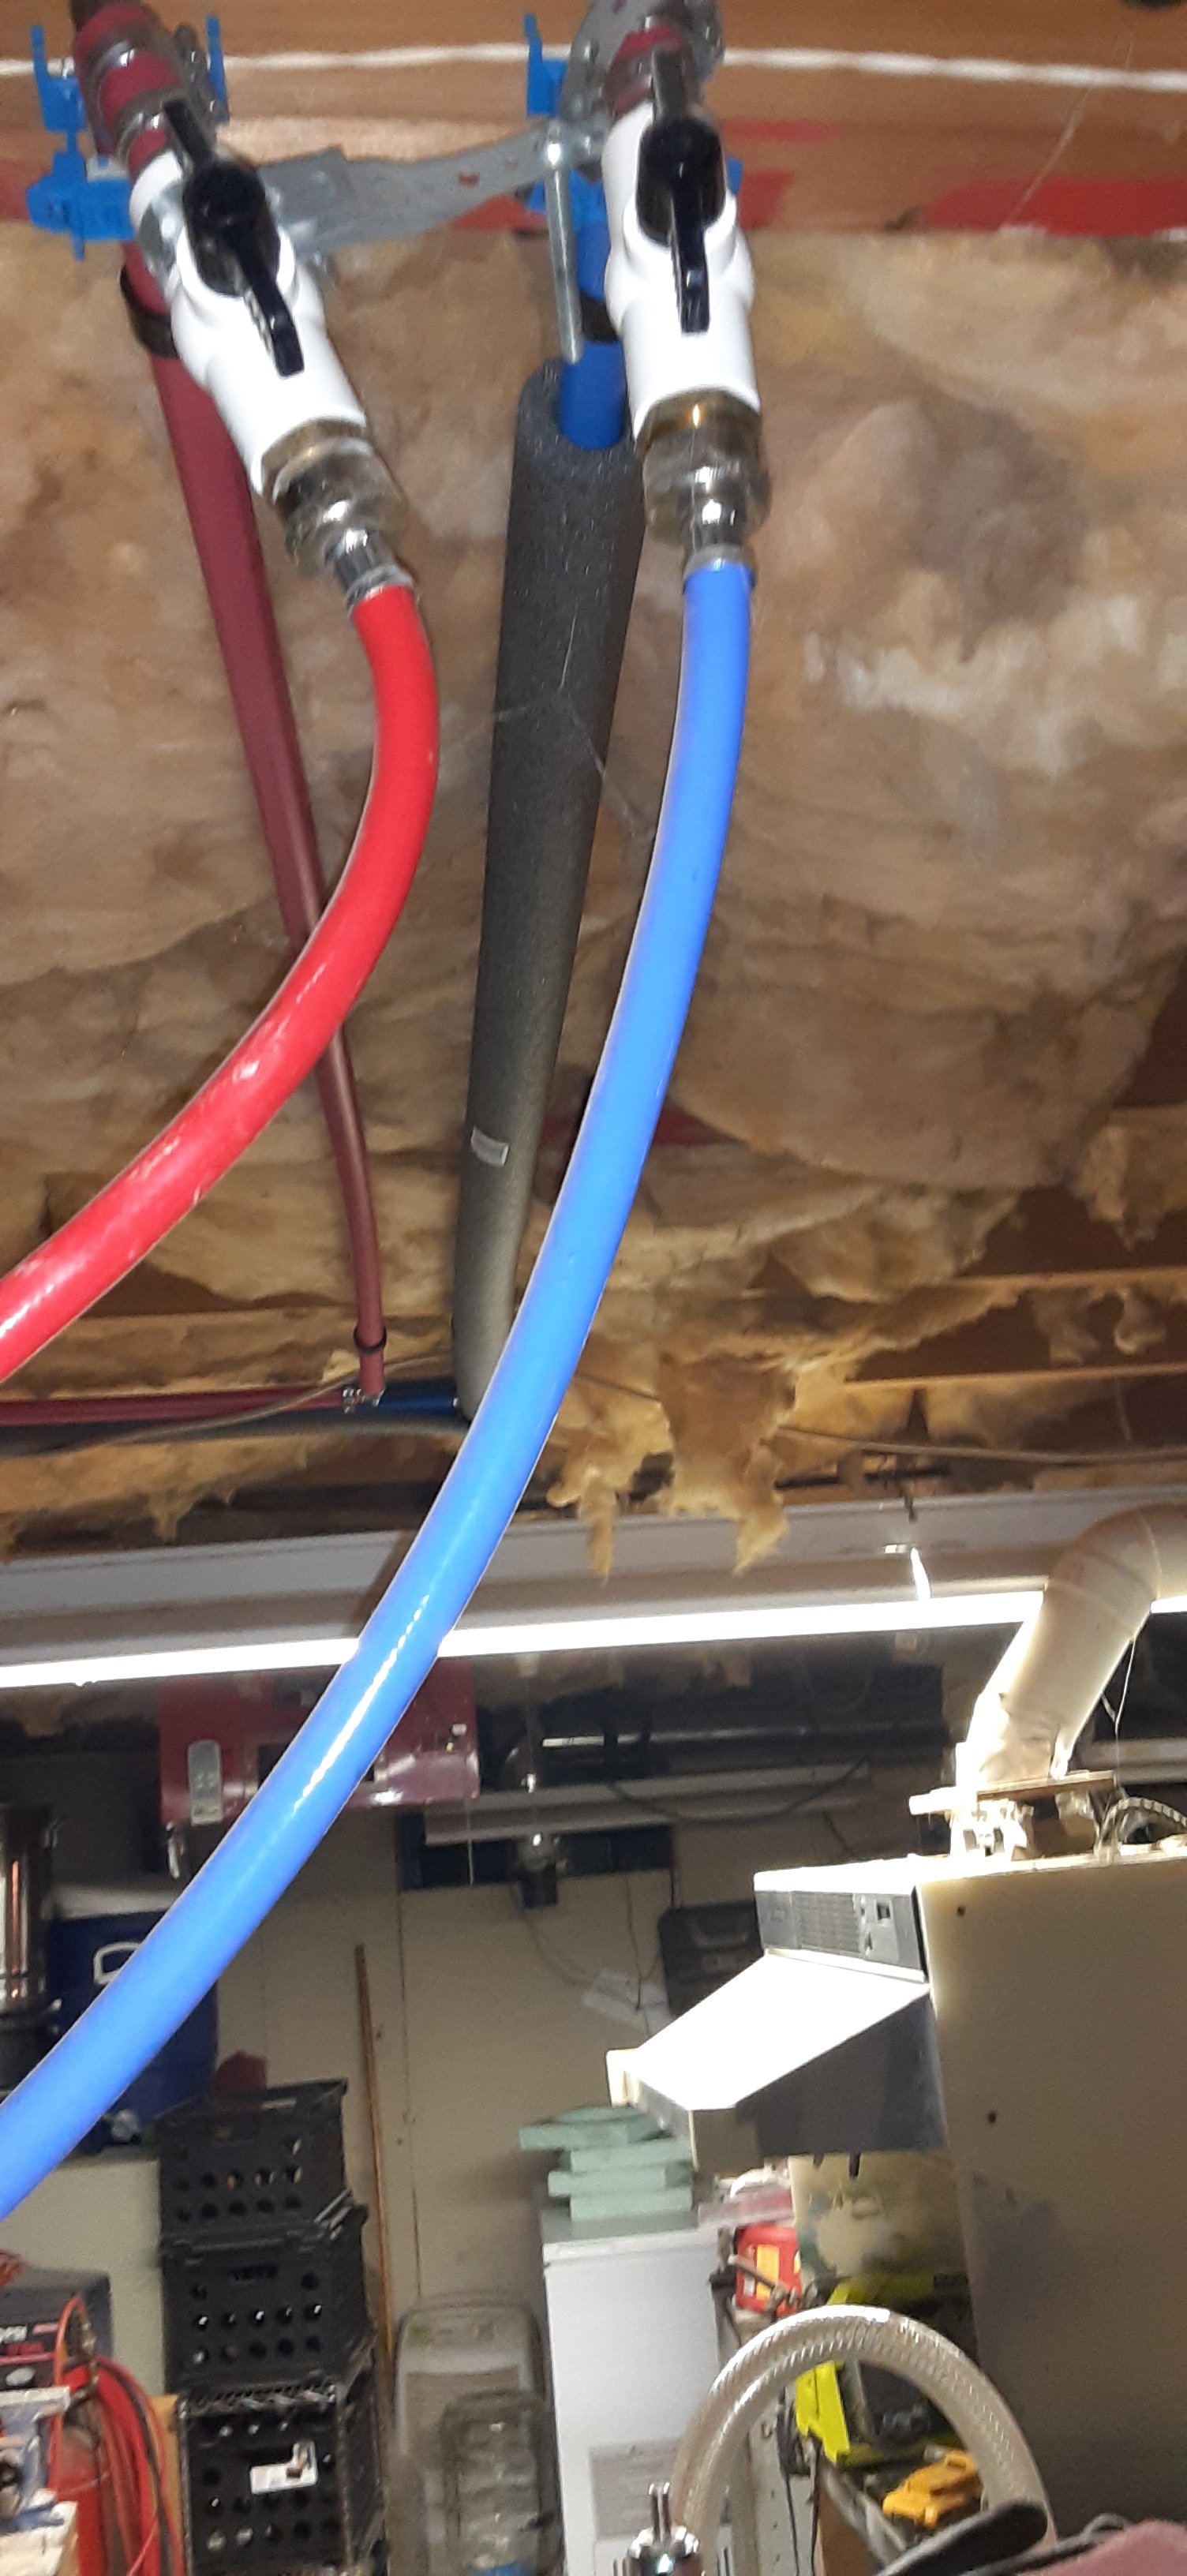
In order to get the water out, I opted for a small submersible pump. I turned to my favorite which is the Vivosun 800gph model, I now have 5 of these and they never cost more than $20. On my garden hoses and chillers, I use brass disconnects that I purchased in sets and I had extras. I had an old rv water hose that had a hole but I saved it and salvaged the rest. I ran the hoses to the lid of the barrel. I had some extra stainless steel elbows, valves, hex nuts, some washers and gaskets too. That Vivosun comes with extra ½” NPT plastic barbs in three barb sizes and I had some of those too. The basic idea of a weldless bulkhead is usually a nipple or a street elbow even through the wall with a gasket, washer perhaps, and a hex nut. Since I went through the top, it doesn’t have to be perfect. There’s a feed and a return in the lid. I added a push to connect bulkhead and a thermowell, consider those extra. That’s mostly it, peruse the pictures and you can see how it all fits together.
1721930540003.jpeg

Photo is of lid underside, pump sits at bottom of the barrel. The small notch allowed for the cord to go through the lid and the cord sits behind the sealing band.

So how good does Phase I work? I filled the barrel with the waste water from my RO system first to find out. (That’s what the ptc bulkhead was for.) I have used it twice, and both times using 75-77F room temperature water, it brought the wort down to 96F. The thermowell was for a temperature logger I had that wasn’t being used, an Inkbird but that particular model doesn’t connect to their newer app and I couldn’t get it to connect to the old app either. So I don’t know how long it took but it was about 15 minutes of recirculation. This project can incorporate an immersion chiller, cfc, or plate chiller. The idea is that the wort and the tank water will equalize and the time to do that will depend on your chiller. I have found my CFC to be slightly slower than a plate chiller in general, but an IC is a bit longer. If you had an IC, a pump wouldn’t be strictly necessary for the wort but whirlpooling helps a lot there so at least have a spoon available.
1721930653930.jpeg


Phase 2 options I can think of four. Continuing to riff on the perpetual spring, a second smaller vessel such as a cooler or bucket could hold a few gallons of water to which reusable ice blocks could be added. This ice could simply be in soda bottles. The water could be saved and reused by keeping the lid on the ice water vessel. Second option, transfer the wort to its fermentation vessel and place in a refrigerated fermentation chamber, let cool to pitching temperature. Third, seal the wort in its fermenter and let cool to pitching temperature. Fourth is to use a glycol chiller to cool to pitching temperature.
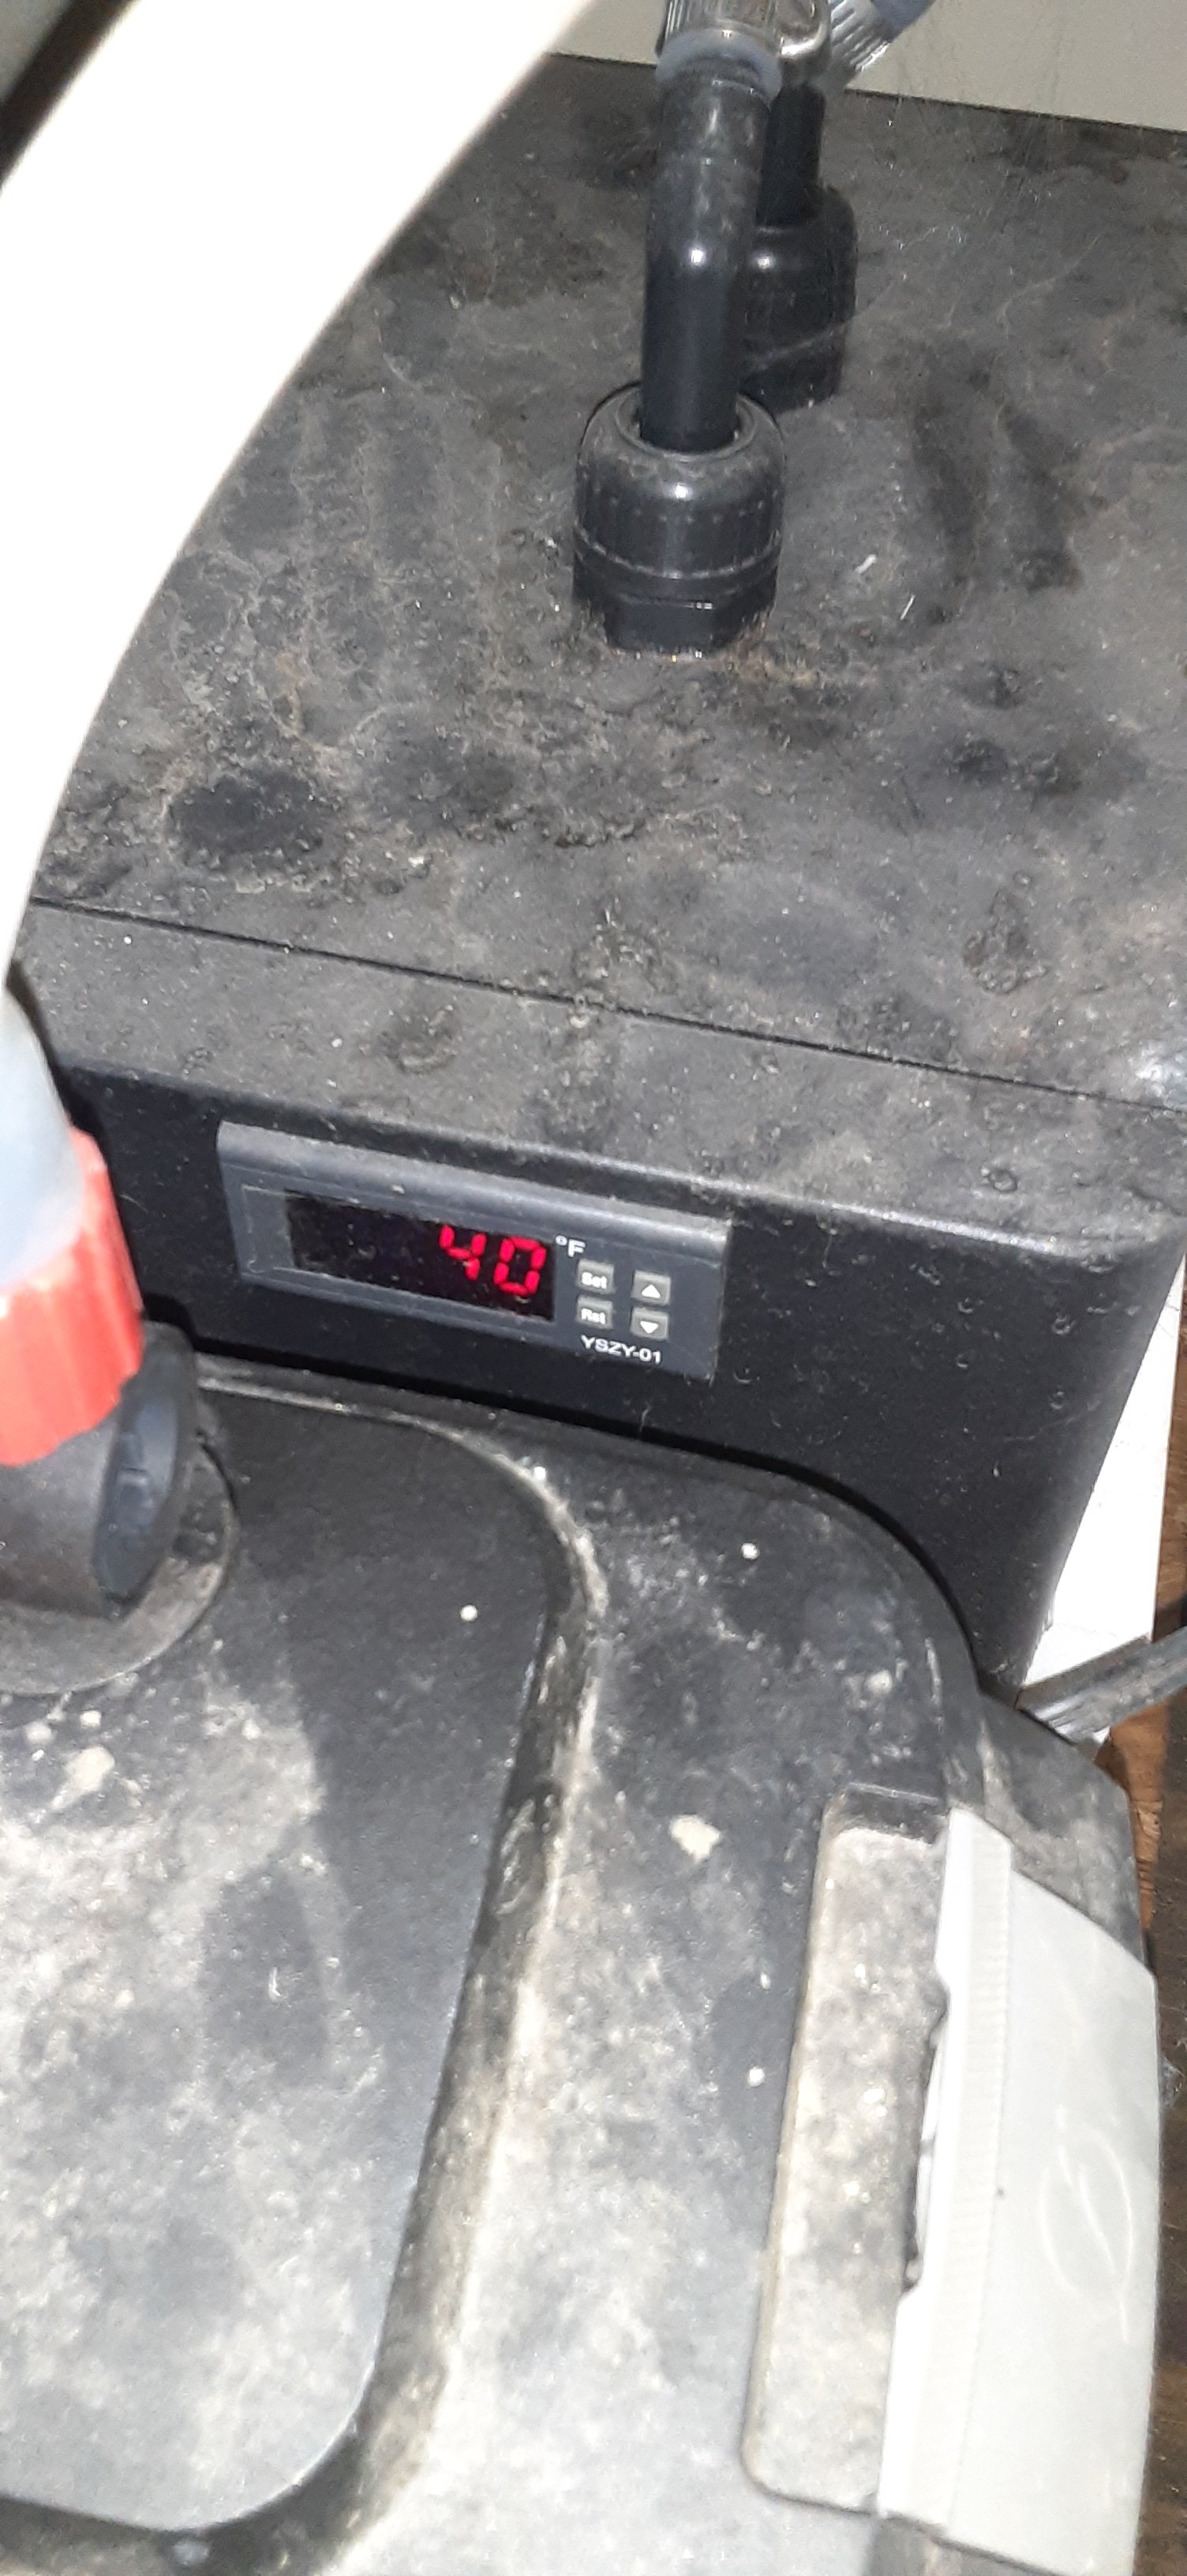
Option 1 would certainly work, as that has been used successfully for chilling lagers. I was looking to test out my glycol chiller so I used option 4 on an ale and a lager. I didn’t capture the data properly with the ale but it was a couple hours. I have an Icemaster 100 and the ale was in a unitank with a coil. I also didn’t record the glycol temperature. The second go was a lager. This took way longer as I initially had the temperature around 50F but then kept forgetting to properly set the temperature at the end of setting it. It was stuck at 65 for hours. This brew went into a carboy as well and the coil is small (Anvil carboy coil). I did end up building a cozy for it out of a camping sleeping mat and duct tape. The insulation works great and the lager is fermenting at 52F.

Additional thoughts:
1. A 2.5-3 gallon batch could certainly be brought to about room temperature. But an ice bath there could probably do it too and the water could be saved as in option 1.
2. A 10 gallon batch could be done similarly but you would need a bigger barrel 70-80 gallons. A 55 gallo might be too small in my opinion but you could go bigger with the ice water mix in phase II.
3. Option 4 with the glycol chiller might be considered a little taxing on the chiller as I have seen recommendations to not have the wort more than 100F. The only brew I had cooling was the one being tested each time so I don’t feel I strained it excessively. In the future, I will be working with option 1 as I have a new chest freezer finally with some extra space to freeze blocks of ice and reusable blocks.
1721930683436.jpeg

Carboy cozy. Make a cylinder first, then trace the cylinder diamter on the pad. Circle cutouts sit on the cylinder walls, not inside the cylinder. Sweat does build up on the stopper, saran wrap could fix that so it doesn't drip at the neck and stopper intersection.
 
I've been using water from my rain barrels (four @ 50 gallons each) to chill for a little while now, but I'm getting tired of the slowness of the gravity feed and the PITA of pouring the water back into the barrels one bucket at a time. I have the right tool for the job (a pressure boosting water pump) sitting in my basement collecting dust, and I also have a couple of extra rain barrels that aren't currently in use that could be purposed for receiving so I wouldn't have to worry about emptying the receiving vessel until I was done. Not exactly a perpetual spring, but this way doesn't put the heat from the wort into the chilling water. I have several immersion chillers, so I'll set up an ice bucket pre-chiller for phase 2.
 
I like this idea! Though I hold some of my cooling water for cleaning, creating sanitizing solution, watering plants, etc. I always waste water. 30-35 gallons feels appropriate, but like Mac said, a two vessel system may be the way to go so one doesn’t fight the hot water being returned while still trying to cool a batch.

I don’t like the footprint of two 35-gallon barrels, but I like the thought of not wasting water.

I imagine to keep the water from getting funky one would need to treat it like a spa/swimming pool. Maintain pH and chlorinate or something along those lines.
 
I don't remember when I got my rain barrels, but it's been well over ten years. No treating. No testing. No funk. Ever. The barrels do have mesh screens under the lid openings to keep crud and mosquitos out.
 
I have this thought as well. Great to see you pursuing it. I thought it would be good to pick up a used chest freezer to keep the water at 35-37F. Then you could chill anything and use less water.

I copied this quote in from another thread where I mentioned this chilling method. Thirty-five gallons converts to about 4.67 cu ft. Suppose I could use the equivalent space inside a freezer, consider a 5 cu ft model. For a 5.5 gallon batch, there is about a 6:1 ratio of water to wort. I used slightly warmer (~75-77F) than room temperature water to get to 96F. A rough way of considering the final temperature is a weighted temperature average of the wort and water in the drum. We started with 212F wort and 76F water. So (212+6 x 76)/(6+1) is the weighted average, and that happens to be 95.4F and I ended up experimentally at 96F. With 36F water, you'd end up at 61.1F. Now you'd be using some additional electricity but you could minimize that by running the freezer pre-brew for the time needed to ,just ool the water to its target temp and then when done just turning off the freezer so you are not cooling the water back down to 36F for the next brew until needed. Or just brainstorming a little more, you could just use slightly warmer than 36F water so that your final water temp is just room temp. That way, you wouldn't be overcooling the water. In other words, decide on the volume and temp of water needed in the freezer to just hit room temperature. Wouldn't bring it down to lager temps though unless the volume of water was increased.

One can do the weighted average for a 55 gallon drum and 72F water with 5.5 gallons of wort and the final temperature is about 84.7F. It's a 10:1 ratio so (10 x 72 +212)/(10=1).
 
With a good immersion chiller, I do not think you would need 35 gallons. Especially for ales in a five gallon batch. For lagers you could switch to an ice recirc if needed. The colder the water is, the faster the wort will chill. And the slower you could run the pump. To me, the key is having the water as cold as possible.
 
With a good immersion chiller, I do not think you would need 35 gallons. Especially for ales in a five gallon batch. For lagers you could switch to an ice recirc if needed. The colder the water is, the faster the wort will chill. And the slower you could run the pump. To me, the key is having the water as cold as possible.
This method doesn't rely on the type of chiller because the temperatures in both the wort and the water used are equalizing. There could be small system dependent loses at the outside of a PC or CFC vs a submerged IC but I'd guess those are negligible. As soon as the water starts absorbing heat, it's temperature would rise past room temp so the outside of the chiller would be exchanging heat with the air anyway. The time to do it might but my PC and CFC are a significantly faster than my IC. Perhaps something like a Jaded Hydra might be closer, I've never used one.

One of the options I suggested was to ice recirc to get to that last bit of temperature drop needed and that could be extended to lagers. Colder is definitely better but I was also wanting to avoid using power if possible so I use room temperature water. A way I just thought of though for lagers if you were using a chest freezer approach would be to remove some water and let a fixed percentage of the water volume freeze. Then you could just return the water to the holding container in the freezer right before chilling. You'd just need to have enough liquid water to recirculate. It would come back hot and melt the ice.
 
I always think about solutions like this, as a mental exercise, and then I'm thankful that I have year round 57F well water. Before that was the case, my winter brewing plan was to have two 50 gallon barrels outside stacked on top of each other. The bottom one would be filled with a glycol mixture and have a submersible pump to push it through my chiller. The output of the chiller would go back outside and collect in the empty top tank. After chilling was done, I'd open up the top drain valve to put it all back into the bottom tank. Not mixing the crazy hot chiller output into the source tank is a huge boost in chilling speed and lowers the minimum wort temp.

The reason I never implemented is just the fact that it would only be cold enough outside for 4-5 months out of the year.
 
I've been using this system for 3 years, it uses an aquarium chiller, a canister filter to.circulate water through the chiller, it is plumbed overhead and pumped with an auxiliary pump through the cooling coil, quick connectors make removing the emerson chiller for cleaning easy , the 35 gallon brute trash barrel is insulated,
 

Attachments

  • 20250104_195750.jpg
    20250104_195750.jpg
    616 KB
  • 20250104_195441.jpg
    20250104_195441.jpg
    588.3 KB
  • 20250104_195453.jpg
    20250104_195453.jpg
    575.3 KB
  • 20250104_195427.jpg
    20250104_195427.jpg
    1.4 MB
Thanks. Can you explain the system a little bit more and and maybe post a link to the aquarium chiller or similar? Thanks. I am definitely a chilling nerd!
 
Thanks. Can you explain the system a little bit more and and maybe post a link to the aquarium chiller or similar? Thanks. I am definitely a chilling nerd!
I do not have a link to the chiller, I had it on a shelf as a spare for one of my Reef tanks, I bought it( several in fact because they were half price) at a going out of buisness sale, it's a 1/3 hp titanium chiller,
I have a cold water feed plumbed to the storage tank ( 35 gallon Brute trash can) the chilling system is plumbed through a 650 Gph canister filter( another item I had hanging around).
The recirculation system consists of an external pump, that I bought after figuring the head pressure and flow I needed to bring cooling water( blue hose) from the storage tank, through piping then flex hose to my immersion chiller, the hot water is returned to the storage tank via the red hose.
I'll be brewing Friday, I'll take a few pictures to post .
I only brew 5 gallon batches, larger brews would obviously require more storage capacity using the same small chilling unit.
 
Yes, the canister filter is the pump, I had it so its convient, some of the chillers cool better than others, I have another one set up in a 10 gallon cooler set to 34, I run non toxic antifreeze through that one, it is set up to chill my fermenters,that one is 1/4:hp and can go to 32 degrees, the one I use to chill my wort, has a low if 40, when buying these small chillers, check to see what size aquarium they are rated for, and their lowest set point.
Both of those units will retain set points 12 months of the year, the reason the storage tank is insulated is to.cut down on sweating in the summer.
 
I do not have a link to the chiller, I had it on a shelf as a spare for one of my Reef tanks, I bought it( several in fact because they were half price) at a going out of buisness sale, it's a 1/3 hp titanium chiller,
I have a cold water feed plumbed to the storage tank ( 35 gallon Brute trash can) the chilling system is plumbed through a 650 Gph canister filter( another item I had hanging around).
The recirculation system consists of an external pump, that I bought after figuring the head pressure and flow I needed to bring cooling water( blue hose) from the storage tank, through piping then flex hose to my immersion chiller, the hot water is returned to the storage tank via the red hose.
I'll be brewing Friday, I'll take a few pictures to post .
I only brew 5 gallon batches, larger brews would obviously require more storage capacity using the same small chilling unit.
Thanks for your reply. I did a little research and I am unclear about the use for fish tanks vs brewing. The stuff I read talked about only a few degrees of temperature movement for the fish tanks where we are wanting to go down to just above freezing. Does this push the units very hard?

What kind of time is needed to get 20-35 gallons of water down to 40F?

These units are smaller than a chest freezer so that is a positive.
 
Thanks for your reply. I did a little research and I am unclear about the use for fish tanks vs brewing. The stuff I read talked about only a few degrees of temperature movement for the fish tanks where we are wanting to go down to just above freezing. Does this push the units very hard?

What kind of time is needed to get 20-35 gallons of water down to 40F?

These units are smaller than a chest freezer so that is a positi
That unit has been in place for 3 years, it maintains 40 degrees 24/7 as I said during the cooling process when I'm returning 212 degree boiling water through my return, it only rises to the mid 50 to high 50s by the time my wart is 75 degrees and it only takes 10 to 15 minutes to do it..it recovers back to 40 within an hour.
Different aquarium chillers have differant cooling values, choose one that can go to 40 or lower, not all can, I used to keep sea horses, their water had to.be maintained at 60, I had circulators,skimmers and metal HO florescent lighting that put a heat load on that tank( and my home is not air conditioned in summer), it's that experience that led me to using an aquarium chiller to cool my "cooling tower"
 
Thanks for your reply. I did a little research and I am unclear about the use for fish tanks vs brewing. The stuff I read talked about only a few degrees of temperature movement for the fish tanks where we are wanting to go down to just above freezing. Does this push the units very hard?

What kind of time is needed to get 20-35 gallons of water down to 40F?

These units are smaller than a chest freezer so that is a positive.

Aquarium chillers are heat exchangers that chill liquid that flows through, usually pumped through externally. The ones you find for under a few hundred dollars are a joke. For budget friendly options, refer to any of the DIY glycol chiller threads. This cold water tank is just a large reservoir glycol unit.
 
FWIW, before I made the designated cooling tower, I filled 100 at. Cooler with water and ice and used a submersible 600 gph pump to pump ice water through my immersion chiller to cool my wort, it was a giant PITA but it only used 100 quarts and chilled the wort in about the same amount of time the cooling tower does.
 
Aquarium chillers are heat exchangers that chill liquid that flows through, usually pumped through externally. The ones you find for under a few hundred dollars are a joke. For budget friendly options, refer to any of the DIY glycol chiller threads. This cold water tank is just a large reservoir glycol unit.
Not really, they are refrigerant dependent and are not heat exchangers.
 
That unit has been in place for 3 years, it maintains 40 degrees 24/7 as I said during the cooling process when I'm returning 212 degree boiling water through my return, it only rises to the mid 50 to high 50s by the time my wart is 75 degrees and it only takes 10 to 15 minutes to do it..it recovers back to 40 within an hour.
Different aquarium chillers have differant cooling values, choose one that can go to 40 or lower, not all can, I used to keep sea horses, their water had to.be maintained at 60, I had circulators,skimmers and metal HO florescent lighting that put a heat load on that tank( and my home is not air conditioned in summer), it's that experience that led me to using an aquarium chiller to cool my "cooling tower"
Thank you. I was wondering if it could be turned on in the morning or day before brew day and cool 20 -30 gallons down to 35-40F? Since I brew in the garage, I would probably need a modular setup and continuous running would probably not work out.

My thoughts on this setup would be 20 gallon tank for the cool water and a 20 gallon tank for the hot water return. If it was a permanent setup then the first 20 gallons could be inside a chest freezer. But if a cooler of some sort could be turned on the night before the whole setup could be more mobile. From my current water usage, I think 20 gallons could be enough for ales and maybe lagers. A move to ice recirc could be added for lagers when needed.
 
Not really, they are refrigerant dependent and are not heat exchangers.

Yes, really. The refrigerant goes through one side of the exchanger and the water flows through the other. The heat "exchanges" from your process liquid into the refrigerant that goes back to the compressor. I didn't mention refrigerant because I thought that was a given. I was distinguishing an aquarium chiller from a glycol chiller. The former uses an exchanger while the latter directly cools a tank with your process liquid in it.
 
Last edited:
Yes, really. The refrigerant goes through one side of the exchanger and the water flows through the other. The heat "exchanges" from your process liquid into the refrigerant that goes back to the compressor. I didn't mention refrigerant because I thought that was a given. I was distinguishing an aquarium chiller from a glycol chiller. The former uses an exchanger while the latter directly cools a tank with your process liquid in it.
Let me explain the difference between a chiller and a heat exchanger, a heat exchanger, is what you have in your car, with a radiator it uses no refrgerant,it relies solely on "exchange" of outside air to remove heat from the load, a chiller with refrigerant, uses a refrigerant to cool the water,and the evaporator removes the heat load via a fan blowing air through it,that is your exhange the same way you heat exchanger does, the 2 are worldly different in their capabilities, I use both in my job every day..in this application , heat exchangers are poor at removing latent heat, understand, a chiller of this size cannot be expected to cool the hot water on its own, like an ac unit would, it must be used in conjunction with a storage unit(or aquarium) In my machine shop, we have chillers that run refrigerant to cool the spindle units, they work exactly like my cooling tower , I also have heat exchangers that use no refrigerant that cool hydraulic units, I'm not going to argue the point any longer, I know what I'm talking about.
 
I don't know why you're doing all that chest beating. A heat exchanger is a device that moves heat from one medium to another without those mediums mixing. Full stop. That can be a liquid to liquid (immersion chiller, plate exchanger or CFC like we using in brewing), liquid to air (car radiator), air to air (forced air furnace). An aquarium chiller has liquid on one side of the exchanger and cold refrigerant on the other. It's odd that you use these devices every day, don't grasp the entire concept, and then want to have a fight about it.
 
Is this a good place to see if anyone would like to try a geo-thermal idea I don't have the cash or physical ability to do myself? (Brain/Spine/CNS damage so any numbers given may be way off, but here goes):
I'd like to use a post-hole digger that can make 5' deep holes. First; dig out a plot next to the house about 4'x8' down to just below the frost-line. Second; Make 8 holes, 5' deep. Third; Get a few hundred feet or so of 3/8" copper and make some 5' tall coils (similar to fermenter chilling coils) and drop one in each hole. Connect them in parallel to an insulated manifold (1/2"-3/4") that goes into the house and pump water in a loop for chilling and the steam condenser through it.
Any takers?
The chiller idea has to be cheaper and easier than 5' holes dug into your yard and a few hundred feet of copper etc...!
 
That unit has been in place for 3 years, it maintains 40 degrees 24/7 as I said during the cooling process when I'm returning 212 degree boiling water through my return, it only rises to the mid 50 to high 50s by the time my wart is 75 degrees and it only takes 10 to 15 minutes to do it..it recovers back to 40 within an hour.
Different aquarium chillers have differant cooling values, choose one that can go to 40 or lower, not all can, I used to keep sea horses, their water had to.be maintained at 60, I had circulators,skimmers and metal HO florescent lighting that put a heat load on that tank( and my home is not air conditioned in summer), it's that experience that led me to using an aquarium chiller to cool my "cooling tower"
Hello,

I just wanted to follow up on this. Do you know how long your chiller would take to get 20-30 gallons of 80F water down to 40F?
 
I always think about solutions like this, as a mental exercise, and then I'm thankful that I have year round 57F well water. Before that was the case, my winter brewing plan was to have two 50 gallon barrels outside stacked on top of each other. The bottom one would be filled with a glycol mixture and have a submersible pump to push it through my chiller. The output of the chiller would go back outside and collect in the empty top tank. After chilling was done, I'd open up the top drain valve to put it all back into the bottom tank. Not mixing the crazy hot chiller output into the source tank is a huge boost in chilling speed and lowers the minimum wort temp.

The reason I never implemented is just the fact that it would only be cold enough outside for 4-5 months out of the year.
I was originally thinking of the water tank as a heat sink but had the mistaken idea that the most heat it could absorb was determined by the weighted average of the water and wort temperatures. That was why I just used the one tank. It turns out that simplifying the model calculation with the weighted average is the highest final temperature the wort can achieve. The wort still gets cooled this way. But since enough people mentioned not returning the hot water to the supply tank I started thinking about how to model this with the water diverting to a second tank. When the water does go back to the same tank, it starts to heat the water up incrementally as the wort is incrementally cooled.

Modification-Again, and this is simplifying, consider that the in my CFC the water and wort equalize, then each volume leaves the CFC. Now the water goes to the second tank and the wort returns to the BK. In order to estimate the equalized temperature, I apply the weighted average again but instead, the volumIe of water is the water in the CFC and the volume of wort is that inside the CFC. It was too complicated and cold in my garage to try to empirically measure the volume of fluids inside the CFC. I was able to however calculate the volume of water and wort from the tubing measurements. I have one of those slimmer diameter but fat outer tubing copper CFC's, bought used without knowledge of brand. Based on reading various specs, it seems these are all built with 7/8" outer diameter refrigeration tubing for the water and 5/8" outer diameter refrigeration tubing for the wort. Both use 12' of tubing. It is probably closer to 12.5 since these come in 50' rolls but I used 12' as that is what the product description page usually says, sometimes 13'. Since the tubing is measured outer diameter, subtract out 2x the wall thickness for the wort to get the inner diameter, then the volume is the cross sectional area x length. For the water tubing, do the same, but then calculate the volume of the wort tubing and subtract that as well. With these water and wort volumes now known, I can calculate the weighted average temp inside the CFC.

Next, the water would go to a second tank and the wort into the BK. This lowers the BK wort temperature at the next incremental step. The water stays the same but gets subtracted out of the tank capacity until all the water is now in the second tank. I put this all into a spreadsheet and was able to determine that the final wort temperature would be about 7 degrees lower. In this case, it is 89F final vs 96F with just one tank. This makes sense because only small increments of water and wort are mixing and not all the water and wort. With more water one could get it down further, like the essentially infinite supply from the tap. I extended the spreadsheet to look at 55 gallon barrels, and that would be the way to go as this reached a calculated temperature of 73.5F. The single barrel temperature with a 55 gallon is 84.7F. I would have bought a 55 if there had been one locally!
 
Back
Top